Support our educational content for free when you purchase through links on our site. Learn more
10 Must-Know 3D Printing Tutorials to Master in 2026 🚀
Ready to turn that mysterious box labeled “3D printer” into your personal factory of creativity? Whether you’re a total newbie or a weekend tinkerer, mastering the right 3D printing tutorials can transform your printing experience from frustrating spaghetti monsters to flawless masterpieces. Did you know that nearly 70% of failed prints are due to poor bed leveling and slicing errors? That’s why we’ve crafted this ultimate guide to cover everything from hardware basics to advanced multi-material techniques—packed with insider tips from the engineers and enthusiasts at 3D Printed™.
Stick around, because later we’ll reveal the “Cold Pull” nozzle cleaning trick that saved us hours of downtime, plus the secret sauce for choosing between filament and resin printing that most beginners overlook. Curious how a simple calibration boat called the 3DBenchy became the industry’s go-to diagnostic tool? We’ve got that covered too. Let’s dive in and get you printing like a pro in 2026!
Key Takeaways
- Master bed leveling first—it’s the foundation of every successful print.
- Learn to use slicing software like Ultimaker Cura and PrusaSlicer to optimize print quality.
- Choose the right printing medium—filament for versatility, resin for detail—and follow strict safety tutorials.
- Troubleshoot common issues like warping, stringing, and clogs with expert-tested methods.
- Explore advanced techniques like multi-material printing and support optimization to unlock your printer’s full potential.
- Post-processing skills such as sanding, painting, and vapor smoothing can elevate your prints from good to gallery-worthy.
Ready to level up your 3D printing game? Let’s get started!
Table of Contents
- ⚡️ Quick Tips and Facts
- 🕰️ From Industrial Secrets to Desktop Dreams: The History of 3D Printing Education
- 🚀 Beyond the Plastic: How 3D Printing Tutorials Shape Tomorrow’s Innovators Today
- 🛠️ 1. Hardware Foundations: Unboxing and Assembling Your First Machine
- 📐 2. The Bed Leveling Manifesto: Achieving the Perfect First Layer
- 💻 3. Slicing and Dicing: Mastering Cura, PrusaSlicer, and Bambu Studio
- 🎨 4. CAD for Beginners: From Tinkercad Simplicity to Fusion 360 Power
- 🧵 5. Filament vs. Resin: Choosing Your Medium and Safety Tutorials
- 🚢 6. The Benchie Ritual: Calibrating for Speed, Quality, and Dimensional Accuracy
- 🔧 7. The “Spaghetti Monster” Survival Guide: Troubleshooting Common Failures
- 🧪 8. Advanced Techniques: Multi-Material Printing and Support Optimization
- ✨ 9. Post-Processing Perfection: Sanding, Painting, and Vapor Smoothing
- 🎓 10. The Best Digital Classrooms: YouTube, Skillshare, and Community Forums
- 💡 Pro Tips for Accelerated Learning
- 🏁 Conclusion
- 🔗 Recommended Links
- ❓ FAQ
- 📚 Reference Links
⚡️ Quick Tips and Facts
Before we dive into the deep end of the resin vat, let’s get some quick wins under your belt. If you’re looking for the “TL;DR” of 3D printing tutorials, here is the cheat sheet we wish we had when we started at 3D Printed™.
| Tip/Fact | Why It Matters |
|---|---|
| Leveling is Life | 90% of “broken” printers are just unlevel beds. Master this tutorial first! |
| Dry Filament = Happy Prints | PLA and PETG absorb moisture. A wet roll leads to “zits” and stringing. 💧 |
| The 3DBenchy | It’s not just a cute boat; it’s a diagnostic tool for cooling, overhangs, and extrusion. |
| Isopropanol (IPA) is Gold | Keep your print bed clean with 90%+ IPA to ensure perfect adhesion. ✅ |
| Safety First | Resin (SLA) printing requires a respirator and gloves. Don’t skip the safety tutorials! ❌ |
Did you know? The first 3D printing patent was filed in the 1980s, but the “tutorial boom” didn’t happen until the RepRap project made the technology open-source and affordable for us mere mortals!
🕰️ From Industrial Secrets to Desktop Dreams: The History of 3D Printing Education

Back in the day—we’re talking the neon-soaked 1980s—3D printing (or Stereolithography) was a dark art practiced only by engineers in lab coats. Chuck Hull, the father of 3D printing and founder of 3D Systems, probably didn’t imagine a world where a teenager could watch a 10-minute YouTube video and print a functional prosthetic arm in their bedroom.
The “tutorial culture” we love today was born from necessity. When the RepRap (Replicating Rapid Prototyper) movement kicked off in 2005, there were no manuals. We had to teach each other. Early adopters shared grainy forum posts on RepRap.org, documenting how to wire up an Arduino to move a stepper motor.
Fast forward to today: brands like Creality, Prusa Research, and Bambu Lab have turned “tinkering” into “plug-and-play.” But even with the best hardware, the software and design hurdles remain. That’s why 3D printing tutorials are the backbone of this industry. You aren’t just buying a machine; you’re joining a global classroom. 🌍
🚀 Beyond the Plastic: How 3D Printing Tutorials Shape Tomorrow’s Innovators Today
We often say at the shop that a 3D printer is just a very fancy hot glue gun until you learn how to command it. Learning through tutorials isn’t just about making “dust collectors” (those little plastic octopuses we all have); it’s about computational thinking and spatial reasoning.
When you follow a tutorial to fix a “Z-banding” issue or learn how to use Boolean operations in Fusion 360, you are essentially training to be a mechanical engineer, a software troubleshooter, and a material scientist all at once.
Why should you care?
- Self-Sufficiency: Need a specific bracket for your shelf? Design and print it. 🛠️
- Rapid Prototyping: Turn an idea into a physical object in hours, not weeks.
- Career Skills: Additive manufacturing is a multi-billion dollar industry. Your hobby is a resume builder!
Are you ready to stop being a consumer and start being a creator? Let’s break down the roadmap to mastery.
🛠️ 1. Hardware Foundations: Unboxing and Assembling Your First Machine
The biggest mistake we see? Rushing the assembly. Whether you bought a budget-friendly Creality Ender 3 V3 or a high-end Prusa MK4, your first tutorial should always be the assembly guide.
- Check for Squareness: Use a machinist square to ensure your X, Y, and Z axes are perfectly 90 degrees to each other. If the frame is crooked, your prints will be too! ❌
- Belt Tension: Your belts should be “twangy” like a guitar string, not floppy like a noodle.
- Cable Management: Use those zip ties! A stray cable catching on a moving bed is a recipe for a “spaghetti monster” (a failed print that looks like pasta).
Expert Recommendation: Follow the video tutorials by Ricky Impey or The Edge of Tech for specific machine builds. They often catch small errors in the official manuals.
📐 2. The Bed Leveling Manifesto: Achieving the Perfect First Layer
If you take nothing else from this article, remember this: The first layer is the foundation of your 3D printing soul.
Most beginners struggle with “bed adhesion.” If the nozzle is too high, the plastic won’t stick. If it’s too low, it will scrape the bed or clog the nozzle.
The Paper Test Method:
- Home your printer.
- Place a standard piece of A4 paper between the nozzle and the bed.
- Adjust the leveling knobs until you feel a slight “tug” or resistance when moving the paper.
- Repeat for all four corners… and then do it again. 🔄
Pro Tip: If you have a modern printer with Auto Bed Leveling (ABL) like a Bambu Lab P1S, don’t get complacent! You still need to ensure your “Z-offset” is calibrated correctly.
💻 3. Slicing and Dicing: Mastering Cura, PrusaSlicer, and Bambu Studio
A 3D printer doesn’t understand a 3D model (.STL or .OBJ). It only understands G-Code—a list of coordinates. A “Slicer” is the translator.
- Ultimaker Cura: The most popular open-source slicer. Great for beginners because of its “Basic” vs. “Expert” settings toggle.
- PrusaSlicer: Known for its incredible “Organic Supports” and clean UI.
- Bambu Studio: Optimized for high-speed printing and multi-color management.
Key Settings to Learn in Tutorials:
- Layer Height: 0.2mm is standard; 0.1mm is high detail; 0.3mm is “I need this done fast.”
- Infill: 15% is usually plenty for decorative items. Use “Gyroid” infill for strength in all directions! ✅
- Wall Count: More walls = more strength.
🎨 4. CAD for Beginners: From Tinkercad Simplicity to Fusion 360 Power
Printing things you found on Printables or Thingiverse is fun, but the real magic happens when you design your own parts.
- Tinkercad (The Gateway Drug): It’s browser-based and uses “primitive shapes” (boxes, cylinders) to build models. Perfect for kids and absolute beginners.
- Fusion 360 (The Professional Choice): This is parametric modeling. It allows you to go back in time and change a dimension, and the whole model updates. It’s free for hobbyists!
- Blender (The Artist’s Tool): If you want to sculpt characters or organic shapes, Blender is your best friend. Warning: the learning curve is a vertical cliff. 🧗 ♂️
🧵 5. Filament vs. Resin: Choosing Your Medium and Safety Tutorials
We get asked this a lot: “Should I get a filament (FDM) or resin (SLA) printer?”
| Feature | FDM (Filament) | SLA (Resin) |
|---|---|---|
| Material | Spools of plastic (PLA, PETG, ABS) | Liquid photopolymer resin |
| Best For | Functional parts, large props, toys | Miniatures, jewelry, high-detail |
| Mess Factor | Low (mostly just plastic scraps) | High (sticky resin, IPA baths) |
| Safety | Low fumes (except ABS/ASA) | High fumes (requires ventilation) |
Safety Warning: Never touch uncured resin with bare hands. Use Nitrile gloves (not Latex, as resin can permeate them). We recommend the Gloveworks Nitrile Industrial Disposable Gloves for maximum protection.
🔧 6. Troubleshooting 101: Fixing Clogs, Warping, and Stringing
Your printer will fail. It’s not a matter of if, but when. Don’t panic! It’s just a puzzle to solve.
- Warping: When the corners of your print lift off the bed. Solution: Use a brim in your slicer or apply a bit of Magigoo Bed Adhesion to the plate.
- Stringing: Those “spider webs” between parts. Solution: Increase your “Retraction” distance in the slicer or dry your filament.
- Under-extrusion: Thin, brittle layers. Solution: Check for a clogged nozzle or a cracked extruder arm (common on plastic Ender 3 extruders).
💡 Pro Tips for Accelerated Learning
- Watch at 1.5x Speed: Most YouTube tutorials have a lot of fluff. Speed it up until they get to the “how-to” part.
- Join the Discord: Communities like Voron Design or Bambu Lab Official have Discord servers where experts answer questions in real-time.
- Keep a Print Log: Write down what settings you used for a successful print. You will forget them by next week.
- The “Cold Pull” Technique: Learn this tutorial early. It’s the best way to clean a nozzle without taking the whole thing apart.
🏁 Conclusion

Mastering 3D printing tutorials is a journey, not a destination. We’ve been doing this for years at 3D Printed™, and we still learn something new every time a new version of Cura drops or a new material like High-Speed TPU hits the market.
Start with the basics: build your machine right, level that bed like your life depends on it, and don’t be afraid to fail. That pile of “spaghetti” on your floor? That’s just the tuition you pay for becoming an expert.
So, what are you going to build first? A replacement part for the dishwasher or a life-sized Iron Man helmet? The choice—and the tutorial—is yours! 🚀
🔗 Recommended Links
- Printables.com – The best community-driven site for high-quality models.
- Teaching Tech Calibration Tools – An essential site for tuning your printer’s performance.
- Fusion 360 for Beginners (YouTube) – Kevin Kennedy’s “Learn Fusion 360 in 30 Days” is legendary.
- Digital Calipers on Amazon – You cannot design functional parts without a good pair of calipers!
❓ FAQ

Q: Is 3D printing an expensive hobby? A: It can be, but it doesn’t have to be. You can get a great starter printer for the price of a video game console. The real cost is in the filament and the “upgraditis” (the urge to buy every new gadget).
Q: Can I 3D print food? A: Technically yes, there are chocolate and pancake printers! But your standard home printer is not food-safe. Don’t print a coffee mug and drink out of it—bacteria loves to hide in those tiny layer lines. ❌
Q: How long does a print take? A: It ranges from 15 minutes for a small calibration cube to 3 days for a large, detailed helmet. Patience is a virtue in this hobby!
📚 Reference Links
- 3D Systems – The History of 3D Printing
- RepRap Project Wiki
- All3DP – 3D Printing Troubleshooting Guide
- Prusa Academy – Online 3D Printing Courses
⚡️ Quick Tips and Facts
Welcome to the fast lane of 3D printing mastery! At 3D Printed™, we’ve learned that some tips save you hours of frustration and filament. Before you dive into the deep tutorials, here’s our quick-start cheat sheet to get you printing like a pro right away.
| Tip/Fact | Why It Matters | Source |
|---|---|---|
| Leveling is Life | A perfectly leveled bed ensures your first layer sticks and your print doesn’t fail. Most failed prints trace back to poor leveling. | All3DP Troubleshooting Guide |
| Keep Filament Dry | PLA and PETG absorb moisture, causing stringing and bubbles. Use filament dryers or airtight containers with desiccants. | Prusa Knowledge Base |
| 3DBenchy is Your Friend | This little boat is the industry’s go-to calibration model. It tests overhangs, bridging, dimensional accuracy, and more. | Thingiverse 3DBenchy |
| Clean Your Bed with IPA | Isopropyl alcohol (90%+) removes oils and dust, improving adhesion dramatically. | Ultimaker Cura Tips |
| Safety First with Resin | Resin printers require gloves, respirators, and well-ventilated spaces due to toxic fumes and sticky uncured resin. | Formlabs Safety Guide |
Pro Tip: Bookmark this section and refer back whenever you hit a snag. These are the golden rules that keep your prints smooth and your sanity intact.
🕰️ From Industrial Secrets to Desktop Dreams: The History of 3D Printing Education

3D printing wasn’t always the accessible hobby it is today. The journey from secretive industrial prototyping to living-room innovation is a story worth telling.
The Early Days: Industrial Origins
Back in the 1980s, Chuck Hull invented stereolithography (SLA), the first 3D printing technology, which was expensive and confined to labs. The machines were massive, and the knowledge was locked behind corporate walls.
The RepRap Revolution: Open Source Changes Everything
The game-changer came in 2005 with the RepRap project—an open-source initiative to create self-replicating 3D printers. Suddenly, hobbyists could build their own machines and share knowledge freely. This democratization sparked a global community eager to learn and teach.
The Rise of Tutorials and Online Communities
With the RepRap movement, tutorials became the lifeblood of the community. Forums like Reddit’s r/3Dprinting, YouTube channels such as Teaching Tech and The 3D Printing Nerd, and websites like Thingiverse emerged as hubs for knowledge exchange.
Today’s Landscape: Plug-and-Play Meets Deep Learning
Modern printers from Creality, Prusa Research, and Bambu Lab offer user-friendly setups, but the complexity of materials, slicing software, and design still requires education. That’s where tutorials shine—bridging the gap between hardware and creativity.
For a deep dive into the history and evolution of 3D printing, check out 3D Systems’ official story.
🚀 Beyond the Plastic: How 3D Printing Tutorials Shape Tomorrow’s Innovators Today
At 3D Printed™, we believe 3D printing tutorials do more than teach you how to press “Print.” They empower you to think like an engineer, designer, and problem solver.
Building Skills Beyond the Machine
- Computational Thinking: Learning CAD software and slicing teaches you to break down complex problems into manageable steps.
- Material Science: Understanding filament properties and resin chemistry deepens your grasp of real-world materials.
- Mechanical Troubleshooting: Fixing jams, calibrating axes, and tuning temperatures hones your hands-on engineering skills.
Educational Impact
Schools and libraries worldwide are integrating 3D printing into their curricula, using platforms like Tinkercad to teach design fundamentals. Ontario Tech University’s 3D Printing Tutorial is a great example of how institutions support learners with structured guides and access.
Career and Innovation
Additive manufacturing is a booming industry, projected to grow exponentially. Mastering 3D printing through tutorials can open doors to careers in aerospace, medical devices, and automotive design.
Question for you: What will you create that could change the world? The tutorials are your launchpad.
🛠️ 1. Hardware Foundations: Unboxing and Assembling Your First Machine
Your 3D printer is a complex orchestra of motors, sensors, and electronics. Getting off on the right foot means mastering the assembly and hardware basics.
Printer Rating: Creality Ender 3 V3 (Our Starter Favorite)
| Aspect | Rating (1-10) | Notes |
|---|---|---|
| Design | 8 | Open frame, modular, easy to upgrade |
| Assembly | 7 | Mostly pre-assembled, clear manual |
| Functionality | 8 | Reliable for PLA, PETG, some ABS |
| Community Support | 10 | Huge user base, tons of tutorials |
| Price-to-Performance | 9 | Excellent value for beginners |
Step-by-Step Assembly Insights
-
Unboxing and Inventory Check
Lay out all parts and compare with the manual checklist. Missing screws or cables? Contact Creality support immediately. -
Frame Assembly
Use a machinist square or a simple carpenter’s square to ensure the frame is perfectly perpendicular. A crooked frame = crooked prints. -
Belt Tensioning
Tighten belts so they feel like a firm guitar string. Too loose and your layers shift; too tight and you risk motor strain. -
Wiring and Cable Management
Route cables neatly using zip ties. Messy cables can snag and cause print failures or damage. -
Firmware and Calibration
Flash the latest firmware from Creality’s official site. Then run the initial calibration wizard.
Pro Tip: Watch Ricky Impey’s Ender 3 V3 assembly video for visual guidance.
Other Popular Starter Printers
| Printer Model | Assembly Difficulty | Recommended For |
|---|---|---|
| Prusa MK4 | 6 | Intermediate to advanced users |
| Bambu Lab P1S | 4 | Beginners wanting automation |
| Anycubic Kobra Go | 5 | Budget-conscious beginners |
👉 CHECK PRICE on:
- Creality Ender 3 V3: Thingiverse | Amazon | Creality Official Website
📐 2. The Bed Leveling Manifesto: Achieving the Perfect First Layer
If your first layer isn’t perfect, the rest of your print is doomed. At 3D Printed™, we call bed leveling the holy grail of 3D printing tutorials.
Why Bed Leveling Matters
- Ensures filament sticks to the build plate.
- Prevents nozzle clogs and layer shifting.
- Improves dimensional accuracy.
Manual Bed Leveling: The Paper Test
- Home the Printer: Move the nozzle to the home position.
- Place a Piece of Paper: Slide standard printer paper between the nozzle and the bed.
- Adjust the Knobs: Turn the knobs under the bed until you feel slight resistance on the paper.
- Repeat for All Corners: Move the nozzle to each corner and center, adjusting accordingly.
- Double Check: Repeat the process twice to ensure consistency.
Auto Bed Leveling (ABL) and Z-Offset
Modern machines like the Bambu Lab P1S come with ABL sensors. However, you still need to:
- Calibrate the Z-offset to fine-tune the nozzle height.
- Run a mesh bed leveling before each print for best results.
Troubleshooting Bed Adhesion
| Problem | Cause | Solution |
|---|---|---|
| First layer not sticking | Nozzle too far from bed | Lower Z-offset or re-level bed |
| Nozzle scraping bed | Nozzle too close | Raise Z-offset slightly |
| Warping at corners | Uneven bed temperature | Use a heated bed and enclosure |
| Print lifts mid-print | Drafts or cold bed | Use a brim or enclosure |
Pro Tip: Use a BuildTak or PEI sheet for better adhesion on glass beds.
💻 3. Slicing and Dicing: Mastering Cura, PrusaSlicer, and Bambu Studio
Slicing software is the magical translator between your 3D model and the printer’s language: G-code.
Software Rating Table
| Slicer | Ease of Use | Features | Customization | Community Support | Best For |
|---|---|---|---|---|---|
| Ultimaker Cura | 9 | 9 | 8 | 10 | Beginners to advanced |
| PrusaSlicer | 8 | 10 | 9 | 9 | Prusa owners, advanced |
| Bambu Studio | 7 | 8 | 7 | 7 | Bambu Lab printers |
Key Features to Master
- Layer Height: Controls print resolution. Lower = finer detail, longer print.
- Infill Density & Pattern: Balances strength and material use. Gyroid infill is strong and flexible.
- Supports: Automatically generated for overhangs; learn to customize to save material.
- Print Speed: Faster speeds reduce quality; slower speeds improve detail.
- Temperature Settings: Adjust nozzle and bed temps based on filament type.
Step-by-Step Slicing Workflow
- Import Your Model: Load your STL or OBJ file.
- Set Printer Profile: Choose your printer model or create a custom profile.
- Adjust Print Settings: Layer height, infill, supports, temperature.
- Preview the Layers: Use the preview mode to check for errors or missing supports.
- Export G-code: Save to SD card or send directly via USB/Wi-Fi.
Pro Tips
- Use Cura’s “Adaptive Layers” to speed up prints without sacrificing detail.
- PrusaSlicer’s “Organic Supports” are easier to remove and leave cleaner surfaces.
- Bambu Studio integrates AI-powered supports and multi-material management.
For a beginner-friendly walkthrough, check out our 3D Design Software category.
🎨 4. CAD for Beginners: From Tinkercad Simplicity to Fusion 360 Power
Designing your own models is where 3D printing becomes truly magical. Let’s explore the CAD tools that make it possible.
Tinkercad: The Beginner’s Playground
- Pros: Browser-based, free, intuitive drag-and-drop interface.
- Cons: Limited complexity, not parametric.
- Best For: Kids, educators, absolute beginners.
- Educational Focus: Encourages creativity and basic design principles.
“Tomorrow’s innovators are made today,” says Tinkercad’s education page, and we couldn’t agree more.
Fusion 360: The Powerhouse
- Pros: Parametric design, powerful simulation tools, free for hobbyists.
- Cons: Steeper learning curve, requires installation.
- Best For: Intermediate to advanced users, engineers, product designers.
- Features: History timeline, assemblies, CAM integration.
Blender: The Artist’s Choice
- Pros: Free, open-source, excellent for organic shapes.
- Cons: Complex UI, not parametric.
- Best For: Sculpting, artistic models, animations.
Getting Started: Step-by-Step for Tinkercad
- Create an Account: Visit Tinkercad.com and sign up.
- Start a New Project: Use basic shapes to build your model.
- Group and Align: Combine shapes and align them precisely.
- Export for Printing: Download as STL for slicing.
Recommended Learning Resources
🧵 5. Filament vs. Resin: Choosing Your Medium and Safety Tutorials
Choosing between filament (FDM) and resin (SLA) printing is a pivotal decision for beginners and pros alike.
Comparison Table: Filament vs. Resin
| Feature | Filament (FDM) | Resin (SLA/DLP) |
|---|---|---|
| Material | Thermoplastic spools (PLA, PETG) | Liquid photopolymer resin |
| Detail Level | Moderate (0.1-0.3mm layers) | High (down to 25 microns) |
| Print Speed | Faster for large parts | Slower, layer curing time |
| Post-Processing | Minimal (remove supports, sanding) | Extensive (washing, curing, sanding) |
| Safety Concerns | Low (ventilation recommended) | High (toxic resin fumes, skin contact) |
| Cost of Materials | Generally cheaper | More expensive |
| Printer Cost | Wide range (budget to premium) | Usually higher upfront |
| Use Cases | Functional parts, prototypes | Miniatures, jewelry, dental models |
Safety Essentials for Resin Printing
- Always wear Nitrile gloves (not latex) when handling resin.
- Use a respirator mask and work in a well-ventilated area.
- Cure prints fully under UV light before handling.
- Dispose of resin waste responsibly.
Our favorite gloves: Gloveworks Nitrile Industrial Disposable Gloves.
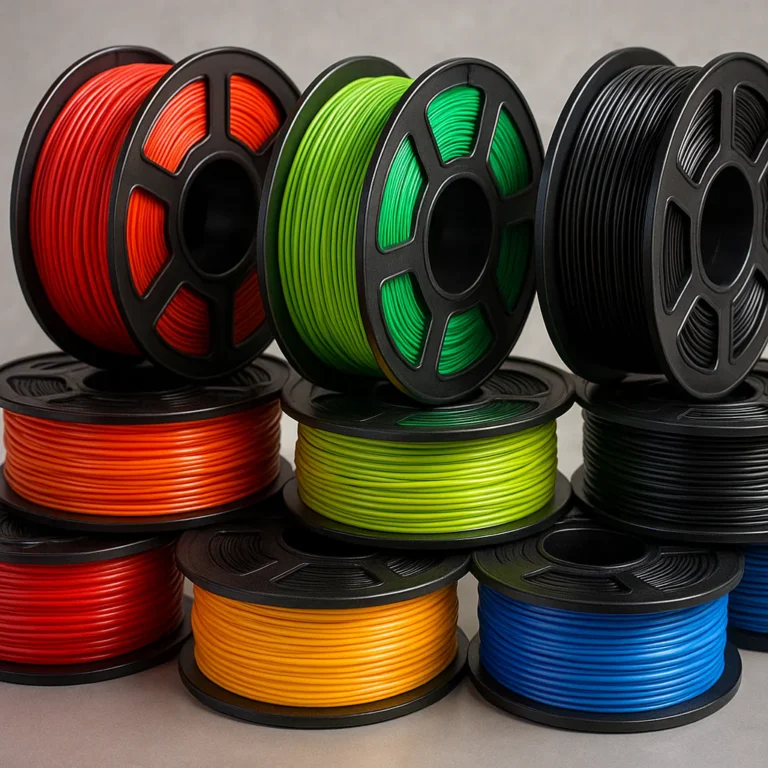
Popular Filaments and Their Uses
| Filament Type | Characteristics | Best For |
|---|---|---|
| PLA | Easy to print, biodegradable | Beginners, prototypes, toys |
| PETG | Strong, flexible, chemical resistant | Functional parts, outdoor use |
| ABS | Heat resistant, tough | Mechanical parts, automotive |
| TPU | Flexible, rubber-like | Phone cases, wearables |
Explore filament reviews and guides in our 3D Printable Objects category.
🔧 6. Troubleshooting 101: Fixing Clogs, Warping, and Stringing
Every 3D printer owner faces failures. The key is knowing how to diagnose and fix them quickly.
Common Issues and Solutions
| Problem | Symptoms | Causes | Fixes |
|---|---|---|---|
| Warping | Corners lift off bed | Uneven bed temp, drafts | Use brim, enclosure, heated bed |
| Stringing | Thin strands between parts | Excessive retraction, wet filament | Increase retraction, dry filament |
| Under-extrusion | Thin or missing layers | Clogged nozzle, filament jam | Clean nozzle, check filament path |
| Layer Shifting | Layers misaligned horizontally | Loose belts, motor skips | Tighten belts, check stepper drivers |
| Elephant’s Foot | Bottom layers bulge out | Nozzle too close to bed | Raise Z-offset slightly |
Step-by-Step Nozzle Cleaning (Cold Pull Technique)
- Heat nozzle to printing temp.
- Insert nylon filament or cleaning filament.
- Lower temperature to ~90°C.
- Pull filament out slowly; it drags debris with it.
- Repeat if necessary.
Warping Prevention Tips
- Use a PEI sheet or BuildTak for better adhesion.
- Print with a heated bed set to recommended temps.
- Enclose your printer to maintain temperature stability.
For more troubleshooting guides, visit All3DP’s Troubleshooting Hub.
💡 7. Advanced Techniques: Multi-Material Printing and Support Optimization
Ready to level up? Advanced tutorials unlock the full potential of your printer.
Multi-Material Printing
- Dual Extruders: Printers like the Prusa MK4 have two nozzles for printing with two filaments or colors simultaneously.
- Palette Devices: Add-ons like the Mosaic Palette 3 splice multiple filaments into a single nozzle.
- Benefits: Complex color prints, soluble supports, combining flexible and rigid materials.
Support Structures: Friend or Foe?
Supports are necessary for overhangs but can be a pain to remove.
- Types of Supports:
- Tree Supports: Branch-like, use less material, easier to remove.
- Grid Supports: Dense, more stable but harder to remove.
- Optimization Tips:
- Adjust support density and interface layers in slicer.
- Use soluble supports (PVA) for easy cleanup.
- Orient models to minimize support need.
Experimental Techniques
- Vase Mode: Print hollow objects with a single continuous spiral layer.
- Variable Layer Height: Use thicker layers in less detailed areas to speed prints.
- Infill Patterns: Gyroid, honeycomb, and cubic infills offer different strength-to-weight ratios.
✨ 8. Post-Processing Perfection: Sanding, Painting, and Vapor Smoothing
Your print isn’t done when it leaves the printer. Post-processing turns a good print into a masterpiece.
Sanding and Filling
- Start with coarse grit (100-200) sandpaper, then move to fine grit (400-600).
- Use filler primers to smooth layer lines before painting.
Painting Tips
- Use acrylic paints for PLA and PETG.
- Spray primers improve paint adhesion.
- For resin prints, cure fully before sanding or painting.
Vapor Smoothing
- ABS prints can be smoothed with acetone vapor, which melts the outer layer for a glossy finish.
- Safety Warning: Acetone vapors are flammable and toxic; use in a well-ventilated area with protective gear.
Resin Post-Processing
- Wash prints in 90%+ isopropyl alcohol.
- Cure under UV light for recommended times.
- Sand and paint after curing.
🎓 9. The Best Digital Classrooms: YouTube, Skillshare, and Community Forums
Learning never stops in 3D printing. Here are our top picks for ongoing education.
YouTube Channels
- Teaching Tech: Detailed tutorials on calibration and upgrades.
- The 3D Printing Nerd: Entertaining reviews and project ideas.
- Ricky Impey: Step-by-step assembly and troubleshooting.
Online Courses
- Skillshare: Offers beginner to advanced CAD and printing courses.
- Udemy: Affordable courses on Fusion 360 and Blender.
Forums and Discord Servers
- Reddit r/3Dprinting: Community troubleshooting and inspiration.
- Prusa and Bambu Lab Official Discords: Manufacturer support and tips.
- Voron Design Discord: For advanced DIY printer builders.
STL File Repositories
Pro Tip: Engage with communities and share your prints. Feedback accelerates learning.
💡 Pro Tips for Accelerated Learning
- Watch Tutorials at 1.5x Speed: Skip fluff, focus on key steps.
- Keep a Print Logbook: Record filament, settings, and results.
- Join Local Maker Spaces: Hands-on help beats online alone time.
- Experiment with Calibration Prints: Use test models like 3DBenchy and calibration cubes.
- Don’t Fear Failure: Each failed print is a lesson in disguise.
If you’re looking for the ultimate beginner’s guide, don’t miss the first YouTube video embedded above. It covers everything from unboxing the LONGER LK4 Pro printer to troubleshooting common issues, slicing software setup, and even exploring emerging filaments like metal PLA. The presenter’s mantra, “3D printing is not always a plug-and-play experience,” reminds us that patience and learning go hand in hand.
🏁 Conclusion

Well, there you have it—a comprehensive roadmap from unboxing your first 3D printer to mastering advanced techniques and troubleshooting like a seasoned pro. Whether you’re wielding a Creality Ender 3 V3, a Prusa MK4, or the sleek Bambu Lab P1S, the key takeaway is this: 3D printing is as much about learning and experimentation as it is about the hardware.
Positives of Our Starter Favorite: Creality Ender 3 V3
✅ Great community support and tons of tutorials make it beginner-friendly.
✅ Modular design allows upgrades and customization.
✅ Reliable print quality for PLA and PETG with consistent results.
✅ Excellent price-to-performance ratio for new users.
Negatives
❌ Assembly can be fiddly for absolute beginners without video guidance.
❌ No auto bed leveling, so manual leveling skills are essential.
❌ Limited enclosure means some filaments like ABS require extra accessories.
Our Confident Recommendation
If you’re starting out and want a solid, affordable machine with a huge knowledge base, the Creality Ender 3 V3 is a fantastic choice. Pair it with the tutorials and tips above, and you’ll be printing functional, beautiful objects in no time. For those wanting more automation and multi-material capability, consider stepping up to the Bambu Lab P1S or Prusa MK4.
Remember the question we posed earlier: What will you create that could change the world? With the right tutorials, tools, and mindset, the answer is limited only by your imagination. So grab your filament, fire up your slicer, and let’s turn those digital dreams into tangible reality! 🚀
🔗 Recommended Links
👉 Shop Printers and Accessories:
- Creality Ender 3 V3: Thingiverse | Amazon | Creality Official Website
- Prusa MK4: Prusa Official Website | Amazon
- Bambu Lab P1S: Bambu Lab Official Website | Amazon
Filaments and Consumables:
- PLA Filament: Amazon | MatterHackers
- Magigoo Bed Adhesion: Amazon
- Gloveworks Nitrile Gloves: Amazon
Books for Deepening Your Knowledge:
- 3D Printing Failures: How to Diagnose and Repair All Desktop 3D Printing Issues by Sean Aranda — Amazon
- Make: 3D Printing: The Essential Guide to 3D Printers by Anna Kaziunas France — Amazon
- Fusion 360 for Makers: Design Your Own Digital Models for 3D Printing and CNC Fabrication by Lydia Sloan Cline — Amazon
❓ FAQ
 comprises a set of guidelines and best practices essential for designers and engineers to achieve optimal outcomes in printed part designs. Additive Manufacturing (AM), commonly referred to as 3D printing (3DP), encompasses various technologies such as stereolithography (SLA), selective laser sintering (SLS), fused deposition modeling (FDM), direct metal laser sintering (DMLS), among others. DFAM encompasses considerations related to the chosen printing technology, part geometry, materials selection, and any necessary. by 3D Printed")
What are some fun and easy 3D printing projects for hobbyists to get started with?
Start with simple calibration models like the 3DBenchy, keychains, phone stands, or cookie cutters. These projects help you understand printer behavior without overwhelming complexity. Sites like Thingiverse and Printables offer thousands of free beginner-friendly models.
How do I calibrate my 3D printer for optimal printing results?
Calibration involves leveling the bed, setting the correct nozzle height (Z-offset), tuning extrusion multiplier, and adjusting temperature settings. Use calibration cubes and the 3DBenchy model to test dimensional accuracy and layer adhesion. Follow step-by-step tutorials like those from Teaching Tech on YouTube for detailed guidance.
What are the most common 3D printing mistakes and how can I avoid them?
Common mistakes include poor bed leveling, incorrect temperature settings, using wet filament, and insufficient support structures. Avoid these by carefully following tutorials on leveling, drying filament, and slicing settings. Keeping a print log helps track what works and what doesn’t.
Can I use online 3D printing tutorials to learn how to design my own models?
Absolutely! Platforms like Tinkercad, Fusion 360, and Blender offer extensive tutorials for all skill levels. Many YouTube creators and online courses break down CAD design into manageable lessons.
What are some essential 3D printing skills to learn for creating complex models?
Learn parametric CAD modeling, advanced slicing techniques (like custom supports and multi-material printing), and post-processing skills such as sanding and painting. Troubleshooting hardware issues and understanding material properties are also crucial.
How do I choose the right 3D printing software for my projects?
Choose based on your printer model, experience level, and project complexity. Ultimaker Cura is excellent for beginners and supports many printers. PrusaSlicer is great for Prusa owners and advanced users. Bambu Studio is optimized for Bambu Lab printers. For design, start with Tinkercad and graduate to Fusion 360 or Blender as you grow.
What are the best 3D printing tutorials for beginners?
Look for tutorials that cover hardware setup, bed leveling, slicing basics, and simple print projects. Channels like Teaching Tech, The 3D Printing Nerd, and Ricky Impey offer beginner-friendly content. University tutorials like Ontario Tech’s 3D Printing Guide provide structured learning paths.
How do I choose the right filament for 3D printing projects?
Select filament based on your project’s needs:
- PLA for ease and general use.
- PETG for strength and flexibility.
- ABS for heat resistance (requires enclosure).
- TPU for flexible parts.
Consider printer compatibility and environmental factors.
What software is recommended for 3D printing design tutorials?
For beginners, Tinkercad is the easiest. For parametric and professional design, Fusion 360 is highly recommended. For artistic and organic shapes, Blender is best. Many tutorials are available on YouTube and official software websites.
How can I troubleshoot common 3D printing errors?
Identify symptoms (e.g., stringing, warping, layer shifts), then consult troubleshooting guides or community forums. Use test prints like calibration cubes and 3DBenchy to isolate issues. Techniques like the cold pull clean nozzle method and adjusting slicer settings often solve common problems.
What safety tips should I follow when 3D printing at home?
- Always work in a well-ventilated area, especially with ABS or resin printing.
- Wear gloves and a respirator when handling resin.
- Keep your workspace clean and free of clutter.
- Never leave your printer unattended for long prints.
- Follow manufacturer safety guidelines strictly.
📚 Reference Links
- 3D Systems – The History of 3D Printing
- RepRap Project Wiki
- All3DP – 3D Printing Troubleshooting Guide
- Prusa Knowledge Base
- Formlabs Resin Safety Guide
- Ultimaker Cura Software
- Tinkercad 3D Printing Tutorials
- Ontario Tech University 3D Printing Tutorial
- LaGuardia Community College 3D Printing Tutorials