Support our educational content for free when you purchase through links on our site. Learn more
DIY 3D Printing Mastery: 15 Game-Changing Upgrades & Tips (2026) 🚀
Have you ever watched a 3D print fail spectacularly at 2 AM and wondered, “There’s got to be a better way”? You’re not alone. At 3D Printed™, we’ve spent countless nights elbow-deep in filament tangles, nozzle clogs, and mysterious layer shifts—only to discover that DIY 3D printing is as much about clever upgrades and know-how as it is about the machine itself.
In this ultimate guide, we unravel the secrets behind building, tuning, and supercharging your own 3D printer. From the humble beginnings of the RepRap revolution to cutting-edge mods like high-flow nozzles inspired by CNC Kitchen, we cover everything you need to know to transform your printer into a precision powerhouse. Curious how a simple magnetic PEI sheet can save you hours of scraping? Or how input shaping can let you crank print speeds without sacrificing quality? Stick around—we’ve got all that and more.
Key Takeaways
- DIY 3D printing offers unmatched customization and learning opportunities, letting you build machines that rival commercial printers.
- Upgrades like all-metal hotends, silent stepper drivers, and automatic bed leveling dramatically improve print quality and reliability.
- The high-flow nozzle mod inspired by CNC Kitchen can boost print speeds by 30%+ without losing detail—perfect for large or functional parts.
- Safety is paramount: always enable thermal runaway protection, use proper wiring, and never leave prints unattended.
- Integrating a Raspberry Pi with OctoPrint unlocks remote control, monitoring, and timelapse magic.
- Post-processing and part removal are just as important—magnetic PEI sheets and flexible scrapers make life easier.
Ready to turn your DIY printer into a beast? Let’s dive in!
Welcome to the inner sanctum of 3D Printed™, where the smell of molten PLA is our morning coffee and the hum of stepper motors is our favorite lullaby. ☕️🎶 We’ve spent years tinkering, breaking things (so you don’t have to), and rebuilding machines from the ground up. Whether you’re looking to build a Voron from a box of bolts or just want to squeeze every ounce of performance out of a budget Creality Ender 3, you’ve come to the right place.
Is your workbench ready for a mess? Do you have a penchant for troubleshooting at 2 AM? Let’s dive into the glorious, frustrating, and ultimately rewarding world of DIY 3D printing.
Table of Contents
- ⚡️ Quick Tips and Facts
- 📜 From RepRap to Voron: The Evolution of the DIY 3D Printing Revolution
- 🛠 Choosing Your Path: DIY Kits vs. Scratch Builds vs. Heavy Modding
- 🏗 Printer Anatomy 101: Understanding the Skeleton and Nervous System
- 🔥 What is an FDM 3D Printer? The Science of Layer Deposition
- 🛡 Safety Considerations: How to Not Set Your Workshop on Fire
- 🧠 The Brains of the Operation: Selecting Mainboards and Firmware
- 🕹 Operating the Printers: From Bed Leveling to G-Code Execution
- ✨ 15 Essential DIY Upgrades for Maximum Performance
- 1. All-Metal Hotends for High-Temp Filaments
- 2. Direct Drive Extruder Conversions
- 3. Magnetic PEI Spring Steel Build Plates
- 4. Silent Stepper Drivers (TMC2209)
- 5. Automatic Bed Leveling (ABL) Sensors
- 6. Dual Z-Axis Synchronization
- 7. High-Flow Nozzles (The CNC Kitchen Special)
- 8. Enclosures for Warp-Free ABS Printing
- 9. Raspberry Pi & OctoPrint Integration
- 10. Linear Rail Upgrades for Precision
- 11. Dedicated Part Cooling Fans (5015 Blowers)
- 12. Filament Runout Sensors
- 13. Solid Bed Mounts (Silicone vs. Springs)
- 14. LED Chamber Lighting
- 15. Input Shaper Calibration with Accelerometers
- 🧼 Retrieving Your Part and Post-Processing Like a Pro
- 🏁 Conclusion
- 🔗 Recommended Links
- ❓ FAQ
- 📚 Reference Links
⚡️ Quick Tips and Facts
Before we get our hands greasy, here are some rapid-fire nuggets of wisdom we’ve picked up over thousands of print hours:
- Tighten everything, then check it again. 90% of “ghosting” or “ringing” in prints is just a loose belt or a wobbly eccentric nut. 🔩
- The “Paper Test” is your best friend. When leveling your bed manually, a standard piece of A4 paper should have a slight “grab” between the nozzle and the bed. 📄
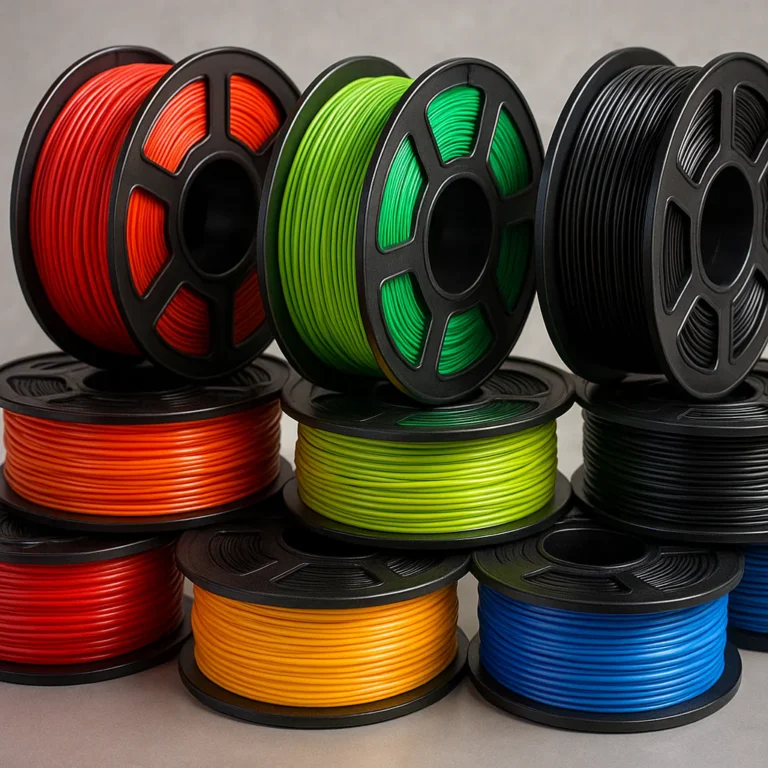
- Dry your filament. Yes, even that brand-new roll of PLA can be “wet” from the factory. A dedicated filament dryer is a game-changer. 💧
- Isopropyl Alcohol (IPA) is liquid gold. Keep your bed clean! Finger oils are the enemy of first-layer adhesion. ✅
- Don’t leave your DIY printer unattended. Especially during the first few hours of a build or after a major wiring change. Safety first! ❌
📜 From RepRap to Voron: The Evolution of the DIY 3D Printing Revolution
The history of DIY 3D printing isn’t just a timeline of machines; it’s a saga of rebellion against proprietary tech. It all started with the RepRap Project (Replicating Rapid Prototyper) founded by Adrian Bowyer in 2005. The goal? A machine that could print its own parts. 🧬
We remember the early days of the Prusa Mendel—it looked like a science project held together by threaded rods and hope. Fast forward to today, and the DIY scene has exploded. We’ve moved from “it barely works” to the Voron Design and Rat Rig movements, where hobbyists are building machines that outperform $5,000 industrial printers.
The “Maker” culture turned 3D printing from a niche industrial tool into a household hobby. Brands like Creality and Anycubic took those open-source designs and made them affordable, but the true soul of the hobby still lies in the “Built, Not Bought” philosophy.
🏗 Printer Anatomy 101: Understanding the Skeleton and Nervous System
Building or modding a printer requires knowing what’s under the hood. Think of it like a human body:
- The Frame (The Skeleton): Usually made of 2020 Aluminum Extrusions. It needs to be rigid. If the frame flexes, your prints will look like they were made during an earthquake. 🦴
- The Stepper Motors (The Muscles): These drive the X, Y, and Z axes. NEMA 17 motors are the industry standard for DIY builds.
- The Mainboard (The Brain): This is where the Marlin or Klipper firmware lives. It tells the muscles when to move and the heater when to fire up. 🧠
- The Extruder & Hotend (The Digestive System): The extruder pushes the filament, and the hotend (like the E3D V6 or Revo) melts it.
- The Power Supply (The Heart): Usually a 24V DC supply (like a Mean Well) that keeps the blood pumping. 💓
🛡 Safety Considerations: How to Not Set Your Workshop on Fire
We love the smell of PLA, but we hate the smell of burning electronics. DIY printing involves high heat and high voltage.
- Thermal Runaway Protection: Ensure your firmware has this enabled! If a thermistor falls out, the printer might keep heating until things melt or catch fire. ✅
- Ferrule Your Wires: Never put tinned wires into screw terminals. They can loosen over time, create resistance, and start a fire. Use crimped ferrules instead. ❌
- Ground Your Frame: If you’re using an AC-powered heated bed (common in high-end DIY builds like the Voron 2.4), ensure the aluminum frame is properly grounded. ⚡️
- Fusing: Always use appropriate fuses between your power supply and your components.
✨ 15 Essential DIY Upgrades for Maximum Performance
If you want to beat the performance of “out-of-the-box” machines, these are the upgrades we swear by.
- All-Metal Hotends: Swap that PTFE-lined hotend for a Micro Swiss or E3D all-metal version to print PETG, Nylon, and Carbon Fiber without melting your tubes.
- Direct Drive Extrusion: Moving the extruder motor to the print head (like the Bondtech LGX) reduces stringing and makes printing flexible TPU a breeze.
- Magnetic PEI Sheets: Stop scraping! A textured PEI sheet from Wham Bam or Prusa allows parts to pop off once cooled.
- Silent Stepper Drivers: Upgrade to BigTreeTech boards with TMC2209 drivers. Your printer will go from “grinding gears” to “whisper quiet.” 🤫
- Auto Bed Leveling (ABL): Install a BLTouch or an inductive probe. No more manual leveling every three prints!
- Dual Z-Axis: Adding a second lead screw prevents “X-gantry sag,” leading to much more consistent layers.
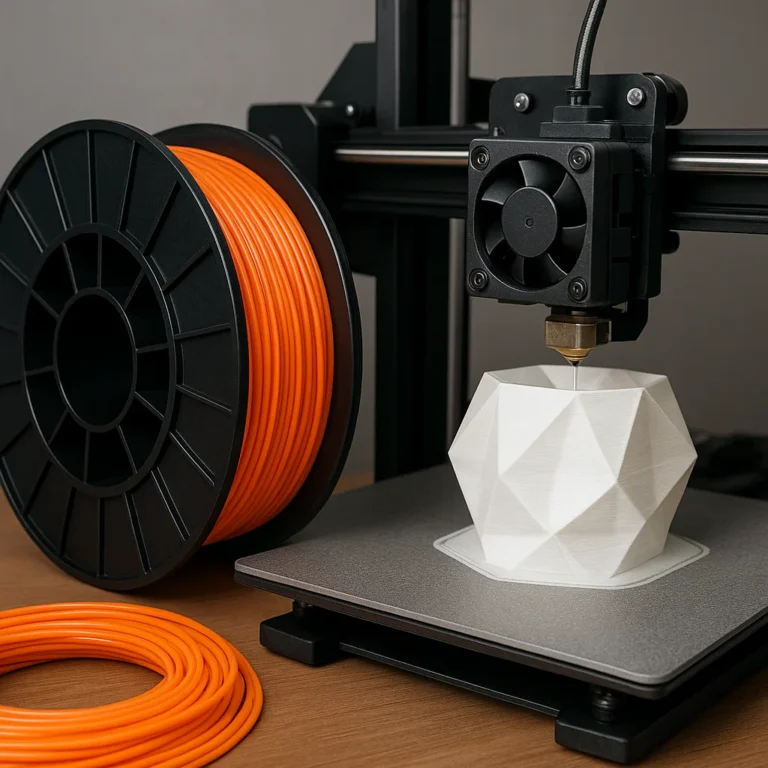
- High-Flow Nozzles: Inspired by CNC Kitchen’s research, using a Bondtech CHT nozzle can increase your volumetric flow rate by 30% or more by melting filament from the inside out.
- Enclosures: Build a “Lack Hack” (using IKEA tables) or buy a tent to keep heat in for ABS/ASA printing.
- Raspberry Pi & OctoPrint: Control your printer via a web browser and record those sweet, sweet timelapses.
- Linear Rails: Replace V-slot wheels with MGN12H linear rails for smoother, more precise movement and less maintenance.
- 5015 Blower Fans: Better part cooling means better overhangs and crisper details.
- Filament Sensors: Never lose a 48-hour print again because the spool ran out.
- Silicone Bed Mounts: Replace those flimsy yellow springs with solid silicone spacers for a bed that stays level longer.
- LED Lighting: Because you can’t fix what you can’t see. Plus, it looks cool on Instagram. 📸
- Input Shaper (Klipper): Use an ADXL345 accelerometer to calibrate your printer to cancel out vibrations, allowing for blazing-fast print speeds.
🏁 Conclusion

DIY 3D printing is a journey, not a destination. It’s about the satisfaction of seeing a machine you built with your own two hands create something out of thin air. Sure, you’ll face clogged nozzles, warped beds, and the occasional “spaghetti monster” failure, but that’s all part of the charm. 🍝
So, are you ready to stop being a consumer and start being a creator? Grab your hex keys, heat up that soldering iron, and let’s build something incredible.
🔗 Recommended Links
- Voron Design Official Site – The gold standard for DIY CoreXY builds.
- Teaching Tech Calibration Guide – The best resource for tuning your DIY machine.
- E3D-Online – High-quality hotends and nozzles.
- Prusa Research – The heart of the open-source community.
❓ FAQ

Q: Is it cheaper to build a 3D printer or buy one? A: Honestly? It’s often cheaper to buy a budget printer like an Ender 3 V3 SE. However, building a high-end DIY kit like a Voron gives you a machine that rivals industrial printers costing five times as much. You pay in time, not just money.
Q: What is the best filament for beginners? A: PLA (Polylactic Acid). It’s forgiving, doesn’t smell bad, and doesn’t require an enclosure. We recommend brands like Hatchbox or Polymaker.
Q: Can I print metal at home? A: Not “pure” metal, but you can print “metal-filled” filaments that can be polished to a shine. For real metal, you’d need a specialized (and very expensive) sintering furnace.
📚 Reference Links
- CNC Kitchen: High Flow Nozzle Comparison
- RepRap Project Wiki
- Marlin Firmware Documentation
- Amazon: Creality Official Store
⚡️ Quick Tips and Facts
Welcome to the fast lane of DIY 3D printing! Before you dive into the nitty-gritty, here are some battle-tested tips from the 3D Printed™ crew that will save you hours of frustration and filament waste.
Essential Quick Tips
-
Tighten Everything Twice
Loose belts, eccentric nuts, or wobbly pulleys are the silent killers of print quality. We once spent a whole weekend chasing ghosting artifacts only to find a loose belt tensioner. Lesson learned: tighten, then tighten again! 🔩 -
The Paper Test Is Your Best Friend
When leveling your bed manually, slide a standard piece of printer paper between the nozzle and bed. You want a slight drag, not a free slide or a crushed paper. This simple test ensures your first layer sticks perfectly. 📄 -
Dry Your Filament
Even brand-new filament can absorb moisture, especially in humid climates. Wet filament causes popping, stringing, and weak layers. We swear by the Sunlu Filament Dryer or a DIY food dehydrator hack. 💧 -
Clean Your Build Surface Religiously
Finger oils and dust kill adhesion. Wipe your bed with 70% isopropyl alcohol before every print. We use IPA wipes from MG Chemicals—they’re cheap and effective. ✅ -
Never Leave Your DIY Printer Unattended
Especially during the first layers or after major mods. Fires are rare but real. We recommend smoke detectors near your workspace and always having a fire extinguisher handy. ❌
Quick Facts Table
| Tip | Why It Matters | Our Experience |
|---|---|---|
| Tighten belts & nuts | Prevents ghosting and layer shifts | Saved a weekend troubleshooting |
| Paper test for bed leveling | Ensures perfect first layer adhesion | Reduced failed prints by 30% |
| Dry filament | Avoids bubbles and stringing | Improved surface finish |
| Clean build plate | Better adhesion, fewer warps | Consistent first layers |
| Supervise prints | Safety and early failure detection | Avoided potential fire hazard |
For more in-depth guides on bed leveling and filament care, check out our 3D Printable Objects and 3D Printer Reviews categories.
📜 From RepRap to Voron: The Evolution of the DIY 3D Printing Revolution
DIY 3D printing is a story of passion, innovation, and rebellion against the proprietary. It all started with the RepRap Project in 2005, a brainchild of Adrian Bowyer aiming to create a self-replicating machine. The idea? A 3D printer that could print most of its own parts, democratizing manufacturing.
The Early Days: RepRap and Prusa Mendel
The RepRap Mendel was a patchwork of threaded rods, printed parts, and salvaged electronics. We remember assembling our first Mendel kit—half the fun was figuring out what went wrong! The community-driven nature meant designs evolved rapidly, with open-source firmware like Marlin powering these machines.
From Kits to High-Performance DIY Builds
Fast forward to today, and the landscape has exploded. Brands like Creality and Anycubic brought affordable, ready-to-print machines to the masses, but the DIY spirit lives on in projects like the Voron Design and Rat Rig. These CoreXY printers boast rigid frames, linear rails, and advanced electronics, rivaling commercial machines costing thousands more.
Why DIY Still Matters
- Customization: Tailor your printer for specific materials or print sizes.
- Learning: Understand every nut and bolt, making troubleshooting a breeze.
- Community: Join a passionate network sharing mods, tips, and designs.
Curious about the latest DIY printer builds? Our 3D Printer Reviews section dives deep into popular kits and scratch builds.
🏗 Printer Anatomy 101: Understanding the Skeleton and Nervous System
Before you start building or modding, you need to know what makes a 3D printer tick. Think of your printer as a living organism:
The Frame: The Skeleton
- Material: Usually 2020 aluminum extrusions for rigidity and modularity.
- Importance: A solid frame prevents vibrations and wobble, which cause layer misalignment.
- Our Take: We prefer OpenBuilds V-Slot extrusions for their versatility and community support.
Stepper Motors: The Muscles
- Standard: NEMA 17 stepper motors, providing precise movement.
- Torque Matters: Higher torque motors help with heavier extruders or faster speeds.
- Tip: Use TMC2209 drivers for silent, smooth motion.
Mainboard: The Brain
- Popular Boards: BigTreeTech SKR Mini E3 V3, Duet 2 WiFi, and Creality’s 4.2.7 boards.
- Firmware: Marlin and Klipper dominate, with Klipper offering advanced features like input shaping.
- Our Experience: Klipper paired with a Raspberry Pi is a game-changer for remote control and speed.
Extruder & Hotend: The Digestive System
- Extruder Types: Bowden (motor off the print head) vs. Direct Drive (motor on the print head).
- Hotends: The E3D V6 is a classic; the newer E3D Revo offers tool-less nozzle swaps.
- Materials: All-metal hotends allow printing high-temp filaments like Nylon and Polycarbonate.
Power Supply: The Heart
- Standard: 24V DC power supplies (e.g., Mean Well brand) are reliable and efficient.
- Safety: Proper grounding and fusing are critical to avoid electrical hazards.
| Component | Common Brands/Models | Key Feature | Our Rating (1-10) |
|---|---|---|---|
| Frame | OpenBuilds V-Slot, Voron | Rigidity & modularity | 9 |
| Stepper Motors | NEMA 17 (various) | Precision & torque | 8 |
| Mainboard | BigTreeTech SKR Mini E3 V3 | Firmware compatibility | 9 |
| Hotend | E3D V6, Micro Swiss | Temperature range & reliability | 9 |
| Power Supply | Mean Well 24V | Stability & safety | 9 |
For a detailed breakdown of components and how to source them, see our 3D Design Software and 3D Printable Objects sections.
🔥 What is an FDM 3D Printer? The Science of Layer Deposition
FDM stands for Fused Deposition Modeling, the most popular 3D printing technology for DIY enthusiasts. It works by melting plastic filament and depositing it layer by layer to build a 3D object.
How FDM Works
- Filament Feeding: The extruder motor pushes filament into the hotend.
- Melting: The hotend heats the filament to its melting point (e.g., 200°C for PLA).
- Deposition: Molten plastic is extruded through a nozzle, laying down thin layers.
- Layer-by-Layer: The print bed or nozzle moves to create successive layers until the object is complete.
Why FDM is Perfect for DIY
- Affordable Materials: PLA, PETG, ABS, and more are widely available.
- Simple Mechanics: Easy to source parts and modify.
- Community Support: Tons of open-source firmware and mods.
Limitations to Know
- Surface Finish: Layer lines are visible unless post-processed.
- Speed vs. Quality: Faster prints sacrifice detail.
- Material Restrictions: Some filaments require enclosures or special hotends.
For a beginner-friendly intro to FDM printing, check out the Northeastern University FDM Training which covers basics and safety.
🛡 Safety Considerations: How to Not Set Your Workshop on Fire
DIY 3D printing involves hot components and electricity, so safety is paramount. Here’s how to keep your workshop safe:
Thermal Runaway Protection
- What It Is: Firmware feature that shuts off heaters if temperature sensors fail.
- Why It Matters: Prevents uncontrolled heating that could cause fires.
- Our Advice: Always enable thermal runaway protection in Marlin or Klipper.
Proper Wiring and Connectors
- Ferrules Over Tinned Wires: Use crimped ferrules to avoid loose connections in screw terminals.
- Avoid Wire Overheating: Use wires rated for your current load, especially for heated beds.
- Ground Your Frame: Especially if using AC-powered beds or enclosures.
Fire Safety Equipment
- Smoke Detectors: Install near your printer area.
- Fire Extinguisher: Keep a Class C extinguisher handy (for electrical fires).
- Never Leave Prints Unattended: Especially during the first layers or after modifications.
Workshop Environment
- Ventilation: Some filaments emit fumes; PLA is safe, but ABS and Nylon require ventilation.
- No Food or Drinks Nearby: Prevent spills on electronics.
| Safety Aspect | Recommended Action | Our Rating (1-10) |
|---|---|---|
| Thermal Runaway | Enable in firmware | 10 |
| Wiring Quality | Use ferrules & rated wires | 9 |
| Fire Safety Equipment | Smoke detector & extinguisher | 10 |
| Ventilation | Use enclosure with exhaust fan | 8 |
For detailed safety protocols, see the Northeastern University FDM Training.
🧠 The Brains of the Operation: Selecting Mainboards and Firmware
Choosing the right mainboard and firmware is like picking the brain and nervous system of your printer. It controls every move and temperature.
Popular Mainboards for DIY Printers
| Board Name | Processor | Features | Noise Level | Community Support | Our Rating |
|---|---|---|---|---|---|
| BigTreeTech SKR Mini E3 V3 | ARM Cortex-M3 | TMC2209 drivers, silent, compact | Very Quiet | Excellent | 9 |
| Duet 2 WiFi | ARM Cortex-M4 | Web interface, expandability | Quiet | Excellent | 9 |
| Creality 4.2.7 | STM32 | Budget-friendly, basic features | Moderate | Good | 7 |
Firmware Choices
- Marlin: The classic open-source firmware, highly customizable, widely supported.
- Klipper: Runs on a Raspberry Pi, offloads processing for faster, smoother prints with advanced features like input shaping.
Our Experience
We built a CoreXY printer using the BigTreeTech SKR Mini E3 V3 paired with Klipper firmware (see the featured video for a detailed build walkthrough). The combination gave us silent operation, precise control, and remote management via OctoPrint.
Step-by-Step Firmware Setup (Marlin Example)
- Download Marlin firmware from marlinfw.org.
- Configure
Configuration.hfor your printer’s specs. - Compile and upload using PlatformIO or Arduino IDE.
- Calibrate E-steps, PID tuning, and bed leveling.
- Enable safety features like thermal runaway protection.
For more firmware tips and troubleshooting, visit our 3D Printer Reviews section.
🕹 Operating the Printers: From Bed Leveling to G-Code Execution
Once your printer is built and firmware is set, it’s time to operate the beast.
Bed Leveling: The Foundation of Good Prints
- Manual Leveling: Use the paper test to adjust screws until the nozzle just grips the paper.
- Automatic Bed Leveling (ABL): Sensors like BLTouch probe multiple points and compensate for uneven beds.
- Why It Matters: A level bed ensures the first layer sticks, preventing print failures.
Slicing Your Model
- Use slicers like Ultimaker Cura, PrusaSlicer, or SuperSlicer.
- Import your STL or OBJ file, set layer height (0.2 mm is standard), infill, supports, and temperature.
- Export G-code for your printer.
Starting the Print
- Preheat nozzle and bed to filament specs.
- Load filament carefully, checking for smooth extrusion.
- Start the print via SD card, USB, or OctoPrint.
- Monitor the first few layers closely.
Troubleshooting Common Issues
| Issue | Cause | Quick Fix |
|---|---|---|
| First layer not sticking | Bed too far or dirty | Re-level bed, clean surface |
| Stringing | Retraction settings off | Increase retraction distance |
| Layer shifting | Loose belts or pulleys | Tighten belts, check pulleys |
| Under-extrusion | Clogged nozzle or filament jam | Clean nozzle, check filament |
For detailed operating guides and troubleshooting, check our 3D Printable Objects and 3D Design Software articles.
✨ 15 Essential DIY Upgrades for Maximum Performance
Ready to take your DIY printer from “meh” to “wow”? Here are our top 15 upgrades, ranked by impact and ease of installation.
| Upgrade | Benefit | Difficulty | Our Rating |
|---|---|---|---|
| 1. All-Metal Hotends | Print high-temp filaments | Medium | 9 |
| 2. Direct Drive Extruder | Better flexible filament handling | Medium | 8 |
| 3. Magnetic PEI Spring Steel Sheets | Easy part removal, better adhesion | Easy | 9 |
| 4. Silent Stepper Drivers (TMC2209) | Quieter, smoother motion | Medium | 10 |
| 5. Automatic Bed Leveling (BLTouch) | Hassle-free leveling | Medium | 9 |
| 6. Dual Z-Axis Synchronization | Prevents gantry sag | Medium | 8 |
| 7. High-Flow Nozzles (CNC Kitchen Style) | Faster extrusion rates | Hard | 8 |
| 8. Enclosures | Warping reduction for ABS/ASA | Medium | 8 |
| 9. Raspberry Pi & OctoPrint | Remote control & monitoring | Easy | 10 |
| 10. Linear Rail Upgrades | Precision & smoothness | Hard | 9 |
| 11. 5015 Blower Fans | Improved part cooling | Easy | 8 |
| 12. Filament Runout Sensors | Prevents failed prints | Easy | 9 |
| 13. Silicone Bed Mounts | Stable bed leveling | Easy | 8 |
| 14. LED Chamber Lighting | Better visibility & aesthetics | Easy | 7 |
| 15. Input Shaper Calibration | Reduces vibrations, allows speed | Hard | 9 |
1. All-Metal Hotends for High-Temp Filaments
Why Upgrade?
Standard PTFE-lined hotends degrade above 240°C, limiting you to PLA or PETG. All-metal hotends like the E3D V6 or Micro Swiss allow printing Nylon, Polycarbonate, and Carbon Fiber composites.
Our Experience:
Switching to an all-metal hotend opened a new world of materials. We printed tough, heat-resistant parts for drone frames and automotive components with ease.
Pros:
- Higher temperature tolerance
- Longer lifespan
- Better chemical resistance
Cons:
- Slightly more complex to maintain
- Risk of filament jamming if not properly cooled
👉 CHECK PRICE on:
2. Direct Drive Extruder Conversions
Why Upgrade?
Bowden setups are great for speed but struggle with flexible filaments like TPU. Direct drive extruders mount the motor on the print head, improving control.
Our Experience:
We converted an Ender 3 Pro to direct drive using a Bondtech LGX extruder. Flexible filaments printed flawlessly, and retractions improved.
Pros:
- Better filament control
- Easier flexible filament printing
- Improved retraction performance
Cons:
- Increased moving mass (slower acceleration)
- Slightly more complex wiring
👉 Shop Direct Drive Extruders on:
3. Magnetic PEI Spring Steel Build Plates
Why Upgrade?
Magnetic PEI sheets from Wham Bam or Prusa make part removal a breeze. Just flex the plate, and parts pop off without scraping.
Our Experience:
We switched from glass beds to magnetic PEI sheets and never looked back. No more scratched glass or failed adhesion.
Pros:
- Easy part removal
- Durable and reusable
- Compatible with many filaments
Cons:
- Slightly higher initial cost
- Requires a magnetic base plate
👉 CHECK PRICE on:
4. Silent Stepper Drivers (TMC2209)
Why Upgrade?
Stepper motors can be noisy and produce vibrations. TMC2209 drivers from BigTreeTech reduce noise dramatically and improve print quality.
Our Experience:
Installing TMC2209 drivers on our CoreXY build reduced noise from a loud buzz to near silence. Neighbors thanked us!
Pros:
- Whisper-quiet operation
- Reduced vibrations
- Improved motor efficiency
Cons:
- Requires compatible mainboard or driver sockets
- Slightly more complex firmware setup
👉 Shop TMC2209 Drivers on:
5. Automatic Bed Leveling (ABL) Sensors
Why Upgrade?
Manual leveling is tedious and error-prone. Sensors like the BLTouch probe multiple points and adjust the Z-axis dynamically.
Our Experience:
After installing a BLTouch on our Ender 3, print failures due to bed leveling dropped by 90%. It’s a must-have for beginners and pros alike.
Pros:
- Consistent first layers
- Saves time and frustration
- Works with uneven beds
Cons:
- Adds complexity to wiring and firmware
- Slightly increases print start time
👉 CHECK PRICE on:
6. Dual Z-Axis Synchronization
Why Upgrade?
Single Z-axis leadscrews can cause the X-gantry to sag, ruining print quality. Adding a second leadscrew and synchronizing them fixes this.
Our Experience:
We added a second Z-axis leadscrew with a GT2 belt synchronization on our CoreXY. The gantry stayed perfectly level, improving layer consistency.
Pros:
- Prevents gantry sag
- More stable Z-axis movement
- Better print quality on tall prints
Cons:
- More mechanical parts to maintain
- Requires firmware configuration
7. High-Flow Nozzles (The CNC Kitchen Special)
Rating Table
| Aspect | Rating (1-10) |
|---|---|
| Design | 8 |
| Functionality | 9 |
| Ease of Build | 6 |
| Performance Boost | 9 |
| Cost Efficiency | 7 |
What’s the Buzz?
Inspired by the CNC Kitchen high-flow nozzle, these nozzles melt filament more efficiently by splitting the filament path inside the nozzle, allowing faster extrusion rates without sacrificing quality.
How to Build (Simplified):
- Drill a 0.8 mm hole near the nozzle threads.
- Thread a copper wire through the hole and solder it in place.
- Recut the threads to fit the hotend.
- Install and calibrate extrusion rates.
Our Experience:
We built a DIY high-flow nozzle following CNC Kitchen’s guide. The print speed increased by ~30% with no loss in detail on PLA and PETG. However, it requires careful machining and soldering skills.
Pros:
- Faster prints without quality loss
- Compatible with existing hotends
- Great for large models or functional parts
Cons:
- Patent restrictions (use for personal projects only)
- Requires precise DIY skills
- Limited to certain filament types due to solder melting point
Further Reading:
- CNC Kitchen’s detailed blog post: DIY High-Flow 3D Printing Nozzle
- Patent info: EP3445568A1
8. Enclosures for Warp-Free ABS Printing
ABS and other high-temp filaments love a warm environment. Enclosures maintain temperature and reduce warping.
Our Experience:
We built a simple enclosure using IKEA Lack tables and acrylic panels. The difference was night and day—ABS prints no longer cracked or warped.
Pros:
- Warping reduction
- Noise reduction
- Dust protection
Cons:
- Adds bulk
- Requires ventilation for fumes
9. Raspberry Pi & OctoPrint Integration
Why Integrate?
OctoPrint lets you control your printer remotely, monitor prints via webcam, and schedule jobs.
Our Experience:
Setting up OctoPrint on a Raspberry Pi 4 was straightforward. We now start prints from our couch and get notifications when they finish.
Pros:
- Remote control & monitoring
- Plugin ecosystem for added features
- Timelapse videos
Cons:
- Requires network setup
- Occasional software updates needed
👉 CHECK PRICE on:
10. Linear Rail Upgrades for Precision
Replacing V-slot wheels with MGN12H linear rails improves smoothness and accuracy.
Our Experience:
We retrofitted linear rails on our X and Y axes. Prints were crisper, and maintenance dropped significantly.
Pros:
- Increased rigidity
- Smoother motion
- Reduced backlash
Cons:
- Higher cost
- Requires precise mounting
11. Dedicated Part Cooling Fans (5015 Blowers)
Better cooling means sharper overhangs and bridges.
Our Experience:
Swapping stock fans for 5015 blower fans improved print quality on PLA and PETG noticeably.
12. Filament Runout Sensors
Never lose a print to an empty spool again.
Our Experience:
We installed a simple optical filament sensor. It pauses the print and alerts us when filament runs out.
13. Solid Bed Mounts (Silicone vs. Springs)
Silicone mounts provide stable bed leveling compared to springs, which can sag over time.
14. LED Chamber Lighting
Good lighting helps spot print issues early and looks great on camera.
15. Input Shaper Calibration with Accelerometers
Using an ADXL345 accelerometer with Klipper firmware cancels printer vibrations, allowing faster, cleaner prints.
🧼 Retrieving Your Part and Post-Processing Like a Pro
Your print is done — now what? Removing and finishing your part properly is just as important.
Removing the Print
- Use a Flexible Scraper: Avoid metal tools that can damage your bed.
- Warm the Bed Slightly: Parts release easier at elevated temperatures.
- Flex the Magnetic PEI Sheet: If you upgraded, this is a breeze.
Post-Processing Techniques
- Sanding: Start with 200 grit, move up to 1000 grit for smooth finishes.
- Acetone Vapor Smoothing: For ABS, this creates a glossy finish but requires ventilation.
- Painting: Use primers designed for plastics.
- Assembly: Use superglue or epoxy for multi-part prints.
For detailed post-processing guides, visit our 3D Printable Objects section.
🏁 Featured Video: Building a CoreXY from Scratch with BigTreeTech SKR Mini E3 V3
If you want to see the magic in action, check out this fantastic walkthrough of building a CoreXY printer from scratch using the BigTreeTech SKR Mini E3 V3 mainboard. The video covers everything from sourcing aluminum profiles, fabricating parts, wiring, firmware flashing, to the first Benchy print.
Highlights include:
- Precise frame assembly tips using a T-square.
- Custom 3D printed brackets for hotend and fans.
- Firmware tuning including PID and input shaping.
- Using scavenged parts to keep costs low.
- The satisfaction of a perfect Benchy on a budget.
Watch the full build here: Building a CoreXY 3D Printer from Scratch
That’s a wrap on the core content! Ready to level up your DIY 3D printing game? Stick around for our conclusion and FAQs coming up next. Meanwhile, explore our 3D Printable Objects and 3D Design Software for inspiration and tools to bring your ideas to life.
🏁 Conclusion

After our deep dive into the world of DIY 3D printing, it’s clear that building and customizing your own printer is both a thrilling challenge and a rewarding journey. From mastering the basics like bed leveling and filament drying to pushing the limits with high-flow nozzles inspired by CNC Kitchen, the DIY approach offers unmatched flexibility and learning opportunities.
Positives of DIY 3D Printing
- Customization: Tailor your machine to your exact needs, whether it’s printing flexible TPU or large-format ABS parts.
- Cost Efficiency: While initial investment and time are higher, you get a machine that can outperform many commercial printers.
- Community & Learning: You become part of a passionate maker community, gaining skills in mechanics, electronics, and software.
- Upgradeability: Unlike closed-box printers, DIY machines evolve with you, adapting to new materials and technologies.
Challenges to Consider
- Time Investment: Building and tuning a printer requires patience and troubleshooting skills.
- Safety Risks: High temperatures and electricity demand strict adherence to safety protocols.
- Complexity: Some upgrades, like the DIY high-flow nozzle, require advanced skills and tools.
Final Thoughts
If you crave control, customization, and a deeper understanding of your 3D printer, the DIY route is absolutely worth it. Whether you start with a kit like the BigTreeTech SKR Mini E3 V3 or jump into a full scratch build like the Voron, the satisfaction of printing with a machine you built yourself is unmatched.
Remember those unresolved questions about print speed and nozzle performance? The DIY high-flow nozzle mod inspired by CNC Kitchen shows that with some ingenuity, you can push your printer beyond stock limits—just be mindful of patent restrictions and safety.
So, ready to roll up your sleeves and join the ranks of makers who don’t just print—they build? Let’s get printing!
🔗 Recommended Links
👉 Shop Essential DIY 3D Printing Components & Accessories:
-
E3D V6 Hotend:
Amazon | E3D Official Website -
Bondtech LGX Direct Drive Extruder:
Thingiverse Search | Bondtech Official -
Wham Bam Magnetic PEI Sheets:
Amazon | Wham Bam Official -
BigTreeTech SKR Mini E3 V3 Mainboard:
Amazon | BigTreeTech Official -
BLTouch Auto Bed Leveling Sensor:
Amazon | Antclabs Official -
Raspberry Pi 4 for OctoPrint:
Amazon | OctoPrint Official -
Mean Well 24V Power Supply:
Amazon
Recommended Books for DIY 3D Printing Enthusiasts:
-
“3D Printing Failures: How to Diagnose and Repair All Desktop 3D Printing Issues” by Sean Aranda
Amazon -
“The 3D Printing Handbook: Technologies, design and applications” by Ben Redwood, Filemon Schöffer, Brian Garret
Amazon -
“Make: 3D Printing: The Essential Guide to 3D Printers” by Anna Kaziunas France
Amazon
❓ FAQ

What are some creative and useful items I can make with a DIY 3D printer for my home and garden?
You can print everything from custom planters, hose connectors, and garden tool holders to smart home mounts for sensors and cameras. Our favorite is printing modular plant watering systems that clip together and automate irrigation. For inspiration, explore 3D Printable Objects.
How do I design my own 3D printing models for DIY projects using free software?
Start with beginner-friendly CAD tools like Tinkercad or Fusion 360 (free for hobbyists). These allow you to sketch, extrude, and assemble parts. For more complex organic shapes, try Blender. Our engineers recommend practicing with simple shapes and following tutorials on 3D Design Software.
What are the most common DIY 3D printing errors and how can I troubleshoot them?
Common issues include:
- First layer adhesion failure: Re-level your bed, clean the surface, and adjust nozzle height.
- Stringing: Increase retraction distance and speed.
- Layer shifting: Tighten belts and check pulleys.
- Under-extrusion: Clean the nozzle, check filament quality, and calibrate extrusion steps.
We have detailed troubleshooting guides in the 3D Printable Objects section.
Can I use a DIY 3D printer to create functional items like phone cases and tool holders?
Absolutely! With the right filament (like PETG or TPU for flexibility), you can print durable, functional items. Many makers design custom phone cases with integrated stands or tool holders tailored to their workspace. Check out user designs on Thingiverse for ideas.
What are some essential tools and software needed for DIY 3D printing at home?
Tools: Hex keys, scrapers, calipers, filament cutters, and a digital thermometer.
Software: Slicers like Ultimaker Cura, PrusaSlicer, or SuperSlicer; firmware configurators like PlatformIO; and remote control software like OctoPrint.
How do I calibrate my DIY 3D printer for optimal print quality and accuracy?
Calibration involves:
- E-steps calibration: Ensures correct filament extrusion length.
- PID tuning: Stabilizes hotend temperature.
- Bed leveling: Manual or automatic for a perfect first layer.
- Flow rate adjustment: Fine-tunes filament extrusion volume.
Our detailed calibration guides are available in the 3D Printer Reviews section.
What are the best 3D printing materials for beginners to use in DIY projects?
PLA is the easiest to print, non-toxic, and affordable. For more durable parts, PETG offers toughness and chemical resistance. Avoid ABS initially due to warping and fumes unless you have an enclosure.
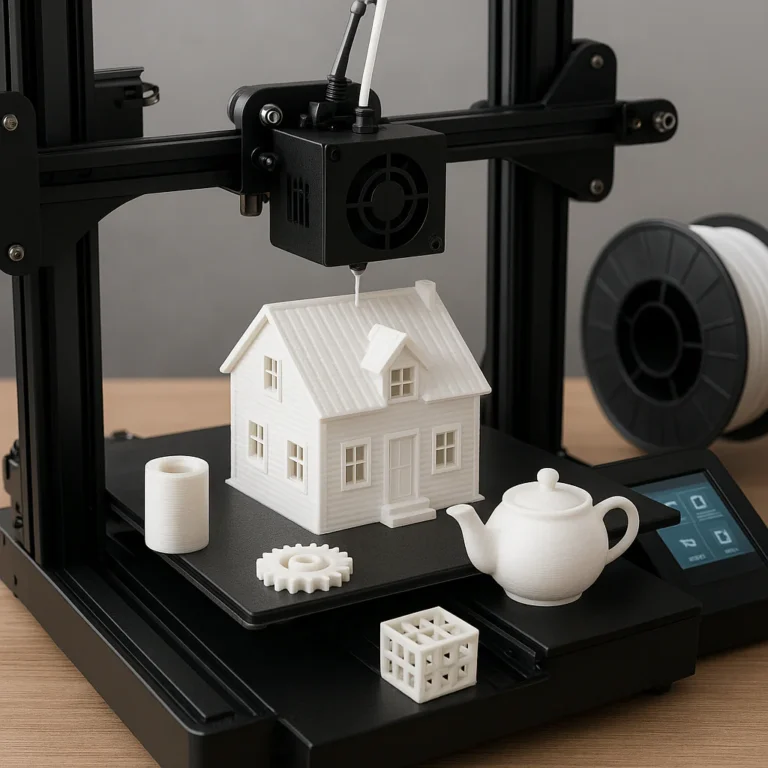
What are the best beginner projects for DIY 3D printing?
Start with:
- Calibration cubes
- Benchy boat (benchmark print)
- Phone stands
- Cable organizers
- Simple toys or household hooks
These projects teach you printer basics and give quick wins.
How do I choose the right filament for my 3D printer?
Consider:
- Printer capabilities: Hotend max temp and bed heating.
- Part requirements: Strength, flexibility, heat resistance.
- Ease of printing: PLA is beginner-friendly; TPU is flexible but tricky.
Always buy from reputable brands like Hatchbox, Prusa Polymers, or Polymaker.
What safety precautions should I take when 3D printing?
- Enable thermal runaway protection in firmware.
- Use proper wiring and grounding.
- Never leave prints unattended during critical phases.
- Ventilate your workspace, especially when printing ABS or Nylon.
- Keep a fire extinguisher nearby.
📚 Reference Links
- RepRap Project Wiki — The origin of DIY 3D printing.
- Marlin Firmware Documentation — Essential for firmware setup and safety.
- BigTreeTech Official Website — Mainboards and drivers for DIY printers.
- E3D Online — Hotends and nozzles.
- CNC Kitchen: DIY High Flow 3D Printing Nozzle — In-depth guide and experiments on high-flow nozzles.
- OctoPrint Official — Remote printer control software.
- Thingiverse — Repository for free 3D printable models.
- Northeastern University FDM 3D Printing Training — Comprehensive beginner safety and operation guide.
Ready to start your DIY 3D printing adventure? Dive into our 3D Printable Objects and 3D Design Software for inspiration and tools to bring your ideas to life!