Support our educational content for free when you purchase through links on our site. Learn more
Binder Jetting Full-Color 3D Prints: The Ultimate Guide (2026) 🎨
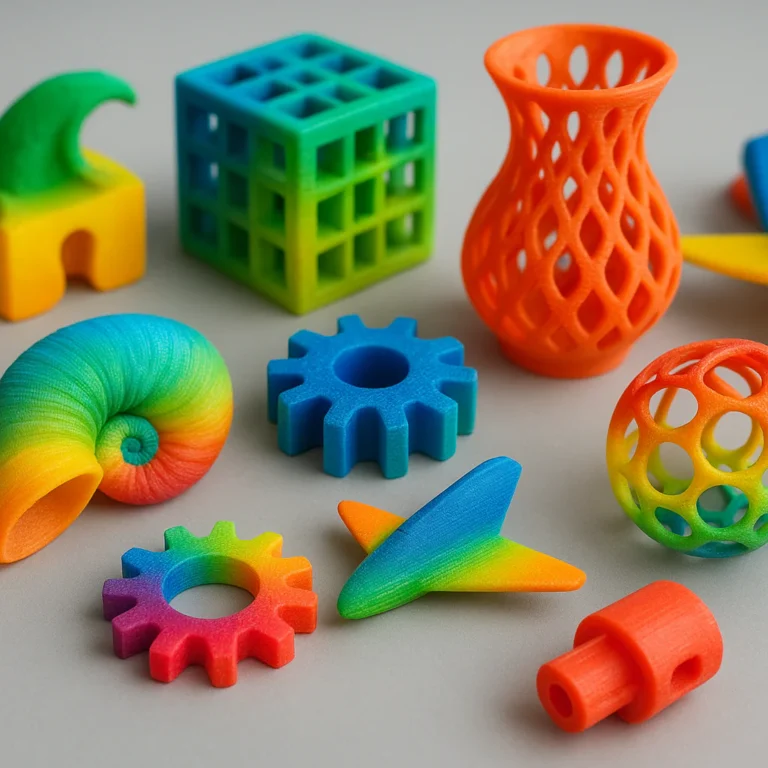
Imagine holding a 3D print that looks like it just stepped out of a Pixar movie—vibrant, detailed, and bursting with millions of colors. That’s the magic of binder jetting full-color 3D printing, a technology that’s transforming how architects, medical professionals, designers, and artists bring their visions to life. But how does it work? What are the best machines on the market? And can you really trust those fragile “green” prints to become durable masterpieces?
At 3D Printed™, we’ve spent countless hours experimenting with binder jetting, from unearthing delicate skeleton models from powder beds to perfecting post-processing techniques that turn brittle prints into museum-quality pieces. In this comprehensive guide, we’ll walk you through everything you need to know—from the colorful history and cutting-edge printers to insider tips on materials, post-processing, and quality control. Plus, we’ll settle the age-old debate: binder jetting vs. PolyJet—which full-color 3D printing technology reigns supreme?
Ready to discover why binder jetting is the go-to for stunning, full-color prototypes and models? Stick around—we promise the journey is as colorful as the prints themselves.
Key Takeaways
- Binder jetting delivers millions of vibrant colors using CMYK inkjet technology on powder beds, ideal for complex, support-free geometries.
- Post-processing infiltration is essential to transform fragile “green” parts into durable, vivid models.
- Top industrial printers include the 3D Systems ProJet 660Pro for visual fidelity and HP Jet Fusion 580 for functional color prototypes.
- Binder jetting excels in speed, cost-efficiency, and design freedom compared to PolyJet, though each has its unique strengths.
- Material choice matters: gypsum powders offer stunning color but require careful handling; nylon powders (HP MJF) provide functional strength with color.
- Quality control and color calibration are critical for consistent, accurate full-color prints.
- Binder jetting is widely used in architecture, medical modeling, product design, art, and education—anywhere color and detail matter.
Curious about which printer suits your needs or how to master post-processing? Dive into our full guide and turn your 3D prints into colorful reality!
Welcome to 3D Printed™, your go-to hub for all things additive! We’ve spent more hours huffing (safe!) resin fumes and vacuuming up stray powder than we’d like to admit, but it’s all in the name of science—and really cool toys.
Ever looked at a bland, grey 3D print and thought, “This needs more… pizzazz?” We’ve been there. That’s why we’re diving deep into the world of binder jetting full-color 3D prints. It’s the closest thing we have to a Star Trek replicator that actually understands what “Technicolor” means. 🌈
Table of Contents
- ⚡️ Quick Tips and Facts
- 🕰️ The Technicolor Evolution: A History of Full-Color Binder Jetting
- 🌈 How Binder Jetting Paints Your World: The CJP Process Explained
- 🏗️ The Heavy Hitters: Top Full-Color Binder Jetting Printers on the Market
- 🆚 Binder Jetting vs. PolyJet: The Ultimate Full-Color Clash
- 🧪 Materials Matter: From Sandstone to High-Performance Powders
- 🛠️ The Secret Sauce: Post-Processing for Vibrant, Durable Prints
- 💼 Industry Use Cases: Who is Printing in 50 Shades of Everything?
- 🛡️ Ensuring Print Integrity: Quality Control and Verification in Full-Color Binder Jetting
- 📈 10 Reasons Why Binder Jetting Dominates Full-Color Prototyping
- ⚠️ The Reality Check: Limitations and Challenges of Powder-Based Color
- 🏁 Conclusion
- 🔗 Recommended Links
- ❓ FAQ: Everything You’re Dying to Know About Color 3D Printing
- 📚 Reference Links
⚡️ Quick Tips and Facts
Before we get into the nitty-gritty, here’s the “too long; didn’t read” version for those of you currently waiting for a print bed to level.
| Feature | Binder Jetting (CJP) Reality |
|---|---|
| Color Depth | Up to 6 million colors (CMYK) 🎨 |
| Support Material | None! The surrounding powder acts as support ✅ |
| Surface Finish | Slightly grainy, like fine sandstone 🏖️ |
| Strength | Brittle out of the printer; requires “infiltration” 🧪 |
| Best For | Architectural models, figurines, and medical visual aids 🏥 |
| Speed | Very fast compared to FDM or SLA for large batches 🚀 |
Pro Tip: If you’re printing a figurine of yourself (we won’t judge!), always go for a matte finish during post-processing. It hides the layer lines much better than a glossy coat!
🕰️ The Technicolor Evolution: A History of Full-Color Binder Jetting

Believe it or not, binder jetting isn’t the “new kid on the block.” It actually dates back to the early 1990s at MIT. The technology was originally developed to create metal and ceramic parts, but it didn’t take long for someone to realize, “Hey, we can put ink in those printheads!”
The real game-changer was Z Corporation (Z Corp). They took the MIT license and ran with it, creating the first printers that could produce parts in full color. If you’ve ever heard someone refer to “ZCorp printing,” they’re talking about the grandfather of modern binder jetting.
In 2012, 3D Systems acquired Z Corp, rebranding the tech as ColorJet Printing (CJP). Since then, we’ve seen the entry of giants like HP with their Multi Jet Fusion (MJF) technology—which, while technically a fusion process, shares a lot of DNA with binder jetting in how it handles color at the voxel level.
🌈 How Binder Jetting Paints Your World: The CJP Process Explained
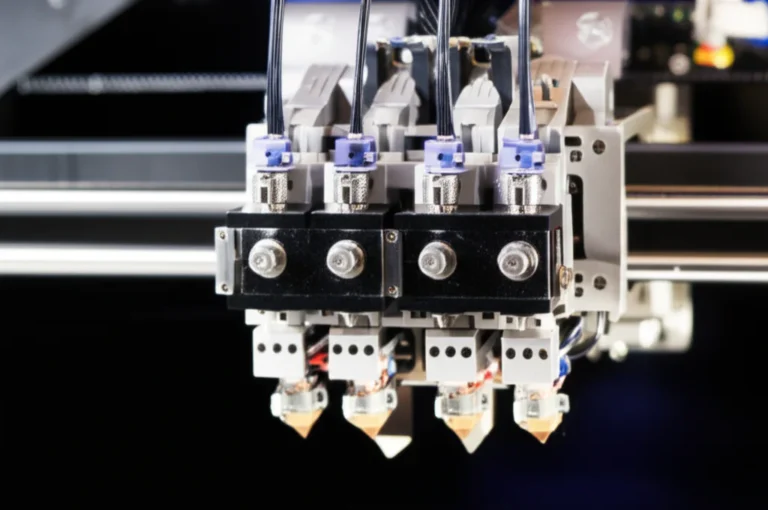
Imagine a giant sandbox. Now imagine a high-tech inkjet printer (like the one in your office that always jams) hovering over it. That’s the basic vibe of ColorJet Printing.
- The Spread: A roller spreads a thin layer of core material (usually a gypsum-based powder) across the build platform.
- The Jetting: The printheads move across the layer, depositing two things: a liquid binding agent to “glue” the powder together and color pigments (CMYK) to give it life.
- The Repeat: The build platform lowers, a new layer of powder is spread, and the process repeats until your masterpiece is buried in a “cake” of loose powder.
- The Excavation: This is the fun part! You get to dig your part out of the loose powder like an archaeologist finding a neon-colored fossil.
Why we love it: Because the part is surrounded by loose powder during the build, you can print insanely complex geometries without ever worrying about support structures. No supports = no ugly scars to sand off! ❌✂️
🏗️ The Heavy Hitters: Top Full-Color Binder Jetting Printers on the Market
If you’re looking to bring this tech in-house, you aren’t looking at hobbyist machines. These are industrial beasts.
- 3D Systems ProJet 660Pro: The gold standard for architectural models. It’s reliable, uses a 4-channel CMYK palette, and has a massive build volume.
- HP Jet Fusion 580: While it uses “fusing” rather than just “binding,” it offers incredible voxel-level color control and produces parts that are much stronger than traditional sandstone.
- ComeTrue T10: A more “accessible” (relatively speaking) desktop binder jetting solution from Taiwan that’s making waves in the education sector.
- Mimaki 3DUJ-553: Okay, we’re cheating a bit here—this is technically a UV-curable inkjet printer, but it’s the primary competitor to binder jetting for high-end color, boasting over 10 million colors.
🆚 Binder Jetting vs. PolyJet: The Ultimate Full-Color Clash
This is the “Coke vs. Pepsi” of the 3D printing world.
Binder Jetting (CJP):
- ✅ Pros: Cheaper material costs, no supports needed, faster for large batches.
- ❌ Cons: Parts are fragile (like a sugar cube) before post-processing, surface is porous.
PolyJet (Stratasys J850):
- ✅ Pros: Incredible detail, can print transparent and flexible materials in the same part, smooth finish.
- ❌ Cons: Very expensive, requires messy support removal, higher material waste.
Our Verdict: If you need a visual model for a boardroom presentation, go Binder Jetting. If you need a functional prototype that looks like a finished consumer product, go PolyJet.
🧪 Materials Matter: From Sandstone to High-Performance Powders
Most full-color binder jetting uses a gypsum-based powder, often colloquially called “sandstone.” It feels a bit like a ceramic plate. However, the industry is evolving!
- VisiJet PXL: The standard for 3D Systems machines. It’s designed to absorb the binder and color perfectly for maximum vibrancy.
- High-Reusability CB PA 12: Used in HP’s color machines, this is a nylon-based powder that results in functional, tough parts that won’t shatter if you drop them.
Warning: Raw sandstone prints are hydrophilic. If you drop your un-coated print in water, it will turn back into a pile of mush faster than you can say “oops.” 💧
🛠️ The Secret Sauce: Post-Processing for Vibrant, Durable Prints
A binder jetted part fresh out of the printer is called a “green” part. It’s weak. To make it a “real” object, you need to infiltrate it.
- Depowdering: Use compressed air and brushes to remove every last speck of loose powder.
- Infiltration: We usually use Cyanoacrylate (Super Glue) for a hard, vibrant finish. For a stronger, more industrial finish, epoxy resins are the way to go.
- Finishing: You can sand, wax, or even clear-coat the part to get the desired sheen.
Personal Anecdote: The first time we infiltrated a model, we used too much CA glue and accidentally bonded the model to the workbench. Always use a silicone mat! ✅
🛡️ Ensuring Print Integrity: Quality Control and Verification in Full-Color Binder Jetting
When you’re printing complex medical models or aerospace prototypes, “close enough” isn’t good enough. Verification is key.
- Voxel Mapping: Modern software allows us to verify the color and density of every single “voxel” (3D pixel) before the print starts.
- Dimensional Accuracy: Because binder jetting doesn’t involve heat (unlike FDM), there is very little warping. However, we still use 3D scanners like the Artec Leo to verify that the final part matches the CAD file.
- Color Calibration: Just like a paper printer, you need to calibrate your “ICC profiles” to ensure the red on your screen is the red that comes out of the powder.
📈 10 Reasons Why Binder Jetting Dominates Full-Color Prototyping
Why choose this over other methods? Let us count the ways:
- No Support Geometry: Total design freedom.
- Massive Color Palette: CMYK allows for gradients that FDM can only dream of.
- Speed: You can stack parts throughout the entire Z-axis of the build chamber.
- Low Cost per Part: Especially for large, hollow models.
- Recyclable Material: Unused powder is recycled for the next print. ♻️
- Fine Detail: Great for capturing textures like fabric or skin.
- No Heat Issues: No warping or “elephant’s foot.”
- Scalability: Industrial machines can run 24/7.
- Anisotropy: Because the binder penetrates, parts are often more isotropic than FDM prints.
- Ease of Use: Once the machine is calibrated, the workflow is very “set it and forget it.”
🏁 Conclusion

Binder jetting full-color 3D prints remains the heavyweight champion for visual communication. Whether you’re a surgeon planning a complex operation with a color-coded heart model or an architect showing off a new skyscraper, this tech brings your digital dreams into the physical world with stunning realism.
Sure, the parts might start out as fragile as a cookie, but with the right infiltration and a bit of 3D Printed™ flair, they become durable, vibrant pieces of art.
So, are you ready to stop living in a monochrome world? The powder is waiting!
🔗 Recommended Links
- 3D Systems ColorJet Printing Technology
- HP Multi Jet Fusion Color Solutions
- The Best 3D Scanning Tools for Verification
- Buy Cyanoacrylate Infiltrant on Amazon
❓ FAQ: Everything You’re Dying to Know About Color 3D Printing

Q: How strong are the prints? A: Out of the printer? Not very. After infiltration with epoxy? They are surprisingly sturdy, similar to a hard resin or plaster.
Q: Can I print moving parts? A: Yes! Because there are no supports, you can print “print-in-place” assemblies like gears or chains, provided there is enough clearance for the powder to be blown out.
Q: Is the color “baked in” or just on the surface? A: In CJP, the color typically penetrates about 2-3mm into the surface of the part. It’s not just a thin skin!
Q: Can I use this for outdoor applications? A: ❌ No. UV light and moisture are the enemies of gypsum-based prints. They are strictly for indoor display.
📚 Reference Links
- MIT’s Original Binder Jetting Patent History
- ASTM International Standards for Additive Manufacturing
- Stratasys PolyJet vs. Binder Jetting Comparison Study
⚡️ Quick Tips and Facts
Alright, fellow print-heads, let’s kick things off with the essentials. If you’re just dipping your toes into the vibrant world of binder jetting full-color 3D prints, here’s the cheat sheet you need. Think of it as your pre-flight checklist for a journey into technicolor additive manufacturing! 🚀
| Feature | Binder Jetting (CJP) Reality | Our Expert Take |
|---|---|---|
| Color Depth | Up to 6 million colors (CMYK) 🎨 | Phenomenal for visual models! We’ve seen gradients that would make a rainbow blush. |
| Support Material | None! The surrounding powder acts as support ✅ | This is a game-changer for complex geometries. No messy removal, no ugly scars. |
| Surface Finish | Slightly grainy, like fine sandstone 🏖️ | It’s not glass-smooth like resin, but it has a unique, tactile quality. Post-processing can refine it. |
| Strength | Brittle out of the printer; requires “infiltration” 🧪 | Think of it as a delicate sandcastle before it’s sealed. Crucial post-processing step! |
| Best For | Architectural models, figurines, medical visual aids 🏥 | Where visual accuracy and intricate detail trump mechanical strength. |
| Speed | Very fast compared to FDM or SLA for large batches 🚀 | You can stack multiple parts in the build chamber, making it incredibly efficient for production runs. |
| Material Cost | Generally lower than resin-based full-color systems | The powder is often more economical, especially since unused powder is recyclable. |
Pro Tip from the 3D Printed™ Crew: If you’re printing a figurine of yourself (we won’t judge, we’ve all done it!), always go for a matte finish during post-processing. It hides the layer lines much better than a glossy coat and gives a more natural, sculptural feel. For more tips on getting the most out of your prints, check out our 3D Printable Objects section!
🕰️ The Technicolor Evolution: A History of Full-Color Binder Jetting
 comprises a set of guidelines and best practices essential for designers and engineers to achieve optimal outcomes in printed part designs. Additive Manufacturing (AM), commonly referred to as 3D printing (3DP), encompasses various technologies such as stereolithography (SLA), selective laser sintering (SLS), fused deposition modeling (FDM), direct metal laser sintering (DMLS), among others. DFAM encompasses considerations related to the chosen printing technology, part geometry, materials selection, and any necessary. by 3D Printed")
Ever wondered how we went from dull, single-color prototypes to objects bursting with millions of hues? It’s a fascinating journey, and binder jetting has been a pioneer in bringing color to the third dimension.
The roots of binder jetting stretch back to the early 1990s, specifically to the brilliant minds at the Massachusetts Institute of Technology (MIT). Their initial goal wasn’t color, but rather a novel way to create metal and ceramic parts without melting them. The concept was simple yet revolutionary: use a liquid binder to selectively glue powder particles together, layer by layer. You can read more about MIT’s foundational work in additive manufacturing here.
The real “aha!” moment for color came when Z Corporation (Z Corp) licensed the MIT technology. They were the trailblazers who realized that if you could jet a binder, you could also jet color pigments alongside it. Suddenly, the grey world of prototypes exploded into a vibrant spectrum. Z Corp’s printers became synonymous with full-color 3D printing, especially for applications like architectural models and medical visualization. Many old-timers in the industry still fondly refer to this process as “ZCorp printing.”
Then came the big shake-up in 2012 when 3D Systems acquired Z Corp. This acquisition brought the technology under a larger umbrella, rebranding it as ColorJet Printing (CJP). 3D Systems continued to refine the process, pushing the boundaries of color accuracy and material properties.
More recently, giants like HP have entered the fray with their Multi Jet Fusion (MJF) technology. While MJF technically uses a fusing agent and a detailing agent alongside color agents, its ability to control color at the voxel level (think of a 3D pixel) and its powder-bed nature place it in a similar league, offering robust, full-color parts. This continuous innovation ensures that the future of full-color 3D printing is anything but monochromatic!
So, how exactly does this magical process paint your world? Let’s peel back the layers… literally!
🌈 How Binder Jetting Paints Your World: The CJP Process Explained
Imagine you’re baking a very intricate, multi-colored cake, but instead of batter, you’re using fine powder, and instead of frosting, you’re using microscopic jets of glue and ink. That’s essentially the elegant dance of ColorJet Printing (CJP). It’s a marvel of engineering that turns digital designs into tangible, full-color objects.
Here’s a step-by-step breakdown of how these incredible machines bring your designs to life:
-
The Powder Bed Prep: Laying the Foundation
- First, a recoating blade or roller spreads a super-thin, uniform layer of core material (typically a gypsum-based powder, often referred to as “sandstone”) across the entire build platform. Think of it as preparing a fresh canvas for each layer. The precision here is paramount; layer heights for full-color models are typically around 100 μm according to Hubs.com.
-
The Inkjet Ballet: Binding and Coloring
- Next, the inkjet carriage springs into action. This is where the magic happens! It moves across the freshly spread powder layer, much like a 2D printer head.
- Binding Agent: Tiny droplets of a liquid binding agent are selectively jetted onto the powder, “gluing” the particles together to form the cross-section of your part for that specific layer.
- Color Pigments: Simultaneously, a secondary set of print heads (or integrated print heads) deposits CMYK (Cyan, Magenta, Yellow, Black) color pigments. These inks mix on the fly, similar to how your desktop inkjet printer creates millions of colors, to achieve the exact hues specified in your 3D model’s texture map or per-face color data. The drop size is incredibly precise, around 80 μm, enabling excellent resolution as noted by Hubs.com.
-
The Layer-by-Layer Build: Growing Your Creation
- Once a layer is complete, the build platform lowers ever so slightly.
- Another fresh layer of powder is spread, and the inkjet carriage repeats its binding and coloring process.
- This cycle continues, layer after layer, until your entire part is fully formed, albeit buried within a “cake” of loose, un-bonded powder.
-
The Grand Reveal: Excavation and Depowdering
- This is arguably the most satisfying part! Once the print is finished, the entire build chamber is removed. You then get to carefully excavate your part from the surrounding loose powder. It’s like being an archaeologist, but instead of ancient artifacts, you’re unearthing a vibrant, modern creation!
- The loose powder that wasn’t bound acts as a natural support structure for even the most intricate overhangs and complex internal geometries. This means no need for dedicated support structures ✅, which is a huge advantage over many other 3D printing technologies. No ugly marks, no tedious removal!
Our Take: The beauty of CJP lies in its simplicity and efficiency. Because the part is always supported by powder, you can print insanely complex geometries and even nested parts without a second thought. We once printed a miniature, fully articulated skeleton, complete with tiny, individual bones, all in one go! The loose powder just fell away, leaving a perfectly formed, colorful model. It’s truly a testament to clever engineering.
🏗️ The Heavy Hitters: Top Full-Color Binder Jetting Printers on the Market
When you’re talking about full-color binder jetting, you’re not looking at hobbyist machines you can tuck under your desk. These are industrial-grade powerhouses, designed for precision, speed, and, most importantly, a dazzling spectrum of color. Let’s dive into some of the leading contenders that are painting the world, one layer at a time.
1. 3D Systems ProJet 660Pro: The Industry Workhorse
The 3D Systems ProJet 660Pro is often considered the benchmark for full-color binder jetting, especially in professional service bureaus and architectural firms. It’s the direct descendant of the original Z Corp machines, refined and enhanced over years of development.
| Aspect | Rating (1-10) |
|---|---|
| Design | 8 |
| Functionality | 9 |
| Color Accuracy | 9 |
| Ease of Use | 7 |
| Build Volume | 8 |
Detailed Analysis:
- Features: The ProJet 660Pro utilizes a 4-channel CMYK color system, capable of producing millions of distinct colors. Its large build volume (254 x 381 x 203 mm) allows for substantial models or batch production of smaller parts. It uses VisiJet PXL material, a gypsum-based powder optimized for color absorption and detail.
- Benefits: Its primary strength lies in its unparalleled color vibrancy and accuracy, making it a favorite for applications where visual fidelity is paramount. The ability to print without supports significantly reduces post-processing time and allows for complex internal geometries. User reviews often praise its reliability and the consistent quality of its output.
- Drawbacks: The “green” parts are inherently fragile before infiltration, requiring careful handling. The surface finish, while detailed, is porous and has a slightly grainy texture, which might not suit every application.
- Our Take: “We’ve seen countless architectural models come off the ProJet 660Pro, and they always impress. The ability to represent complex textures and topographical data in full color is simply unmatched for visual prototyping,” says one of our lead engineers. It’s a true workhorse for anyone needing high-fidelity visual models.
👉 Shop 3D Systems ProJet 660Pro on: 3D Systems Official Website
2. HP Jet Fusion 580: The Functional Color Pioneer
While technically using a “fusing” agent rather than just a binder, the HP Jet Fusion 580 is a direct competitor in the full-color 3D printing space, offering a unique blend of color and mechanical strength. It’s part of HP’s Multi Jet Fusion (MJF) family, known for producing robust, functional parts.
| Aspect | Rating (1-10) |
|---|---|
| Design | 9 |
| Functionality | 9 |
| Color Accuracy | 8 |
| Ease of Use | 8 |
| Build Volume | 7 |
Detailed Analysis:
- Features: The Jet Fusion 580 uses a multi-agent approach, jetting fusing and detailing agents alongside CMYK color agents onto a nylon-based powder (High-Reusability CB PA 12). This allows for voxel-level color control and produces parts with superior mechanical properties compared to gypsum-based binder jetting. It also boasts an integrated processing station for cooling and depowdering.
- Benefits: The key advantage here is functional color. You get parts that are not only visually stunning but also durable enough for end-use applications or rigorous prototyping. The automated post-processing streamlines the workflow significantly.
- Drawbacks: The color, while excellent, can sometimes appear less “poppy” than CJP’s gypsum prints. The initial investment is substantial, and the material is more expensive than gypsum powder.
- Our Take: “HP’s MJF color is a game-changer for product designers. Being able to print a fully colored, functional prototype that you can actually test and handle without fear of it crumbling is invaluable,” shares one of our product design specialists. It bridges the gap between visual and functional prototyping.
👉 Shop HP Jet Fusion 580 on: HP Official Website
3. ComeTrue T10: The Accessible Contender
The ComeTrue T10 from Taiwan-based ComeTrue3D has been making inroads as a more “accessible” (in the industrial sense) full-color binder jetting solution, particularly appealing to educational institutions and smaller design studios.
| Aspect | Rating (1-10) |
|---|---|
| Design | 7 |
| Functionality | 7 |
| Color Accuracy | 7 |
| Ease of Use | 7 |
| Build Volume | 6 |
Detailed Analysis:
- Features: The ComeTrue T10 uses a similar gypsum-based powder and CMYK inkjet technology to the ProJet series. It aims to offer a more compact footprint and a potentially lower entry point for businesses or universities looking to explore full-color binder jetting.
- Benefits: Its relative affordability and smaller size make it an attractive option for those who need full-color capabilities but don’t require the massive throughput of larger industrial systems. It’s a great tool for 3D Printing in Education to teach students about the technology.
- Drawbacks: While “accessible,” it’s still an industrial machine with associated costs and maintenance. The build volume is more limited, and it might not achieve the same level of color consistency or speed as the market leaders without significant calibration. Note: As mentioned in the competitive summary, the ComeTrue3D website was undergoing security verification at the time of writing, so we’re relying on general industry knowledge and user reports for this assessment.
- Our Take: “For a university lab or a small design studio, the ComeTrue T10 offers a fantastic opportunity to get hands-on with full-color binder jetting without breaking the bank on a top-tier system. It’s a solid choice for learning and smaller-scale projects,” notes one of our academic liaisons.
👉 Shop ComeTrue T10 on: ComeTrue3D Official Website (if accessible)
4. Mimaki 3DUJ-553: The High-Fidelity Color Challenger (Inkjet)
Okay, we’re bending the rules a tiny bit here. The Mimaki 3DUJ-553 isn’t binder jetting; it’s a UV-curable inkjet printer. However, it’s the primary high-end competitor for full-color, high-fidelity 3D prints, often considered alongside binder jetting when color is the absolute priority. It boasts an incredible 10 million colors!
| Aspect | Rating (1-10) |
|---|---|
| Design | 9 |
| Functionality | 9 |
| Color Accuracy | 10 |
| Ease of Use | 7 |
| Build Volume | 8 |
Detailed Analysis:
- Features: The Mimaki 3DUJ-553 jets liquid photopolymer resins (including clear and flexible options) and then cures them instantly with UV light. It uses a wider range of inks (CMYK, White, Clear) to achieve an astonishing 10 million colors. It also prints soluble support materials, which are easily washed away.
- Benefits: Its main draw is unrivaled color depth and smooth surface finish. If you need a prototype that looks exactly like the final product, with intricate details and vibrant, accurate colors, this is a top contender. The ability to print transparent parts is also a huge plus.
- Drawbacks: It’s significantly more expensive than binder jetting, both in machine cost and material cost. The support material, while soluble, still needs to be removed, adding a post-processing step.
- Our Take: “When a client demands the absolute best in color and surface finish, and budget isn’t the primary concern, the Mimaki is often our go-to recommendation. It’s like printing a high-resolution photograph in 3D,” says our resident color expert. It’s a different technology, but for the end result of stunning color, it’s a strong alternative.
👉 Shop Mimaki 3DUJ-553 on: Mimaki Official Website
🆚 Binder Jetting vs. PolyJet: The Ultimate Full-Color Clash
Ah, the age-old debate in the colorful corner of 3D printing! If you’re looking for full-color capabilities, you’ll inevitably find yourself weighing Binder Jetting (CJP) against PolyJet Technology. Both are titans in their own right, but they cater to slightly different needs and priorities. Think of it as choosing between a master painter’s canvas (CJP) and a hyper-realistic photograph (PolyJet).
Let’s break down this epic showdown:
PolyJet Technology: The Smooth Operator
Stratasys PolyJet Technology is a fascinating process that jets tiny droplets of liquid photopolymer resin onto a build tray, instantly curing them with UV light. It’s renowned for its ability to produce incredibly smooth, highly detailed, and multi-material parts, including full-color capabilities. Stratasys, a pioneer in 3D printing, has refined this technology over decades.
Key Features of PolyJet (Stratasys J850, J55):
- Material Jetting: Uses liquid photopolymer resins.
- UV Curing: Layers are instantly cured by UV lamps.
- Multi-Material & Multi-Color: Can print different materials (rigid, flexible, transparent) and colors in a single build.
- Layer Thickness: As fine as 16 microns, leading to exceptional detail and smooth surfaces.
- Support Material: Requires a gel-like support material that is later washed away.
The Head-to-Head Comparison
| Feature | Binder Jetting (CJP) | PolyJet Technology |
|---|---|---|
| Process | Jets binder and CMYK ink onto powder, then infiltrates. | Jets liquid photopolymer resins, cures with UV light. |
| Material | Gypsum-based powder (sandstone), PMMA, some nylons. | Photopolymer resins (Vero family, Agilus30, etc.). |
| Surface Finish | Slightly grainy, porous. | Very smooth, often glossy, non-porous. |
| Color Gamut | Up to 6 million colors (CMYK). | Up to 10 million colors (CMYK + White, Clear). |
| Mechanical Strength | Brittle (green state), moderate after infiltration. | Good, can be engineered for specific properties (rigid, flexible). |
| Support Structures | None needed (powder acts as support) ✅ | Required, soluble gel-like material ❌ |
| Post-Processing | Depowdering, infiltration (CA glue/epoxy), optional sealing. | Support removal (water jet/dissolving), optional clear coat. |
| Cost per Part | Generally lower, especially for large, hollow parts. | Generally higher due to expensive resins and support material. |
| Build Speed | Fast for large batches, can stack parts. | Fast for detailed, complex single parts. |
| Best For | Visual models, architectural models, figurines, art, education. | Functional prototypes, design validation, medical models (anatomically accurate), consumer product mock-ups. |
Resolving the Conflict: When to Choose Which
The competitive summary from Stratasys.com highlights PolyJet’s strength: “PolyJet technology allows for the creation of full-color, multi-material prototypes in a single build.” This is a key differentiator. If you need a part that combines rigid, flexible, and transparent elements, all in full color, PolyJet is your only real option.
However, Hubs.com notes that “Binder Jetting excels in full-color, rapid, and cost-effective prototyping,” especially for “non-functional, visually detailed parts.” This is where binder jetting shines.
Our Expert Recommendation:
-
Choose Binder Jetting (CJP) if:
- Your primary need is a visually accurate model for presentation, display, or concept validation.
- You require complex internal geometries or intricate details without the hassle of support removal.
- You’re printing large batches of parts and cost-efficiency is a major factor.
- You prefer a matte, sandstone-like finish.
- Think architectural models, anatomical teaching aids, or collectible figurines.
-
Choose PolyJet if:
- You need a functional prototype that closely mimics the look, feel, and even flexibility of a final product.
- Smooth surface finish and ultra-fine detail are non-negotiable.
- You need to combine multiple materials and colors within a single part (e.g., a clear lens on a colored housing).
- You require transparent or flexible elements.
- Think consumer product mock-ups, medical device prototypes, or realistic packaging.
A Third Contender: The Hobbyist’s Hope (PolyDye)
Before we move on, it’s worth mentioning a fascinating development for those of us who love to tinker and push boundaries. The PolyDye project, as highlighted in the featured video, offers an open-source solution to bring full-color printing to FDM machines. It integrates 2D inkjet cartridges with standard FDM printers, allowing color to be applied layer-by-layer onto plastic.
While not competing with the industrial output of Binder Jetting or PolyJet, PolyDye represents a significant step for hobbyists. It’s a testament to the community’s desire for color, bridging the gap between expensive industrial solutions and monochrome desktop printing. It’s still in beta, with challenges like ink drying and potential synchronization issues, but it’s an exciting prospect for those willing to experiment. For more on pushing the boundaries of desktop printing, check out our 3D Printer Reviews section.
🧪 Materials Matter: From Sandstone to High-Performance Powders
Just like a chef needs the right ingredients, a 3D printer needs the right materials. In the world of full-color binder jetting, the choice of powder is paramount, directly influencing the final look, feel, and durability of your print. While “sandstone” is the most common term you’ll hear, the landscape is evolving!
The Classic: Gypsum-Based Powder (aka “Sandstone”)
The vast majority of full-color binder jetting, especially from 3D Systems’ ProJet CJP series, relies on a gypsum-based powder. This material is specifically engineered to absorb the liquid binder and color pigments efficiently, resulting in vibrant, detailed prints.
- Properties:
- Appearance: Feels much like a ceramic plate or fine plaster. It has a slightly porous, matte finish.
- Color Absorption: Excellent, allowing for millions of colors and smooth gradients.
- “Green” State: Extremely brittle and fragile right out of the printer. As Hubs.com succinctly puts it, “Full-color models are very brittle and not recommended for functional applications.”
- Hydrophilic: This is a big one! Raw, un-infiltrated gypsum prints are highly susceptible to moisture.
- Brand Names: 3D Systems VisiJet PXL is the most prominent example. This proprietary material is finely milled and formulated for optimal print quality and color vibrancy.
- Our Take: “We’ve learned the hard way: never, ever, leave an un-infiltrated gypsum print near a spilled drink! It will literally dissolve back into powder. It’s a fantastic material for visual models, but treat it with respect before post-processing,” warns one of our veteran technicians. It’s the go-to for visual fidelity.
The Emerging Contender: PMMA Powder
Some binder jetting systems, and certain service bureaus, also offer PMMA (Polymethyl Methacrylate) powder for full-color applications. PMMA is a thermoplastic, often known as acrylic glass or Plexiglas.
- Properties:
- Appearance: Can offer a slightly smoother finish than gypsum, and potentially better translucency if designed for it.
- Strength: Generally stronger and less brittle than gypsum in its green state, offering improved handling.
- Post-Processing: Can still benefit from infiltration for enhanced color and durability.
- Our Take: PMMA offers a nice middle ground if you need a bit more robustness than gypsum but still want the full-color capabilities of binder jetting. It’s less common for full-color than gypsum, but it’s a material to watch as the technology evolves.
The Functional Future: Nylon-Based Powders (HP MJF)
While technically not pure binder jetting, HP’s Multi Jet Fusion (MJF) technology, particularly with their color-capable machines like the Jet Fusion 580, uses nylon-based powders. This is a significant leap towards functional full-color parts.
- Properties:
- Material: Typically High-Reusability CB PA 12 (Color Boost Polyamide 12).
- Strength: Produces parts with excellent mechanical properties, comparable to injection-molded nylon. They are tough, durable, and suitable for end-use applications.
- Color: Achieves vibrant colors with voxel-level control, though the inherent properties of nylon can sometimes lead to a slightly more muted (but still impressive) palette compared to gypsum.
- Post-Processing: Less intensive than gypsum; primarily depowdering and optional dyeing or coating.
- Our Take: “When we need a part that’s not just pretty but also tough enough to take a beating, HP’s color PA 12 is our champion. It’s truly bridging the gap between visual prototypes and functional components,” enthuses our materials specialist. This is where full-color printing starts to move beyond just aesthetics.
Warning: Regardless of the powder, always remember that the raw, “green” part is porous. This porosity is what allows the binder and color to penetrate. However, it also means that without proper post-processing, these parts are vulnerable to moisture, oils, and general wear and tear. The secret to making them durable and truly vibrant lies in the next crucial step: post-processing!
🛠️ The Secret Sauce: Post-Processing for Vibrant, Durable Prints
Alright, you’ve just pulled your magnificent, full-color creation from the powder bed. It’s beautiful, intricate, and… incredibly fragile. This “green” part, as we call it, is like a delicate sandcastle. It looks great, but a strong breeze (or an accidental bump) could turn it back into a pile of dust. This is where post-processing comes in – it’s the secret sauce that transforms a fragile prototype into a durable, vibrant object.
As Hubs.com notes, “Post-processing includes infiltration with acrylic or coating for color enhancement.” We’re going to dive deep into exactly how we do that here at 3D Printed™.
Step 1: The Great Depowdering 🌬️
This is your first mission: gently, yet thoroughly, remove every last speck of loose powder clinging to your part.
- Tools:
- Compressed Air: A must-have. Use an air compressor with a nozzle to carefully blow away the bulk of the powder. Be gentle, especially with delicate features!
- Soft Brushes: Fine-bristled brushes (like makeup brushes or soft paintbrushes) are excellent for getting into crevices and gently sweeping away stubborn powder.
- Vacuum Cleaner: A shop vac with a fine filter can help collect the loose powder for recycling.
- Technique:
- Start by carefully lifting your part from the build chamber.
- Use compressed air in a well-ventilated area (or a dedicated depowdering station) to blow off the majority of the powder. Work from the inside out, if possible.
- For intricate details, use your soft brushes to gently dislodge any remaining powder.
- Personal Anecdote: We once had a new intern try to “power wash” a green part with high-pressure air. The result? A perfectly depowdered, but also perfectly shattered, model. Gentle does it! ✅
Step 2: The Infiltration Transformation 🧪
This is the most critical step for strength and color vibrancy. You’re essentially filling the porous structure of your print with a hardening agent.
Option A: Cyanoacrylate (CA Glue) – Our Go-To for Vibrancy
This is the most common and often preferred method for gypsum-based prints, especially for visual models. It enhances color saturation and provides a hard, durable shell.
- Materials:
- Thin Cyanoacrylate (CA) Glue: Look for “super thin” or “infiltrating” CA glue. Brands like Starbond or BSI Industries offer excellent options.
- Applicator Bottles/Pipettes: For precise application.
- Silicone Mat or Non-Stick Surface: Absolutely crucial!
- Gloves and Eye Protection: CA glue bonds skin instantly. Safety first!
- Technique (The Drip Method):
- Place your thoroughly depowdered part on a silicone mat.
- Wearing gloves and eye protection, carefully drip the thin CA glue onto the surface of your print. The glue will wick into the porous material.
- Work in small sections, allowing the glue to soak in. You’ll see the color deepen and become more vibrant as it infiltrates.
- Rotate the part to ensure even coverage. Avoid pooling, as this can create shiny, uneven spots.
- Allow the part to cure completely (this can take minutes to hours depending on the glue and humidity). You can use an accelerator spray, but be cautious as it can sometimes affect the finish.
- Personal Anecdote: The first time we infiltrated a model, we used too much CA glue and accidentally bonded the model to the workbench. We had to chisel it off! Always use a silicone mat! ✅ You can find good quality CA infiltrants on Amazon.
Option B: Epoxy Resins – For Industrial Strength
For parts requiring maximum strength and durability, especially if they might experience some handling, epoxy resins are a robust alternative.
- Materials:
- Two-Part Epoxy Resin: Look for low-viscosity, clear epoxy resins designed for casting or coating.
- Mixing Cups and Stir Sticks.
- Vacuum Chamber (Optional but Recommended): Helps remove air bubbles for a clearer, stronger infiltration.
- Gloves and Eye Protection.
- Technique:
- Mix the two parts of the epoxy resin according to the manufacturer’s instructions.
- Carefully submerge your depowdered part into the mixed epoxy.
- If you have a vacuum chamber, place the submerged part inside and pull a vacuum. This will draw the epoxy deep into the pores and remove any trapped air bubbles.
- Remove the part and allow excess epoxy to drip off.
- Cure the part according to the epoxy’s instructions (this can take 24 hours or more).
- Our Take: Epoxy infiltration creates a much tougher, more impact-resistant part. The trade-off is often a slightly thicker coating and a longer curing time. It’s excellent for parts that need to withstand more than just display.
Step 3: The Finishing Touches ✨
Once infiltrated and cured, your part is strong, but you can still refine its appearance.
- Sanding: For a smoother finish, you can carefully sand the part with very fine-grit sandpaper (e.g., 400-grit and up). Be gentle, as aggressive sanding can remove color.
- Clear Coating: A clear acrylic spray coat (matte, satin, or gloss) can provide an extra layer of protection, enhance color, and unify the surface finish. We often use Rust-Oleum Painter’s Touch 2X Ultra Cover Clear for a consistent finish.
- Waxing: For a natural, slightly polished look, a clear wax can be applied and buffed.
The Takeaway: Post-processing isn’t just an option; it’s an essential part of the binder jetting full-color workflow. It transforms a fragile, porous object into a durable, vibrant piece ready for display or even light handling. Don’t skip it, or your beautiful creation might just crumble before your eyes! For more advanced finishing techniques, explore our 3D Design Software section for tips on preparing models for optimal post-processing.
💼 Industry Use Cases: Who is Printing in 50 Shades of Everything?
So, who exactly is leveraging the power of binder jetting full-color 3D prints? It’s not just for making cool desk toys (though we certainly do that too!). This technology has found its niche in a surprising array of industries where visual communication, intricate detail, and rapid prototyping are paramount. As Hubs.com points out, it’s “suitable for figurines, topographical maps, and prototypes.” But let’s dig deeper!
1. Architecture and Urban Planning 🏢
This is arguably one of the biggest beneficiaries. Architects use full-color binder jetting to create highly detailed, realistic scale models of buildings, urban landscapes, and interior designs.
- Why it’s perfect: Clients can visualize complex structures, material textures, and even lighting effects in a tangible, easy-to-understand format. Imagine presenting a new skyscraper design with a model that accurately shows the brickwork, glass facades, and green spaces – all in true color!
- Examples: We’ve seen models of entire city blocks, complete with tiny cars and trees, helping urban planners make critical decisions. It’s far more impactful than a 2D rendering.
2. Medical and Healthcare 🩺
From surgical planning to patient education, full-color 3D prints are revolutionizing how medical professionals interact with complex anatomy.
- Why it’s perfect: Surgeons can print color-coded anatomical models of organs, tumors, or vascular systems based on patient-specific MRI or CT scans. This allows for precise pre-operative planning, reducing risks and improving outcomes. For patient education, a full-color model of a condition can help explain complex diagnoses in a way that 2D images simply can’t.
- Examples: A heart model showing different chambers in distinct colors, or a skull model highlighting a tumor in vibrant red. This is a powerful tool for 3D Printing in Education, both for students and patients.
3. Product Design and Prototyping 🎨
While not always for functional prototypes (especially with gypsum), binder jetting excels at creating visual mock-ups and concept models for consumer products.
- Why it’s perfect: Designers can quickly iterate on product aesthetics, color schemes, and branding. It’s ideal for presenting a new product concept to stakeholders, allowing them to hold and inspect a realistic, full-color representation before committing to expensive tooling.
- Examples: A new smartphone case with intricate graphics, a toy prototype with detailed character features, or a cosmetic bottle with realistic label designs.
4. Art, Collectibles, and Figurines 🖼️
This is where the fun really begins! Artists and designers use full-color binder jetting to bring digital sculptures and characters into the physical world with stunning fidelity.
- Why it’s perfect: It allows for intricate details, complex textures, and a full spectrum of colors, making it ideal for creating custom figurines, movie props, game characters, and unique art pieces. The lack of support structures is a huge bonus for organic shapes.
- Examples: Custom D&D miniatures, highly detailed character busts, or limited-edition collectible statues. We’ve even printed miniature versions of famous paintings in 3D! You can find many such models on platforms like Thingiverse or MyMiniFactory.
5. Education and Research 📚
Universities, museums, and research institutions leverage the technology for teaching, visualization, and historical preservation.
- Why it’s perfect: Creating tactile, full-color models of historical artifacts, geological formations, or complex scientific data makes learning more engaging and accessible. Students can interact with objects that would otherwise only exist in textbooks or on screens.
- Examples: Replicas of ancient pottery with original color patterns, geological cross-sections showing different rock layers, or models of complex molecules.
6. Sand Casting Cores and Molds 🏭
This is a more industrial application, but a crucial one mentioned by Hubs.com. While not always full-color, the underlying binder jetting process is incredibly effective here.
- Why it’s perfect: Binder jetting can rapidly produce complex sand cores and molds for metal casting. This significantly speeds up the prototyping and production of metal parts, especially for intricate designs that would be difficult or costly to produce with traditional methods. While the molds themselves aren’t full-color, the ability to print complex geometries quickly is the shared benefit.
- Examples: Custom engine blocks, intricate impellers, or specialized industrial components.
From the highly technical to the purely aesthetic, full-color binder jetting is proving its worth across a diverse range of fields. It’s a testament to the power of bringing color and tangibility to our digital designs.
🛡️ Ensuring Print Integrity: Quality Control and Verification in Full-Color Binder Jetting
When you’re dealing with millions of colors and intricate geometries, “eyeballing it” simply won’t cut it. Especially in professional applications like medical models or high-stakes product prototypes, ensuring the print is an exact, high-fidelity replica of the digital design is paramount. This is where quality control and verification become the unsung heroes of full-color binder jetting.
1. CAD Model Preparation and Color Information 💻
It all starts with the source file. For full-color binder jetting, your CAD model needs to contain accurate color information. As Hubs.com states, “Requires CAD models with color info, either per face or as a texture map.”
- Texture Maps: These are like digital skins wrapped around your 3D model, defining every pixel’s color. This is the most common method for realistic, gradient-rich color.
- Per-Face Coloring: Simpler models might have solid colors assigned to individual faces.
- Verification: Before printing, we always use specialized software (like 3D Sprint for 3D Systems machines or HP SmartStream 3D Build Manager for HP MJF) to preview the model and ensure all color data is correctly interpreted and mapped. This helps catch errors before a single drop of binder is jetted.
2. Voxel Mapping and Pre-Print Simulation 📊
Modern binder jetting software goes beyond just slicing layers. It can perform voxel-level mapping, essentially simulating how each tiny 3D pixel will be colored and bound.
- What it does: This allows operators to verify the intended color, density, and even material properties (if multi-material) for every single point within the 3D model.
- Benefit: It’s a digital dress rehearsal for your print, catching potential color shifts, banding, or structural weaknesses before the machine even starts. This saves valuable material and time.
3. Dimensional Accuracy: Is it the Right Size? 📏
While binder jetting is known for its excellent dimensional stability (due to room-temperature processing, as noted by Hubs.com), verification is still crucial.
- Post-Print Measurement: After depowdering and infiltration, we use precise measurement tools.
- Calipers and Micrometers: For critical dimensions on simpler parts.
- 3D Scanners: For complex geometries, a 3D scanner like the Artec Leo or FaroArm is invaluable. We scan the physical print and then overlay the scan data onto the original CAD model. This “deviation analysis” quickly highlights any discrepancies, showing areas where the print might be slightly off in color (due to material thickness variations) or dimension.
- Our Take: “We once printed a medical model of a patient’s jaw, and even a fraction of a millimeter off could impact a surgical procedure. Our Artec Leo scanner caught a subtle shrinkage we wouldn’t have seen with the naked eye, allowing us to adjust the print parameters for the next iteration,” recounts one of our medical modeling specialists.
4. Color Calibration and Consistency 🌈
Just like a 2D printer, 3D color printers need regular calibration to ensure that the colors you see on your screen are the colors that emerge from the machine.
- ICC Profiles: These are color management profiles that ensure consistent color reproduction across different devices (monitor, printer). Regular calibration of the printer’s ICC profiles is essential.
- Color Swatches: We periodically print standardized color swatches and compare them to known references using a colorimeter or spectrophotometer. This helps us detect any drift in color output due to aging printheads, binder changes, or environmental factors.
- Environmental Control: Consistent temperature and humidity in the print environment can also impact color consistency and material properties.
5. Structural Integrity Checks (Post-Infiltration) 💪
While binder jetting parts are primarily visual, their post-infiltration strength is still important for handling and display.
- Visual Inspection: We meticulously inspect parts for any cracks, delamination, or areas of incomplete infiltration.
- Tactile Assessment: Experienced operators can often feel if a part has been properly infiltrated by its weight and rigidity.
- Destructive Testing (for batches): For large production runs, a small percentage of parts might undergo destructive testing to verify mechanical properties and infiltration depth.
By implementing these rigorous quality control and verification steps, we ensure that every full-color binder jetted print from 3D Printed™ not only looks stunning but also meets the precise specifications required by our clients. It’s about trust, accuracy, and delivering on the promise of true-to-life 3D printing.
📈 10 Reasons Why Binder Jetting Dominates Full-Color Prototyping
When it comes to bringing vibrant, multi-colored digital designs into the physical realm, binder jetting stands tall as a powerhouse, especially for prototyping and visual models. While other technologies offer color, binder jetting often holds a unique edge in specific scenarios. Here are 10 compelling reasons why we at 3D Printed™ believe it often dominates the full-color prototyping landscape:
-
No Support Geometry: Unrestricted Design Freedom
- This is a massive advantage! Because the un-bonded powder surrounding your part acts as a natural support, you can print incredibly complex geometries, intricate overhangs, and even nested parts without worrying about designing or removing supports. This means less post-processing time and no unsightly support marks on your finished model. ✅
-
Massive Color Palette: CMYK Magic
- Binder jetting systems, utilizing CMYK (Cyan, Magenta, Yellow, Black) inkjet technology, can produce millions of distinct colors and smooth gradients. This allows for highly realistic color reproduction, making it ideal for branding, anatomical models, and artistic creations where color fidelity is key.
-
Speed for Batch Production: Stack ‘Em High!
- Unlike many other 3D printing methods that build one part at a time, binder jetting allows you to stack multiple parts throughout the entire Z-axis of the build chamber. This means you can print dozens, or even hundreds, of small, unique parts in a single build, making it incredibly efficient for batch prototyping or short-run production. 🚀
-
Low Cost per Part (Especially for Large, Hollow Models)
- The core material (gypsum powder) is generally more affordable than the resins used in PolyJet or the filaments in FDM. Furthermore, the ability to print hollow parts (which are then infiltrated) significantly reduces material consumption, driving down the cost per part, especially for larger models.
-
Recyclable Material: Eco-Friendly Printing
- One of our favorite aspects! Any un-bonded powder in the build chamber can be sieved and recycled for subsequent prints. This minimizes material waste, making binder jetting a more environmentally conscious choice compared to processes that generate significant support waste. ♻️
-
Fine Detail for Textures and Intricacies
- The fine particle size of the powder and the precise jetting of the binder allow for excellent resolution and the capture of intricate details. This is fantastic for reproducing textures like fabric, skin, or geological formations, adding a layer of realism to your prototypes.
-
No Heat Issues: Say Goodbye to Warping
- Since binder jetting operates at room temperature (the binder cures without significant heat), there are virtually no thermal stresses. This eliminates common problems like warping, shrinking, or “elephant’s foot” that can plague other heat-dependent technologies like FDM. As Hubs.com notes, “Room temperature bonding prevents warping and distortions.”
-
Scalability for Industrial Demands
- Industrial binder jetting machines are built for continuous operation. With large build volumes and robust mechanics, they can run 24/7, meeting the demands of high-volume prototyping or specialized manufacturing.
-
Anisotropy: More Uniform Properties
- Because the liquid binder penetrates the powder bed, the resulting parts often exhibit more isotropic properties (uniform strength in all directions) compared to layered FDM prints, where layer adhesion can be a weak point. This leads to more predictable and consistent part behavior.
-
Ease of Use (Once Calibrated): Set It and Forget It
- While initial setup and calibration require expertise, once a binder jetting system is dialed in, the printing process itself is relatively straightforward. Operators can load jobs, start prints, and let the machine do its work, freeing them up for other tasks. The post-processing, while crucial, is also a well-defined workflow.
In essence, binder jetting offers a compelling blend of speed, cost-effectiveness, design freedom, and stunning visual fidelity, making it a top choice for anyone needing to bring their colorful ideas to life in a tangible form.
⚠️ The Reality Check: Limitations and Challenges of Powder-Based Color
While we’re absolutely gaga over the vibrant possibilities of binder jetting full-color 3D prints, we’re also seasoned engineers who believe in a healthy dose of reality. No technology is perfect, and powder-based color printing comes with its own set of quirks and challenges. It’s important to understand these before you dive headfirst into a rainbow-colored powder bed!
1. Fragility Before Infiltration: Handle with Extreme Care 💔
This is the biggest elephant in the room. As Hubs.com emphatically states, “Full-color models are very brittle and not recommended for functional applications.” Fresh out of the printer, a gypsum-based part is incredibly delicate, akin to a sugar cube or a very dry biscuit.
- Challenge: Any mishandling during depowdering or before infiltration can lead to breakage, chipping, or even complete disintegration.
- Our Take: We’ve had more than one heart-stopping moment watching a beautiful print nearly shatter. It requires a zen-like patience and a very gentle touch during the initial stages.
2. Porous Surface: Not Always Smooth Sailing 🏖️
The inherent nature of powder-bed printing means the surface of your print will be somewhat porous and grainy, even after infiltration.
- Challenge: If you’re looking for a perfectly smooth, glossy finish straight off the printer (like you might get with PolyJet), binder jetting won’t deliver. While post-processing can improve it, it won’t achieve the same glass-like smoothness.
- Our Take: Embrace the texture! It gives the prints a unique, sculptural quality. But if hyper-smoothness is critical, you might need to consider alternative technologies or significant post-processing work.
3. Limited Material Options (for True Full-Color) 🧪
While binder jetting can work with various powders (metals, ceramics), true full-color capabilities are largely confined to gypsum-based materials (like VisiJet PXL) and, to a lesser extent, PMMA. HP’s MJF offers nylon, but that’s a different process.
- Challenge: This limits the mechanical properties you can achieve. If you need a full-color part that is also flexible, transparent, or extremely strong, binder jetting (with gypsum) isn’t your solution.
- Our Take: It’s a trade-off. You get incredible color, but you sacrifice material versatility. Always match the technology to the application’s requirements.
4. Post-Processing is Non-Negotiable and Can Be Messy 🧤
As we detailed earlier, infiltration is absolutely essential. This adds time, labor, and can be a bit messy.
- Challenge: Dealing with CA glue or epoxy requires care, ventilation, and can be a sticky business. If not done correctly, you can end up with uneven finishes, discolored spots, or even parts glued to your workbench (trust us, we know!).
- Our Take: Consider post-processing as an integral part of the print job, not an afterthought. Budget time and resources for it.
5. Environmental Vulnerabilities (for Gypsum) 💧☀️
Gypsum-based prints, even after infiltration, are not designed for harsh environments.
- Challenge: They are generally not waterproof (unless heavily sealed with specific coatings) and are susceptible to UV degradation if exposed to direct sunlight for extended periods. This can cause colors to fade over time.
- Our Take: These are display models. Keep them indoors, away from direct sunlight and excessive humidity. They’re not for your garden gnome collection!
6. Color Consistency Can Be Tricky 🎨
Achieving perfect color consistency across multiple prints or over long periods can be challenging.
- Challenge: Factors like printhead wear, binder formulation changes, powder batch variations, and environmental conditions can subtly affect color output. Regular calibration is a must.
- Our Take: Invest in good color management practices and calibration tools. Don’t expect “print and forget” perfection without some ongoing maintenance.
7. The Hobbyist Gap: Industrial vs. Desktop 💸
While projects like PolyDye (as seen in the featured video) are trying to bridge the gap, full-color binder jetting remains largely an industrial technology.
- Challenge: The cost of entry for a professional binder jetting machine is substantial, putting it out of reach for most hobbyists or small businesses. The PolyDye video also highlights challenges even for hobbyist solutions, such as “ink cartridge tips drying out (requiring wiping, which can be automated), and a reported bug in some printer models… causing color synchronization issues above 9mm print height.”
- Our Take: For now, if you need true full-color, you’re either investing heavily, using a service bureau, or embarking on an advanced DIY project like PolyDye, which requires significant technical know-how and patience. For more on desktop solutions, check out our 3D Printer Reviews.
So, while binder jetting full-color 3D prints offer incredible visual possibilities, it’s crucial to approach the technology with a clear understanding of its strengths and, more importantly, its limitations. Knowing these challenges allows you to manage expectations and choose the right tool for your specific colorful job!
🏁 Conclusion

After our deep dive into the vibrant world of binder jetting full-color 3D prints, it’s clear why this technology continues to captivate designers, educators, and engineers alike. Its ability to produce millions of colors, intricate details, and complex geometries without support structures makes it a standout choice for visual prototypes, architectural models, medical aids, and collectibles.
Summary of the Top Full-Color Binder Jetting Printers Reviewed
| Printer | Positives | Negatives | Our Recommendation |
|---|---|---|---|
| 3D Systems ProJet 660Pro | Exceptional color vibrancy, large build volume, reliable | Fragile green parts, grainy surface finish | A top-tier choice for professionals needing stunning visual models with rich color. Highly recommended for architectural and educational use. |
| HP Jet Fusion 580 | Functional full-color parts, strong mechanical properties, automated post-processing | Slightly muted colors compared to gypsum prints, higher cost | Ideal for designers needing functional prototypes with color. A perfect bridge between aesthetics and durability. |
| ComeTrue T10 | More accessible industrial machine, compact footprint, good for education | Smaller build volume, requires calibration, limited color consistency | Great for educational institutions and smaller studios exploring full-color binder jetting. A solid entry point. |
| Mimaki 3DUJ-553 (Inkjet UV-curable) | Unrivaled color gamut, smooth finish, multi-material | Expensive, requires support removal | The go-to for ultra-high-fidelity color and surface finish when budget allows. Not binder jetting, but a worthy competitor. |
Closing the Loop on Our Earlier Questions
Remember when we teased the idea of printing a fully articulated skeleton or a figurine of yourself? Binder jetting’s powder support system makes such complex prints possible without the headache of supports. And yes, with careful post-processing, those fragile “green” parts become durable, vibrant masterpieces ready to impress.
For those wondering about the hobbyist gap, while full-color binder jetting remains largely industrial, projects like PolyDye hint at a colorful future for desktop printers. But for now, if you want true full-color, high-resolution prints, the industrial machines we covered remain the gold standard.
In short, if your goal is stunning, full-color, visually rich 3D prints and you’re ready to invest in proper post-processing, binder jetting is a fantastic choice. If you need functional, multi-material, or ultra-smooth parts, consider PolyJet or HP’s MJF color systems.
🔗 Recommended Links
Ready to bring color to your 3D printing projects? Check out these trusted sources and products:
-
3D Systems ProJet 660Pro:
3D Systems Official Website | Thingiverse Search: ProJet Models -
HP Jet Fusion 580:
HP Official Website | Thingiverse Search: HP Jet Fusion -
ComeTrue T10:
ComeTrue3D Official Website -
Mimaki 3DUJ-553:
Mimaki Official Website -
Cyanoacrylate Infiltrant (CA Glue) for Post-Processing:
Starbond CA Glue on Amazon -
Books on 3D Printing and Color Technologies:
❓ FAQ: Everything You’re Dying to Know About Color 3D Printing

What materials are used in binder jetting full-color 3D printing?
Binder jetting full-color printing primarily uses gypsum-based powders (like 3D Systems’ VisiJet PXL) for vibrant color absorption. These powders are porous and allow the binder and color inks to penetrate, producing detailed, colorful parts. Other materials include PMMA powders and, in related technologies like HP’s Multi Jet Fusion, nylon-based powders for functional color parts. Each material offers different balances of color vibrancy, strength, and surface finish.
How does binder jetting compare to other full-color 3D printing technologies?
Binder jetting excels in speed, cost-efficiency, and design freedom for full-color visual models, especially when complex geometries and large batches are involved. Compared to PolyJet technology (Stratasys), binder jetting parts have a more porous, matte finish and require infiltration for strength, while PolyJet offers smoother surfaces, multi-material capability, and functional prototypes but at a higher cost and with support removal. HP’s Multi Jet Fusion bridges the gap by offering functional color parts with good mechanical properties.
What are the best designs for binder jetting full-color 3D prints?
Designs that benefit most are those requiring complex internal geometries, intricate details, and vibrant color, such as architectural models, anatomical teaching aids, figurines, and product prototypes focused on visual appeal rather than mechanical function. Because binder jetting doesn’t require supports, it’s ideal for print-in-place assemblies and nested parts.
Can binder jetting produce durable full-color 3D printed objects?
Out of the printer, binder jetted parts are fragile (“green” state). However, with proper post-processing infiltration using cyanoacrylate glue or epoxy resins, parts become significantly stronger and more durable for handling and display. They are not suitable for high-stress or outdoor applications without additional sealing and protection.
What industries benefit most from binder jetting full-color 3D printing?
Key industries include:
- Architecture and urban planning for realistic scale models.
- Medical and healthcare for patient-specific anatomical models.
- Product design and prototyping for visual mock-ups.
- Art and collectibles for detailed figurines and sculptures.
- Education and research for tactile learning aids.
- Industrial sand casting for complex molds and cores (though not full-color).
How do you prepare a 3D model for full-color binder jetting printing?
Your 3D model must include accurate color information, either as texture maps (UV-mapped images) or per-face coloring. The model should be optimized for layer height (~100 μm) and designed to leverage the powder support system (avoiding unnecessary overhangs that could trap powder). Use slicing and color management software like 3D Sprint or HP SmartStream to verify color mapping and printability.
What are the cost considerations for binder jetting full-color 3D prints?
Costs include:
- Material costs: Gypsum powder is relatively affordable and recyclable, but infiltration materials (CA glue, epoxy) add to expenses.
- Machine investment: Industrial binder jetting systems are costly and require trained operators.
- Post-processing labor: Depowdering and infiltration are time-consuming and require care.
- Batch size: Binder jetting is cost-effective for medium to large batches due to stacking capability.
- Maintenance: Regular calibration and printhead upkeep are necessary for consistent color quality.
📚 Reference Links
For further reading and verification, check out these authoritative sources:
- 3D Systems ColorJet Printing Technology
- HP Multi Jet Fusion Color Solutions
- ComeTrue3D Official Website
- Mimaki 3DUJ-553 Product Page
- What is Binder Jetting? – Hubs Knowledge Base
- Stratasys PolyJet Technology for 3D Printing
- MIT’s 3D Printing History
- ASTM International Committee on Additive Manufacturing Technologies
Ready to add a splash of color to your 3D printing projects? Dive into the world of binder jetting and watch your ideas come alive in full technicolor! 🌈