Support our educational content for free when you purchase through links on our site. Learn more
🤯 Say Goodbye to Stuck Prints: A 3D Printing Enthusiast’s Guide to Print Removal [2024]
, computer-generated image of a number of oblong-shaped, Vibrio parahaemolyticus bacteria. The artistic recreation was based upon scanning electron microscopic (SEM) imagery. See PHIL 21922, for another view of these microbes. by 3D Printed")
We’ve all been there: you’ve just finished a dazzling 3D print, brimming with pride, only to realize it’s glued tighter than a stubborn toddler to the print bed. We know the struggle is real, and that’s why we’re here to share our wisdom (and some hard-won lessons) on how to tackle this age-old 3D printing dilemma! From the humble beginnings of 3D printing, adhesion has been a constant challenge, but we’ve got you covered with tips, techniques, and tricks to ensure your prints are always ready for their close-up.
Quick Answer
Here are some key strategies for a smooth, frustration-free print removal experience:
- Patience is Key: Allow your print to cool down completely before trying to remove it.
- Gentle Force: Use a flat blade or spatula to carefully pry the print from the edges.
- Heat It Up: For stubborn prints, use a heat gun on a low setting to soften the base.
- Leverage Flexibility: If you’ve got a flexible build plate, give it a gentle bend to release the print.
- Clean Up: Clean your print bed with isopropyl alcohol after every print to prevent residue buildup.
👉 Shop for Print Bed Essentials:
- Glue Sticks: Amazon | Walmart
- Hairspray: Amazon | Walmart
- Flexible Build Plates: Amazon | BuildTak Official
Table of Contents
- Quick Tips and Facts
- The History of 3D Printing and the Problem of Removing Prints
- How to Safely Remove a 3D Print
- How to Prevent a 3D Print from Getting Stuck
- Cleaning the 3D printer print surface after every print can help solve adhesion issues.
- D Print Bed Maintenance
- Work After Printing Finished (removing, cleaning, bonding the …)
- Conclusion
- Recommended Links
- FAQ
- Reference Links
Quick Tips and Facts
Getting your 3D print off the bed can be a delicate dance! But before we dive into the nitty-gritty, let’s start with some quick tips. This is especially helpful if you’re new to the world of 3D printing – welcome aboard!
💡 Key takeaway: Removing your 3D print from the print bed should be done with care to avoid damage to both the print and the bed.
A little patience goes a long way!
- Patience is Key: Don’t rush the process. Allow the print to cool down completely before attempting to remove it.
- The Right Tool for the Job: Instead of brute force, try using a flat blade or spatula to gently pry the print free.
- A Helping Hand: If the print is still stubborn, you can try using a heat gun on a low setting to soften the base layer.
Got stubborn PLA? No worries, we’ve got you covered!
- PLA Power: PLA doesn’t melt as easily, so you can experiment with bending the print bed or using a solvent like isopropyl alcohol.
Let’s talk about that print bed, shall we?
- The Importance of Cleaning: Don’t forget to clean your print bed after each print to prevent residue build-up! This can seriously affect future prints (and not in a good way).
The History of 3D Printing and the Problem of Removing Prints

3D printing, also known as additive manufacturing, has revolutionized the way we design and create objects. With a rich history tracing back to the 1980s, it has come a long way. It was initially used in niche applications, like rapid prototyping, before becoming more accessible to consumers and businesses, opening up a world of possibilities. But one challenge we’ve faced since the very beginning is getting those awesome prints off the print bed! 🎉
Early 3D printers struggled with adhesion – a common thread for any 3D printer enthusiast
- The first “fused deposition modeling” (FDM) printers often used low-quality materials and had limited bed control, leading to prints that were more likely to stick or detach prematurely.
- With advancements in technology, we’ve seen improvements in print bed materials, software, and filament technologies.
Today, with improved FDM technology, we’ve seen significant improvements – but the struggle to get that first layer perfect is still a commonality across the spectrum of brands
- The rise of heated beds made a huge difference, giving us more control over the temperature and providing a better environment for adhesion.
- A wide range of filaments has also been introduced, each with its own adhesion characteristics, making it crucial to fine-tune print settings.
Remember, getting those prints off the bed is a crucial part of the 3D printing journey
- Whether you’re a seasoned veteran or just starting out in your 3D printing adventures, understanding the dynamics of print bed adhesion is essential.
How to Safely Remove a 3D Print
Alright, so you’ve finished your stunning 3D print. 🤩 Time to take it off the bed. But how to do it without damaging your creation or the print bed? Here’s a step-by-step guide, taking inspiration from our personal experiences and valuable user feedback:
1. Patience is a Virtue:
- Don’t rush it! Allow your print to cool down completely before attempting to remove it. This ensures that the material has solidified and prevents warping or damage.
2. The Power of a Gentle Touch:
- Flat Blade or Spatula: Gentleness is key – use a blunt flat blade or spatula to gently pry the print free.
- Work from the Edges: Start at the edges of the print and carefully pry it up. Avoid applying force directly on the center.
3. Leverage the Power of a Tool:
- Spatula with a Little Help: For larger prints, a scraper or putty knife with a flexible blade might be needed.
- A Helping Hand: Hold the print bed in place and use the tool to leverage the print up.
4. Consider a Twist:
- Gentle Twisting: Sometimes a gentle twist of the print will help to break the bond between it and the bed.
5. When It Just Won’t Budge:
- Heat Gun Time: If your print is still stuck to the bed – try applying gentle heat to the base of the print with a heat gun on low settings. Be careful not to overheat, which could melt or deform the print.
- A Gentle Spritz: If using PLA, try a little isopropyl alcohol. Apply it around the base of the print; you may find it helps to separate the print from the bed.
6. Avoid a Forceful “Release”:
- Don’t Use Force: Resist the temptation to yank the print off. This could damage your print or the bed surface.
7. Cleaning Your Masterpiece:
- A Gentle Touch is Best: Wipe off any leftover adhesive or support material with a soft cloth.
8. Maintain Your Print Bed:
- Regular Cleaning: Clean your print bed surface regularly (after every print, if possible) with a microfiber cloth, 90% isopropyl alcohol, or a gentle cleaning solution.
How to Prevent a 3D Print from Getting Stuck
Now that you know how to handle a stuck print, let’s learn how to prevent them altogether!
1. Mastering the Art of Bed Leveling:
- A Level Playing Field: Your print bed must be perfectly level to ensure the first layer adheres correctly.
- Calibration is Key: Properly calibrate your 3D printer to ensure the best results.
2. The Power of Bed Adhesives:
- Glue Stick Magic: A light layer of glue stick is a great way to improve adhesion for PLA prints.
- Hairspray Wonders: Hairspray can also work wonders! Apply a thin, even coat to your bed surface.
- Blue Painter’s Tape: For larger prints, blue painter’s tape is a great option.
3. Embrace the Flexibility:
- Flexible Build Plates: Consider investing in a flexible build plate, like BuildTak, PEI, or steel.
- Easy Release: Flexible build plates enable you to bend the platform slightly, making it easier to remove your print.
4. Find Your Filament’s Sweet Spot:
- Filament Compatibility: Make sure you’re using the correct print temperatures and bed temperatures for your chosen filament.
- Check Online Resources: Many online resources provide great tips for printing with specific filaments.
5. Get Creative with the Print Bed Surface:
- Glass Beds: Glass beds are often used for 3D printing and allow for smoother, more even prints.
- PEI Coatings: Some glass beds have a PEI coating, which can be beneficial for adhesion.
- BuildTak (PEI Flex Plate): This flexible BuildTak PEI sheet is a great option for a smooth and easy-to-clean surface.
6. Keep Your Print Bed Clean:
- A Clean Slate: Make sure your print bed is free of dust, dirt, or debris before starting a new print job.
7. Keep Your Filament Immaculate:
- Dry Storage: Store your filament in a cool, dry place to prevent it from absorbing moisture.
Cleaning the 3D printer print surface after every print can help solve adhesion issues.
After removing your print, it’s time to give your print bed a little TLC. We’ve got you covered with some handy cleaning tips for a print bed that’s ready for any challenge. We recommend cleaning your bed after every print:
1. The Cool Down: Always allow the print bed to cool down completely before cleaning.
2. The Removal Process:
- Scrape Gently: Use a scraper, blade, or putty knife to gently remove any leftover filament residue.
- Avoid Aggressive Action: Don’t scrape too hard, as this could damage the print surface.
3. The Cleaning Routine:
- Clean with Isopropyl Alcohol (IPA): Use a soft cloth and 90% isopropyl alcohol to clean the bed surface.
- Avoid Strong Solvents: Avoid using strong solvents like acetone, which can damage or dissolve the print bed material.
4. The Final Touch:
- Dry Thoroughly: Dry the bed surface thoroughly with a clean cloth before starting a new print.
- Dust Prevention: Consider using a dust cover to protect your print bed when not in use.
D Print Bed Maintenance
Think of your print bed as a crucial part of your 3D printing game. With a little love, you can keep it in excellent shape to ensure your prints come out beautifully! Here are a few maintenance strategies to keep your print bed in tip-top condition.
1. Regular Cleanliness:
- Clean after Every Print: Clean your print bed after every print using isopropyl alcohol and a microfiber cloth to prevent debris buildup and ensure consistent adhesion.
- Keep It Dust-Free: Keep the bed free of dust and fingerprints.
2. Leveling Matters:
- Level Up Your Game: Before each print, take a few moments to level your print bed using the auto-bed leveling feature or manual leveling techniques.
- The First Layer is Crucial: A perfectly level bed results in a solid first layer.
3. Adhesion Solutions:
- Glue Stick: Use a light coating of glue stick for improved PLA adhesion.
- Hairspray: A thin layer of hairspray can also help with adhesion.
- PEI: PEI coatings are excellent, but keep an eye out for wear and tear.
4. Replace When Needed:
- Signs of Damage: If your print bed shows signs of wear, scratching, or peeling, it’s time to replace it to prevent further problems.
- Invest in Quality: Investing in a quality build plate will pay off in the long run.
Work After Printing Finished (removing, cleaning, bonding the …)
1. Removing the 3D Print
- Let it Cool: Wait for the print to cool completely to avoid warping.
- Gentle Force: Use a spatula or scraper with a soft edge to gently lift from the edges.
- Heat Gun or Alcohol: If stuck, use a low heat setting or isopropyl alcohol.
- Flexible Build Plates: Bend the plate to loosen the print.
2. Cleaning the Build Plate
- Isopropyl Alcohol: Use 90% IPA and a microfiber cloth to remove filament residue.
- Scrape Lightly: If necessary, use a scraper but avoid scratching the surface.
3. Bonding Multiple Parts
- Glue Stick: Works for PLA prints with low bonding strength.
- Epoxy Glue: For strong bonds, use AB epoxy glue or TPU-based shoe-repair glue.
- Hot-Melt Glue: Utilize a glue gun for rough surfaces like PAHT-CF or PET-CF.
4. Support Removal
- Remove Immediately: Remove supports within 2 hours to avoid softening with moisture.
- Water-Soluble Supports: Soak in water and wash or remove.
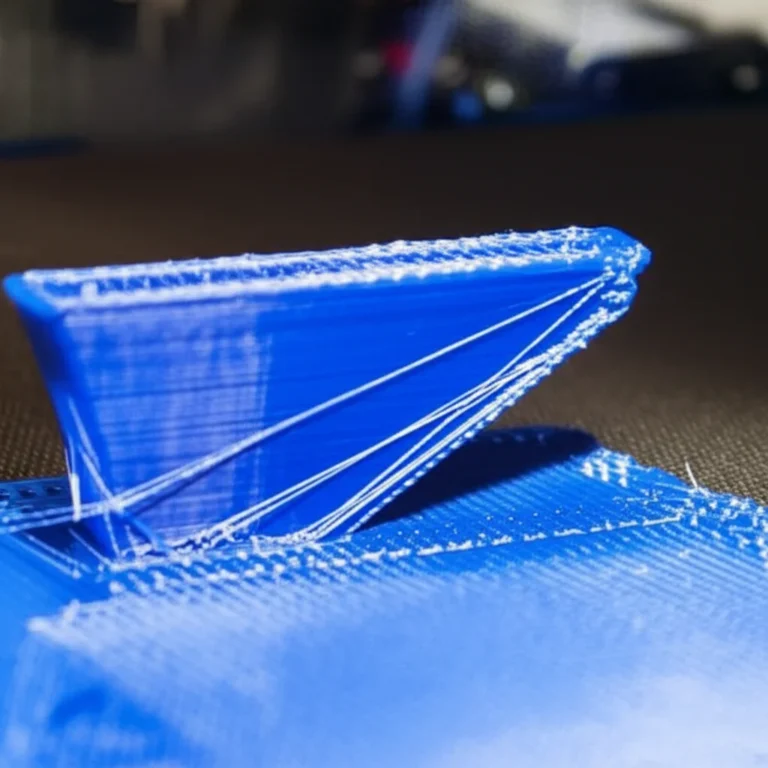
5. Stringing Removal
- Heat Gun or Hairdryer: Use hot air to melt away stringing.
- Lighter Flame: Apply a lighter flame cautiously to burn it off.
6. Repairing Defects
- Melted Filament: Use a heater to melt filament and fill in holes or gaps.
- Sanding or Grinding: Smooth out rough surfaces or uneven areas.
7. Polishing
- Grind: Use sandpaper and a grinding machine to address rough surfaces.
- Solvents: Apply acetone, methylene chloride, or toluene carefully for polishing.
- Coatings: Apply varnish or polish to improve the finish.
8. Annealing
- Benefits: Increases strength, heat resistance, and water resistance.
- Temperature and Time: Start low and gradually increase temperature.
- Risks: Deformation and warping.
9. Finishing Touches
- Painting: Consider painting your print with acrylic paints for a custom look.
- Varnishing: Add protection and a glossy finish with a varnish sealant.
10. Enjoy Your Creation!
Remember: Always follow safety precautions when using tools, solvents, or heat.
Conclusion

We hope this guide has been a breath of fresh air! 💨 Getting your 3D print off the bed shouldn’t be a frustrating ordeal. With a little practice, proper techniques, and some key tips like patience, the right tools, and a touch of TLC for your print bed, you’ll be a master of print removal in no time! We’ve explored the ins and outs of 3D print bed adhesion, from historical context to modern solutions, and have armed you with the confidence to conquer any sticky situations. Remember, success in 3D printing is all about continuous learning and experimentation – embrace those challenges head-on and you’ll unlock a whole new world of creative possibilities!
Recommended Links
👉 Shop Print Bed Adhesives:
👉 Shop Flexible Build Plates:
- BuildTak: Amazon | BuildTak Official
- PEI Sheets: Amazon
- Steel Build Plates: Amazon
👉 Shop 3D Printers:
- Creality Ender 3: Amazon | Creality Official
- Bambu Lab P1S: Bambu Lab Official | Amazon
Recommended Books:
- “3D Printing, A Beginner’s Guide” by Massimo Temporelli: Amazon
FAQ

When can I remove my 3D print?
The best time to remove a 3D print is after it has completely cooled down. This ensures the material has solidified properly and reduces the risk of warping or damaging the print.
Here’s a helpful guideline:
- PLA: Typically takes 10-15 minutes to cool down sufficiently.
- ABS: Needs a bit more time, around 20-30 minutes.
- PETG: Slightly longer at 30-45 minutes depending on the size and thickness of the print.
Why is my 3D print hard to remove?
There are a few reasons why your 3D print might be stubbornly clinging to the bed.
- Poor Bed Leveling: A misaligned bed can lead to inconsistent adhesion, making removal difficult.
- Excessive Adhesion: An overly strong adhesive layer on the print bed can form a tenacious bond.
- Filament Issues: Moisture in the filament can affect adhesion strengths, making it hard to remove.
- Material Type: Certain materials, like PETG, are known for their strong adhesion properties.
How to get 3D print off of glass?
Sticking issues on glass beds are common, but don’t be discouraged.
Here are some tips for getting a print off a glass bed:
- Gentle Prying: Use a flat blade or spatula and start at the edges of the print, working your way around carefully.
- Heat It Up: Apply a low setting heat gun to the base of the print to slightly soften the material, making it easier to release.
- Cool It Down: If all else fails, try placing the glass bed in the freezer for a few minutes to contract the print.
How to remove stuck 3D print on Reddit?
You can find a wealth of information and advice on Reddit’s 3D printing communities.
- r/3DPrinting: This is a great place to ask questions and get feedback from other enthusiasts.
- r/FixMyPrint: If you’re really struggling, check out this subreddit for specific help with challenging removal situations.
How to prevent 3D printing from sticking to the bed?
Preventing sticking is all about setting up a successful print – and ensuring adhesion is just right.
- Bed Leveling: This is fundamental! Properly calibrate your printer’s bed leveling.
- Adhesion Solutions: Choose an appropriate bed adhesion method for your filament and print bed.
- Clean Your Bed: Clean the bed surface after every print.
- Dry Filament: Keep your filament moisture-free.
Reference Links
- BuildTak PEI Flex Plates: BuildTak Official
- Isopropyl Alcohol (IPA): Amazon
- PETG Filament: Amazon
- PLA Filament: Amazon
- Creality Ender 3: Creality Official
- Bambu Lab P1S: Bambu Lab Official
- “Work After Printing Finished (removing, cleaning, bonding the …)”: Bambu Lab
- r/3DPrinting: Reddit
- r/FixMyPrint: Reddit