Support our educational content for free when you purchase through links on our site. Learn more
🎨 Master the Art of Painting 3D Printed Parts: 12 Pro Tips for Flawless Finishes (2025)

If you’ve ever pulled a freshly 3D printed part off the build plate and thought, “Hmm, this looks… unfinished,” you’re not alone. Those visible layer lines, rough edges, and dull plastic surfaces are the starting line—not the finish. Painting 3D printed parts is where your creation truly comes to life, transforming raw plastic into vibrant, detailed, and durable masterpieces. But how do you go from “meh” to “wow” without wasting hours or ruining your print?
In this comprehensive guide, we’ll walk you through 12 expert tips and techniques to prime, paint, and finish your 3D prints like a seasoned pro. From choosing the right filament and prepping your surface, to mastering brushwork, spray painting, and airbrushing, we cover every step with insider secrets and product recommendations. Plus, we’ll reveal the little-known magic of chemical smoothing for ABS and how to fix common painting mishaps that could otherwise derail your project.
Ready to unlock the full potential of your 3D prints? Keep reading to discover how to turn those plastic layers into stunning works of art—and why a good primer might just be your new best friend.
Key Takeaways
- Proper preparation is crucial: Cleaning, sanding, and priming your 3D prints dramatically improve paint adhesion and finish quality.
- Material matters: Different filaments and resins require tailored approaches for best results.
- Multiple thin coats win: Whether priming or painting, thin layers prevent drips and preserve detail.
- Advanced techniques elevate your work: Airbrushing, weathering, and sealing add realism and durability.
- Safety first: Use respirators, gloves, and work in ventilated spaces to protect yourself.
Curious about the best primers and paints to use? Check out our recommended brands like Krylon, Tamiya, Vallejo, and Montana Gold later in the article for trusted options that deliver professional results.
Table of Contents
- ⚡️ Quick Tips and Facts: Your Fast Track to Flawless Finishes
- 🎨 The Art & Science of Finishing 3D Prints: A Brief History of Post-Processing Perfection
- ✨ Beyond the Layer Lines: Why Painting Your 3D Prints is a Game-Changer
- 🧵 Choosing Your Canvas: Best 3D Printing Filaments & Resins for Painting Success
- 🛠️ Your Arsenal of Awesomeness: Essential Tools and Supplies for Painting 3D Prints
- 🚀 The Foundation of Flawless Finishes: Mastering 3D Print Preparation
- 🌈 Unleashing Your Inner Artist: Advanced Painting Techniques for 3D Prints
- 🔒 Locking in the Look: Sealing and Protecting Your Masterpiece
- 🤦♀️ Oops! Fixing Common Painting Mishaps on 3D Prints
- 💡 Pro-Level Secrets: Elevating Your 3D Print Painting Game
- ⚠️ Paint Smart, Print Safe: Essential Safety Considerations
- 🏁 Conclusion: Your Journey to Painted Perfection
- 🔗 Recommended Links: Dive Deeper!
- ❓ FAQ: Your Burning Questions Answered
- 📚 Reference Links: Our Sources of Wisdom
⚡️ Quick Tips and Facts: Your Fast Track to Flawless Finishes
Welcome to the colorful world of painting 3D printed parts! 🎨 Whether you’re a hobbyist aiming to bring your miniatures to life or an engineer prototyping a sleek product, painting your prints transforms raw plastic into eye-catching masterpieces. Here are some quick, expert tips from the 3D Printed™ team to get you started:
- Always prep your print: Cleaning, sanding, and priming are non-negotiable steps for paint adhesion and smoothness.
- Choose the right primer: Spray primers like Krylon or Montana provide even coverage; Tamiya is excellent for preserving fine details.
- Use multiple thin coats: Whether primer or paint, thin layers prevent drips and reveal details better than one thick coat.
- Sand between coats: Wet sanding with 600-1000 grit paper smooths imperfections and improves finish quality.
- Safety first: Use a NIOSH-approved respirator, gloves, and work in a well-ventilated area to avoid inhaling fumes or dust.
- Experiment with paint types: Acrylics are versatile and beginner-friendly; enamels and lacquers offer durability but require more care.
- Seal your work: A clear coat protects paint and enhances the final look—choose matte, satin, or gloss depending on your style.
Curious how these tips come together in practice? Keep reading—we’ll unravel the full process step-by-step, with pro secrets and product recommendations!
For a quick overview, check out our related article on 3D Printed™ to dive deeper into 3D printing and finishing techniques.
🎨 The Art & Science of Finishing 3D Prints: A Brief History of Post-Processing Perfection
Painting 3D printed parts is not just a cosmetic afterthought; it’s a time-honored craft that bridges technology and artistry. The journey began with rough prototypes in the 1980s, where finishes were crude and functional. As 3D printing tech evolved, so did the desire for professional-looking, detailed models—from architectural models to cosplay props.
Today, post-processing is a multi-disciplinary art involving chemistry (primers and paints), physics (surface adhesion), and fine motor skills (brushwork and airbrushing). Enthusiasts and professionals alike have refined techniques to overcome the unique challenges of plastic surfaces—layer lines, porosity, and material-specific quirks.
The rise of affordable spray primers and airbrush technology democratized high-quality finishes, while online communities on Thingiverse and MyMiniFactory share tips and custom paint recipes. The result? A vibrant ecosystem where anyone can turn a raw print into a gallery-worthy piece.
Want to see how experts do it today? Our step-by-step guides below will show you the ropes!
✨ Beyond the Layer Lines: Why Painting Your 3D Prints is a Game-Changer
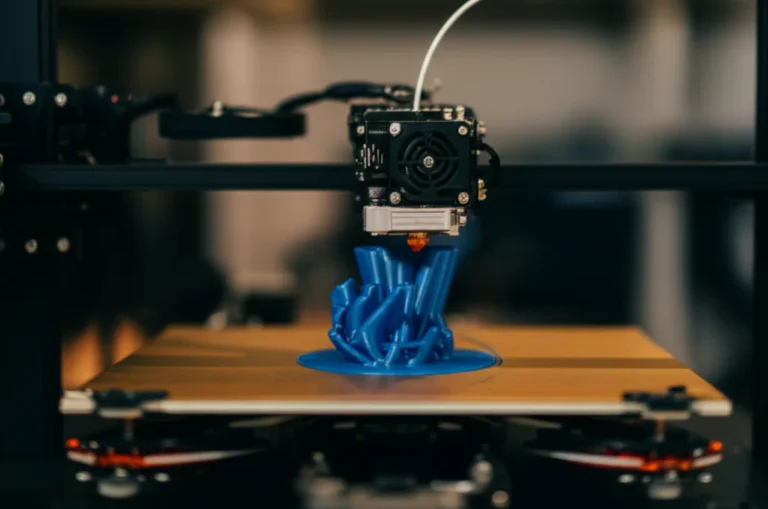
You’ve just pulled your print off the bed, and it looks… well, like a print. Visible layer lines, rough edges, and a dull finish. Painting is the magic wand that transforms this into a smooth, vibrant, and durable object.
Why paint?
- Hide imperfections: Primer and paint fill and mask layer lines and small defects.
- Add realism: Weathering, shading, and metallic effects bring models to life.
- Customization: Choose any color or finish to match your vision.
- Protection: Paint seals the surface against UV, moisture, and handling wear.
But painting isn’t just slapping on color. It’s a careful process that requires preparation, patience, and the right materials. We’ll guide you through every step, from sanding to sealing, so your prints don’t just look good—they look professional.
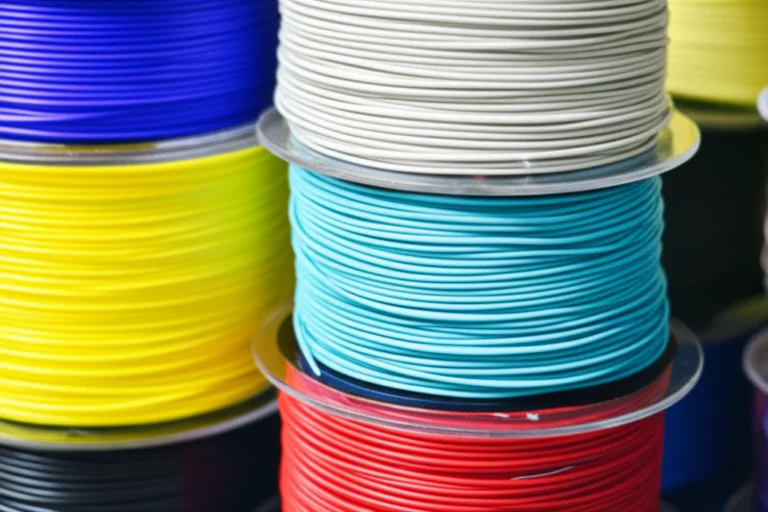
🧵 Choosing Your Canvas: Best 3D Printing Filaments & Resins for Painting Success
Before you pick up that brush, consider your print’s material. Different filaments and resins behave differently under paint. Here’s a breakdown from our 3D Printed™ engineers:
| Material | Paint Adhesion | Surface Smoothness | Prep Difficulty | Best Paint Types | Notes |
|---|---|---|---|---|---|
| PLA | ✅ Good | Moderate | Easy | Acrylics, Spray | Most beginner-friendly; sands well. |
| ABS | ✅ Very Good | Smooth | Moderate | Acrylics, Enamel | Can be chemically smoothed with acetone vapor. |
| PETG | ✅ Moderate | Slightly Glossy | Moderate | Acrylics | Paint may peel if not primed well. |
| Resin (SLA/DLP) | ✅ Excellent | Very Smooth | Moderate | Acrylics, Enamel | Requires thorough post-curing before painting. |
| TPU/Flexible | ❌ Challenging | Soft, Flexible | Hard | Specialized | Paint adhesion poor; flexible paints needed. |
PLA: The Friendly All-Rounder
PLA is the most common filament and the easiest to paint. It sands well and accepts primers and acrylic paints nicely. However, it can be brittle, so handle with care during prep.
ABS: The Smooth Operator (with a Catch!)
ABS’s ability to be smoothed chemically with acetone vapor makes it a favorite for flawless finishes. However, acetone fumes are hazardous, so proper ventilation and PPE are essential.
PETG: The Tough Nut to Crack
PETG’s glossy surface resists paint adhesion unless properly primed. Sanding and using adhesion promoters help, but it’s trickier than PLA or ABS.
Resin (SLA/DLP): The Detail King
Resin prints have fantastic detail and smooth surfaces but require post-curing and cleaning to avoid paint adhesion issues. Use compatible primers and avoid over-sanding to preserve details.
Other Exotics: When Specialty Calls
Materials like nylon, polycarbonate, or flexible filaments require specialized paints and primers, often with limited success. We recommend testing small samples before committing.
For printable models tailored to these materials, explore 3D Printable Objects on 3D Printed™.
🛠️ Your Arsenal of Awesomeness: Essential Tools and Supplies for Painting 3D Prints
Having the right tools is half the battle won. Here’s what our team swears by for a smooth painting experience:
The Smoothing Squad: Sanding & Filling Tools
- Sandpapers: 220, 400, 600, 1000 grit (wet/dry) for progressive smoothing.
- Rotary tools: Dremel or Proxxon with sanding drums and polishing bits.
- Hand files: For controlled removal of supports and rough edges.
- Filler putty: Bondo or automotive putty to fill gaps and seams.
Primer Power-Ups: The Foundation Fixers
- Spray primers: Krylon, Montana, Tamiya (each with different viscosities).
- Brush-on primers: For touch-ups and small areas.
Paint Palooza: Your Color Concoction Kit
- Acrylic paints: Vallejo, Golden, Arteza—great for beginners and professionals.
- Enamels and lacquers: For durable, glossy finishes (requires ventilation).
- Spray paints: Montana Gold or Krylon for quick, even coats.
Brush Brigade & Airbrush Aces: Application Tools
- Brushes: Synthetic and natural bristles, various sizes.
- Airbrush kits: Iwata or Badger compressors and airbrushes for smooth gradients.
Sealing & Protecting: The Finish Line Guardians
- Clear coats: Matte, satin, gloss options from brands like Testors or Rust-Oleum.
- Polishing compounds: For buffing glossy finishes.
Safety First Gear: Your Personal Protection Posse
- Respirators: NIOSH-approved masks for fumes and dust.
- Gloves: Nitrile or latex to protect skin and avoid fingerprints.
- Eye protection: Safety glasses or goggles.
Check out our 3D Printer Reviews for recommended rotary tools and airbrush kits.
🚀 The Foundation of Flawless Finishes: Mastering 3D Print Preparation
The secret sauce to a stunning paint job? Preparation, preparation, preparation! Let’s break down the essential steps.
1. 🧼 Cleaning Your Canvas: Removing Support Structures & Residue
- Carefully remove supports with pliers, knives, or rotary tools.
- Use an old toothbrush and isopropyl alcohol to scrub away dust and oils.
- For resin prints, post-cure fully under UV light to harden the surface.
2. ✨ Smoothing the Way: Sanding & Filling Techniques for Eliminating Layer Lines
The Art of Sanding: Grit by Grit to Perfection
Start with 220-320 grit to remove major imperfections, then progress to 600-1000 grit for a silky finish. Wet sanding reduces dust and scratches.
Filling the Voids: Bondo, Putty, and Beyond
Apply a thin layer of filler to seams or pits, let dry, then sand smooth. Repeat as needed for a flawless surface.
Chemical Smoothing (ABS): The Vapour Magic
Acetone vapor smoothing melts the outer layers of ABS, erasing layer lines. Use a sealed chamber and proper PPE—this is not for the faint-hearted!
Post-Curing Resin Prints: A Critical Step
Incomplete curing leads to poor paint adhesion. Use a UV curing station or sunlight for recommended times to fully harden resin prints.
3. 🛡️ The Primer Power-Up: Why and How to Prime Your 3D Prints for Optimal Adhesion
Primer is the unsung hero of painting 3D prints. It bonds paint to plastic, fills minor flaws, and creates a uniform surface.
Choosing Your Primer: Filler vs. Regular
- Filler primers (e.g., Krylon Filler Primer) fill small imperfections.
- Regular primers provide adhesion but less filling power.
Application Techniques: Spray vs. Brush-On
Spray primers give even coats and are faster; brush-on primers are great for touch-ups or small areas.
Drying & Re-Priming: Patience is a Virtue
Allow each coat to dry fully (usually 15-30 minutes). Sand lightly between coats for the smoothest finish.
For a detailed primer application demo, see the first YouTube video embedded in this article.
🌈 Unleashing Your Inner Artist: Advanced Painting Techniques for 3D Prints
Ready to level up? Here’s how to add depth, realism, and personality to your prints.
1. 🖌️ Brush Painting Brilliance: Precision and Control
Brush Types & Care: Your Tools of the Trade
Use fine synthetic brushes for detail, larger flat brushes for base coats. Clean brushes promptly to preserve bristles.
Paint Thinning & Consistency: The Goldilocks Zone
Thin acrylics with water or medium for smooth application. Too thick? Brush marks show; too thin? Paint runs.
Layering & Blending: Building Depth and Dimension
Apply multiple thin layers, blending colors while wet for gradients and shadows.
Detail Work & Fine Lines: The Miniaturist’s Touch
Use fine-tipped brushes and steady hands to paint eyes, buttons, or weathering effects.
2. 💨 Spray Painting Sensation: Speed and Even Coverage
Can Control: Distance, Sweeps, and Coats
Hold spray can 6-12 inches away, use sweeping motions, and apply multiple light coats.
Ventilation & Environment: Your Spray Booth Setup
Spray in a well-ventilated area or use a spray booth to avoid inhaling fumes and dust.
Masking Magic: Crisp Lines and Multi-Color Designs
Use painter’s tape or liquid mask to protect areas and create sharp color separations.
3. 🌬️ Airbrushing Artistry: Gradients, Smoothness, and Professional Finishes
Airbrush & Compressor Basics: Getting Started
Choose a dual-action airbrush like the Iwata Eclipse with a compressor that maintains steady pressure.
Paint Preparation for Airbrushing: The Perfect Mix
Thin acrylics with airbrush medium to avoid clogging and ensure smooth flow.
Techniques: Shading, Highlights, and Fine Details
Practice layering light coats, feathering edges, and adding highlights for realism.
4. ⚔️ Weathering & Detailing Wonders: Adding Realism and Character
Dry Brushing: Highlighting Edges
Dip brush in paint, wipe most off, then lightly brush raised edges for a worn look.
Washing & Paneling: Grime and Depth
Thin paint washes settle in recesses, simulating dirt and shadows.
Stippling & Sponging: Texture and Damage
Use a sponge or stiff brush to dab paint, creating chipped paint or rust effects.
Battle Damage & Scratches: Telling a Story
Use fine blades or silver paint to add scratches and dents, telling your model’s story.
🔒 Locking in the Look: Sealing and Protecting Your Masterpiece
Your paint job deserves protection! Clear coats lock in color and add desired sheen.
Choosing Your Clear Coat: Matte, Satin, or Gloss?
| Finish Type | Look & Feel | Best For |
|---|---|---|
| Matte | Flat, non-reflective | Realistic models, weathered look |
| Satin | Soft sheen | Balanced, semi-glossy finish |
| Gloss | Shiny, reflective | Toys, props, or glossy effects |
Application Methods: Spray, Brush, or Dip
- Spray clear coats offer even coverage and speed.
- Brush-on clear coats allow control but may leave brush marks.
- Dip coating is rare but effective for small parts.
Curing & Durability: Ensuring Longevity
Allow clear coats to cure fully (24-48 hours). Some sealers can be polished for extra shine.
🤦♀️ Oops! Fixing Common Painting Mishaps on 3D Prints
Mistakes happen! Here’s how to troubleshoot:
Runs, Drips, and Uneven Coats
- Sand smooth once dry, then repaint with thinner coats.
- Use misting spray technique to avoid thick spots.
Paint Peeling or Not Sticking
- Check primer adhesion; re-prime if necessary.
- Clean surface thoroughly before painting.
Dust and Debris in Wet Paint
- Remove with a fine brush or sand lightly after drying.
- Spray in a dust-free environment.
Orange Peel Texture
- Caused by spraying too close or thick coats.
- Sand lightly and reapply with proper technique.
💡 Pro-Level Secrets: Elevating Your 3D Print Painting Game
Want to impress even the toughest critics? Here are some insider tricks:
Custom Paint Mixing: Unleash Your Inner Alchemist
Mix acrylics to create unique shades or weathering effects. Add mediums for texture or gloss.
Lighting for Painting: See Every Detail
Use daylight-balanced lamps to spot imperfections and true colors.
Batch Painting Efficiency: Time-Saving Strategies
Paint multiple parts simultaneously using dowels and rotating stands.
Display & Photography Tips: Showcasing Your Work
Use neutral backgrounds and soft lighting to highlight your paint job’s details.
⚠️ Paint Smart, Print Safe: Essential Safety Considerations
Your health matters as much as your art!
Ventilation is Your Best Friend
Always paint in a well-ventilated space or use a spray booth to avoid inhaling fumes.
Personal Protective Equipment (PPE)
Wear a NIOSH-approved respirator, gloves, and eye protection during sanding and painting.
Proper Disposal of Chemicals and Waste
Dispose of paint cans, solvents, and rags according to local hazardous waste regulations.
🏁 Conclusion: Your Journey to Painted Perfection
Well, there you have it—our ultimate guide to painting 3D printed parts, straight from the trenches of the 3D Printed™ workshop! From prepping your print with meticulous sanding and priming to mastering brushwork, spray painting, and airbrushing, you now hold the keys to transforming raw plastic into a stunning, durable masterpiece. 🎉
Remember, patience and preparation are your best friends. Skipping steps like priming or sanding might save time upfront but will cost you in finish quality and durability. Whether you’re working with PLA, ABS, or resin, choosing the right materials and tools—and respecting safety protocols—makes all the difference.
We teased you earlier about the “magic wand” of painting—now you know it’s not magic but a blend of science, skill, and creativity. So, grab your favorite paints (Vallejo and Montana Gold are personal favorites), prime with care (Krylon and Tamiya never disappoint), and seal your work with confidence.
If you’re wondering which tools to start with, we recommend a Dremel rotary tool for sanding, a quality airbrush kit like Iwata Eclipse for smooth finishes, and a NIOSH-approved respirator for safety. These essentials will elevate your painting game from “meh” to “wow!” in no time.
Now, go forth and paint your prints like the pros! And if you want to explore more 3D printing innovations or printable objects, check out our 3D Printed™ categories.
🔗 Recommended Links: Dive Deeper!
Ready to gear up? Here are some top picks and resources to fuel your painting journey:
-
Dremel Rotary Tools:
Amazon | Walmart | Dremel Official Website -
Krylon Spray Primer:
Amazon | Walmart | Krylon Official Website -
Tamiya Primer & Paints:
Amazon | Hobby Lobby | Tamiya Official Website -
Vallejo Acrylic Paints:
Amazon | Vallejo Official Website -
Montana Gold Spray Paint:
Amazon | Montana Colors Official Website -
Iwata Airbrush Kits:
Amazon | Iwata Official Website -
NIOSH-Approved Respirators:
Amazon | 3M Official Website -
Books:
❓ FAQ: Your Burning Questions Answered
How do you prepare 3D printed parts for painting?
Preparation is the foundation of a great paint job. Start by removing supports and cleaning the print with isopropyl alcohol or water. Next, sand the surface progressively from coarse (220 grit) to fine (600-1000 grit) to smooth layer lines. For ABS, consider acetone vapor smoothing to melt and smooth the surface chemically. Finally, apply a primer to create a uniform, paint-friendly surface that improves adhesion and hides minor imperfections.
What types of paint work best on 3D printed materials?
Acrylic paints are the most versatile and beginner-friendly, compatible with PLA, ABS, and resin prints. Brands like Vallejo and Golden offer excellent pigmentation and flow. For more durable finishes, enamels and lacquers provide glossy, hard coatings but require good ventilation and longer curing times. Spray paints like Montana Gold or Krylon are great for base coats and quick coverage. Always ensure paints are compatible with your print material and primer.
Can you paint 3D prints without sanding them first?
❌ Not recommended. Sanding removes layer lines, smooths rough surfaces, and helps primer and paint adhere better. Skipping sanding often results in uneven paint, visible defects, and poor durability. However, for very small or decorative prints where detail is less critical, minimal sanding may suffice, but expect a less professional finish.
What are the best primers for 3D printed parts?
Spray primers like Krylon Filler Primer and Montana offer even coverage and filling properties. Tamiya primers are thinner and preserve fine details, ideal for miniatures. Choose primers formulated for plastics to ensure good adhesion. For touch-ups, brush-on primers can be used. Multiple thin coats with light sanding between layers yield the best results.
How long should you wait between coats when painting 3D prints?
Typically, 15-30 minutes drying time is sufficient between primer or paint coats, but this depends on paint type and environmental conditions. Acrylics dry faster, while enamels and lacquers may require longer. Always follow manufacturer instructions and ensure each coat is fully dry to avoid trapping solvents, which can cause bubbling or peeling.
Is it necessary to seal painted 3D printed objects?
✅ Yes! A clear coat seals the paint, protects against scratches, UV damage, and moisture, and enhances the finish’s appearance. Choose matte, satin, or gloss finishes depending on your desired look. Clear coats also improve durability, especially for handling or outdoor use.
What techniques improve paint adhesion on 3D printed surfaces?
- Thorough cleaning to remove oils and dust.
- Sanding to create a slightly rough surface for mechanical adhesion.
- Priming with plastic-compatible primers.
- Chemical smoothing (e.g., acetone vapor for ABS) to reduce surface irregularities.
- Using adhesion promoters or specialty primers for challenging materials like PETG.
- Applying multiple thin coats rather than thick layers.
📚 Reference Links: Our Sources of Wisdom
- Formlabs: How to Prime and Paint 3D Prints — A comprehensive primer and painting guide from a leading resin 3D printer manufacturer.
- Gambody: Painting 3D Printed Models: How To — Detailed walkthrough of painting techniques and materials.
- Krylon Official Website — For primers and spray paints designed for plastics.
- Tamiya Official Website — Renowned for modeling primers and paints.
- Vallejo Official Website — Acrylic paints favored by hobbyists and professionals.
- Montana Colors Official Website — High-quality spray paints for art and modeling.
- Dremel Official Website — Rotary tools for sanding and finishing.
- 3M Respiratory Protection — Safety gear for painting and sanding.
For more inspiration and printable models to practice your painting skills, visit Thingiverse and browse our 3D Printable Objects category.
Ready to paint your prints like a pro? Let’s get those brushes moving and those spray cans hissing! 🎨🚀