Support our educational content for free when you purchase through links on our site. Learn more
3D Printed: 20+ Useful, Weird & Wonderful Ideas 🖨️

3D printed objects can be practical, personal, or gloriously odd—and the best results start with matching the design and material to the job. A desktop FDM printer can make organizers, prototypes, and simple replacement parts, while resin printing can capture tiny details and industrial processes can produce much larger or more specialized structures.
We’ve seen a small cable clip tidy up an entire desk, and we’ve seen a replacement part fail because it was printed in the wrong direction. That’s the fun—and the engineering—of 3D printing: a good idea becomes a useful object when you get the material, settings, and design right.
Key Takeaways
- Start with the job, not the printer: decide what the object needs to do, then choose a suitable design, process, and material.
- FDM suits many everyday projects; resin excels at fine detail. Each has different setup, finishing, and safety requirements.
- PLA is beginner-friendly, but not right for every environment. Check a material’s specifications for heat, outdoor use, and mechanical demands.
- Treat replacement parts and experimental prints as prototypes until you’ve checked fit, function, and durability.
- Inspect model licenses before sharing or selling prints. A downloadable file is not automatically free for commercial use.
- Use a slicer preview and watch the first layer. Catching a problem early can save a long print—and a roll of filament.
Table of Contents
- ⚡️ Quick Tips and Facts About 3D Printing
- 🧭 What Does “3D Printed” Mean?
- 📜 A Short History of 3D Printing and Additive Manufacturing
- 🖨️ How 3D Printing Works
- From Digital Model to Finished Part
- The Role of Slicers, G-code, and STL Files
- 🔧 The Main Types of 3D Printing
- FDM and FF Filament Printing
- SLA and MSLA Resin Printing
- SLS, MJF, and Industrial Powder Printing
- Metal, Concrete, and Other Specialized 3D Printing
- 🧵 3D Printing Materials Explained
- PLA, PETG, ABS, ASA, and Flexible Filaments
- Resins, Nylon, Composites, and Metal Powders
- Choosing the Right Material for Your Project
- 🎨 What Can You Make with a 3D Printer?
- Useful Home Repairs and Replacement Parts
- Miniatures, Cosplay, Toys, and Art
- Prototypes, Tools, and Custom Manufacturing
- 3D-Printed Homes, Buildings, and Infrastructure
- Experimental Projects: Printed Records and Moving Parts
- 💻 3D Design Software and Finding Printable Models
- CAD Programs for Beginners and Professionals
- Where to Download 3D-Printable STL and 3MF Files
- How to Check Model Licensing and Copyright
- 📐 Designing a Model for 3D Printing
- Wall Thickness, Clearances, Overhangs, and Supports
- Preparing a Model in OpenSCAD
- Editing Audio or Music for a 3D-Printed Record
- 🛠️ How to 3D Print a Model: Step-by-Step
- Choose a Printer, Material, and Model
- Slice the File and Set Print Parameters
- Level the Bed and Start the Print
- Remove Supports and Finish the Part
- ⚙️ Essential 3D Printer Settings
- Layer Height, Nozzle Temperature, and Print Speed
- Infill, Walls, Supports, and Build-Plate Adhesion
- How to Improve Strength, Accuracy, and Surface Finish
- 🧯 Troubleshooting Common 3D Printing Problems
- Warping, Poor Bed Adhesion, and First-Layer Failures
- String, Clogs, Under-Extrusion, and Layer Shifts
- Resin Print Failures and Safe Cleanup
- 🧼 3D Printer Maintenance and Workshop Safety
- Cleaning, Lubrication, and Routine Checks
- Filament Storage, Ventilation, and Resin Handling
- 💰 3D Printing Costs, Waste, and Environmental Impact
- 🛒 Choosing a 3D Printer for Your Needs
- Best Features for Beginners
- When to Choose FDM, Resin, or a 3D Printing Service
- Popular 3D Printer Brands and What to Compare
- 🏭 3D Printing Applications Across Industries
- Healthcare, Dental, and Assistive Devices
- Aerospace, Automotive, and Product Design
- Education, Architecture, and Construction
- 🔮 The Future of 3D-Printed Products and Manufacturing
- ✅ Conclusion
- 🔗 Recommended Links
- ❓ FAQ
- 📚 Reference Links
⚡️ Quick Tips and Facts About 3D Printing
For a fast tour of useful, funny, and delightfully odd projects, start with our guide to 🤯 What Are 3D Printed Items? 16+ Things You Can Actually Make (2026). The short answer: if you can model it—or find a suitable printable file—you can probably make it, but the right printer, material, and design determine whether the result is a useful part or a very convincing paperweight.
| Quick fact | What it means for your project |
|---|---|
| 3D printing builds a part from a digital model, usually layer by layer. | The shape is not the only consideration: orientation, supports, and layer direction can affect strength and finish. |
| FDM printers melt and deposit thermoplastic filament. | They’re versatile for organizers, brackets, prototypes, toys, and many household projects. |
| Resin printers cure liquid photopolymer with light. | They can capture fine detail for miniatures and small models, but resin handling and post-processing take extra care. |
| PLA is easy to print, but it is not suitable for every environment. | Check heat and strength needs before making parts for a hot car, outdoor use, or load-bearing applications. |
| A printable file is not automatically safe or functional. | Inspect dimensions, model licensing, intended use, and any safety-critical requirements before printing. |
Our quick recommendations:
- ✅ Start with a practical, low-risk project: a cable clip, drawer divider, plant label, or simple desk organizer.
- ✅ Measure the real object before modeling a replacement part. A few millimeters can be the difference between “fits perfectly” and “fits the recycling bin.”
- ✅ Use a slicer preview to inspect supports, walls, and the first layer before committing filament.
- ❌ Don’t print food-contact, medical, electrical, or load-bearing parts by guesswork. Material, design, printer cleanliness, and applicable regulations matter.
- ❌ Don’t assume a print is waterproof, UV-resistant, or heatproof just because it looks sturdy.
We’ve seen a modest cable-management print make a desk feel instantly less chaotic. We’ve also watched an attractive replacement clip fail because the model was designed with the wrong orientation. That little lesson follows us through the rest of this guide: successful 3D printing starts before the printer starts moving.
🧭 What Does “3D Printed” Mean?
“3D printed” describes an object made by a process that forms material into a three-dimensional shape from digital design data. The process is also called additive manufacturing, because material is added to create the part rather than carved away from a block.
That broad definition covers a desktop printer making a small organizer, a resin machine producing a miniature, and a construction system depositing cementitious material to build a wall. The machines, materials, scale, and rules are different—but the shared idea is digitally guided fabrication.
A printed object is a design plus a process
A 3D model alone is not the finished object. To make a usable part, you need to consider:
- Geometry: Does the shape fit, function, and print without impossible overhangs?
- Material: Does it need flexibility, stiffness, heat resistance, or outdoor durability?
- Print process: Is the part best suited to filament, resin, powder, or another method?
- Orientation: Which direction should the layers run to support the expected forces?
- Post-processing: Will it need support removal, curing, sanding, sealing, or assembly?
For example, a small phone stand might print in PLA with minimal fuss. A clip exposed to sunlight and summer heat might need a more suitable material and design. The model is the recipe; the print settings and material are the cooking method.
3D printing versus traditional manufacturing
| Consideration | 3D printing | Traditional manufacturing |
|---|---|---|
| Best fit | Customized parts, prototypes, complex geometry, short runs | High-volume production, established parts, consistent large-scale output |
| Setup | Often little dedicated tooling for a new model | May require molds, dies, fixtures, or specialized tooling |
| Design freedom | Can produce internal channels and complex shapes, within process limits | Some shapes may require more assembly or machining steps |
| Part properties | Depend on the technology, material, and build direction | Depend on the material and manufacturing process |
| Economics | Often attractive when customization or low volume matters | Often attractive when producing large quantities |
Neither method wins every contest. A 3D printer is not a magical replacement for every factory, but it can make certain custom or low-volume parts easier to produce. For an overview of how the field is defined, see the National Institute of Standards and Technology’s additive manufacturing resources.
📜 A Short History of 3D Printing and Additive Manufacturing

Modern 3D printing grew from industrial research into processes that could build physical objects from digital data. Over time, techniques such as stereolithography, material extrusion, and powder-bed fusion developed into distinct ways of making parts.
As patents expired, electronics improved, and online design communities grew, desktop 3D printers became more accessible. Open-source projects and shared model libraries helped turn additive manufacturing from a specialist tool into something makers, schools, designers, and small businesses could explore.
The timeline below is deliberately broad: different technologies had their own development paths, and no single milestone explains the whole story.
| Period | What changed |
|---|---|
| Early development | Researchers and manufacturers explored processes for producing three-dimensional objects from digital designs. |
| Industrial adoption | Additive processes found uses in protyping and specialized manufacturing. |
| Wider access | Lower-cost hardware and shared models broadened interest among hobbyists, educators, and small businesses. |
| Current era | Applications range from desktop prints to medical devices, industrial parts, and large-scale construction projects. |
For a standards-focused overview of additive manufacturing terminology and methods, consult NIST and the ASTM International additive manufacturing standards information. The history is still being written, especially as large-format printing moves from eye-catching demonstration to carefully evaluated construction practice.
🖨️ How 3D Printing Works
Most 3D-printing workflows begin with a digital model and end with a physical part. Between those endpoints, software converts the model into instructions the printer can follow. The specifics vary by technology, but the general journey is easy to remember: design, prepare, print, finish, inspect.
From Digital Model to Finished Part
A typical desktop workflow looks like this:
- Create or obtain a 3D model. Design one in CAD software, scan an object, or download a model you’re permitted to use.
- Check the model. Confirm its dimensions, orientation, wall thickness, and intended purpose.
- Open it in a slicer. A slicer prepares the model for a specific printer and material.
- Choose print settings. Set parameters such as layer height, walls, infill, speed, and supports.
- Preview the toolpath. Look for missing sections, unnecessary supports, thin features, or a risky first layer.
- Print the part. Watch the first layers and check for unexpected errors.
- Finish and inspect. Remove supports, clean or cure the part as required, and test fit or function safely.
The NIST overview of additive manufacturing explains the wider technology landscape. For hands-on project ideas, browse our 3D Printable Objects guides.
The Role of Slicers, G-code, and STL Files
STL is a common 3D model format, while 3MF can carry additional model information. Neither format, by itself, guarantees that a model is printable or correctly scaled. A slicer translates model geometry into a printer-specific toolpath, often saved as G-code or another machine-readable format.
| Term | What it is | Why you’ll care |
|---|---|---|
| STL | A widely used mesh file format | Commonly shared, but may not include richer project metadata |
| 3MF | A 3D manufacturing file format | Can preserve more information than a basic mesh |
| Slicer | Software that prepares a model for printing | Where you set supports, layer height, infill, and other parameters |
| G-code | Instructions used by many 3D printers | Tells compatible machines how to move and operate |
| Profile | A group of machine and material settings | A helpful starting point, not a guarantee of a perfect print |
Popular slicers include PrusaSlicer, UltiMaker Cura, and OrcaSlicer. Use the software and machine profiles recommended for your printer, then validate unfamiliar settings with a small test print.
🔧 The Main Types of 3D Printing
“3D printer” is a bit like saying “vehicle”: a bicycle and a cement truck both move things, but you wouldn’t choose one by the same checklist. Here are the main technologies you’re likely to encounter.
| Technology | How it forms parts | Often used for | Main trade-off |
|---|---|---|---|
| FDM/FFF | Extrudes softened thermoplastic filament | Prototypes, organizers, functional parts, large models | Visible layer lines; strength depends on geometry and orientation |
| SLA/MSLA | Cures liquid photopolymer resin with light | Detailed miniatures, models, dental applications | Requires resin handling, washing, curing, and waste care |
| SLS | Uses a laser to fuse polymer powder | Complex parts and small-batch production | Industrial equipment and powder handling are more involved |
| MJF | Uses agents and heat to fuse powder | Production-oriented polymer parts | Typically accessed through professional manufacturing services |
| Metal powder processes | Fuse or bind metal feedstock or powder | Specialized industrial parts | Process control, finishing, and safety demands are substantial |
| Concrete printing | Deposits construction material in programmed paths | Building components and construction projects | Engineering codes, reinforcement, site conditions, and inspection remain essential |
NIST describes additive manufacturing as a family of processes, not one single machine type. That distinction matters when comparing print quality, material properties, safety, and cost. Explore our 3D printer reviews for desktop-machine comparisons.
FDM and FF Filament Printing
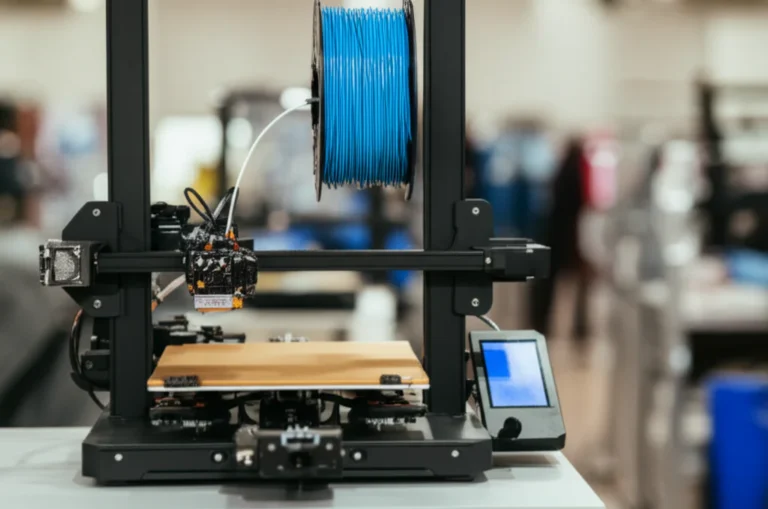
Fused deposition modeling (FDM) and fused filament fabrication (FFF) refer to material-extrusion printing, where a nozzle deposits softened thermoplastic in successive paths. The terms are commonly used for the same broad process; FDM is a trademarked term.
FDM is a strong choice for many makers because filament comes in a wide range of colors and formulations, and the workflow is comparatively approachable. It can produce everything from simple organizers to engineered prototypes, provided the design and material match the job.
Benefits:
- Broad selection of filament types.
- Practical for many medium- and large-sized parts.
- Parts can often be made with relatively simple post-processing.
- Convenient for iterative design: adjust, reprint, repeat.
Drawbacks:
- Layer lines are usually visible.
- Fine details can be limited by nozzle size and settings.
- Parts may be weaker in some directions because the layers are not equally strong in every orientation.
- Poor tuning can cause warping, string, or weak layer bonding.
SLA and MSLA Resin Printing
Resin printers use light to cure photopolymer resin. In SLA, a laser traces the layer; MSLA systems use a masked light source, commonly an LCD, to expose a layer pattern.
Resin printing is often chosen for detailed miniatures, small models, and intricate surfaces. The trade-off is a more involved handling routine: uncured resin can irritate skin, and parts generally need washing and post-curing according to the material manufacturer’s instructions.
Resin printing makes sense when: fine detail is the priority and you have a suitable workspace, protective equipment, and a responsible plan for cleaning and waste.
It may not make sense when: you need a low-maintenance printer for large household parts, don’t have appropriate ventilation and handling practices, or want to avoid post-processing.
For chemical handling and workplace safety guidance, consult the NIOSH chemical safety resources and the safety data sheet supplied with the specific resin.
SLS, MJF, and Industrial Powder Printing
Powder-bed processes fuse or bind selected regions of a powder layer to form a part. Selective laser sintering (SLS) and Multi Jet Fusion (MJF) are among the processes used for polymer parts.
These methods can be useful for complex geometries and production runs because surrounding powder may support features during printing. That doesn’t mean every part emerges ready to use: depowdering, surface finishing, material selection, and design review still matter.
If you’re evaluating a part for professional use, ask the service provider about:
- Material grade and documented properties.
- Dimensional tolerances and inspection.
- Surface finish and post-processing.
- Build orientation and manufacturing constraints.
- Any certifications required for the application.
Metal, Concrete, and Other Specialized 3D Printing
Metal additive manufacturing and construction-scale printing get plenty of attention—and for good reason—but they are specialized engineering processes, not scaled-up hobby printers. Metal workflows may involve powder, binders, furnaces, machining, and formal inspection. Concrete printing requires suitable feedstock, controlled deposition, structural design, and compliance with applicable codes.
The Army’s Fort Bliss report describes large-scale construction using ICON technology and collaboration with the U.S. Army Corps of Engineers. That is a very different engineering challenge from printing a desktop bracket, even though both use digital instructions to build material into a shape.
🧵 3D Printing Materials Explained
Material choice affects appearance, strength, flexibility, heat resistance, durability, and print difficulty. Start by asking what the part needs to survive, not which filament color looks best in the spool photo.
| Material family | Common strengths | Watch-outs |
|---|---|---|
| PLA | Accessible, easy to print, widely available | Can soften in heat; not ideal for every outdoor or mechanical use |
| PETG | Useful balance of toughness and ease for many projects | Can string; print behavior varies by brand and profile |
| ABS/ASA | Often selected where heat or outdoor performance is needed | Usually benefits from controlled printing conditions; check manufacturer guidance |
| TPU | Flexible and useful for compliant parts | Can be slower or more demanding to feed consistently |
| Nylon | Tough and useful for some engineering applications | Moisture-sensitive; drying and compatible hardware may be needed |
| Resin | Fine surface detail in many applications | Requires careful handling, washing, curing, and disposal |
| Composite filament | Can add specific characteristics or appearance | Abrasive fillers may wear standard nozzles |
Material performance varies by formulation and print process. Check the datasheet for the exact product; a generic material name is not a complete specification.
PLA, PETG, ABS, ASA, and Flexible Filaments
- PLA: A popular first filament for decorative prints, prototypes, and many indoor projects. Don’t assume it will retain its shape in high heat.
- PETG: Often useful for parts that need more toughness than basic PLA, though strings and blobs can show up if settings are poorly tuned.
- ABS: A common engineering plastic, but printing it can require more attention to enclosure, ventilation, and warping.
- ASA: Often chosen for weather-exposed parts, subject to the particular material’s datasheet and print conditions.
- TPU: A flexible filament family used for items such as bumpers, grips, and protective features. It is not automatically safe for every skin-contact or food-contact use.
We keep a simple habit: test a new material with a small, low-risk object before trusting it with a real job. A temperature tower or calibration print can reveal whether the manufacturer’s recommended settings suit your machine.
Resins, Nylon, Composites, and Metal Powders
These materials can be excellent for particular applications, but they ask more of the printer—and the operator.
- Resin: Choose based on the application and follow the manufacturer’s instructions for gloves, washing, curing, ventilation, and disposal.
- Nylon: Store dry and use a suitable setup; moisture can affect print quality.
- Fiber-filled composites: Confirm whether your nozzle and drive components can handle abrasive material.
- Metal powders or bound metal feedstocks: Use qualified services and follow the process-specific safety and inspection requirements.
For health and safety guidance, refer to the material’s safety data sheet and relevant NIOSH resources. A material name on a spool or bottle is not a substitute for a verified specification.
Choosing the Right Material for Your Project
| If you need… | Consider… | Before printing |
|---|---|---|
| An indoor organizer | PLA may be suitable | Check heat exposure and expected load |
| A tougher everyday part | PETG or another documented material | Verify dimensions and test the actual part |
| An outdoor component | A material with relevant weather-resistance data, such as a suitable ASA formulation | Consider sunlight, water, temperature cycling, and fasteners |
| A flexible bumper or grip | TPU or another flexible filament | Confirm softness, compatibility, and fit |
| A detailed miniature | Resin or fine-nozzle FDM, depending on detail needs | Plan for supports and finishing |
| A safety-critical part | A qualified material and controlled process | Get appropriate engineering validation rather than guessing |
🎨 What Can You Make with a 3D Printer?
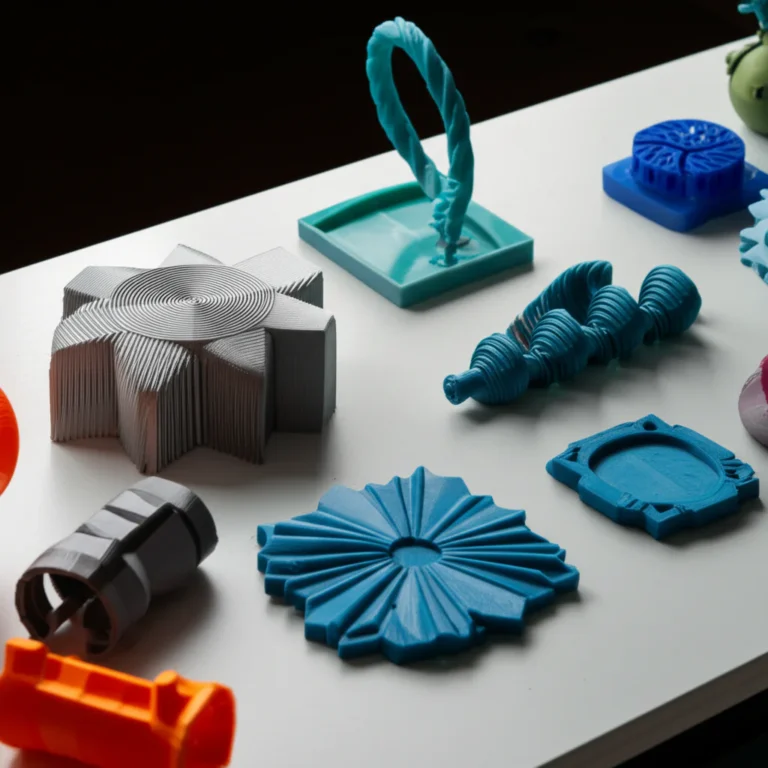
The most useful projects are often ordinary: a label that finally fits the drawer, a clip that keeps a cable off the floor, or a spacer that solves a very specific household annoyance. Then there are the wonderfully unnecessary prints—the ones that exist because someone thought, “What if my desk had a tiny banana fan?”
The 50 Awesome 3D Prints video offers a lively snapshot of both sides: phone stands, organizers, fidgets, masks, collectibles, custom accessories, and multi-part builds. Treat the video as inspiration, not proof that every design is safe or fit for a particular job. Check the model, materials, licensing, and intended use before printing.
For more project inspiration, browse 3D Printable Objects.
Useful Home Repairs and Replacement Parts
Practical household prints include:
- Cable clips and cord guides.
- Drawer dividers and small-bin organizers.
- Plant labels and seed-starting tools.
- Hooks and holders for lightweight items.
- Knobs, spacers, brackets, and non-critical replacement parts.
- Dustpan accessories, remote holders, or custom storage.
Repair tip: Measure the part that failed, but also think about why it failed. If a clip broke under repeated bending, copying its dimensions exactly may repeat the problem. A redesigned profile or more suitable material might work better.
Do not use a printed part as an unverified replacement for a component that carries significant weight, contains heat or pressure, protects against electrical hazards, or contributes to a vehicle or medical device’s safety.
Miniatures, Cosplay, Toys, and Art
Resin printers can reproduce small details, while FDM printers suit larger props and costume components that can be assembled and finished. The video’s masks, figures, themed containers, and fidget toys show how a print can be both a project and a conversation starter.
For cosplay or wearable items:
- Check the fit before printing a full-size part.
- Split large objects into sections that suit your build volume.
- Design sturdy attachment points.
- Sand, fill, and finish with suitable protective measures.
- Keep ventilation and material safety in mind during post-processing.
For toys and items for children, inspect for sharp edges, detachable small parts, material suitability, and age appropriateness. A toy-shaped object isn’t automatically a compliant children’s product.
Prototypes, Tools, and Custom Manufacturing
A printed prototype can help answer questions before a more expensive production run: Does this grip fit? Can a lid clear that hinge? Is the enclosure too bulky? A quick test piece can save a great deal of redesign.
We like printing only the section that answers the next question. If you’re testing a snap-fit, there’s no need to print the entire housing just to find out the tab is too stiff. Make the smallest useful experiment, learn from it, then revise.
For projects beyond a home printer’s capabilities, a manufacturing service may offer resin, powder, or metal processes. Ask for material data and tolerance information rather than assuming every technology can achieve the same result.
3D-Printed Homes, Buildings, and Infrastructure
Construction-scale additive manufacturing can place building material along programmed paths, but printed walls are only one part of a building. Design, foundations, utilities, reinforcement, weatherproofing, local building codes, inspection, and site conditions all remain relevant.
The Army reports that the Fort Bliss project involved 10 planned transient-training barracks, with the first two opened in the announcement. Its report says printing all 10 buildings took 58 days, while the full construction and delivery timeline involved additional work. The Army also reports an estimated 9.3% cost saving against traditional military-construction benchmarks for that project. These are project-specific figures—not a promise that every 3D-printed building will be faster or cheaper.
Read the project details in the U.S. Army report, and explore more of our coverage on 3D Printing in Architecture.
Experimental Projects: Printed Records and Moving Parts
Experimental prints are fun because they make the limits visible. A mechanism might work beautifully at a small scale but bind when enlarged. A printed musical object may produce sound, yet sound quality, wear, and compatibility can differ from a commercial product.
The Instructables summary available for a project on 3D printing records for a Fisher-Price toy record player contains only cookie and privacy notices, so it does not provide verified build instructions, materials, dimensions, or settings. We won’t invent those details. If you try a similar project, check the mechanism’s dimensions, sound requirements, material limits, and licensing—and expect careful experimentation.
A similar caution applies to claims about a 3D-printed guitar pick: the supplied summary of the Prusa article contains consent notices, not the article’s technical details. The useful takeaway is not a made-up recipe; it’s that experimental prints should be treated as prototypes until tested for fit, function, and durability.
💻 3D Design Software and Finding Printable Models
You can start with a model someone else created, make a remix, or design from scratch. Pick the path that suits your goal: downloading a desk hook is quick; designing a replacement component is a measurement and iteration project.
Explore our 3D Design Software guides for more on design tools.
CAD Programs for Beginners and Professionals
| Software | Good starting point for | Notes |
|---|---|---|
| Tinkercad | Beginners and simple shapes | Browser-based, approachable for basic models |
| Onshape | Parametric CAD and collaborative work | Browser-based tools and structured design workflow |
| Autodesk Fusion | Product design and mechanical parts | Feature-rich; check current licensing and eligibility terms |
| FreeCAD | Open-source parametric CAD | Flexible, with a learning curve |
| OpenSCAD | Scripted, parameter-driven geometry | Particularly useful when dimensions need to be adjusted by code |
| Blender | Organic shapes, art, and sculpting | Excellent for creative forms; mechanical dimensions may need extra care |
No one tool is best for everything. For a dimensioned bracket, use a CAD workflow; for an organic creature or sculpted prop, choose a tool built for freeform modeling. Official software documentation is the best place to confirm current features and licensing.
Where to Download 3D-Printable STL and 3MF Files
Model libraries include free, paid, and mixed-license designs. Before downloading, check:
- File formats and model scale.
- User photos or tested print information.
- Remix and commercial-use permissions.
- Design revisions and known issues.
- Whether the model needs supports, hardware, or multiple parts.
Useful places to explore include Thingiverse, Printables, MakerWorld, MyMiniFactory, Cults3D, and Yegi. A popular download count is a clue—not a quality certification. Read the description and inspect the model before slicing.
For practical home projects, start with our 3D Printable Objects category.
How to Check Model Licensing and Copyright
A file being downloadable does not mean it can be sold, remixed, or redistributed. Read the license attached to the model and follow its conditions. Some creators allow personal use but prohibit commercial use; others require attribution or restrict modified versions.
Before selling a print:
- Confirm that the license permits commercial use.
- Check whether attribution is required.
- Confirm that the model is not infringing someone else’s protected work.
- Keep a record of the license and source.
- Ask the creator if the terms are unclear.
Fan art and recognizable branded characters deserve special caution. A model appearing on a sharing site does not automatically grant commercial rights.
📐 Designing a Model for 3D Printing
A good printable model is not merely a digital sculpture. It needs to work with the chosen printer, material, and expected use.
Before printing, check that the model is:
- Correctly scaled and oriented.
- Watertight or otherwise accepted by your slicer.
- Thick enough to produce reliable walls.
- Designed with realistic clearances for moving or mating parts.
- Supported where required, without burying critical surfaces in support material.
Wall Thickness, Clearances, Overhangs, and Supports
The right minimum feature size depends on the printer, nozzle, material, orientation, and use. Don’t blindly copy a number from a different machine. Use a small calibration print to test whether fine walls, holes, and clearances behave as expected.
| Design feature | Why it matters | Practical approach |
|---|---|---|
| Wall thickness | Very thin walls may not print consistently | Match wall design to nozzle and slicer behavior |
| Clearance | Parts may fuse or fit too loosely | Test a small tolerance sample first |
| Overhang | Step shapes can sag without support | Adjust orientation or add support where needed |
| Bridging | Long unsupported spans can drop | Shorten the span, add support, or tune settings |
| Snap-fit | Tabs can crack or become too stiff | Use material-appropriate geometry and prototype the joint |
| Holes | Printed holes may differ from CAD dimensions | Print a test coupon and adjust the model |
A slicer preview can reveal problems, but it cannot guarantee a part’s strength. For parts that carry meaningful loads, validate the design and material rather than relying on a pretty preview.
Preparing a Model in OpenSCAD
OpenSCAD creates models through code, which makes it useful for objects with repeatable dimensions or adjustable parameters. A simple workflow is:
- Define parameters such as width, height, and thickness.
- Build geometry from primitives like cubes and cylinders.
- Combine shapes using Boolean operations.
- Render and inspect the model for unexpected geometry.
- Export a mesh in a suitable format.
- Open it in a slicer and verify scale, orientation, and printability.
OpenSCAD’s official site provides downloads and documentation. If you’re learning a new tool, begin with a simple box or spacer before scripting an interlocking mechanism. It’s easier to debug a cube than a seven-part hinge.
Editing Audio or Music for a 3D-Printed Record
A printed record project combines sound, geometry, playback hardware, and material behavior. It is not just a matter of turning audio into an STL: groove geometry, playback speed, stylus compatibility, and surface quality all matter.
Because the supplied Instructables summary does not include verified technical instructions, we can’t responsibly provide a specific record design or print recipe. If you explore the concept, treat it as an experimental engineering project:
- Identify the player and its playback requirements.
- Confirm the permitted audio source and any relevant rights.
- Check whether the record size and groove format match the player.
- Test a small sample and assess playback without risking valuable equipment.
- Don’t assume a plastic print will reproduce audio like a manufactured record.
🛠️ How to 3D Print a Model: Step-by-Step
A reliable print is usually the result of several small decisions made in the right order. Here’s the workflow we use for a straightforward FDM project.
Choose a Printer, Material, and Model
- Define the job. Is it decorative, functional, flexible, detailed, or large?
- Choose the technology. FDM is a versatile starting point for many household objects; resin is better suited to many detailed small models.
- Choose a material based on conditions. Consider heat, moisture, sunlight, bending, and expected load.
- Confirm the model fits the build area. Check dimensions before opening the slicer.
- Inspect the license and design notes. Look for required hardware, orientation advice, and print reports.
- Check the printer’s material compatibility. Follow the manufacturer’s guidance.
If you’re comparing machines, see our 3D Printer Reviews.
Slice the File and Set Print Parameters
- Import the model into your printer’s slicer.
- Confirm scale and orientation.
- Select the correct printer and material profile.
- Set layer height and print speed using a known starting profile.
- Add walls and infill appropriate to the part’s use.
- Add supports only where the geometry needs them.
- Preview the toolpath layer by layer.
- Save the machine-ready file to the correct media or send it through the supported workflow.
Trust a validated starting profile before chasing speed. A slower successful print is more useful than a fast one that turns into spaghetti halfway through.
Level the Bed and Start the Print
- Clean the build surface using the printer maker’s recommended method.
- Check that the plate is installed correctly and clear of debris.
- Run bed leveling or first-layer calibration if required.
- Load the correct filament and confirm the nozzle is ready.
- Start the job and observe the first layer.
- Stop the print if the material is not adhering or the nozzle is dragging.
- Continue monitoring according to your machine’s safety guidance.
The first layer is the foundation of the whole print. If it is uneven or poorly adhered, the rest of the job may be doomed before the second layer arrives.
Remove Supports and Finish the Part
When the print cools or completes its required curing process:
- Remove the part using the printer’s recommended technique.
- Take off supports carefully to avoid damaging thin features.
- Wash and post-cure resin parts according to the resin manufacturer’s instructions.
- Sand or finish only where appropriate, using suitable protective measures.
- Test the fit and function in a low-risk setting.
- Record what worked so you can repeat it next time.
For moving assemblies, test each joint gently. If something binds, don’t force it: check for support remnants, dimensions, orientation, and clearance.
⚙️ Essential 3D Printer Settings
Slicer settings are connected. Changing one can affect print time, surface finish, strength, and reliability. Start with a known-good profile and adjust one variable at a time.
Layer Height, Nozzle Temperature, and Print Speed
- Layer height: Smaller layers can improve vertical detail, but often increase print time. Larger layers can be efficient for coarse parts.
- Nozzle temperature: Use a range supported by the filament manufacturer, then tune for your specific printer and material.
- Bed temperature: Follow the material and printer guidance; a hotter or colder bed is not a universal fix.
- Print speed: Higher speeds can affect surface quality and layer bonding. Use the machine’s validated limits rather than trusting a marketing maximum.
- Cooling: Too much or too little cooling can affect bridges, overhangs, and layer bonding.
If a print looks rough, don’t change five settings at once. Pick the most likely cause, make one controlled adjustment, and compare the result.
Infill, Walls, Supports, and Build-Plate Adhesion
| Setting | What it changes | Good habit |
|---|---|---|
| Walls/perimeters | The outer shell of the part | Add walls when shell strength and stiffness matter |
| Infill | The internal structure | Choose a pattern and density based on geometry and use |
| Supports | Temporary material beneath overhangs | Orient the model to reduce support where possible |
| Brim or raft | Extra material around or beneath a print | Use when appropriate for bed adhesion and shape stability |
| Seam placement | Where the outer wall starts and stops | Place it on a less-visible or less-critical area |
More infill does not automatically mean a stronger part. Wall count, material, orientation, shape, and layer bonding can matter just as much. For a functional design, test the part under safe, realistic conditions.
How to Improve Strength, Accuracy, and Surface Finish
- Strength: Align layers with the expected load where practical; add material to the areas that actually need it.
- Accuracy: Calibrate the machine and print dimension tests before making tight-fitting parts.
- Finish: Choose an orientation that hides important surfaces from supports and seams.
- Repeatability: Keep notes on printer, material, settings, and any changes.
- Assembly: Use test coupons for hinges, snap-fits, threads, and press-fit parts.
A useful part isn’t necessarily the one with the highest infill or smallest layer height. It’s the one that meets its job requirements reliably and safely.
🧯 Troubleshooting Common 3D Printing Problems
When a print fails, pause before blaming the printer. Filament condition, room conditions, bed cleanliness, model design, and settings can all be involved. Diagnose from the evidence rather than changing everything at once.
Warping, Poor Bed Adhesion, and First-Layer Failures
Common causes include a dirty build surface, incorrect first-layer setup, material shrinkage, drafts, or unsuitable settings.
Try this order:
- Clean the surface using the printer maker’s recommended method.
- Recheck the bed and first-layer calibration.
- Confirm that the selected profile matches your material.
- Inspect the model’s contact area with the plate.
- Use an appropriate brim or other adhesion aid only if needed.
- For warp-prone materials, follow the manufacturer’s enclosure and environmental recommendations.
If a corner lifts, don’t immediately raise the bed temperature. First check cleanliness, leveling, and airflow; a temperature change alone may not solve the root problem.
String, Clogs, Under-Extrusion, and Layer Shifts
- String: Check filament dryness, temperature, and retraction settings.
- Clogs: Confirm that the nozzle and feed path are clear, following the printer maker’s procedure.
- Under-extrusion: Check for a partial clog, slipping feeder, poor filament path, or incorrect material settings.
- Layer shifts: Inspect belts, puleys, collisions, and motion components according to the manufacturer’s maintenance guidance.
- Blobs or rough seams: Review nozzle cleanliness, seam placement, temperature, and extrusion settings.
Change one likely cause at a time. If the same failure occurs across different models, inspect the machine and material; if it happens only with one model, examine the geometry and slicer preview.
Resin Print Failures and Safe Cleanup
Resin failures can involve poor plate adhesion, inadequate supports, exposure settings, contaminated resin, or a post-processing error. Follow the printer and resin manufacturers’ instructions rather than using a generic cure time or cleaning method.
- Wear the protective equipment specified for the resin.
- Keep uncured resin away from skin and eyes.
- Use suitable ventilation and designated cleaning containers.
- Don’t pour uncured resin or contaminated wash liquid down a drain.
- Follow local rules and product guidance for disposal.
For safety information, consult the specific resin’s safety data sheet and NIOSH resources. If a print fails, remove residue carefully and inspect the vat and film as directed by the printer manufacturer.
🧼 3D Printer Maintenance and Workshop Safety
A clean, maintained machine is easier to troubleshoot. Before maintenance, follow the printer manufacturer’s instructions and make sure the machine is in the required safe state.
Cleaning, Lubrication, and Routine Checks
A practical maintenance rhythm includes:
- Remove debris from the build plate and printer interior.
- Check the nozzle and filament path for buildup.
- Inspect belts, fasteners, and moving parts.
- Lubricate only where and how the manufacturer specifies.
- Replace worn components with compatible parts.
- Keep a short log of issues and maintenance.
Avoid improvised lubricants or disassembly steps that conflict with the machine’s manual. A little scheduled care beats troubleshooting a mystery woble during a long print.
Filament Storage, Ventilation, and Resin Handling
- Store filament according to the material maker’s recommendations; some materials are sensitive to moisture.
- Keep spools clean and prevent tangles.
- Use adequate ventilation suited to the printer and materials.
- Review safety information for the specific filament, resin, or finishing chemical.
- Keep children and pets away from hot parts, moving components, resin, and workshop chemicals.
- Use appropriate eye and skin protection when required.
FDM is not emissions-free, and resin printing is not a casual tabletop craft. Choose equipment and workspace controls based on the material, printer, and local safety guidance. The NIOSH website provides occupational safety resources; product-specific documentation should guide handling.
💰 3D Printing Costs, Waste, and Environmental Impact
The material used by a print is only one part of its total cost. Also consider failed prints, supports, electricity, replacement nozzles, post-processing, design time, and machine wear.
| Factor | What to consider |
|---|---|
| Material use | Estimate the model, supports, brim, and likely test prints |
| Electricity | Print duration and machine power use vary by setup |
| Waste | Failed prints and supports may not be recyclable through curbside programs |
| Durability | A longer-lasting repair can be more useful than repeated disposable replacements |
| Production volume | A home printer may suit custom low-volume parts; mass production may be more efficient elsewhere |
3D printing can reduce waste in some workflows by producing only the needed geometry, but it can also generate failed parts and support material. “Printed” does not automatically mean sustainable. Choose durable designs, avoid unnecessary test prints, and check local waste rules for materials and resin waste.
🛒 Choosing a 3D Printer for Your Needs
Choose a printer based on what you plan to make and how much maintenance you’re willing to do. The most capable machine on paper may be the wrong fit if you don’t need its build volume or material range.
| Your priority | Consider |
|---|---|
| General household projects | An FDM printer with reliable first-layer setup and accessible profiles |
| High-detail miniatures | A resin printer, if you can manage safe handling and post-processing |
| Large models | A larger build volume, or a design that can be printed in sections |
| Engineering materials | A printer built and documented for the specific material |
| Minimal fuss | Strong documentation, good support, and straightforward maintenance |
| Professional parts | A qualified manufacturing service with documented process and material data |
Browse our 3D Printer Reviews before buying.
Best Features for Beginners
Look for features that reduce avoidable frustration:
- Clear setup and maintenance instructions.
- Reliable bed leveling or first-layer assistance.
- A slicer profile for the exact printer.
- Readily available replacement parts.
- An active support community and useful documentation.
- A build volume that matches your projects.
- Safety features appropriate to the machine and materials.
Fancy features are nice, but a predictable first layer and good documentation are worth more than a long spec sheet you’ll never use.
When to Choose FDM, Resin, or a 3D Printing Service
| Choose… | When… | Trade-off |
|---|---|---|
| FDM | You want versatile filament printing for many household and prototype projects | Layer lines and material-direction effects |
| Resin | Fine detail is central to the project | More handling, cleaning, and post-processing |
| A service | You need a specialized process, documented material, or occasional professional part | Less immediate control and iteration |
If you only need one industrial-style part, a service may be more practical than buying specialized equipment. If you plan to iterate frequently, owning the right printer may make sense.
Popular 3D Printer Brands and What to Compare
Brands to investigate include Bambu Lab, Creality, Elegoo, Anycubic, Prusa Research, and UltiMaker. Compare specific models, not just logos.
Check:
- Build volume and supported materials.
- Print profiles and software compatibility.
- Replacement parts and warranty terms.
- Enclosure and ventilation considerations.
- Noise, maintenance, and setup.
- Independent user reports alongside official documentation.
Anecdotes from a community can reveal everyday quirks, but they are not controlled testing. Look for patterns across multiple reports, then confirm specifications on the manufacturer’s site.
🏭 3D Printing Applications Across Industries
Additive manufacturing is used in applications that range from design prototypes to specialist production. The right process depends on the part’s function, performance requirements, regulatory context, and production volume.
Healthcare, Dental, and Assistive Devices
Healthcare applications can include anatomical models, dental components, surgical planning aids, and customized devices. Those uses demand appropriate materials, controlled processes, and professional oversight. A home-printed object should not be treated as a medical device or substitute for clinical advice.
Learn more through our 3D Printing in Healthcare coverage and the U.S. Food and Drug Administration’s 3D printing information.
Aerospace, Automotive, and Product Design
Design teams use 3D printing for prototypes, fixtures, jigs, specialized components, and other applications where geometry or production flexibility matters. Safety-critical parts require the relevant industry validation, quality control, and traceability; a successful-looking prototype is not enough.
For formal technology terminology and measurement information, see NIST additive manufacturing resources.
Education, Architecture, and Construction
In schools and design studios, 3D printing can make abstract geometry tangible. In architecture, models help communicate form and spaces. In construction, large-format printing is being explored for building components and structures, with project outcomes depending on engineering, codes, materials, and inspection.
Our 3D Printing in Architecture category covers this growing area. For the Fort Bliss barracks project, the Army reports specific project details and performance figures in its official announcement. Those figures should be read as one project’s reported results, not a universal benchmark.
🔮 The Future of 3D-Printed Products and Manufacturing
The next phase of 3D printing is less about asking, “Can we print it?” and more about asking, “Can we make it repeatably, safely, and at the right scale?”
Areas to watch include:
- Easier multi-material and multi-color workflows.
- Better monitoring and quality assurance.
- More specialized materials with documented performance.
- Wider use of digital inventories and on-demand spare parts.
- Construction projects evaluated against building codes and long-term performance.
- Better integration between design software, simulation, and manufacturing.
That video full of magnetic-looking phone stands and playful fidgets hints at the creative side; the Fort Bliss project shows a very different side, where coordination, engineering, and real-world performance matter. The thread connecting them is simple: a digital design becomes valuable when it solves a real problem—or makes someone smile—reliably.