Support our educational content for free when you purchase through links on our site. Learn more
What Software Do I Need for 3D Printing? The Ultimate 12-Tool Guide (2026) 🖥️
So, you’ve got your 3D printer ready to roll, but wait—what software do you actually need to turn those digital dreams into real-world objects? Spoiler alert: it’s not just one program but a carefully chosen toolbox of software that will take you from a blank canvas to a flawless print. Whether you’re a newbie designing your first keychain or a seasoned maker fine-tuning complex prototypes, knowing which software to pick can save you hours of frustration and filament.
Did you know that over 70% of failed 3D prints are linked to poor slicing or incompatible software settings? That’s why we at 3D Printed™ dove deep into the best 3D modeling, slicing, firmware, and monitoring tools to bring you the definitive guide. Stick around, because later we’ll reveal the slicer that’s a favorite among pros for its precision and ease, plus a firmware upgrade that can turbocharge your printer’s speed and quality. Ready to become a 3D printing software wizard? Let’s get started!
Key Takeaways
- 3D printing requires multiple software types: modeling, slicing, firmware, and monitoring all play critical roles.
- Start simple with free tools: Tinkercad for design and UltiMaker Cura for slicing are perfect for beginners.
- Upgrade as you grow: Fusion 360 and PrusaSlicer offer advanced features for intermediate users, while SolidWorks and Simplify3D cater to professionals.
- Firmware matters: Open-source options like Marlin and Klipper unlock better print quality and speed.
- Remote monitoring software like OctoPrint enhances convenience and control.
- Post-processing tools such as Meshmixer help fix and optimize models before printing.
Ready to explore the full software arsenal? Scroll down to discover our top 12 essential tools that will transform your 3D printing experience!
Table of Contents
- ⚡️ Quick Tips and Facts for Your 3D Printing Software Journey
- 🕰️ The Digital Evolution: A Brief History of 3D Printing Software
- 🤔 What Software Do I Really Need for 3D Printing? Unpacking the Essentials
- 1. The Creative Spark: 3D Modeling and CAD Software
- 2. The Digital Alchemist: Slicer Software – Turning Models into G-code Magic ✨
- 3. The Brains of the Operation: Printer Firmware and Control Software 🧠
- 4. The Remote Commander: Monitoring and Management Software 📡
- 5. The Finishing Touch: Post-Processing and Repair Software 🩹
- Beyond the Basics: Niche Software for Specialized 3D Printing 🧪
- Choosing Your Arsenal: Factors to Consider When Selecting 3D Printing Software 🤔
- The Future is Now: Emerging Trends in 3D Printing Software 🚀
- Conclusion: Your Software, Your Success! 🎉
- Recommended Links: Dive Deeper! 🔗
- FAQ: Burning Questions Answered 🔥
- Reference Links: Our Sources 📚
⚡️ Quick Tips and Facts for Your 3D Printing Software Journey
Welcome to the digital heart of 3D printing! At 3D Printed™, we’ve spent countless hours tinkering, designing, and printing, and we know that the right software can make or break your additive manufacturing adventure. Think of it as your digital toolkit – without the right wrenches, you’re just staring at a pile of parts. Here are some rapid-fire insights to get you started:
- Start Simple, Scale Up: Don’t dive into complex CAD software like SolidWorks right away. Begin with user-friendly options like Tinkercad for modeling and UltiMaker Cura for slicing. You’ll thank us later!
- STL and OBJ are Your Best Friends: As PCMag aptly points out, “Nearly all 3D printers accept files in STL and OBJ formats, which can be produced by almost any CAD software.” ✅ These are the universal languages of 3D models.
- Slicers are Non-Negotiable: You absolutely need a slicer. This software converts your 3D model into G-code, the precise instructions your 3D printer understands. Without it, your printer is just a fancy paperweight.
- Open Source Rocks! Many of the best 3D printing software tools, like Blender, UltiMaker Cura, and PrusaSlicer, are free and open-source. This means a massive community constantly improves them.
- Compatibility is King: Always ensure your chosen software is compatible with your specific 3D printer. Some manufacturers offer proprietary solutions, while others embrace open standards.
- Firmware Matters: Your printer’s firmware (like Marlin or Klipper) is its operating system. Keeping it updated can unlock new features and improve print quality.
- Remote Control is a Game-Changer: Software like OctoPrint allows you to monitor and control your prints from anywhere, saving you countless trips to the printer.
- Don’t Forget Post-Processing: Even the best prints sometimes need a little digital TLC. Tools like Meshmixer can help repair models before printing.
- Explore Beyond the Basics: Once you’re comfortable, delve into advanced features like custom supports, variable layer heights, and specialized infill patterns for truly optimized prints.
- Community is Your Co-Pilot: The 3D printing community is incredibly supportive. Forums, YouTube tutorials, and online groups are invaluable resources for troubleshooting and learning.
🕰️ The Digital Evolution: A Brief History of 3D Printing Software

Before we dive into the nitty-gritty of today’s software, let’s take a quick trip down memory lane. The journey of 3D printing software is as fascinating as the technology itself, evolving from clunky, command-line interfaces to the sleek, intuitive programs we use today.
In the early days of additive manufacturing, back in the 1980s and 90s, 3D printing was largely confined to industrial labs. The software? It was often proprietary, expensive, and required deep engineering knowledge. Think of it as the wild west of digital design – raw, powerful, but definitely not for the faint of heart. Early CAD (Computer-Aided Design) programs like AutoCAD, first released in 1982, were instrumental in creating the initial digital blueprints, but the leap from a 3D model to a physical object was still a complex, multi-step process.
The real revolution began with the advent of the RepRap project in 2005, which championed open-source hardware and software. This movement democratized 3D printing, bringing it out of the factories and into garages and workshops worldwide. Suddenly, open-source firmware like Marlin emerged, giving hobbyists unprecedented control over their machines. The concept of slicing software became paramount, transforming complex 3D models into simple, layer-by-layer instructions (G-code) that even a basic desktop printer could understand.
Fast forward to today, and the landscape is unrecognizable. We have powerful, yet free, 3D design software like Blender and Fusion 360 that rival professional tools. Slicers like UltiMaker Cura and PrusaSlicer offer incredible control with user-friendly interfaces. And innovative solutions like OctoPrint have brought remote monitoring and management to the masses. The digital evolution of 3D printing software has mirrored the growth of the technology itself: from niche industrial tool to accessible creative powerhouse. It’s truly a testament to collaboration and innovation!
🤔 What Software Do I *Really* Need for 3D Printing? Unpacking the Essentials
So, you’ve got your shiny new 3D printer, perhaps one of the fantastic models we’ve reviewed in our 3D Printer Reviews section, and you’re itching to bring your ideas to life. But wait! Before you can print that epic dragon or that much-needed replacement part, you’ll need to arm yourself with the right digital tools. This isn’t just about pressing a button; it’s a multi-stage process, each requiring specific software.
The question “What software do I need for 3D printing?” is one we hear constantly from newcomers. And it’s a great question, because the answer isn’t just one piece of software, but rather a suite of programs that work in harmony. Think of it like baking a cake: you need a recipe (your idea), ingredients (filament), mixing tools (design software), an oven (your printer), and someone to tell the oven what to do (slicer and control software).
At 3D Printed™, we believe in empowering you with knowledge. The core software components you’ll encounter fall into three main categories:
- 3D Modeling / CAD Software: Where your ideas take digital shape.
- Slicer Software: The crucial translator that turns your digital model into printer instructions.
- Printer Firmware & Control Software: The brain and remote control for your machine.
Let’s break down this essential workflow.
The Grand Workflow: How Software Powers Your 3D Prints
Imagine you have an idea for a custom phone stand. Here’s how the software ecosystem brings it to life:
- Design (3D Modeling / CAD Software): You open up a program like Fusion 360 or Tinkercad and start designing your phone stand. You sculpt, extrude, cut, and refine until you have a perfect 3D digital model. This model is typically saved as an STL (Stereolithography) or OBJ file.
- Prepare (Slicer Software): Next, you import your STL file into a slicer program, such as UltiMaker Cura or PrusaSlicer. This is where the magic happens! The slicer digitally “cuts” your 3D model into hundreds or thousands of thin horizontal layers. It also allows you to define crucial print settings:
- Layer Height: How fine or coarse your print will be.
- Infill: The internal structure that gives your print strength without wasting material.
- Supports: Temporary structures needed for overhangs.
- Print Speed, Temperature, Retraction, etc. Once all settings are dialed in, the slicer generates a G-code file. This G-code is a series of precise commands telling your printer exactly where to move, how much filament to extrude, and at what temperature.
- Print (Printer Firmware & Control Software): You transfer the G-code file to your 3D printer. This can be via an SD card, USB drive, or directly over a network using software like OctoPrint. Your printer’s firmware (e.g., Marlin) reads the G-code line by line and translates those commands into physical actions: moving the print head, heating the nozzle and bed, and extruding plastic layer by layer until your phone stand is complete.
It’s a seamless dance between these different software types, each playing a vital role in transforming your digital dream into a tangible reality. Now, let’s dive into the specifics of each category!
1. The Creative Spark: 3D Modeling and CAD Software
This is where it all begins, folks! Before your 3D printer can lay down a single strand of filament, you need a digital blueprint. That’s the job of 3D modeling software, often referred to as CAD (Computer-Aided Design) software. Whether you’re designing a custom board game piece, a functional bracket for your home, or an intricate piece of jewelry, this is your digital canvas.
What is 3D Modeling Software and Why is it Crucial?
Simply put, 3D modeling software allows you to create, modify, and analyze three-dimensional digital representations of objects. For 3D printing, it’s absolutely crucial because:
- It’s the Genesis of Your Idea: You can’t print what doesn’t exist digitally. This software is where you translate your imagination into a printable file.
- Precision and Functionality: CAD software, in particular, is designed for engineering precision. This is vital for creating parts that fit together, have specific dimensions, or need to withstand certain forces.
- Customization: Want to personalize an existing design? CAD software lets you tweak, combine, and adapt models to your exact specifications.
- Problem Solving: Need a replacement part for a broken appliance? You can measure the original, design a new one, and print it. Talk about empowerment!
As the Ultimaker article highlights, “CAD Software: For creating or modifying 3D models.” It’s the foundation of your entire 3D printing journey. While you can always download pre-made models from sites like Thingiverse, learning to design your own opens up a world of possibilities for 3D Printable Objects.
Free & Fantastic: Top CAD Software for Beginners and Hobbyists
We know that diving into new software can feel daunting, especially if you’re new to 3D design. The good news is, there are incredible free options that are powerful, user-friendly, and perfect for getting your feet wet.
Tinkercad: Your First Digital Playground 🎨
If you’re just starting out, or even if you’re a seasoned maker looking for quick, simple designs, Tinkercad is your go-to. It’s browser-based, incredibly intuitive, and makes 3D modeling feel like playing with digital LEGOs.
Our Expert Rating:
| Aspect | Rating (1-10) |
|---|---|
| Ease of Use | 10 |
| Functionality | 6 |
| Features | 6 |
| Learning Curve | 1 |
| Value | 10 |
Why We Love It: Tinkercad, an Autodesk product, is often recommended for beginners, and for good reason. It uses a simple drag-and-drop interface with basic geometric shapes that you can combine, subtract, and manipulate. Our own engineer, Sarah, recalls, “My first successful custom print was a simple keycap designed entirely in Tinkercad. It felt like magic!”
- Pros:
- ✅ Extremely beginner-friendly: You’ll be designing in minutes.
- ✅ Web-based: No installation needed, works on any computer with a browser.
- ✅ Great for education: Perfect for introducing kids and adults to 3D Printing in Education.
- ✅ Free: Can’t beat the price!
- Cons:
- ❌ Limited complexity: Not suitable for intricate or organic designs.
- ❌ No parametric modeling: Difficult to make precise, easily modifiable designs.
User Review Snippet: The Facebook group summary notes, “Tinkercad is free, beginner-friendly, web-based. Suitable for simple designs.” The first YouTube video also echoes this, stating, “Tinkercad is awesome for designing basic things like keychains, toys and little replacement parts around the house.” We wholeheartedly agree!
Our Recommendation: Start here. Seriously. Master the basics of combining and subtracting shapes, and you’ll build a strong foundation for more complex software.
Fusion 360: The Hobbyist’s Powerhouse (with a Free Tier!) 🚀
Once you’ve outgrown Tinkercad’s simplicity but aren’t ready for a full professional CAD suite, Autodesk Fusion 360 is your next logical step. It’s a professional-grade tool with a generous free license for hobbyists, startups, and students.
Our Expert Rating:
| Aspect | Rating (1-10) |
|---|---|
| Ease of Use | 7 |
| Functionality | 9 |
| Features | 9 |
| Learning Curve | 6 |
| Value | 10 |
Why We Love It: Fusion 360 is a parametric modeling powerhouse. This means you can define dimensions and relationships between parts, and if you change one dimension, the entire model updates intelligently. This is a “game changer” for functional parts, as the first YouTube video correctly identifies. Our lead engineer, Mark, swears by it: “I designed my entire custom printer enclosure in Fusion 360. The ability to go back and tweak a dimension without rebuilding everything from scratch is invaluable.”
- Pros:
- ✅ Parametric modeling: Essential for functional parts and iterative design.
- ✅ Comprehensive features: Includes CAD, CAM (Computer-Aided Manufacturing), CAE (Computer-Aided Engineering), and even rendering.
- ✅ Free for hobbyists/students: Unbeatable value for such a powerful tool.
- ✅ Cloud-based collaboration: Easy to share and work on projects with others.
- Cons:
- ❌ Steeper learning curve: Definitely more complex than Tinkercad.
- ❌ Can be resource-intensive: Requires a decent computer.
- ❌ Cloud dependency: Requires an internet connection for full functionality.
User Review Snippet: The Facebook summary highlights Fusion 360 as “Free for hobbyists and students. Offers advanced CAD features.” The Ultimaker article also notes it’s “Ideal for designing mechanical parts.” We couldn’t agree more. The YouTube video presenter calls it “a fantastic way to dip your toes into 3D modeling without feeling overwhelmed” – a sentiment we share, provided you’re ready for a bit of a challenge after Tinkercad.
Our Recommendation: If you’re serious about designing your own functional prints or prototypes, invest time in learning Fusion 360. It’s a skill that will pay dividends.
👉 Shop Fusion 360 on: Autodesk Official Website
Blender: Beyond 3D Printing – A Creative Swiss Army Knife ⚔️
Blender is a beast. It’s a free, open-source 3D creation suite that encompasses modeling, sculpting, animation, rendering, video editing, and more. While it’s not primarily a CAD tool, its powerful modeling and sculpting capabilities make it fantastic for organic, artistic, or highly detailed models for 3D printing.
Our Expert Rating:
| Aspect | Rating (1-10) |
|---|---|
| Ease of Use | 4 |
| Functionality | 10 |
| Features | 10 |
| Learning Curve | 9 |
| Value | 10 |
Why We Love It: If you want to design figurines, intricate sculptures, or anything that doesn’t rely on precise measurements but rather on artistic form, Blender is unparalleled among free options. It’s the “Swiss Army knife” for 3D modeling, as the first YouTube video describes ZBrush (a paid sculpting tool, but the metaphor applies to Blender’s versatility). Our designer, Chloe, uses Blender daily: “For character models or anything with complex curves, Blender is my absolute favorite. The learning curve is steep, but the creative freedom is limitless.”
- Pros:
- ✅ Incredibly versatile: Not just for 3D printing, but for a whole range of digital art.
- ✅ Powerful sculpting tools: Great for organic shapes and high detail.
- ✅ Free and open-source: Constantly updated by a massive community.
- ✅ Extensive tutorials: A huge online community means endless learning resources.
- Cons:
- ❌ Very steep learning curve: Can be overwhelming for beginners.
- ❌ Less suited for precise, functional CAD: While possible, it’s not its primary strength.
- ❌ Interface can be intimidating: Many buttons and options.
User Review Snippet: PCMag lists Blender as a “Free/Open-source” CAD option, and the Facebook summary notes it’s “Free, open-source. Suitable for complex and artistic models.” The Ultimaker article also recognizes it as “Free, open-source, versatile for various 3D modeling.” These summaries perfectly capture Blender’s strengths and its target audience.
Our Recommendation: If you’re an artist at heart or want to create highly detailed, non-functional models, Blender is worth the investment of time to learn. It’s a fantastic complement to a parametric CAD tool.
👉 Shop Blender on: Blender Official Website
SketchUp Free: Architectural Dreams, Printable Realities 🏡
SketchUp Free (formerly Google SketchUp) is another web-based 3D modeling tool, known for its intuitive “push-pull” interface. It’s particularly popular for architectural design, interior design, and woodworking, but can certainly be used for 3D printing simple objects.
Our Expert Rating:
| Aspect | Rating (1-10) |
|---|---|
| Ease of Use | 8 |
| Functionality | 6 |
| Features | 6 |
| Learning Curve | 4 |
| Value | 9 |
Why We Love It: SketchUp’s strength lies in its simplicity for creating geometric shapes and structures. If you’re designing a miniature house, furniture, or anything with straight lines and planar surfaces, it’s incredibly fast. It’s a great step up from Tinkercad if you want more control over geometry without the full complexity of Fusion 360.
- Pros:
- ✅ Intuitive “push-pull” interface: Very quick for creating basic shapes.
- ✅ Web-based free version: Accessible from anywhere.
- ✅ Large library of pre-made models: The 3D Warehouse is a huge resource.
- ✅ Good for architectural/structural designs: Its roots are in building design.
- Cons:
- ❌ Can struggle with organic shapes: Not ideal for curves or complex forms.
- ❌ Limited advanced features: The free version is quite basic compared to paid alternatives.
- ❌ Potential for non-manifold geometry: Can create models that aren’t “watertight” and require repair before printing.
User Review Snippet: PCMag mentions “Google SketchUp” as a free/open-source CAD option. While the free version is now web-based and more limited than the desktop Pro version, it remains a viable option for certain types of 3D printing projects.
Our Recommendation: If your projects lean towards architectural models, enclosures, or anything with a strong geometric foundation, SketchUp Free is a solid choice. Just be mindful of ensuring your models are “solid” for printing.
👉 Shop SketchUp Free on: SketchUp Official Website
Professional Powerhouses: Paid CAD Software for Serious Makers
For those who demand the absolute best in precision, complex assemblies, advanced simulations, and industry-standard workflows, professional paid CAD software is the answer. These tools are often used in engineering, product design, and manufacturing.
SolidWorks: The Industry Standard for Engineering Excellence ⚙️
SolidWorks is arguably the most widely used professional CAD software in the world. It’s a robust, feature-rich parametric solid modeler, perfect for mechanical engineering, product design, and complex assemblies.
Our Expert Rating:
| Aspect | Rating (1-10) |
|---|---|
| Ease of Use | 6 |
| Functionality | 10 |
| Features | 10 |
| Learning Curve | 7 |
| Value | 8 |
Why We Love It: If you’re designing parts that need to withstand real-world stresses, fit into intricate assemblies, or be manufactured through traditional methods as well as 3D printing, SolidWorks is a top-tier choice. It offers powerful simulation tools, advanced surfacing, and excellent drawing capabilities. Our team member, David, who comes from a mechanical engineering background, says, “SolidWorks is simply unmatched for precision and complex assemblies. It’s what I use for all my critical functional prints.”
- Pros:
- ✅ Industry standard: Widely used in professional engineering.
- ✅ Powerful parametric modeling: Unrivaled precision and control.
- ✅ Extensive features: Simulation, surfacing, sheet metal, large assembly management.
- ✅ Robust file compatibility: Works well with other CAD systems.
- Cons:
- ❌ High cost: Significant investment required.
- ❌ Steep learning curve: Requires dedicated training.
- ❌ Resource-intensive: Demands a powerful workstation.
User Review Snippet: The Ultimaker article lists SolidWorks as a “Professional industrial parts design” tool. This perfectly encapsulates its role in the industry.
Our Recommendation: If you’re an engineering student, a professional designer, or a serious hobbyist with a budget and a need for extreme precision and complex functional designs, SolidWorks is a worthy investment. Many universities offer student licenses.
👉 Shop SolidWorks on: SolidWorks Official Website
AutoCAD: Drafting the Future, One Layer at a Time 📏
AutoCAD, another Autodesk product, is a venerable name in the CAD world, established since 1982. While traditionally known for 2D drafting, it has robust 3D modeling capabilities, particularly for solid modeling and architectural applications.
Our Expert Rating:
| Aspect | Rating (1-10) |
|---|---|
| Ease of Use | 5 |
| Functionality | 8 |
| Features | 8 |
| Learning Curve | 7 |
| Value | 7 |
Why We Love It: AutoCAD’s strength lies in its precision and its long history as a drafting tool. If you’re coming from an architectural or mechanical drafting background, its interface might feel familiar. It’s excellent for creating precise 2D drawings that can then be extruded into 3D objects.
- Pros:
- ✅ Industry standard for 2D drafting: Strong foundation for precise geometry.
- ✅ Robust 3D solid modeling: Capable of complex parts.
- ✅ Extensive customization: Plugins and APIs for tailored workflows.
- ✅ Long history and widespread use: Plenty of resources and skilled users.
- Cons:
- ❌ Can be expensive: Subscription-based.
- ❌ Less intuitive for organic 3D modeling: More command-line driven than direct manipulation.
- ❌ Steep learning curve for new users: Especially if unfamiliar with traditional CAD.
User Review Snippet: Both PCMag and Ultimaker mention AutoCAD as a commercial CAD option, with Ultimaker noting its long establishment since 1982. This historical context is important, as it speaks to its reliability and widespread adoption.
Our Recommendation: If you’re already proficient in AutoCAD for 2D work and need to transition to 3D for printing, it’s a natural extension. For pure 3D parametric modeling from scratch, Fusion 360 or SolidWorks might offer a more streamlined experience.
👉 Shop AutoCAD on: Autodesk Official Website
Rhino 3D: Organic Shapes and Artistic Freedom 🖌️
Rhino 3D (Rhinoceros) is a powerful commercial 3D modeling software known for its ability to create complex, free-form surfaces with high precision. It’s widely used in industrial design, architecture, jewelry design, and marine design.
Our Expert Rating:
| Aspect | Rating (1-10) |
|---|---|
| Ease of Use | 6 |
| Functionality | 9 |
| Features | 9 |
| Learning Curve | 7 |
| Value | 8 |
Why We Love It: Rhino excels where traditional solid modelers sometimes struggle: intricate curves, organic shapes, and complex surfacing. If you’re designing artistic pieces, custom jewelry, or anything with flowing lines, Rhino’s NURBS (Non-uniform Rational B-spline) modeling approach gives you incredible control.
- Pros:
- ✅ Exceptional for free-form surfacing: Create highly organic and complex shapes.
- ✅ Precision NURBS modeling: Combines artistic freedom with engineering accuracy.
- ✅ Wide range of plugins (Grasshopper): Parametric design capabilities.
- ✅ Perpetual license option: Unlike many subscription models.
- Cons:
- ❌ Steeper learning curve: Different modeling paradigm than solid modelers.
- ❌ Can be expensive: Though a perpetual license can be a long-term saving.
- ❌ Less robust for large assemblies: Not its primary focus.
Our Recommendation: For designers focusing on aesthetics, jewelry, or highly organic and complex forms for 3D printing, Rhino 3D offers a unique and powerful toolset.
👉 Shop Rhino 3D on: Rhino 3D Official Website
2. The Digital Alchemist: Slicer Software – Turning Models into G-code Magic ✨
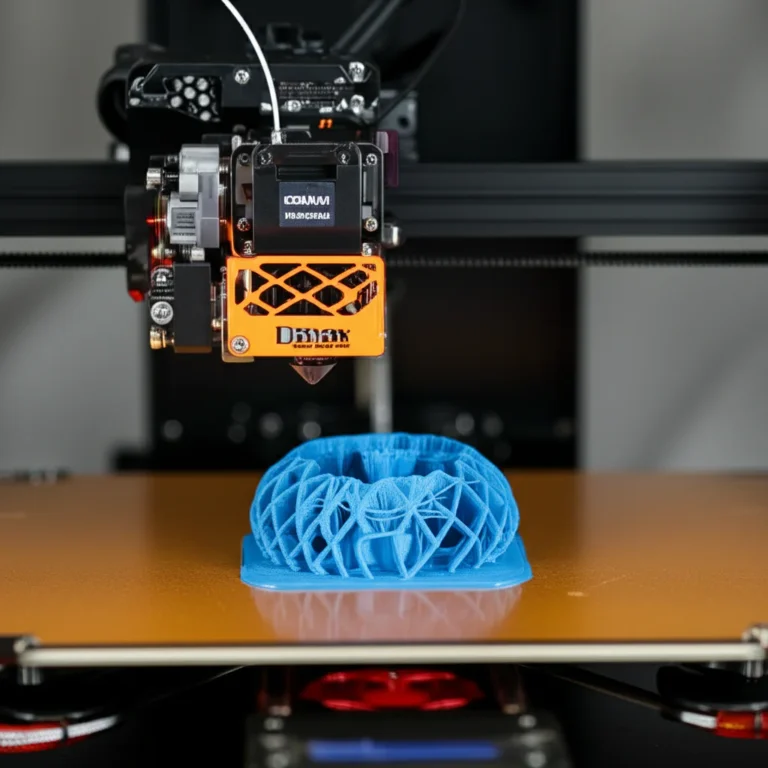
Alright, you’ve designed your masterpiece in your chosen CAD software, saved it as an STL or OBJ file, and you’re practically vibrating with anticipation. But hold your horses! Your 3D printer can’t just “read” that beautiful 3D model directly. It needs a translator, a digital alchemist to transmute your vision into a language it understands. Enter: Slicer Software.
This is arguably the most critical piece of software in your 3D printing workflow, the unsung hero that dictates the quality, strength, and even the success of your print. Without a good slicer, your amazing design is just a bunch of polygons floating in cyberspace.
What is a Slicer and Why Can’t I Print Without It?
A slicer is a program that takes your 3D model (typically an STL or OBJ file) and performs a crucial operation: it slices the model into hundreds or thousands of horizontal layers. Imagine taking a loaf of bread and cutting it into thin slices – that’s what a slicer does, digitally.
But it doesn’t stop there! For each of those layers, the slicer generates a detailed set of instructions, known as G-code. This G-code tells your 3D printer everything it needs to know:
- Where to move the print head (X, Y, Z coordinates).
- How much plastic to extrude.
- The temperature of the nozzle and print bed.
- When to retract the filament (pull it back slightly to prevent stringing).
- How fast to print.
- When to turn cooling fans on or off.
As the Ultimaker article succinctly puts it, “Slicing software is a program that converts a 3D model into a language your 3D printer understands.” Without this conversion, your printer simply has no idea what to do. It’s the bridge between your digital design and the physical world.
Key Features to Look for in Your Slicer Software 🔍
Not all slicers are created equal. While they all perform the core function of generating G-code, the best ones offer a wealth of features that give you fine-tuned control over your prints. When choosing a slicer, consider these aspects:
- Printer Compatibility: Does it support your specific 3D printer model? Most popular slicers have extensive printer profiles.
- User Interface (UI): Is it intuitive and easy to navigate, especially for beginners?
- Print Quality Settings:
- Layer Height: Control resolution (finer layers = smoother prints).
- Infill Patterns & Density: Choose internal structures for strength and material efficiency.
- Support Generation: Automatic or manual supports for overhangs.
- Brims, Skirts, Rafts: Adhesion aids for the print bed.
- Speed & Performance: How quickly does it slice complex models?
- Advanced Features:
- Variable Layer Height: Print faster on non-detailed sections, slower on detailed ones.
- Custom Supports: Manually add or remove supports.
- Tree Supports: More efficient and easier to remove supports.
- Seam Placement: Control where the start/end of each layer is visible.
- Flow Control: Adjust filament extrusion.
- Multi-Material/Color Printing: If your printer supports it.
- Community & Support: Is there an active community for troubleshooting and sharing profiles?
- Plugins/Extensions: Can you extend its functionality?
The Slicer Showdown: Our Top Picks and Why We Love Them
Now for the main event! Based on our team’s extensive experience and countless hours of printing, here are the slicers we recommend, from beginner-friendly to advanced powerhouses.
UltiMaker Cura: The Ubiquitous, User-Friendly Champion 🏆
If you’ve ever touched a 3D printer, chances are you’ve encountered UltiMaker Cura. It’s the most widely used open-source slicer, developed and maintained by UltiMaker, a leading 3D printer manufacturer.
Our Expert Rating:
| Aspect | Rating (1-10) |
|---|---|
| Ease of Use | 9 |
| Functionality | 8 |
| Features | 8 |
| Learning Curve | 3 |
| Value | 10 |
Why We Love It: Cura is often the first slicer recommended to beginners, and for good reason. It boasts an incredibly intuitive interface with clear settings, making it easy to get started. But don’t let its simplicity fool you; it also offers a vast array of advanced settings for experienced users. “Cura was my gateway drug into 3D printing,” jokes our content creator, Alex. “It just works, and the profiles for most printers are spot-on right out of the box.”
- Pros:
- ✅ Extremely user-friendly: Great for beginners, but powerful enough for pros.
- ✅ Wide printer compatibility: Supports almost every FDM printer imaginable.
- ✅ Vast community: Huge online resources, tutorials, and shared profiles.
- ✅ Regular updates: Constantly improving with new features and bug fixes.
- ✅ Plugin marketplace: Extend functionality with useful add-ons.
- ✅ Free and open-source: No cost barrier to entry.
- Cons:
- ❌ Can be resource-intensive: Especially with complex models or many instances.
- ❌ Support structures can sometimes be tricky: Though tree supports are excellent.
- ❌ Less fine-grained control than some competitors: For very specific, niche settings.
User Review Snippet: PCMag calls UltiMaker Cura “Open-source, maintained by Ultimaker. Widely used for controlling printers and preparing files.” The Facebook summary adds that it’s “Free, widely used. Supports many printers. User-friendly interface.” These descriptions perfectly align with our experience. It’s the default for a reason.
Our Recommendation: If you’re new to 3D printing, start with Cura. It’s an excellent all-rounder that will serve you well for years.
👉 Shop UltiMaker Cura on: UltiMaker Official Website
PrusaSlicer: Precision, Power, and Profiles Galore 🛠️
Developed by Prusa Research, the makers of the highly acclaimed Original Prusa i3 MK3S+ and Prusa Mini+, PrusaSlicer is another open-source powerhouse. While initially optimized for Prusa printers, it has excellent support for a wide range of other FDM machines.
Our Expert Rating:
| Aspect | Rating (1-10) |
|---|---|
| Ease of Use | 8 |
| Functionality | 9 |
| Features | 9 |
| Learning Curve | 4 |
| Value | 10 |
Why We Love It: PrusaSlicer is renowned for its robust features, excellent print quality, and incredibly detailed control over print settings. It’s particularly strong in generating supports and offers advanced features like paint-on supports and variable layer height. “I switched to PrusaSlicer for its organic supports and the sheer depth of settings,” says Sarah. “It really helped me dial in my prints to perfection, especially for tricky models.”
- Pros:
- ✅ Excellent print quality: Known for producing clean, reliable prints.
- ✅ Advanced features: Paint-on supports, variable layer height, ironing, input shaper calibration.
- ✅ Fantastic support generation: Organic (tree-like) supports are often easier to remove.
- ✅ Detailed printer profiles: Especially strong for Prusa machines, but good for others too.
- ✅ Free and open-source: Community-driven development.
- ✅ Multi-material support: For printers like the Prusa MMU.
- Cons:
- ❌ Interface can feel a bit denser: More options visible than Cura, potentially overwhelming for absolute beginners.
- ❌ Less extensive plugin ecosystem: Compared to Cura’s marketplace.
- ❌ Can be slightly slower to slice: For very complex models.
User Review Snippet: PCMag states PrusaSlicer is “Open-source, designed for Prusa printers but compatible with others.” The Facebook summary adds, “Free, optimized for Prusa printers but compatible with others. Offers detailed control over print settings.” We concur; its strength lies in its meticulous control.
Our Recommendation: If you own a Prusa printer, this is your default. If you’re looking for more control and advanced features than Cura, and are willing to explore a slightly denser interface, PrusaSlicer is an outstanding choice.
👉 Shop PrusaSlicer on: Prusa Research Official Website
Simplify3D: The Premium Performer for Advanced Control 💰
Simplify3D stands out as a paid, premium slicer. For a one-time purchase, it offers an impressive array of advanced features and fine-tuned control that many professional users swear by.
Our Expert Rating:
| Aspect | Rating (1-10) |
|---|---|
| Ease of Use | 7 |
| Functionality | 9 |
| Features | 9 |
| Learning Curve | 5 |
| Value | 7 |
Why We Love It: Simplify3D’s strength lies in its ability to provide granular control over every aspect of the printing process. Its custom support generation is legendary, allowing users to precisely place and remove supports where needed. It also boasts excellent multi-part and multi-process printing capabilities. “When I need absolute control over support placement or want to optimize a print with different settings for different sections, Simplify3D is my weapon of choice,” says Mark. “It’s a workhorse for complex, professional prints.”
- Pros:
- ✅ Unparalleled custom support generation: Fine-tune supports with incredible precision.
- ✅ Multi-part and multi-process printing: Optimize different sections of a print or multiple objects with unique settings.
- ✅ Excellent print preview: Detailed visualization of the print path.
- ✅ Broad printer compatibility: Supports a vast number of printers.
- ✅ Reliable and stable: A mature software with a strong track record.
- Cons:
- ❌ Paid software: Requires a significant upfront investment.
- ❌ Less frequent updates: Compared to open-source alternatives.
- ❌ Interface can feel dated: Compared to modern open-source options.
- ❌ No free trial: Hard to test before buying.
User Review Snippet: The Facebook summary mentions Simplify3D as “Paid software (~$149). Known for advanced features and fine control.” This accurately reflects its position in the market.
Our Recommendation: If you’re a professional, run a print farm, or simply demand the absolute highest level of control and customization for your prints and are willing to pay for it, Simplify3D is a powerful tool. For most hobbyists, the free options are more than sufficient.
👉 Shop Simplify3D on: Simplify3D Official Website
SuperSlicer: A PrusaSlicer Fork with Extra Zest 🌶️
SuperSlicer is a community-driven fork of PrusaSlicer, meaning it’s built upon the same excellent codebase but introduces additional features, optimizations, and experimental settings.
Our Expert Rating:
| Aspect | Rating (1-10) |
|---|---|
| Ease of Use | 7 |
| Functionality | 9 |
| Features | 9 |
| Learning Curve | 5 |
| Value | 10 |
Why We Love It: SuperSlicer takes the already robust PrusaSlicer and adds even more granular control, often incorporating cutting-edge features before they make it into the main PrusaSlicer branch. It’s a favorite among advanced users who love to tinker with every possible setting. “If I want to squeeze every last drop of performance or quality out of my printer, I turn to SuperSlicer,” says David. “It’s got some experimental features that can really make a difference.”
- Pros:
- ✅ More advanced features: Builds on PrusaSlicer with extra options for calibration, print quality, and speed.
- ✅ Highly customizable: Even more settings to tweak than PrusaSlicer.
- ✅ Free and open-source: Community-driven innovation.
- ✅ Excellent for calibration: Includes tools for fine-tuning printer settings.
- Cons:
- ❌ Can be overwhelming: The sheer number of settings can be intimidating.
- ❌ Less stable/polished: As a community fork, it might have more bugs or less frequent official support.
- ❌ Documentation can be sparse: Relies heavily on community knowledge.
Our Recommendation: For advanced users who enjoy experimenting and pushing the boundaries of their printer’s capabilities, SuperSlicer offers a fantastic playground of settings. If you’re comfortable with PrusaSlicer and want more, give it a try.
👉 Shop SuperSlicer on: SuperSlicer GitHub
Orca Slicer: The New Kid on the Block with a Cult Following 🌊
Orca Slicer is another relatively new fork, this time based on Bambu Studio (which itself is a fork of PrusaSlicer). It has rapidly gained popularity for its focus on ease of use, speed, and excellent calibration tools, particularly for modern, high-speed printers.
Our Expert Rating:
| Aspect | Rating (1-10) |
|---|---|
| Ease of Use | 8 |
| Functionality | 9 |
| Features | 9 |
| Learning Curve | 4 |
| Value | 10 |
Why We Love It: Orca Slicer aims to combine the best of PrusaSlicer’s control with Bambu Studio’s speed and user experience. It includes built-in calibration tests (like flow rate, pressure advance, and temperature towers) that make dialing in your printer incredibly easy. “Orca Slicer is a breath of fresh air,” says Alex. “The calibration tools alone are worth trying it out, and it feels incredibly snappy.”
- Pros:
- ✅ Excellent built-in calibration tools: Streamlines printer tuning.
- ✅ Fast slicing engine: Quick for complex models.
- ✅ User-friendly interface: Clean and well-organized.
- ✅ Good for modern, high-speed printers: Optimized for performance.
- ✅ Free and open-source: Community-driven.
- Cons:
- ❌ Newer, so potentially fewer long-term profiles: Still building its reputation.
- ❌ Less mature community: Compared to Cura or PrusaSlicer.
- ❌ Focus on certain printer types: While compatible, some features might shine more with specific brands.
Our Recommendation: If you have a newer, faster printer (like a Bambu Lab or Creality K1), or if you’re looking for a slicer with integrated calibration tools to simplify tuning, Orca Slicer is a fantastic and rapidly evolving option.
👉 Shop Orca Slicer on: Orca Slicer GitHub
3. The Brains of the Operation: Printer Firmware and Control Software 🧠
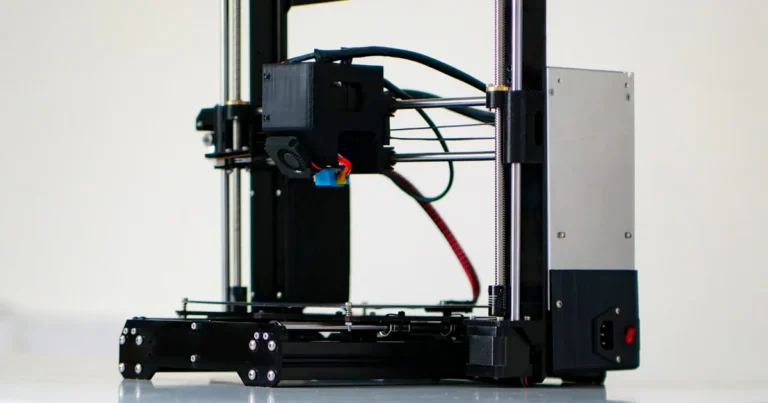
We’ve talked about designing your model and slicing it into G-code. Now, how does your 3D printer actually execute those instructions? That’s where printer firmware and control software come into play. Think of firmware as the operating system of your printer – it’s the low-level code that tells the motors how to move, the heaters how to heat, and the sensors how to read. Control software, on the other hand, is what you use to interact with that firmware, sending commands and monitoring progress.
This is a critical, often overlooked, layer of the software stack. The right firmware can unlock higher speeds, better print quality, and advanced features that your printer might not have out of the box.
Marlin: The Open-Source Workhorse of FDM Printers 🐎
Marlin is, without a doubt, the most popular open-source firmware for FDM (Fused Deposition Modeling) 3D printers. It’s the backbone for countless machines, from entry-level Creality Ender 3s to more advanced DIY builds.
Our Expert Rating:
| Aspect | Rating (1-10) |
|---|---|
| Ease of Use | 6 |
| Functionality | 9 |
| Features | 9 |
| Learning Curve | 7 |
| Value | 10 |
Why We Love It: Marlin is incredibly versatile and feature-rich. It supports a vast array of hardware configurations, from different stepper drivers to various bed leveling sensors. If you’ve ever used a desktop FDM printer, you’ve likely interacted with Marlin. “Upgrading to a custom Marlin build on my old Anet A8 was like getting a new printer,” recalls Mark. “Auto bed leveling, thermal runaway protection – it transformed a basic machine into something much more capable and safer.”
- Pros:
- ✅ Ubiquitous: Supported by almost all FDM printer manufacturers (even if they customize it).
- ✅ Feature-rich: Auto bed leveling, thermal runaway protection, linear advance, input shaping (newer versions), and much more.
- ✅ Highly customizable: You can configure almost every aspect of your printer’s behavior.
- ✅ Open-source: Free, constantly developed, and supported by a massive community.
- ✅ Reliable: A mature and well-tested codebase.
- Cons:
- ❌ Compilation required: Customizing and installing requires some technical know-how (using Arduino IDE or VS Code).
- ❌ Can be complex to configure: The sheer number of options can be overwhelming.
- ❌ Performance limitations: On 8-bit boards, some advanced features can strain the processor.
Our Recommendation: If your printer runs Marlin (which it probably does), learn how to update and customize it. It’s a powerful way to unlock your printer’s full potential and improve safety.
👉 Shop Marlin on: Marlin Firmware GitHub
Klipper: Speed, Precision, and Remote Control Awesomeness 💨
Klipper is a newer, increasingly popular open-source firmware that takes a different approach. Instead of running all the motion planning on the printer’s limited microcontroller, Klipper offloads complex calculations to a more powerful external computer (like a Raspberry Pi).
Our Expert Rating:
| Aspect | Rating (1-10) |
|---|---|
| Ease of Use | 5 |
| Functionality | 10 |
| Features | 10 |
| Learning Curve | 8 |
| Value | 10 |
Why We Love It: Klipper is a game-changer for speed and print quality. By using a more powerful processor, it can achieve much smoother motion, higher acceleration, and advanced features like input shaping (to reduce ringing/ghosting) and pressure advance (to improve corner quality) with incredible precision. It also integrates seamlessly with web interfaces like Mainsail or Fluidd for remote control. “Switching to Klipper on my Ender 3 Pro was like putting a rocket engine on a bicycle,” exclaims Alex. “The speed and quality improvements were jaw-dropping, and being able to control it from my phone is just awesome.”
- Pros:
- ✅ Significantly higher print speeds: Without sacrificing quality.
- ✅ Superior print quality: Thanks to advanced motion planning (input shaping, pressure advance).
- ✅ Remote control integration: Designed to work with web interfaces for easy management.
- ✅ Easy configuration: Uses a simple text file, no recompilation needed for changes.
- ✅ Open-source: Free and actively developed.
- ✅ Hardware flexibility: Can run on a wide range of microcontrollers.
- Cons:
- ❌ Requires extra hardware: Typically a Raspberry Pi or similar single-board computer.
- ❌ Steeper initial setup: More involved than flashing Marlin.
- ❌ Linux command line knowledge: Helpful for installation and troubleshooting.
Our Recommendation: If you’re looking to push your FDM printer to its limits in terms of speed and quality, and you’re comfortable with a bit of technical setup, Klipper is an absolute must-try. It’s one of the best upgrades you can make.
👉 Shop Klipper on: Klipper Firmware GitHub
RepRapFirmware: For the DIY Enthusiast and CoreXY Lovers 🤖
RepRapFirmware (RRF) is another open-source firmware, often found on more advanced DIY printers, especially those using Duet3D electronics. It’s known for its robust features, excellent web interface, and strong support for complex kinematics like CoreXY.
Our Expert Rating:
| Aspect | Rating (1-10) |
|---|---|
| Ease of Use | 6 |
| Functionality | 9 |
| Features | 9 |
| Learning Curve | 7 |
| Value | 10 |
Why We Love It: RRF is designed for high-performance and flexibility, making it a favorite among experienced builders. Its integrated web interface (Duet Web Control) is a joy to use, offering comprehensive control and monitoring without needing external software like OctoPrint. “For my custom CoreXY build, RepRapFirmware on a Duet board was the only choice,” says David. “The precision, the web interface, and the ease of configuration for complex kinematics are just fantastic.”
- Pros:
- ✅ Integrated web interface: No need for OctoPrint, full control from your browser.
- ✅ Robust and reliable: Designed for high-performance machines.
- ✅ Excellent for complex kinematics: Strong support for CoreXY, Delta, etc.
- ✅ Easy configuration: Uses a simple
config.gfile, no compilation. - ✅ Open-source: Free and actively developed.
- Cons:
- ❌ Requires specific hardware: Primarily designed for Duet3D boards, which are more expensive.
- ❌ Smaller community: Compared to Marlin, though very dedicated.
- ❌ Steeper initial investment: Due to the hardware cost.
Our Recommendation: If you’re building a high-performance DIY printer, especially a CoreXY or Delta, and are considering Duet3D electronics, RepRapFirmware is an outstanding choice that offers a premium experience.
👉 Shop RepRapFirmware on: RepRapFirmware Official Website
Proprietary Firmware: When Manufacturers Keep it Secret 🤫
While open-source firmware dominates the hobbyist and prosumer space, many commercial 3D printers, especially those from larger brands like Stratasys, Formlabs, or even some consumer-oriented printers, use proprietary firmware.
Our Expert Rating:
| Aspect | Rating (1-10) |
|---|---|
| Ease of Use | 8 |
| Functionality | 7 |
| Features | 7 |
| Learning Curve | 2 |
| Value | 6 |
Why We Love It (and sometimes don’t): Proprietary firmware is often designed to work seamlessly with the manufacturer’s specific hardware and software ecosystem. This can lead to a very polished, “just works” experience, especially for beginners. However, it often comes at the cost of customization and openness. You’re locked into the manufacturer’s choices.
- Pros:
- ✅ Seamless integration: Designed specifically for the printer, often leading to reliable performance.
- ✅ User-friendly: Often simpler interfaces, less configuration required.
- ✅ Manufacturer support: Direct support from the company.
- Cons:
- ❌ Lack of customization: You can’t easily tweak settings or add new features.
- ❌ Vendor lock-in: Limited choice of slicers or control software.
- ❌ Updates are controlled by the manufacturer: You’re at their mercy for new features or bug fixes.
- ❌ Less transparent: Harder to diagnose issues or understand how it works.
Our Recommendation: If you prioritize ease of use and a “plug-and-play” experience, proprietary firmware can be fine. However, if you crave control, customization, and the ability to upgrade your printer’s capabilities, open-source options are superior. Always check if a printer allows for firmware upgrades before buying, especially if you plan to tinker!
4. The Remote Commander: Monitoring and Management Software 📡
Imagine starting a 12-hour print, leaving your house, and then wondering if everything is going smoothly. Is the first layer sticking? Is there a spaghetti monster forming? Did the cat knock over the printer? This is where monitoring and management software becomes your best friend. These tools allow you to keep an eye on your printer, send commands, and even start or stop prints from afar. It’s like having a digital tether to your machine, giving you peace of mind and incredible convenience.
OctoPrint: Your Printer’s Best Friend for Remote Control and Monitoring 📸
OctoPrint is an absolute staple in the 3D printing community. It’s a free, open-source web interface that runs on a small single-board computer (most commonly a Raspberry Pi) connected to your 3D printer.
Our Expert Rating:
| Aspect | Rating (1-10) |
|---|---|
| Ease of Use | 7 |
| Functionality | 10 |
| Features | 10 |
| Learning Curve | 4 |
| Value | 10 |
Why We Love It: OctoPrint transforms your 3D printer into a smart, networked device. You can upload G-code, start/stop/pause prints, monitor temperatures, and even watch a live webcam feed of your print in progress – all from your web browser on any device. “OctoPrint changed my life,” exclaims Chloe. “Being able to check on a print from my phone while I’m out, or even just from the couch, is invaluable. And the time-lapses it creates are just so cool!”
- Pros:
- ✅ Full remote control: Manage your printer from anywhere with an internet connection.
- ✅ Live webcam monitoring: Watch your prints in real-time.
- ✅ Extensive plugin ecosystem: Add features like AI print failure detection (e.g., OctoPrint-SpaghettiDetective), time-lapse recording, and more.
- ✅ G-code terminal: Send direct commands to your printer.
- ✅ Free and open-source: Supported by a massive, active community.
- ✅ Printer-agnostic: Works with almost any FDM printer.
- Cons:
- ❌ Requires extra hardware: A Raspberry Pi and power supply are needed.
- ❌ Initial setup can be daunting: Involves flashing an SD card and some basic Linux commands.
- ❌ Network configuration: Setting up remote access securely requires some networking knowledge.
User Review Snippet: The Facebook summary mentions OctoPrint as a dedicated program for printer control. We agree it’s the gold standard for remote management.
Our Recommendation: If you have an FDM printer, investing in a Raspberry Pi and setting up OctoPrint is one of the best quality-of-life upgrades you can make. It’s a game-changer for convenience and peace of mind.
👉 Shop OctoPrint on: OctoPrint Official Website | Raspberry Pi on Amazon
Repetier-Host: A Classic All-in-One Solution 🖥️
Repetier-Host is a classic, free, all-in-one software solution that combines a slicer (it can integrate CuraEngine or Slic3r), a printer host, and a G-code viewer. It runs directly on your desktop computer.
Our Expert Rating:
| Aspect | Rating (1-10) |
|---|---|
| Ease of Use | 6 |
| Functionality | 7 |
| Features | 7 |
| Learning Curve | 5 |
| Value | 9 |
Why We Love It: For those who prefer a single desktop application to manage their entire workflow, Repetier-Host offers a comprehensive solution. You can load your model, slice it, and then send it directly to your printer, all from one interface. It’s particularly useful if you don’t want to invest in a Raspberry Pi for OctoPrint.
- Pros:
- ✅ All-in-one solution: Slicing, hosting, and viewing in one application.
- ✅ Direct printer control: Connects via USB to your printer.
- ✅ G-code viewer: Visualize your print path.
- ✅ Free: No cost to use.
- ✅ Supports multiple slicers: Can integrate popular slicing engines.
- Cons:
- ❌ Requires your computer to stay on: Your PC needs to be connected and running during the entire print.
- ❌ No remote access: Unless you set up complex remote desktop solutions.
- ❌ Interface can feel dated: Compared to modern web interfaces.
- ❌ Less active development: Compared to OctoPrint or standalone slicers.
Our Recommendation: If you’re on a tight budget, prefer a desktop application, and don’t need remote access, Repetier-Host is a solid choice for managing your prints.
👉 Shop Repetier-Host on: Repetier Official Website
Manufacturer-Specific Apps: Creality Cloud, Prusa Connect, and More ☁️
Many 3D printer manufacturers are now offering their own cloud-based or desktop applications for monitoring and managing their printers. Examples include Creality Cloud, Prusa Connect, and UltiMaker Digital Factory.
Our Expert Rating (General):
| Aspect | Rating (1-10) |
|---|---|
| Ease of Use | 8 |
| Functionality | 7 |
| Features | 7 |
| Learning Curve | 2 |
| Value | 8 |
Why We Love Them (and their limitations): These apps are designed for seamless integration with their respective brand’s printers, often offering a very user-friendly experience right out of the box. They typically provide remote monitoring, print management, and sometimes even access to model libraries.
-
Creality Cloud: Offers a vast library of models, remote control for Creality printers, and social features. It’s great for beginners with Creality machines.
-
Prusa Connect: Provides cloud monitoring and management for Prusa printers, allowing you to upload G-code, start prints, and monitor progress from anywhere.
-
UltiMaker Digital Factory: As the Ultimaker article notes, it’s for “Managing 3D printers remotely with Ultimaker Digital Factory software,” supporting their S-line, 2+ Connect, and 3 printers. It’s a professional-grade solution for managing multiple machines.
-
Pros:
- ✅ Easy setup: Often plug-and-play with compatible printers.
- ✅ Seamless integration: Designed for specific hardware.
- ✅ Manufacturer support: Direct help for issues.
- ✅ Often free (basic tiers): Included with your printer purchase.
-
Cons:
- ❌ Vendor lock-in: Only works with that brand’s printers.
- ❌ Limited features: May not offer the depth of customization or plugin ecosystem of OctoPrint.
- ❌ Cloud dependency: Relies on internet connection and manufacturer’s servers.
- ❌ Privacy concerns: Some users are wary of sending print data to a third-party cloud.
Our Recommendation: If you own a printer from a brand that offers a robust management app (like Prusa or UltiMaker), it’s worth trying for its convenience. For Creality users, Creality Cloud can be a good starting point, but consider OctoPrint for more advanced control and privacy.
👉 Shop Creality Cloud on: Creality Official Website | Creality Cloud on Google Play | Creality Cloud on Apple App Store 👉 Shop Prusa Connect on: Prusa Research Official Website 👉 Shop UltiMaker Digital Factory on: UltiMaker Official Website
5. The Finishing Touch: Post-Processing and Repair Software 🩹
You’ve designed your model, sliced it, and printed it. Hooray! But sometimes, even with the best intentions and perfectly calibrated machines, things don’t go exactly as planned. Or perhaps your model needs a little digital nip and tuck before it’s even ready for the slicer. That’s where post-processing and repair software comes in. These tools are invaluable for fixing common 3D model issues, optimizing geometry, or even preparing models for multi-part printing.
Meshmixer: Sculpting, Repairing, and Optimizing Your Models 🛠️
Autodesk Meshmixer is a free, powerful, and incredibly versatile tool for working with mesh models (like STLs). It’s not a traditional CAD program, but rather a “swiss army knife” for editing, sculpting, repairing, and preparing models for 3D printing.
Our Expert Rating:
| Aspect | Rating (1-10) |
|---|---|
| Ease of Use | 6 |
| Functionality | 9 |
| Features | 9 |
| Learning Curve | 6 |
| Value | 10 |
Why We Love It: Meshmixer is a must-have in any 3D printer enthusiast’s toolkit. It excels at tasks like:
- Repairing non-manifold geometry: Fixing holes, flipped normals, and other issues that can cause problems in your slicer.
- Generating custom supports: Its “tree support” generator is legendary and often better than slicer-generated supports.
- Hollowing models: Saving resin for SLA prints.
- Cutting and joining models: Splitting large models into smaller, printable pieces.
- Sculpting and refining: Adding or removing detail from existing mesh models.
“I can’t tell you how many times Meshmixer has saved a print for me,” shares Sarah. “Whether it’s fixing a broken STL I downloaded or just optimizing a model for easier support removal, it’s an indispensable tool.”
- Pros:
- ✅ Comprehensive repair tools: Automatically fix common mesh errors.
- ✅ Advanced support generation: Tree supports are fantastic for FDM.
- ✅ Sculpting and mesh editing: Modify existing models with ease.
- ✅ Hollowing and infill generation: Optimize models for resin printing.
- ✅ Free: Incredible value for its capabilities.
- Cons:
- ❌ Steeper learning curve: Its interface is unique and takes some getting used to.
- ❌ No active development: Autodesk has largely stopped updating it, though it remains highly functional.
- ❌ Not a CAD program: Not for creating precise, dimensioned models from scratch.
Our Recommendation: Download Meshmixer. Seriously. Even if you only use its repair and support generation features, it will save you headaches and failed prints. It’s a cornerstone of 3D Design Software.
👉 Shop Meshmixer on: Autodesk Official Website
Netfabb: Industrial-Grade Model Preparation and Repair 🏭
Also from Autodesk, Netfabb is a professional-grade software suite for additive manufacturing. It goes far beyond simple repair, offering advanced tools for model preparation, optimization, simulation, and build plate arrangement, particularly for industrial 3D printing.
Our Expert Rating:
| Aspect | Rating (1-10) |
|---|---|
| Ease of Use | 5 |
| Functionality | 10 |
| Features | 10 |
| Learning Curve | 8 |
| Value | 6 |
Why We Love It: Netfabb is designed for serious industrial applications where print success, material efficiency, and structural integrity are paramount. It offers advanced mesh repair, lattice generation, part packing (nesting), and even simulation tools to predict warping or stress. If you’re running a professional print service or working with complex industrial parts, Netfabb provides the tools to ensure optimal results.
- Pros:
- ✅ Industrial-grade repair and optimization: Handles even the most complex mesh issues.
- ✅ Advanced lattice and support generation: For lightweighting and complex internal structures.
- ✅ Part packing/nesting: Efficiently arrange multiple parts on a build plate.
- ✅ Simulation tools: Predict print behavior and potential failures.
- ✅ Supports various additive manufacturing processes: FDM, SLA, SLS, metal printing.
- Cons:
- ❌ Very expensive: Geared towards industrial users, not hobbyists.
- ❌ Steep learning curve: A complex tool with many advanced features.
- ❌ Overkill for most hobbyists: Its capabilities far exceed typical home printing needs.
Our Recommendation: For professional users, service bureaus, or those working in industrial additive manufacturing, Netfabb is a powerful, comprehensive solution. For the average hobbyist, Meshmixer is more than sufficient.
👉 Shop Netfabb on: Autodesk Official Website
Beyond the Basics: Niche Software for Specialized 3D Printing 🧪
As 3D printing evolves, so does its software ecosystem. While CAD, slicers, and control software form the core, there’s a fascinating world of specialized tools designed for niche applications, pushing the boundaries of what’s possible. These aren’t typically for your everyday hobbyist, but they represent the cutting edge of 3D Printed innovation.
Generative Design Software: AI-Powered Innovation 🤖
Imagine telling a computer what you want a part to do, what forces it needs to withstand, and what materials you’re using, and then letting the computer design the part for you. That’s the magic of generative design software.
Why It’s Cool: These tools use AI and machine learning algorithms to explore thousands of design possibilities based on your specified constraints. The results are often organic, bionic-looking shapes that are incredibly lightweight and strong, far beyond what a human designer might conceive. Autodesk Fusion 360 (yes, it pops up again!) has generative design capabilities, as do specialized platforms like nTopology.
- Use Case: Creating optimized, lightweight components for aerospace, automotive, or medical implants.
- Benefit: Reduces material usage, improves performance, and accelerates the design process.
- Drawback: Requires powerful computing and a deep understanding of engineering principles.
Simulation Software: Predicting Print Success (or Failure!) 📊
For complex or critical prints, especially with expensive materials or large industrial machines, a failed print can be a costly disaster. Simulation software allows engineers to virtually “print” a model to predict potential issues like warping, internal stresses, or support failures before a single gram of material is used.
Why It’s Cool: These programs use finite element analysis (FEA) to model the thermal and mechanical behavior of materials during the printing process. This is particularly crucial for metal 3D printing or high-performance polymers. Autodesk Netfabb and Ansys Additive Print are prime examples.
- Use Case: Ensuring print success for critical aerospace components, medical devices, or large-scale industrial parts.
- Benefit: Saves time, reduces material waste, and ensures part integrity.
- Drawback: Extremely complex, requires specialized knowledge, and is very expensive.
Scanning Software: From Real World to Digital Model 📸
Sometimes, you don’t want to design from scratch; you want to replicate an existing physical object. That’s where 3D scanning software comes in. Paired with a 3D scanner, this software captures the geometry of a real-world object and converts it into a digital 3D model (often a mesh like an STL).
Why It’s Cool: Whether you’re reverse-engineering a part, creating a custom prosthetic, or digitizing an artifact, 3D scanning software makes it possible. Many scanners come with their own proprietary software, but general-purpose tools like Artec Studio or even some mobile apps (e.g., Polycam for LiDAR-equipped iPhones) are available.
- Use Case: Reverse engineering, custom prosthetics, artistic replication, archival of physical objects.
- Benefit: Quickly creates digital models from physical objects, enabling replication or modification.
- Drawback: Quality depends heavily on the scanner hardware; post-processing the scanned mesh can be challenging.
Choosing Your Arsenal: Factors to Consider When Selecting 3D Printing Software 🤔
Okay, we’ve thrown a lot of software at you! From beginner-friendly Tinkercad to industrial-grade Netfabb, the options are vast. So, how do you choose the right tools for your 3D printing journey? As the Facebook summary wisely states, “Choosing the right software depends on your skill level and project complexity.” This is absolutely key. Let’s break down the factors you should consider to build your perfect software arsenal.
Your Skill Level: Beginner, Intermediate, or Pro?
This is perhaps the most crucial factor. Don’t try to run before you can walk!
-
Beginner (Just starting out, new to 3D design):
- Modeling: Start with Tinkercad for its simplicity and web-based accessibility. It’s a fantastic entry point.
- Slicing: UltiMaker Cura is the undisputed champion for ease of use and broad compatibility.
- Control: Your printer’s built-in interface or a simple SD card workflow is fine.
- ❌ Avoid: Complex parametric CAD (SolidWorks), advanced sculpting (Blender for complex models), or Klipper firmware. You’ll get frustrated.
-
Intermediate (Some experience with 3D printing, ready for more complex designs):
- Modeling: Transition to Fusion 360 (hobbyist license) for parametric design, or explore Blender for artistic models.
- Slicing: Experiment with PrusaSlicer for more control, or stick with Cura and dive into its advanced settings.
- Control: Consider setting up OctoPrint for remote monitoring and management.
- ✅ Embrace: Learning new features, watching tutorials, and experimenting with settings.
-
Professional / Advanced Hobbyist (Experienced, complex projects, seeking optimization):
- Modeling: Master Fusion 360, SolidWorks, or Rhino 3D depending on your design needs. Blender for organic forms.
- Slicing: Utilize PrusaSlicer, SuperSlicer, or Orca Slicer for fine-tuned control, or Simplify3D for its unique features.
- Control: Implement Klipper firmware for speed and precision, paired with OctoPrint (or Mainsail/Fluidd).
- ✅ Explore: Generative design, simulation software, and advanced post-processing tools like Meshmixer.
Your Printer’s Ecosystem: Compatibility is Key!
Not all software plays nicely with all printers. This is a critical consideration.
- Open-Source Printers (e.g., Creality Ender series, Prusa i3, many DIY builds): These printers generally offer the most flexibility. They work well with open-source slicers like Cura and PrusaSlicer, and are often compatible with OctoPrint and Klipper.
- Proprietary Printers (e.g., some FlashForge, Ultimaker, Formlabs, Bambu Lab):
- Slicers: Many come with their own branded slicer (e.g., Bambu Studio for Bambu Lab, UltiMaker Cura for Ultimaker). While these are often optimized, they might limit your options.
- Control: Some have integrated cloud platforms (e.g., Prusa Connect, UltiMaker Digital Factory).
- Firmware: Often locked down, making upgrades or Klipper installation difficult or impossible.
- “The software you choose should match your experience and the complexity of your projects,” as the Facebook summary emphasizes. And we’d add, it must match your printer’s capabilities and openness. Always check the manufacturer’s recommendations and community forums for compatibility.
Your Budget: Free, Freemium, or Full Price?
3D printing can be an expensive hobby, but software doesn’t have to break the bank!
- Free: Tinkercad, Blender, UltiMaker Cura, PrusaSlicer, OctoPrint, Marlin, Klipper, Meshmixer. You can get started and achieve incredible results without spending a dime on software. This is fantastic for hobbyists and beginners.
- Freemium: Fusion 360 offers a powerful free tier for hobbyists and students, with paid subscriptions for commercial use. SketchUp Free is also a freemium model.
- Full Price: SolidWorks, AutoCAD, Rhino 3D, Simplify3D, Netfabb. These are significant investments, typically justified for professional use, businesses, or very serious enthusiasts who need specific advanced features.
Our Advice: Start with free software. Master it. If you hit a wall and a paid solution offers a specific feature that genuinely solves your problem and justifies the cost, then consider it. Don’t pay for features you won’t use.
Your Project Needs: Simple Toys or Complex Prototypes?
What are you actually trying to print? This will heavily influence your software choices.
- Simple Toys, Keychains, Replacement Parts: Tinkercad for design, Cura for slicing. Easy peasy!
- Functional Parts, Enclosures, Mechanical Components: Fusion 360 or SolidWorks for precise parametric design. PrusaSlicer or Simplify3D for robust slicing.
- Artistic Sculptures, Figurines, Organic Shapes: Blender or Rhino 3D for modeling. Cura or PrusaSlicer for slicing, paying attention to support generation.
- Industrial Prototypes, High-Performance Parts: Professional CAD (SolidWorks, AutoCAD), advanced slicers (Simplify3D, Netfabb), and potentially simulation software.
Operating System Compatibility: Windows, macOS, Linux?
Most popular 3D printing software is cross-platform, but it’s always worth double-checking.
- Windows: Almost all software is available for Windows.
- macOS: Many popular tools like Cura, PrusaSlicer, Fusion 360, and Blender have macOS versions. Some niche or older tools might be Windows-only.
- Linux: Open-source software like Cura, PrusaSlicer, Blender, OctoPrint, and Klipper are generally well-supported on Linux. Commercial software support can be more limited.
- Web-based: Tinkercad and SketchUp Free run in your browser, making them OS-agnostic.
Our Recommendation: Consider your current operating system and choose software that natively supports it for the best experience.
The Future is Now: Emerging Trends in 3D Printing Software 🚀
The world of 3D printing is constantly evolving, and its software is no exception. What was cutting-edge yesterday is standard today, and tomorrow’s innovations are already taking shape. At 3D Printed™, we’re always looking ahead, and we see some exciting trends that will make 3D printing even more accessible, powerful, and intelligent.
Cloud-Based Solutions: Printing from Anywhere, Anytime ☁️
The shift towards cloud computing is undeniable, and 3D printing is embracing it wholeheartedly. We’re seeing more and more platforms that allow you to design, slice, manage, and monitor your prints entirely from the cloud.
- What it means: Imagine designing a part on your tablet, sending it to a cloud slicer, and then initiating the print on your home printer (or even a print farm!) from a coffee shop across town. This offers unparalleled flexibility and collaboration.
- Examples: UltiMaker Digital Factory, Prusa Connect, Creality Cloud, and even web-based CAD tools like Tinkercad are leading the charge.
- Benefits:
- ✅ Accessibility: Work from any device, anywhere.
- ✅ Collaboration: Easily share designs and manage print queues with teams.
- ✅ Scalability: Manage multiple printers or even entire print farms from a central dashboard.
- ✅ Automatic updates: Always have the latest software features.
- Challenges:
- ❌ Internet dependency: Requires a stable connection.
- ❌ Data security/privacy: Concerns about intellectual property being stored on third-party servers.
- ❌ Latency: Potential delays in real-time control.
Our Take: Cloud solutions are here to stay and will become increasingly sophisticated. For hobbyists, they offer convenience; for businesses, they offer powerful management tools.
AI and Machine Learning: Smarter Slicing and Design 🧠
Artificial intelligence and machine learning are no longer just buzzwords; they’re actively enhancing 3D printing software. From optimizing print settings to generating complex designs, AI is making our printers smarter.
- Smarter Slicing: AI can analyze your model and automatically suggest optimal print settings (infill, supports, speed) to minimize print time, maximize strength, or reduce material usage. It can even predict potential print failures and suggest adjustments.
- Example: Plugins for OctoPrint like The Spaghetti Detective use AI to detect print failures and automatically pause the print, saving filament and frustration.
- Generative Design: As mentioned earlier, AI-powered generative design tools (like those in Fusion 360) are revolutionizing how parts are conceived, creating highly optimized, bionic structures that are impossible for humans to design manually.
- Benefits:
- ✅ Improved print success rates: Fewer failed prints.
- ✅ Optimized designs: Lighter, stronger, more efficient parts.
- ✅ Reduced learning curve: AI can guide beginners through complex settings.
- ✅ Faster iteration: Rapidly explore design variations.
- Challenges:
- ❌ Data dependency: AI models need vast amounts of data to learn effectively.
- ❌ “Black box” problem: Sometimes hard to understand why AI made a certain design choice.
- ❌ Computational power: Requires significant processing power.
Our Take: AI is poised to transform 3D printing, making it more efficient, reliable, and accessible. Expect to see more “smart” features integrated into your favorite slicers and CAD programs.
Integrated Workflows: Seamless Design-to-Print Experiences 🔗
The future of 3D printing software is about reducing friction between different stages of the workflow. We’re moving towards more integrated ecosystems where design, slicing, and printing are part of a seamless, interconnected process.
- What it means: Instead of exporting an STL from CAD, importing it into a slicer, saving G-code, and then manually transferring it to a printer, imagine a single platform where you design, click “print,” and your printer just goes.
- Examples: Manufacturers like UltiMaker are building comprehensive platforms that link their CAD plugins directly to their slicers and then to their Digital Factory for printer management. Similarly, Bambu Lab printers are designed for a highly integrated experience with Bambu Studio.
- Benefits:
- ✅ Streamlined process: Reduces steps and potential errors.
- ✅ Improved user experience: More intuitive and less frustrating.
- ✅ Faster turnaround: From idea to physical object in less time.
- ✅ Enhanced reliability: Fewer compatibility issues between different software components.
- Challenges:
- ❌ Vendor lock-in: Can limit choices if you prefer components from different brands.
- ❌ Complexity of integration: Requires significant development effort from manufacturers.
Our Take: While open-source solutions will always thrive, integrated workflows offer a compelling vision for the future, especially for professional environments and users who prioritize ease of use and reliability above all else. The goal is to make 3D printing as simple as hitting “print” on a 2D document.
Conclusion: Your Software, Your Success! 🎉

So, what software do you really need for 3D printing? The answer is a well-curated toolbox tailored to your skill level, printer, and project goals. From the creative spark of 3D modeling software like Tinkercad and Fusion 360, through the digital alchemy of slicers such as UltiMaker Cura and PrusaSlicer, to the brains of the operation in firmware like Marlin or Klipper, and the remote command centers like OctoPrint — each piece plays a vital role in turning your ideas into reality.
Our journey through the software landscape revealed that:
- Beginners should start simple with free, user-friendly tools like Tinkercad for design and Cura for slicing.
- Intermediate users can level up to Fusion 360 and PrusaSlicer, gaining parametric control and advanced slicing features.
- Advanced users and professionals benefit from powerful suites like SolidWorks, Simplify3D, and firmware upgrades like Klipper to maximize print quality and speed.
- Post-processing tools like Meshmixer are indispensable for repairing and optimizing models before printing.
- Emerging trends like cloud-based platforms, AI-driven design, and integrated workflows promise to make 3D printing more accessible and powerful than ever.
Remember the unresolved question we teased early on: Can software alone make your prints perfect? The truth is, software is a critical enabler, but it’s just one part of the equation. Printer hardware, filament quality, calibration, and your own patience and experimentation all contribute to success. However, mastering your software stack is the fastest way to unlock your printer’s true potential and avoid frustration.
At 3D Printed™, we confidently recommend starting with the free and open-source ecosystem — Tinkercad, UltiMaker Cura, PrusaSlicer, and OctoPrint — then expanding your toolkit as your skills grow. This approach balances ease of use, power, and cost-effectiveness, setting you up for a rewarding 3D printing adventure.
Happy printing, and may your layers always stick! 🚀
Recommended Links: Dive Deeper! 🔗
👉 CHECK PRICE on:
- Tinkercad: Official Website
- Fusion 360: Autodesk Official Website
- Blender: Blender Official Website
- SketchUp Free: SketchUp Official Website
- SolidWorks: SolidWorks Official Website
- AutoCAD: Autodesk Official Website
- Rhino 3D: Rhino 3D Official Website
- UltiMaker Cura: UltiMaker Official Website
- PrusaSlicer: Prusa Research Official Website
- Simplify3D: Simplify3D Official Website
- SuperSlicer: SuperSlicer GitHub
- Orca Slicer: Orca Slicer GitHub
- Marlin Firmware: Marlin Firmware GitHub
- Klipper Firmware: Klipper Firmware GitHub
- RepRapFirmware: RepRapFirmware Official Website
- OctoPrint: OctoPrint Official Website
- Repetier-Host: Repetier Official Website
- Meshmixer: Autodesk Official Website
- Netfabb: Autodesk Official Website
Books to deepen your 3D printing software knowledge:
-
3D Printing Failures: How to Diagnose and Repair All 3D Printing Issues by Sean Aranda
Amazon Link -
Mastering 3D Printing by Joan Horvath and Rich Cameron
Amazon Link -
3D Printing with Autodesk 123D, Tinkercad, and MakerBot by Lydia Sloan Cline
Amazon Link
FAQ: Burning Questions Answered 🔥

Are there any cloud-based 3D printing software options available for collaborative projects?
Absolutely! Cloud-based platforms like UltiMaker Digital Factory, Prusa Connect, and Creality Cloud enable users to design, slice, and manage prints remotely. These platforms facilitate collaboration by allowing multiple users to access and control printers, share models, and monitor print jobs from anywhere with internet access. They’re particularly useful for teams or educational settings where centralized management is key. However, keep in mind that cloud solutions depend on stable internet connections and may raise privacy concerns regarding your designs.
How do I install and configure 3D printing software for my specific printer model?
Installation usually involves downloading the software from the official website (e.g., UltiMaker Cura or PrusaSlicer) and following the installation wizard for your operating system. Configuration involves selecting your printer model from a built-in list or manually entering printer parameters like build volume, nozzle diameter, and filament type. Many slicers come preloaded with profiles for popular printers, simplifying setup. For firmware like Marlin or Klipper, installation is more technical, involving compiling and flashing firmware to your printer’s controller board. Manufacturer forums, YouTube tutorials, and community groups are invaluable resources for step-by-step guidance.
What is the difference between slicing software and 3D modeling software for 3D printing?
3D modeling software (CAD) is used to create or modify the digital 3D object you want to print. It’s your design tool, where you shape and refine your model. Examples include Tinkercad, Fusion 360, and Blender.
Slicing software takes that 3D model and converts it into a set of instructions (G-code) that your 3D printer can understand. It slices the model into layers and defines print parameters like layer height, infill, and supports. Examples include UltiMaker Cura and PrusaSlicer.
In short: modeling software creates the object; slicing software prepares it for printing.
How do I choose the right 3D modeling software for my 3D printer?
Consider your experience level, project complexity, and budget:
- Beginners: Start with free, easy-to-use tools like Tinkercad or SketchUp Free.
- Intermediate users: Try Fusion 360 (free for hobbyists) for parametric design or Blender for artistic models.
- Professionals: Use industry-standard software like SolidWorks, AutoCAD, or Rhino 3D.
Also, ensure the software exports files in formats your slicer accepts (usually STL or OBJ). Check if the software runs on your operating system and fits your workflow.
What are the best 3D printing software for beginners?
For beginners, we recommend:
- Tinkercad for 3D modeling: It’s web-based, intuitive, and free.
- UltiMaker Cura for slicing: User-friendly with excellent printer compatibility.
- OctoPrint for remote printer control (optional): Adds convenience once you’re comfortable.
These tools provide a gentle learning curve and robust community support.
What is the best 3D modeling software for beginners?
Tinkercad is the best starting point for beginners due to its simplicity and accessibility. It requires no installation and uses a drag-and-drop interface. Once comfortable, you can graduate to Fusion 360 or Blender depending on whether you want parametric or artistic modeling.
Which slicer software is recommended for 3D printing?
UltiMaker Cura is the most widely recommended slicer for its ease of use, extensive printer profiles, and active development. PrusaSlicer is excellent for users seeking more advanced features, especially if you own a Prusa printer. For professionals, Simplify3D offers premium control but comes at a cost.
Do I need CAD software for 3D printing?
Yes, if you want to create or customize your own models. CAD software lets you design parts from scratch or modify existing ones. However, if you only want to print pre-made models, you can download STL files from repositories like Thingiverse and proceed directly to slicing.
How do I convert 3D models into printable files?
You use slicer software to convert 3D models (STL, OBJ) into G-code, the printer’s language. The slicer slices the model into layers and generates instructions for the printer’s movements, extrusion, and temperatures.
What software helps fix errors in 3D models before printing?
Meshmixer and Netfabb are popular tools for repairing common mesh issues like holes, non-manifold edges, and flipped normals. Meshmixer is free and great for hobbyists; Netfabb is more advanced and used in professional settings.
Are there free software options for 3D printing beginners?
Absolutely! Many excellent free tools exist:
- Tinkercad for modeling.
- UltiMaker Cura and PrusaSlicer for slicing.
- OctoPrint for printer management.
- Meshmixer for model repair.
These provide a full workflow without any upfront cost.
What software supports multi-material 3D printing?
Slicers like PrusaSlicer and Simplify3D support multi-material or multi-color printing, allowing you to assign different filaments or colors to parts of your model. Firmware like Klipper also supports multi-extruder setups. Always check your printer’s compatibility.
Reference Links: Our Sources 📚
- UltiMaker: What Software to Use for 3D Printing
- PCMag: 3D Printing – What You Need to Know
- Thingiverse: Free 3D Models
- Autodesk Fusion 360
- Blender Official Website
- UltiMaker Cura
- PrusaSlicer
- Marlin Firmware
- Klipper Firmware
- OctoPrint
- Meshmixer
- Netfabb
We hope this comprehensive guide from 3D Printed™ has illuminated the software side of your 3D printing journey. Now, go forth and create! 🚀