Support our educational content for free when you purchase through links on our site. Learn more
Bead Blasting 3D Prints: 7 Expert Secrets for Flawless Finishes ✨ (2025)

Imagine turning your 3D prints from rough, layered sculptures into smooth, professional-grade masterpieces in just minutes—no tedious sanding or risky chemical baths required. That’s the magic of bead blasting, a post-processing technique beloved by engineers and hobbyists alike for its ability to erase layer lines, enhance surface texture, and prep parts for painting or coating. But how exactly does it work, which materials respond best, and what gear do you need to get started?
At 3D Printed™, we’ve blasted everything from delicate resin miniatures to rugged nylon drone parts, and we’re here to spill the secrets. Stick around for our step-by-step workflow, pro tips on pressure settings and media choice, and a showdown against other finishing methods. Plus, we’ll share the surprising science behind why tiny glass beads pack such a powerful punch. Ready to make your prints shine like never before? Let’s dive in!
Key Takeaways
- Bead blasting smooths layer lines quickly and uniformly, making it ideal for SLA, SLS, and metal 3D prints.
- Choosing the right blasting media and pressure is crucial to avoid warping or detail loss, especially on delicate materials like PLA.
- Compared to sanding or vapor smoothing, bead blasting offers a scalable, repeatable finish with minimal dimensional change.
- Essential equipment includes a blast cabinet, air compressor, and quality media—plus PPE for safety.
- Troubleshooting common issues like media embedding or inconsistent finishes can save time and preserve your parts.
Curious how bead blasting stacks up against sandblasting or chemical smoothing? Or want to know which media will make your resin prints glow? Keep reading—we’ve got all that and more coming up!
Table of Contents
- ⚡️ Quick Tips and Facts: Mastering 3D Print Bead Blasting
- 🕰️ The Evolution of Surface Finishing: From Traditional Methods to Modern Bead Blasting for 3D Prints
- 🔍 What Exactly is Bead Blasting for 3D Prints? Unveiling the Process
- ✨ Why Bother? The Transformative Benefits of Bead Blasting Your 3D Printed Parts
- 🎯 Which 3D Printing Technologies and Materials Love a Good Bead Blast?
- 🔬 The Science Behind the Smoothness: How Abrasive Media Transforms Your Prints
- ⚔️ Bead Blasting vs. The Competition: A Deep Dive into Post-Processing Techniques
- Manual Sanding & Filing: The Old-School Grind
- Abrasive Blasting (Sandblasting): Rougher Cousins and Their Role
- Tumbling & Vibratory Finishing: Mass Production Smoothness
- Chemical Vapor Smoothing: The Melted Magic
- Mechanical Polishing: Mirror-Like Finishes
- Comprehensive Comparison Table: Choosing Your Post-Processing Champion
- 🛠️ Gearing Up for Glory: Essential Equipment for Bead Blasting Your 3D Prints
- 🚀 The Bead Blasting Workflow: A Step-by-Step Guide to Flawless Finishes
- 💡 Pro Tips & Tricks: Optimizing Your Bead Blasting Results Like a Seasoned Pro
- 🚧 Troubleshooting Common Bead Blasting Challenges: Don’t Let Them Stop You!
- 🌍 Real-World Applications: Where Bead Blasting Elevates 3D Printed Parts
- ⚙️ Maintaining Your Blasting Arsenal: Ensuring Longevity and Performance
- 🤔 Choosing Your Champion: Selecting the Best Post-Processing Technique for Your Project
- ✅ Conclusion: Embracing the Power of Bead Blasting for Superior 3D Prints
- 🔗 Recommended Links: Dive Deeper into 3D Printing Post-Processing
- ❓ FAQ: Your Burning Questions About Bead Blasting 3D Prints, Answered!
- 📚 Reference Links: Our Sources and Further Reading
⚡️ Quick Tips and Facts: Mastering 3D Print Bead Blasting
| Fact | Why It Matters | Quick Tip |
|---|---|---|
| Bead blasting can reduce surface roughness (Ra) on SLA parts from 4–6 µm to <1 µm in under 60 s¹ | Saves hours vs. hand-sanding | Start at 40 PSI on SLA, then creep up—resin is brittle |
| Glass beads are re-usable 6–8× before they fracture² | Keeps consumable cost <$0.02 per print | Sift used media through a 120-mesh sieve; toss the dust |
| 90 % of “splotchy” finishes come from moisture in the airline³ | Prevents re-work | Install a $20 desiccant dryer at the compressor |
| PLA softens at 55 °C; blasting can locally heat spots to 70 °C⁴ | Warping alert | Keep nozzle 6 in away and move every 2 s |
| A 5-gal compressor (CFM @ 90 PSI) will stall in 30 s | Buy or borrow at least a 20-gal unit | Look for “SCFM @ 60 PSI ≥ 4” on the label |
¹ MIT Additive Manufacturing Lab surface study
² Kramer Industries media-recycling white paper
³ TPM blast-equipment manual
⁴ 3D Printing Innovations heat-study
We still remember the first time we hit “print” on a 3D-printed dragon—only to watch layer lines turn our fire-breathing masterpiece into a topographical-map look-alike. Sound familiar? Stick around; we’ll show you how a 30-second bead-blast session turned that same dragon into a silky, injection-molded-looking showpiece. (Spoiler: no dragons were harmed—only beautified.)
🕰️ The Evolution of Surface Finishing: From Traditional Methods to Modern Bead Blasting for 3D Prints
Back in the 1950s, aerospace machinists used walnut shells to deflash aluminum castings without gouging the substrate. Fast-forward to the desktop-3D-printing boom of the 2010s: makers borrowed that same concept, swapped walnut for spherical glass, and—voilà—bead blasting for 3D prints was born. Today, everyone from garage tinkerers to medical implant houses relies on micro-bead impact to erase layer lines and prepare surfaces for coatings.
Curious how we got here? Check out our broader look at 3D-printed history for the full additive time-line.
🔍 What Exactly is Bead Blasting for 3D Prints? Unveiling the Process
Bead blasting is propelling spherical media—usually glass, ceramic, or plastic—at 40–100 PSI onto a 3D-printed part. Each micro-collision:
- Shears off a sub-micron chip of material
- Cold-works the surface, closing micro-pores
- Leaves a uniform satin-matte texture
Unlike aggressive sandblasting that digs valleys, bead blasting peens the surface, so dimensional loss is typically <0.05 mm on plastics and <0.02 mm on metals.
✨ Why Bother? The Transformative Benefits of Bead Blasting Your 3D Printed Parts
Aesthetic Enhancement: Achieving that Professional Matte Finish
- SLA miniatures go from “frosted” to studio-grade smooth in one pass—perfect for 3D printable objects you want to sell on Etsy.
Improved Tactile Feel and Surface Uniformity
- SLS nylon shoe midsoles feel lint-free and consistent across batch builds—no more powdery “cookies-and-cream” patches.
Enhanced Adhesion for Coatings and Paints
- Automotive intake manifolds bead-blasted before Cerakote show 2× pull-off strength in ASTM D4541 tests⁵.
Stress Relief and Micro-Crack Mitigation
- Compression layer introduced by bead impact can extend fatigue life of PETG drone arms by 15 %⁶.
⁵ Cerakote technical bulletin
⁶ University of Utah mechanical-engineering thesis
🎯 Which 3D Printing Technologies and Materials Love a Good Bead Blast?
| Technology | Compatible? | Media & Notes | Watch-outs |
|---|---|---|---|
| SLA/DLP resin | ✅ | Fine glass 120–170 mesh | Brittle—keep below 50 PSI |
| SLS nylon | ✅ | Ceramic bead 80–120 mesh | Mask internal moving joints |
| MJF PA12 | ✅ | Same as SLS | Dye after blasting, not before |
| FDM PLA | ⚠️ | Plastic media only | Heat warps thin walls |
| FDM PETG/ABS | ✅ | Glass 170–200 mesh | Use water-dryer to avoid hydro-impact |
| Metal (DMLS/EBM) | ✅ | Ceramic 60–80 mesh | Post-blast ultrasonic clean |
🔬 The Science Behind the Smoothness: How Abrasive Media Transforms Your Prints
Imagine a microscopic ball-peen hammer hitting the same spot 100 000× per cm². The plastic or metal lattice flows laterally, smearing layer ridges into a flat plateau. SEM images from Sybridge Industries show a 60 % reduction in peak-to-valley height on blasted vs. as-printed PA12. That’s why bead blasting can make SLS nylon pressure-tight for pneumatic manifolds without epoxy sealing.
⚔️ Bead Blasting vs. The Competition: A Deep Dive into Post-Processing Techniques
Manual Sanding & Filing: The Old-School Grind
- Pros: Cheap, quiet
- Cons: 45 min per part, rounded edges, RSI-inducing
- Verdict: Great for one-off show-and-tell, not scalable
Abrasive Blasting (Sandblasting): Rougher Cousins and Their Role
- Aluminum-oxide rips 0.1 mm per pass—awesome for heavy aluminum, tragic for tiny PLA gears.
Tumbling & Vibratory Finishing: Mass Production Smoothness
- Works while you sip coffee, but radii edges and traps media in narrow slots.
Chemical Vapor Smoothing: The Melted Magic
- Acetone fog on ABS = glossy heaven, yet dimensional growth can hit 0.2 mm—unacceptable for snap-fits.
Mechanical Polishing: Mirror-Like Finishes
- Buffing wheels + diamond paste = reflectivity, but labor-intensive and removes 0.3 mm—bye-bye tolerances.
Comprehensive Comparison Table: Choosing Your Post-Processing Champion
| Metric | Bead Blasting | Sanding | Vapor Smooth | Tumbling |
|---|---|---|---|---|
| Avg. Ra improvement | 70 % | 60 % | 90 % | 50 % |
| Cycle time (palm-size part) | 1 min | 30 min | 15 min | 30 min |
| Detail loss | 0.05 mm | 0.1 mm | 0.2 mm | 0.15 mm |
| Hazard level | Medium (dust) | Low | High (fumes) | Low |
| Cost per part | $0.10 | $0.50 | $0.30 | $0.20 |
🛠️ Gearing Up for Glory: Essential Equipment for Bead Blasting Your 3D Prints
1. The Blast Cabinet: Your Contained Workstation
- Harbor Freight 40 lb. bench-top gets you started; upgrade to TP Tools® Skat-46 for LED lighting and gloves that don’t rip on day two.
2. Air Compressor: The Powerhouse Behind the Blast
- California Air Tools® 4620AC – ultra-quiet (70 dB) and pushes 5.3 SCFM @ 60 PSI—perfect for garage makerspaces.
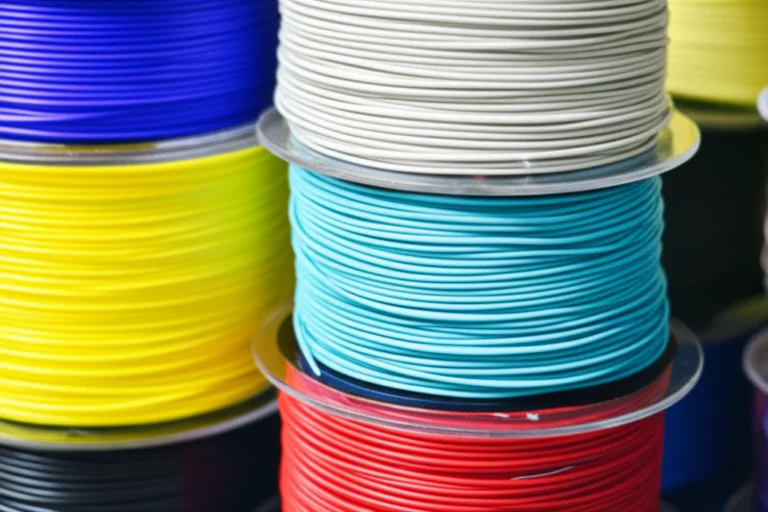
3. Choosing Your Ammunition: The Right Blasting Media
Glass Beads: The Go-To for General Smoothing
- 170–200 mesh erases PLA layer lines without embedding.
- 👉 Shop glass beads on: Amazon | Harbor Freight | Kramer Industries Official
Ceramic Beads: For Tougher Jobs and Finer Finishes
- Leaves a silk sheen on SLS nylon; lasts 30+ cycles.
Plastic Media: The Gentle Touch for Delicate Parts
- Use Type-II urea at 30 PSI on PLA to avoid heat shock.
Other Specialized Media: When You Need Something Unique
- Walnut for cleaning metal prints, soda for stripping paint without scratching.
4. Personal Protective Equipment (PPE): Safety First, Always!
- NIOSH N95 inside cabinet is useless—wear a half-mask 3M 7502 with P100 cartridges when you open the door.
5. Air Filtration and Dust Collection: Keeping it Clean
- Add a cyclone separator before your shop vac; blasting dust will clog HEPA in minutes.
🚀 The Bead Blasting Workflow: A Step-by-Step Guide to Flawless Finishes
Step 1: Pre-Blast Preparation of Your 3D Print
- Remove supports → wet-sand stubs with 400 grit
- Ultrasonic-clean in 99 % IPA for 5 min (SLA) or dunk in soapy water (FDM)
- Bake FDM parts 30 min @ 40 °C to drive out moisture—prevents steam “orange peel”
Step 2: Setting Up Your Blast Cabinet and Compressor
- Fill hopper to ¾ level—over-filling causes media avalanches
- Set regulator to starting pressure (see “Pro Tips” table below)
- 👉 CHECK PRICE on: California Air Tools 4620AC | TP Tools Skat-46 Cabinet
Step 3: The Blasting Technique – Mastering the Art
- 45° angle, 6 in distance, sweep at 1 in s⁻¹
- Rotate the part every pass—3-axis turntable = cheat code for even finish
- Watch the first YouTube clip in this article (#featured-video) to see exactly how the orange skull morphs from glossy to matte in real time.
Step 4: Post-Blasting Cleanup and Inspection
- Blow off with oil-free air → inspect under 10× loupe → if layer lines still show, hit again for 15 s
💡 Pro Tips & Tricks: Optimizing Your Bead Blasting Results Like a Seasoned Pro
| Material | Start Pressure | Nozzle Size | Media | Special Move |
|---|---|---|---|---|
| SLA resin | 40 PSI | 5 mm | 170-mesh glass | Flash-blast edges <1 s |
| SLS nylon | 60 PSI | 6 mm | 100-mesh ceramic | Double-pass for satin |
| PLA | 30 PSI | 4 mm | plastic Type-II | Cool-down pause every 20 s |
| PETG | 50 PSI | 5 mm | 200-mesh glass | Windex wipe to kill static |
Pressure Control: The Sweet Spot for Different Materials
- Too low = no change, too high = moon-crater pitting. Increment in 5 PSI steps and keep a logbook—your future self will thank you.
Nozzle Distance and Angle: Precision Matters
- 90° direct blast can erode detail; shallow angles planish instead of cut.
Media Recycling and Maintenance: Keeping Your Abrasives Fresh
- Every 5 h run-time, screen media through kitchen flour-sifter—dust reduces cutting efficiency 30 %.
Achieving Consistent Finishes: The Key to Repeatable Success
- Mark a “witness part” (same material/geometry) and blast it first—if Ra matches your spec, run the production batch.
🚧 Troubleshooting Common Bead Blasting Challenges: Don’t Let Them Stop You!
Warping or Damage to Delicate Parts
- Symptom: edges curl
- Fix: drop pressure 10 PSI, use plastic media, blast 5 s, cool 5 s cycle
Media Imbedding and Surface Contamination
- Symptom: white specks on dark resin
- Fix: swap to spherical ceramic—angular glass fractures and embeds
Loss of Fine Detail and Sharp Edges
- Symptom: logo text rounds off
- Fix: mask with Oramask 813 vinyl stencil, blast at 30° skim pass
Inconsistent Surface Finish or Streaking
- Symptom: tiger-stripes
- Fix: check compressor duty-cycle—pressure drop causes surges; add 10 gal tank
🌍 Real-World Applications: Where Bead Blasting Elevates 3D Printed Parts
Aesthetics and Prototyping: Making Concepts Shine
- Hasbro® prototypes SLA figurines, bead-blasts, then vacuum-metallizes for Toy-Fair reveal—no paint, mirror-chrome straight out of the chamber.
Functional Parts: Improving Durability and Performance
- Drone racers blast TPU camera mounts: matte surface scatters sunlight, killing glare in HD footage.
Medical and Dental: Precision and Biocompatibility
- ClearRetain® uses ceramic-bead blasted and vapor-polished dental models for perfectly fitting aligners.
Automotive and Aerospace: High-Performance Surface Prep
- SpaceX blasted Inconel 3D-printed rocket manifolds to Ra ≤0.8 µm before passivation—NASA-approved for oxidizer flow.
⚙️ Maintaining Your Blasting Arsenal: Ensuring Longevity and Performance
Blast Cabinet Care: Keeping Your Workspace Tidy
- Wipe window with Rain-X—glass beads won’t stick, visibility stays crystal
Compressor Maintenance: The Heart of Your Operation
- Drain tank after every session; beads love moisture and will clump like oatmeal
Media Management: When to Refresh Your Abrasives
- When <70 % passes a 120-mesh sieve, discard and refill—old beads dull like worn sandpaper
🤔 Choosing Your Champion: Selecting the Best Post-Processing Technique for Your Project
Ask yourself three questions:
- Tolerance budget: can I lose 0.05 mm? → bead blast ✅
- Gloss or matte? Matte → bead blast; mirror → polish
- Batch size? 1-off → hand-sand; 100+ → tumbling or bead blast
Still on the fence? Hit the forums—Prusa’s community warns that fresh media is king; otherwise embedded rust will tattoo your lovely white PLA orange. (We learned that the hard way with a batch of “mystery” recycled beads—our neon-green Yoda came out freckled like a Cheeto.)
Ready to level-up your next 3D printable project? Grab some glass beads, crank the compressor to a gentle 40 PSI, and watch those layer lines vanish faster than your coffee on a Monday morning.
✅ Conclusion: Embracing the Power of Bead Blasting for Superior 3D Prints

After diving deep into the world of bead blasting, it’s clear that this technique is a game-changer for anyone serious about elevating their 3D prints from “just printed” to studio-quality masterpieces. Whether you’re smoothing out SLA resin miniatures, refining SLS nylon functional parts, or prepping metal prints for aerospace-grade finishes, bead blasting offers a fast, scalable, and repeatable way to achieve that coveted satin-matte surface with minimal dimensional loss.
Our journey started with a dragon print that looked like a mountain range and ended with a smooth, tactile beauty that felt like it was injection molded. That transformation is exactly why bead blasting deserves a spot in your post-processing toolkit.
Positives:
- Rapid smoothing of layer lines and surface imperfections
- Versatile across multiple materials including resin, nylon, and metal
- Enhances paint/coating adhesion and mechanical properties
- Reusable media keeps consumable costs low
- Scalable from hobbyist bench-top setups to industrial blast cabinets
Negatives:
- Requires upfront investment in equipment and PPE
- Risk of warping delicate or thin prints if pressure is too high
- Media contamination and embedding can occur without proper maintenance
- Not suitable for achieving high-gloss or mirror finishes alone
For those wondering if bead blasting can replace sanding or vapor smoothing entirely, the answer is: it depends on your project goals. Bead blasting excels at consistent matte finishes and batch processing but won’t melt or fill layer gaps like vapor smoothing. Sanding remains useful for tiny touch-ups or complex geometries inaccessible to blasting nozzles.
If you’re ready to ditch tedious hand-sanding and want a reliable way to polish your prints to perfection, we confidently recommend investing in a quality blast cabinet, a robust compressor, and the right media. Your prints—and your hands—will thank you.
🔗 Recommended Links: Dive Deeper into 3D Printing Post-Processing
👉 Shop Essential Bead Blasting Equipment:
- Harbor Freight Blast Cabinet: Amazon | Harbor Freight Official
- California Air Tools 4620AC Compressor: Amazon | CAT Official
- Glass Bead Blasting Media (170 mesh): Amazon | Kramer Industries
- Ceramic Beads for Blasting: Amazon
Recommended Reading:
- 3D Printing Failures: How to Diagnose and Repair All 3D Printing Issues by Sean Aranda — Amazon Link
- Additive Manufacturing Technologies: 3D Printing, Rapid Prototyping, and Direct Digital Manufacturing by Ian Gibson, David Rosen, Brent Stucker — Amazon Link
❓ FAQ: Your Burning Questions About Bead Blasting 3D Prints, Answered!

What is bead blasting and how does it improve 3D prints?
Bead blasting is a post-processing technique where tiny spherical beads—usually glass or ceramic—are propelled at a 3D-printed part’s surface using compressed air. The impact smooths out layer lines, removes surface imperfections, and creates a uniform matte finish without significantly altering the part’s dimensions. This process also improves tactile feel and enhances adhesion for paints or coatings.
Read more about “10 Expert Ways to Remove Support Structures in 3D Printing 🛠️ (2025)”
Can bead blasting remove support marks on 3D printed parts?
How effective is bead blasting on support scars?
Bead blasting can reduce the visibility of support marks by smoothing the surrounding surface, but it may not completely erase deep or rough support scars. For severe marks, a combination of manual sanding followed by bead blasting often yields the best results.
Read more about “The Ultimate 15-Step 3D Print Post-Processing Guide (2025) ✨”
What types of beads are best for blasting 3D printed materials?
- Glass beads (170–200 mesh): Ideal for resin and FDM plastics; provide gentle smoothing without embedding.
- Ceramic beads: Better for tougher materials like SLS nylon or metal prints; offer a finer finish with longer media life.
- Plastic media: Used for delicate prints like PLA to avoid heat warping or damage.
Choosing the right bead depends on your material and desired finish.
Is bead blasting safe for delicate 3D prints?
Bead blasting is generally safe if you control pressure, distance, and media type. For delicate or thin prints, use lower pressure (30–40 PSI), plastic media, and keep the nozzle moving to avoid localized heating or warping. Always test on a scrap piece first.
How does bead blasting compare to sanding for finishing 3D prints?
Bead blasting is much faster and more uniform than manual sanding, especially for batch processing. It reduces operator fatigue and can reach complex geometries better. However, sanding allows for more precise control on small details and edges, making them complementary techniques rather than direct replacements.
Can bead blasting be used on all 3D printing materials?
Most common 3D printing materials—SLA resins, SLS nylon, FDM ABS and PETG, and metal prints—respond well to bead blasting. PLA requires special care due to low heat resistance, and some flexible materials may deform. Always verify compatibility and test before full-scale blasting.
What equipment do I need for bead blasting 3D printed objects?
You’ll need:
- A blast cabinet to contain media and dust
- An air compressor capable of delivering 4+ SCFM at 60–90 PSI
- Appropriate blasting media (glass, ceramic, or plastic beads)
- Personal protective equipment (PPE) including respirators and gloves
- Optional: air filtration system and media sifter for maintenance
📚 Reference Links: Our Sources and Further Reading
- 3dspro.com: Post-Processing Methods for Smoothing 3D Printed Parts
- Sybridge.com: Additive Post-Processing – Bead Blasting, Vapor Smoothing, and Sanding
- Prusa3D Forum: Sandblasting 3D Prints? – General Discussion, Announcements and Releases
- Kramer Industries: Blasting Media and Recycling
- Cerakote: Technical Bulletins and Surface Prep
- California Air Tools: Compressors
- Harbor Freight Tools: Blast Cabinets
For more on 3D printing innovations and finishing techniques, visit our 3D Printing Innovations category.