Support our educational content for free when you purchase through links on our site. Learn more
Chemical Smoothing 3D Prints: 12 Expert Techniques for a Flawless Finish ✨ (2025)
Ever stared at your freshly printed 3D model and thought, “If only these layer lines would just disappear”? You’re not alone. At 3D Printed™, we’ve battled the notorious “stair-step” effect countless times, and chemical smoothing has been our secret weapon to transform rough prints into sleek, glossy masterpieces. But beware: this isn’t just about aesthetics—chemical smoothing can boost your print’s strength, make it watertight, and elevate your projects from hobbyist to professional grade.
Curious how to safely wield solvents like acetone or isopropyl alcohol without turning your print into a melted mess? Or wondering which filaments actually respond to chemical smoothing (spoiler: PLA isn’t as cooperative as ABS)? Stick with us as we reveal 12 proven techniques, safety essentials, and insider tips that will have your prints shining like never before. Plus, we’ll share how to build your own vapor smoothing chamber and when to call in the pros with commercial smoothing machines. Ready to smooth out the bumps on your 3D printing journey? Let’s dive in!
Key Takeaways
- Chemical smoothing uses solvent vapors to dissolve and reflow the surface of 3D prints, erasing layer lines and creating a glossy finish.
- ABS and ASA paired with acetone vapor are the gold standard for effective and safe smoothing; PLA requires specialized filaments or alternative methods.
- Safety is paramount: always use proper ventilation, PPE, and never leave smoothing chambers unattended.
- Multiple DIY methods exist, with the cold vapor chamber being the most reliable for home users.
- Professional smoothing machines like the Polymaker Polysher and Zortrax Apoller offer automated, consistent results for serious users.
- Chemical smoothing can improve mechanical strength and make prints watertight, but may slightly alter dimensions and soften fine details.
- Alternative finishing methods like sanding, epoxy coatings, and primer remain valuable tools, especially for materials incompatible with solvents.
Ready to elevate your prints? Keep reading to master the art and science of chemical smoothing!
Table of Contents
- ⚡️ Quick Tips and Facts: Your Fast Track to Flawless Finishes!
- 📜 The Quest for Perfection: A Brief History of 3D Print Surface Finishing
- 🧪 What Exactly is Chemical Smoothing? Unveiling the Magic Behind the Mirror Shine
- ✨ Why Go Smooth? The Irresistible Benefits of Vapor Smoothed 3D Prints
- 🔬 The Science of Shine: How Solvent Vapor Transforms Your FDM Prints
- 🤔 Is Chemical Smoothing Your Print’s Best Friend? Deciding When to Dive In
- 🎨 Materials That Love a Chemical Kiss: ABS, PLA, PETG, and Beyond!
- ⚠️ The Solvent Symphony: Choosing Your Chemical Conductor (and Staying Safe!)
- 1. Acetone: The ABS Whisperer
- 2. MEK (Methyl Ethyl Ketone): A Stronger Alternative
- 3. THF (Tetrahydrofuran): Potent, Proceed with Extreme Caution
- 4. Ethyl Acetate: The PLA & PVB Pal
- 5. Dichloromethane (DCM): The ‘Use Only If You Must’ Solvent
- 6. Isopropyl Alcohol (IPA): More for Cleaning, Less for Smoothing
- 🛠️ DIY Chemical Smoothing: Our Top 5 Tried-and-True Techniques for Home Enthusiasts
- 1. The Cold Vapor Chamber Method: Our Go-To for Consistent Results
- 2. The Warm Vapor Chamber Method: Speeding Up the Shine
- 3. The Brush/Dip Method: Direct Application (Use with Extreme Caution! ❌)
- 4. The Spray Method: For Delicate Touches (Expert Level Only! ⚠️)
- 5. The ‘Bag’ Method: A Quick & Dirty Trick (Not for the Faint of Heart!)
- 🏗️ Building Your Own Vapor Smoothing Chamber: A Step-by-Step DIY Guide
- 🏭 Professional Polish: Commercial Chemical Smoothing Systems for Industrial-Grade Finishes
- 🚨 Safety First, Always! Essential Precautions for Chemical Smoothing Success
- 🔍 Troubleshooting Your Smooth: Common Issues and How to Fix Them
- 💡 Expert Insights & Advanced Tips: Mastering the Art of Chemical Smoothing
- ✨ Beyond Chemical Smoothing: Other Ways to Perfect Your Prints
- 🚀 The Future of Flawless: Innovations in Automated Post-Processing
- Conclusion
- Recommended Links
- FAQ
- Reference Links
Here at 3D Printed™, we’ve seen it all. We’ve printed countless models, from intricate tabletop miniatures to robust functional prototypes. And if there’s one universal truth in the world of Fused Deposition Modeling (FDM), it’s this: layer lines are the party crashers of an otherwise perfect print. They’re the tell-tale sign that your beautiful creation came off a spool. But what if you could wave a magic wand and make them vanish, leaving behind a glossy, injection-molded finish? Well, you can! It’s not magic; it’s science, and it’s called chemical smoothing. Let’s dive into the vapor-filled world of post-processing perfection.
⚡️ Quick Tips and Facts: Your Fast Track to Flawless Finishes!
In a hurry to get that mirror shine? Here’s the lowdown, quick and dirty:
- Not all plastics are created equal: The most common and effective pairing is ABS or ASA filament with Acetone vapor.
- PLA is tricky: Standard PLA is highly resistant to common solvents. Special filaments like Polymaker’s PolySmooth (a PVB-based material) are designed to be smoothed with Isopropyl Alcohol (IPA).
- Safety is NOT optional: You’re working with flammable and potentially toxic chemicals. ALWAYS use proper personal protective equipment (PPE) like nitrile gloves and safety glasses, and work in a very well-ventilated area.
- Vapor is king 👑: Exposing your print to solvent fumes in a controlled chamber is the best method. Direct application with a brush or dipping is messy, dangerous, and often yields poor results.
- Patience, young Padawan: The process can take anywhere from 20 minutes to several hours. Overexposing your print will turn it into a melted puddle of regret.
- Hands off! After smoothing, the print’s surface will be incredibly soft. Let it cure for several hours, or even a full day, before handling to avoid fingerprints and deformation.
- It’s not just for looks: Chemical smoothing can dramatically improve the mechanical properties of a print. As the team at Prusa3D discovered in their tests, smoothed parts can have more than double the layer adhesion of their untreated counterparts.
📜 The Quest for Perfection: A Brief History of 3D Print Surface Finishing
Ever since the first FDM printers whirred to life, makers and engineers have been on a relentless quest to conquer the z-axis—or at least, the visible evidence of it. In the early days, our options were pretty medieval: hours of sanding, filling, and painting. It was a labor of love, but “labor” was definitely the operative word.
Then, the community started experimenting, borrowing techniques from other industries. We realized that the very properties that make certain plastics printable also make them vulnerable to specific chemicals. The idea was simple: what if we could just melt the outermost layer, letting it reflow and smooth itself out? Early attempts were… explosive. Kidding! (Mostly.) But through trial, error, and a few melted Benchy boats, the techniques of vapor smoothing were refined, transforming a garage-hacker trick into a reliable post-processing method for both hobbyists and industrial applications. This journey is a perfect example of the constant 3D Printing Innovations that drive our community forward.
🧪 What Exactly is Chemical Smoothing? Unveiling the Magic Behind the Mirror Shine
So, what’s the secret sauce? Chemical smoothing, often called vapor smoothing, is a post-processing technique where a 3D print is exposed to a chemical solvent vapor. Think of it like this: the surface of your FDM print is a landscape of tiny ridges and valleys (the layer lines). The solvent vapor acts as a chemical blanket, gently dissolving just the “peaks” of this landscape.
As the plastic on the surface liquefies, surface tension pulls it all together, causing the molten plastic to flow into the “valleys.” This action fills the gaps between layers, effectively erasing the lines and creating a single, continuous, ultra-smooth surface. Once the print is removed from the vapor, the solvent evaporates, and the plastic re-hardens, locking in that glossy, professional finish. It’s less like sanding (which is subtractive) and more like glazing a donut (which is delicious and additive… well, not really, but you get the picture).
✨ Why Go Smooth? The Irresistible Benefits of Vapor Smoothed 3D Prints
You might be thinking, “Is all this effort worth it just to get rid of some lines?” Oh, it’s about so much more than that!
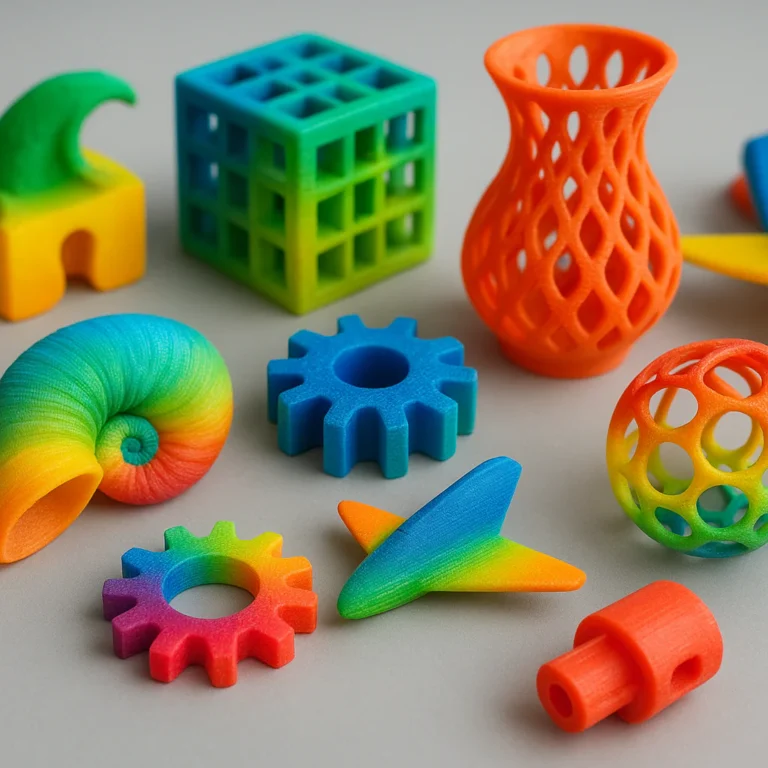
- ✅ Aesthetic Perfection: This is the most obvious benefit. Vapor smoothing can transform a hobbyist-looking print into a professional, injection-molded quality product. It’s perfect for display pieces, character models, and any 3D Printable Objects where looks matter.
- ✅ Improved Mechanical Strength: This is the hidden superpower of chemical smoothing. By fusing the outer layers together, you significantly increase layer adhesion. Prusa’s research showed a dramatic increase in tenacity and layer adhesion on smoothed Prusament ASA parts. This can be critical for functional parts that need to withstand stress.
- ✅ Watertight and Airtight Seals: The process seals the microscopic pores between layers, making prints watertight and airtight. This is a game-changer for printing vases, containers, or components for fluid or air systems.
- ✅ Easier to Clean and Sterilize: A smooth, non-porous surface is much easier to clean and has fewer nooks and crannies for bacteria to hide in. This is a significant advantage for applications in medical or food-adjacent fields.
- ✅ Time Savings (Hear us out!): As Xometry points out, you can often print faster with larger layer heights, knowing that you’ll be smoothing the part later. This can save significant print time, offsetting the time spent on post-processing.
🔬 The Science of Shine: How Solvent Vapor Transforms Your FDM Prints
Let’s put on our lab coats for a second. Most 3D printing filaments are amorphous polymers. This means their molecular chains are all jumbled up like a bowl of spaghetti. When you introduce a solvent, its molecules wiggle their way in between these polymer chains.
This process, called solvent crazing, causes the plastic to swell and soften. In a controlled vapor environment, this happens only on the very surface of the print. The solvent gives the polymer chains on the surface enough mobility to rearrange themselves, driven by surface tension, into a lower energy state—which happens to be a smooth surface! When you remove the print from the vapor, the solvent molecules evaporate, the polymer chains lock back into place, and you’re left with a solid, glossy part. It’s a beautiful dance of chemistry and physics happening right on your print bed.
🤔 Is Chemical Smoothing Your Print’s Best Friend? Deciding When to Dive In
Before you turn your workshop into a science lab, let’s ask the big question: should you be chemical smoothing this print?
| When to Use Chemical Smoothing 👍 | When to Avoid Chemical Smoothing 👎 |
|---|---|
| Aesthetic models (figurines, display pieces) | Parts with critical dimensional accuracy (the process can alter dimensions slightly) |
| Parts needing a watertight seal (vases, pipes) | Functional parts with very sharp edges (details will be softened and rounded) |
| Prints that need to be easily cleaned | Tiny, intricate models (fine details can be completely melted away) |
| Improving layer adhesion on stressed parts | Large, flat surfaces (these are prone to warping during the process) |
| When you want that “wow” factor! | When you’re printing with an incompatible material (like PETG with Acetone) |
As the Prusa team wisely notes, chemical smoothing is not suitable for most mechanical parts. The change in dimensions, however slight, can throw off tolerances for gears, threads, and snap-fit components. For those, you’re better off with a well-calibrated printer or traditional finishing methods. We have some great articles on printer calibration in our 3D Printer Reviews section.
🎨 Materials That Love a Chemical Kiss: ABS, PLA, PETG, and Beyond!
The success of your smoothing adventure depends entirely on pairing the right filament with the right solvent. It’s like a chemical matchmaking service for your prints.
1. ABS: The OG of Smooth
- Solvent: Acetone
- Verdict: ✅ Excellent! This is the classic combination. ABS dissolves readily and predictably in acetone vapor, resulting in a fantastic glossy finish. It’s reliable and the results speak for themselves.
2. PLA: The Tricky Tango with Solvents
- Solvent: Acetone (❌), Ethyl Acetate (⚠️), THF/DCM (☠️)
- Verdict: ⚠️ Difficult and often not recommended. As both Prusa3D and Xometry confirm, acetone does not work on PLA. It might make the surface slightly soft or rubbery, but it won’t smooth the layer lines. More potent (and dangerous) chemicals like Tetrahydrofuran (THF) or Dichloromethane (DCM) can work, but these are hazardous materials that require professional handling and equipment. Wevolver notes that while ethyl acetate is a safer option, its effectiveness can be limited. Honestly, if you want to smooth PLA, you’re better off with other methods like sanding or using an epoxy coating.
3. PETG: Emerging Smoothness
- Solvent: Dichloromethane (DCM)
- Verdict: ⚠️ For experts only. PETG is known for its chemical resistance, which is great for functional parts but makes it a pain to smooth. It can be smoothed with Dichloromethane, but as Prusa warns, this is a dangerous solvent that should only be handled by experienced users with proper protection.
4. ASA & HIPS: ABS’s Smoother Siblings
- ASA (Acrylonitrile Styrene Acrylate):
- Solvent: Acetone
- Verdict: ✅ Excellent! ASA behaves very similarly to ABS and smooths beautifully with acetone. Prusa even found their Prusament ASA to be one of the easiest materials to smooth.
- HIPS (High Impact Polystyrene):
- Solvent: d-Limonene
- Verdict: ✅ Good, but smelly! HIPS is famous for being a dissolvable support material, but it can also be smoothed with d-Limonene. The downside? Your print will smell strongly of orange peels for a while.
5. PVB: Designed for the Shine
- Solvent: Isopropyl Alcohol (IPA)
- Verdict: ✅ Excellent! This is the exception to the PLA rule. Filaments like Polymaker’s PolySmooth are made from PVB (Polyvinyl Butyral) and are specifically designed to be smoothed with IPA. This is a much safer alternative to harsh solvents and gives fantastic results, especially when used with a dedicated machine like the Polymaker Polysher.
6. The ‘No-Go’ List: Materials to Avoid Smoothing
Generally, you should steer clear of trying to chemically smooth these materials, as they are highly resistant to common solvents:
- Nylon
- Polycarbonate (PC)
- TPU and other flexible filaments
⚠️ The Solvent Symphony: Choosing Your Chemical Conductor (and Staying Safe!)
Choosing your solvent is the most critical decision you’ll make. This isn’t like picking a paint color; it’s a matter of effectiveness and, more importantly, safety.
| Solvent | Primary Filament(s) | Safety Level | Key Facts |
|---|---|---|---|
| Acetone | ABS, ASA, some HIPS | 🔥 Flammable | Readily available, effective, but highly flammable vapors. Good ventilation is a must. |
| Isopropyl Alcohol (IPA) | PVB (e.g., PolySmooth) | 🔥 Flammable | Much safer than acetone, but only works on specific filaments. |
| d-Limonene | HIPS | 🔥 Flammable | Derived from citrus peels, relatively safe but can cause skin irritation. Strong smell. |
| Ethyl Acetate | PLA (limited), PVB | 🔥 Flammable | Considered a safer alternative for PLA, but results can be inconsistent. |
| MEK, THF, DCM | PLA, PETG | ☠️ Highly Toxic/Hazardous | NOT RECOMMENDED FOR HOBBYIST USE. These are aggressive, dangerous chemicals requiring professional safety equipment (like a fume hood). |
Our golden rule: If you can’t easily buy it at a hardware or drug store, you probably shouldn’t be using it at home. Stick to Acetone for ABS/ASA and IPA for PVB.
🛠️ DIY Chemical Smoothing: Our Top 5 Tried-and-True Techniques for Home Enthusiasts
Ready to get started? Here are the most common methods, ranked from our most to least recommended.
1. The Cold Vapor Chamber Method: Our Go-To for Consistent Results
This is the safest and most reliable DIY method.
- Find a suitable container: You need a container made of a material that won’t be dissolved by your solvent. For acetone, a clear PP (Polypropylene, recycling #5) container is perfect. The Prusa team recommends transparent PP boxes from IKEA. Do NOT use an ABS container!
- Create a platform: Your print must not touch the liquid solvent. Create a small, raised platform out of metal, aluminum foil, or another non-reactive material.
- Prepare the solvent: Line the bottom of the container with paper towels and lightly soak them with a small amount of your solvent (e.g., acetone). This increases the surface area for evaporation.
- Place your print: Put your 3D print on the platform inside the container.
- Seal (but not too well!): Place the lid on the container. Crucially, the container must not be perfectly airtight. A simple, un-clipped lid is best. An airtight seal can cause pressure to build up, which is extremely dangerous.
- Wait and watch: Keep an eye on your print. The process can take anywhere from 30 minutes to a few hours. When it reaches the desired smoothness, carefully remove it.
- Cure: Place the print in a well-ventilated area to cure for several hours until it’s fully hardened.
2. The Warm Vapor Chamber Method: Speeding Up the Shine
This is a variation of the cold method that uses gentle heat to accelerate the process.
- Follow the steps above, but place the container on a slightly warm surface, like your printer’s heated bed set to a low temperature (around 80°C for acetone, but start lower).
- BE EXTRA CAREFUL: Heating increases the concentration of flammable vapors. This method is faster but carries a higher risk. Never leave it unattended.
- The Prusa 3D team has an excellent video, which you can see at the top of this article, that demonstrates a heated setup. Check it out at #featured-video for a great visual guide.
3. The Brush/Dip Method: Direct Application (Use with Extreme Caution! ❌)
We’re including this for completeness, but we generally don’t recommend it. Applying solvent directly with a brush or by dipping the part is incredibly difficult to control.
- Drawbacks: It’s very likely to leave brush strokes, create an uneven finish, and use a lot of solvent. There’s also a much higher risk of over-exposing the part and turning it into goo. The softened surface is also impossible to handle without causing damage.
4. The Spray Method: For Delicate Touches (Expert Level Only! ⚠️)
Using a spray bottle or airbrush to apply a fine mist of solvent can work for large, simple surfaces, but it’s an advanced technique. It requires an extremely well-ventilated area (preferably outdoors) and full respiratory protection. It’s very easy to apply too much and cause drips or runs.
5. The ‘Bag’ Method: A Quick & Dirty Trick (Not for the Faint of Heart!)
This involves placing the print in a plastic bag (one that won’t dissolve) with a solvent-soaked paper towel, making sure they don’t touch. You then seal the bag and wait. It’s hard to monitor and control, and we’d stick with the vapor chamber method for more predictable results.
🏗️ Building Your Own Vapor Smoothing Chamber: A Step-by-Step DIY Guide
Ready to build the ultimate smoothing station? Here’s how to assemble a safe and effective chamber based on community-tested designs.
- The Chamber: Start with a clear polypropylene (PP) box with a simple, non-locking lid. Transparency is key so you can monitor your print’s progress without opening the chamber.
- The Platform: Create a stable, raised platform. A small metal grid, a few bolts with a metal plate on top, or even a crumpled-up ball of aluminum foil will work. The goal is to keep the print elevated about a few centimeters from the bottom.
- The Wick: Instead of pouring liquid solvent into the bottom, line the sides and/or bottom of the chamber with paper towels. Use magnets or clips to hold them in place. Then, lightly saturate the towels with your solvent. This creates a large surface area for even vapor generation.
- (Optional) The Fan: For more consistent results, you can add a small computer fan. The Prusa team suggests mounting it to the underside of the lid to circulate the vapor. Ensure the fan’s electronics are in perfect condition to avoid any risk of sparks!
- (Optional) The Heat Source: To speed things up, you can place the entire chamber on a 3D printer heatbed or a seedling warming mat. Use a low temperature and monitor it closely. Never use an open flame or a heat source that isn’t temperature-controlled.
🏭 Professional Polish: Commercial Chemical Smoothing Systems for Industrial-Grade Finishes
If you’re running a business or need repeatable, high-quality results, a DIY setup might not cut it. That’s where professional systems come in.
- Polymaker Polysher: This is a desktop-sized machine designed specifically to smooth PolySmooth (PVB) filament using an IPA mist. It’s a safe, automated, and very effective solution for achieving a glossy finish with a compatible material.
- Zortrax Apoller: This is a more industrial-grade Smart Vapor Smoothing (SVS) device that works with acetone and MEK. It offers precise control over the process for consistent results on ABS, ASA, and HIPS prints.
These machines offer safety features, precise controls, and consistency that are difficult to replicate with a DIY setup, making them a worthy investment for serious users.
👉 Shop Smoothing Solutions on:
- Polymaker Polysher: Amazon | Polymaker Official Website
- Zortrax Apoller: Zortrax Official Website
🚨 Safety First, Always! Essential Precautions for Chemical Smoothing Success
We cannot stress this enough. You are working with hazardous chemicals. As the Prusa team says, “Remember that you work with these chemicals at your own risk.”
- Ventilation is #1: Work in a very well-ventilated space. Outdoors or in a garage with the door wide open is ideal. If you’re indoors, you need active ventilation, like a fume extractor or a window fan pointing outwards. Never, ever do this in a small, enclosed room.
- PPE is a Must:
- Gloves: Wear nitrile or other chemical-resistant gloves. Latex gloves may not be sufficient.
- Eye Protection: Safety glasses are the minimum. A full face shield is even better.
- Respirator: For anything more than a very brief exposure, a respirator with organic vapor cartridges is highly recommended.
- Fire Safety: Acetone and IPA are extremely flammable. Keep them far away from any open flames, sparks, or heat sources. Have a fire extinguisher rated for chemical fires (Class B) nearby.
- No Unattended Smoothing: Never, ever walk away and leave your smoothing chamber running, especially if you’re using heat.
- Proper Storage: Store your solvents in their original, clearly labeled containers in a cool, dry, and well-ventilated area away from living spaces.
🔍 Troubleshooting Your Smooth: Common Issues and How to Fix Them
Even with the best technique, things can go sideways. Here’s how to fix common problems.
| Problem | Possible Cause(s) | Solution(s) |
|---|---|---|
| White, chalky residue on the print | Too much moisture in the chamber; solvent evaporated too quickly. | Ensure your chamber is dry. Try the cold vapor method for a slower, more controlled evaporation. |
| Print is warped or deformed | Over-exposure to vapor; part was too thin or had large flat areas. | Reduce exposure time. Add a thick brim/skirt in your slicer settings to anchor the model. Avoid smoothing large, flat models. |
| Uneven smoothing (blotchy finish) | Poor vapor circulation. | Add a small fan to your chamber to circulate the air. Rotate the part halfway through the process. |
| Loss of fine details | Over-exposure to vapor. | This is the trade-off. For highly detailed models, reduce the smoothing time significantly or consider other finishing methods. |
| Print didn’t smooth at all | Incorrect filament/solvent pairing; not enough time or vapor concentration. | Double-check that your filament is compatible with your solvent (e.g., ABS with Acetone). Increase the time or try the warm vapor method. |
💡 Expert Insights & Advanced Tips: Mastering the Art of Chemical Smoothing
Want to take your skills to the next level? Here are a few pro tips from our workshop.
- Lower Layer Height for Better Results: While you can smooth prints with larger layer heights, starting with a lower layer height (e.g., 0.1mm or 0.15mm) will give you a much smoother final product, as there’s less material that needs to reflow.
- Print Orientation Matters: Think about how the vapor will flow around your model. Orient your print to avoid areas where vapor could pool and cause over-smoothing.
- Masking for a Two-Tone Finish: You can use materials like painter’s tape or Kapton tape to mask off sections of your print that you don’t want to be smoothed. This can create interesting textures and preserve sharp edges or functional areas.
- The Post-Cure Bake: After your print has fully hardened (wait at least 24 hours), you can try baking it in an oven at a very low temperature (well below the glass transition temperature of the plastic) for an hour or two. This can help fully evaporate any remaining trapped solvent and may slightly improve the part’s strength. This is an advanced technique; test on a scrap piece first!
✨ Beyond Chemical Smoothing: Other Ways to Perfect Your Prints
Chemical smoothing is a powerful tool, but it’s not the only one in the post-processing toolbox. Depending on your project, these alternatives might be a better fit.
- Sanding and Polishing: The old-fashioned way! As Wevolver details, this is the most common and safest method, especially for PLA. It involves starting with coarse-grit sandpaper and working your way up to ultra-fine grits, sometimes wet sanding for the final polish. It’s labor-intensive but gives you maximum control.
- Epoxy Resin Coating: Products like Smooth-On XTC-3D are two-part epoxy resins that you brush onto your print. The resin self-levels, filling in layer lines and creating a thick, glossy, and durable shell. This is fantastic for adding strength and achieving a super-smooth finish on almost any material.
- Primer and Filler: This technique involves spraying a part with a thick filler primer, sanding it down, and repeating until the layer lines are gone. It’s great preparation for painting and is a go-to method in the cosplay and prop-making communities.
- Heat Gun: A quick blast with a heat gun can melt the very outer layer of a print, reducing the appearance of layer lines. However, as Xometry warns, it’s very easy to overdo it and deform or melt your print, especially on small details.
🚀 The Future of Flawless: Innovations in Automated Post-Processing
The quest for the perfect finish is driving incredible innovation. We’re moving beyond DIY chambers and into a world of automated, intelligent post-processing. Companies are developing systems that can handle everything from support removal to smoothing and even coloring parts with minimal human intervention. These advancements are crucial for making 3D printing a viable technology for mass production and are a key area of focus in 3D Printing in Education to prepare the next generation of engineers and designers. The dream is a “push-button” solution where a rough part goes in one end and a finished product comes out the other. We’re not quite there yet, but the future is looking incredibly smooth.
Conclusion
Chemical smoothing is the secret weapon in the arsenal of any serious FDM 3D printing enthusiast or professional. From our extensive experience at 3D Printed™, we can confidently say that when done right, chemical smoothing transforms your prints from visibly layered to sleek, glossy, and even structurally stronger masterpieces. The magic lies in the right pairing of filament and solvent—ABS and ASA with acetone vapor remain the gold standard, while specialized filaments like Polymaker’s PolySmooth open the door for PLA lovers with safer solvents like isopropyl alcohol.
But beware: this process demands respect. Safety precautions are non-negotiable, and the method is not a one-size-fits-all solution. Complex, tiny, or functional parts requiring tight tolerances may not benefit and can even be damaged by chemical smoothing. For PLA and other challenging materials, sanding, epoxy coatings, or professional vapor polishing machines might be better bets.
If you’re ready to embrace the vapor chamber method, start small, test your parameters, and always prioritize safety. The payoff? Prints that look and feel like they were crafted in a high-end injection molding facility, with improved durability and a finish that will make your friends—and clients—say “Wow!”
Recommended Links
-
Polymaker Polysher (PVB smoothing with IPA):
Amazon | Polymaker Official Website -
Zortrax Apoller (Professional acetone vapor smoothing):
Zortrax Official Website -
Smooth-On XTC-3D Epoxy Resin (Alternative smoothing method):
Amazon -
Acetone (Hardware store availability):
Amazon -
Isopropyl Alcohol (IPA) for PVB smoothing:
Amazon -
Books:
“3D Printing Failures: How to Diagnose and Repair All 3D Printing Issues” by Sean Aranda — Amazon
“Make: 3D Printing: The Essential Guide to 3D Printers” by Anna Kaziunas France — Amazon
FAQ
What is chemical smoothing for 3D prints and how does it work?
Chemical smoothing is a post-processing technique where a 3D printed object is exposed to solvent vapors that partially dissolve the surface layer of the print. This causes the plastic to soften and reflow, filling in the gaps between layers and creating a smooth, glossy surface. Once the solvent evaporates, the plastic hardens again, leaving a seamless finish.
Which materials are compatible with chemical smoothing for 3D prints?
The most compatible materials are ABS and ASA, which respond excellently to acetone vapor. PVB-based filaments like Polymaker’s PolySmooth can be smoothed with isopropyl alcohol. HIPS can be smoothed or dissolved with d-limonene. PETG and PLA are generally resistant to common solvents; PLA requires more hazardous chemicals (e.g., THF or DCM) or alternative methods like sanding or epoxy coatings.
Is chemical smoothing safe for all types of 3D printed objects?
❌ No. Chemical smoothing is not safe or recommended for all prints. Small, intricate models can lose detail or deform. Functional parts requiring precise dimensions may warp or change size. Large flat surfaces are prone to warping during smoothing. Always assess your print’s geometry and purpose before smoothing.
How does chemical smoothing improve the surface finish of 3D prints?
By dissolving the outermost layer of the print, chemical smoothing removes the visible layer lines characteristic of FDM printing. The softened plastic flows into valleys between layers, resulting in a continuous, glossy surface that looks and feels like injection molding.
What are the best chemicals to use for smoothing ABS 3D prints?
Acetone is the industry standard for ABS and ASA smoothing. It’s effective, widely available, and relatively easy to handle with proper safety precautions. Alternatives like MEK or THF exist but are more hazardous and generally unnecessary for ABS.
Can chemical smoothing affect the strength of 3D printed parts?
✅ Yes. Chemical smoothing can improve layer adhesion, which often results in better mechanical strength and tenacity. Prusa’s tests showed smoothed ASA parts had more than double the layer adhesion compared to untreated parts. However, overexposure or improper technique can weaken or deform parts.
How does chemical smoothing compare to sanding and painting 3D prints?
Chemical smoothing is less labor-intensive and can produce a more uniform, glossy finish than sanding and painting. Sanding requires manual effort and can struggle with complex geometries. Painting adds color and protection but doesn’t remove layer lines. Chemical smoothing physically alters the surface for a seamless finish but requires handling hazardous chemicals and is limited to certain materials.
Reference Links
- Prusa3D’s comprehensive guide on chemical smoothing: Improve Your 3D Prints with Chemical Smoothing
- Wevolver’s insights on PLA smoothing techniques: PLA Smoothing: Methods and Safety
- Xometry’s overview of smoothing methods: Smoothest 3D Print – How To Smooth 3D Prints | Xometry
- Polymaker Official Website: https://us.polymaker.com/
- Zortrax Official Website: https://zortrax.com/
- Smooth-On XTC-3D Product Page: https://www.smooth-on.com/products/xtc-3d/
Ready to turn your layered prints into glossy works of art? Chemical smoothing might just be the game-changer you’ve been searching for. Stay safe, experiment wisely, and happy printing! 🚀