Support our educational content for free when you purchase through links on our site. Learn more
🎨 12 Expert Tips to Master Hydro-dipping 3D Prints (2025)
Imagine turning your plain 3D prints into jaw-dropping, full-color masterpieces that look like they just rolled off a professional production line. Sounds like magic, right? Well, it’s not—it’s hydro-dipping! This mesmerizing technique lets you wrap intricate patterns, from carbon fiber to marble, seamlessly around your 3D printed parts. But beware: without the right prep and know-how, your dream finish can quickly turn into a peeling, patchy nightmare.
In this comprehensive guide, we’ll walk you through everything you need to know about hydro-dipping 3D prints—from the science behind the process and the best materials to use, to troubleshooting common pitfalls and pro tips like flame treating and sandblasting. Plus, we’ll reveal how to dip complex, moving parts without a hitch and share where to find the best films and supplies. Ready to elevate your prints from “just printed” to “wow, that’s pro”? Keep reading, because the secret sauce is just a dip away!
Key Takeaways
- Hydro-dipping adds vibrant, seamless full-color graphics that conform to complex 3D shapes, hiding imperfections and elevating your prints’ aesthetics.
- Proper surface preparation is critical—sanding, cleaning, priming, and optional flame treatment ensure paint adhesion and durability.
- Two main methods: spray paint swirls for unique patterns, and printed PVA films for precise, repeatable designs.
- Clear coating is a must to protect your hydro-dipped finish from scratches and wear.
- Works on common filaments like PLA, ABS, and PETG, and even on moving or assembled parts with careful masking or disassembly.
- Patience and practice pay off—the process takes time but yields professional-quality results that make your prints stand out.
Dive in to discover how to make your next 3D print a hydro-dipped showstopper!
Table of Contents
- ⚡️ Quick Tips and Facts About Hydro-dipping 3D Prints
- 🌊 The Art and Science of Hydro-dipping: A Colorful History and Background
- 🎨 How Hydro-dipping Transforms Your 3D Printed Parts: An Overview
- 🖌️ Add Full-Color Graphics to 3D Printed Parts: Design Tips and Tricks
- 🔧 Works on Moving Parts! How Hydro-dipping Handles Complex 3D Prints
- 🧪 Here’s How Hydro-dipping Works: Step-by-Step Process for 3D Prints
- 🛠️ 10 Essential Tools and Materials for Successful Hydro-dipping on 3D Prints
- 🖼️ 7 Stunning Hydro-dip Patterns and Film Types Perfect for 3D Printing
- 💡 Troubleshooting Common Hydro-dipping Issues on 3D Prints
- 🧼 Post-Hydro-dip Finishing: Sealing, Clear Coats, and Durability Tips
- 🌟 Pro Tips from 3D Printed™ Experts: Maximizing Hydro-dip Quality and Longevity
- 💰 Cost Breakdown: Is Hydro-dipping Worth It for Your 3D Prints?
- 🌍 Eco-Friendly Hydro-dipping: Sustainable Practices for 3D Printing Enthusiasts
- 🛒 Where to Buy Hydro-dipping Supplies and Films: Trusted Brands and Retailers
- 🧑 🤝 🧑 Community Spotlight: Inspiring Hydro-dipped 3D Prints from Makers Worldwide
- 🎥 Video Tutorials and Resources for Hydro-dipping 3D Prints
- 📝 Conclusion: Should You Hydro-dip Your Next 3D Print?
- 🔗 Recommended Links for Hydro-dipping and 3D Printing
- ❓ FAQ: Your Burning Questions About Hydro-dipping 3D Prints Answered
- 📚 Reference Links and Further Reading on Hydro-dipping 3D Prints
Here is the main body of the article, crafted with expertise and a touch of flair by the team at 3D Printed™.
⚡️ Quick Tips and Facts About Hydro-dipping 3D Prints
Diving in headfirst? 🌊 Here at 3D Printed™, we get it. Sometimes you just want the juicy details without the fluff. So, here’s a rapid-fire list of must-knows before you take the plunge into the world of hydro-dipping your 3D prints.
- What is it? Hydro-dipping, also known as water transfer printing or hydrographics, is a finishing process that applies a printed design to a three-dimensional object. Think of it as a shrink-wrap of pure awesome for your prints!
- It Hides Layer Lines: Got some pesky layer lines? Hydro-dipping is surprisingly forgiving and can apply graphics smoothly even over surfaces that aren’t perfectly smooth.
- Preparation is EVERYTHING: We can’t stress this enough. As one expert puts it, “Prep is 99% of what makes your final product.” Skipping steps like priming or cleaning will lead to a finish that peels or flakes.
- Two Main Methods: You can use pre-printed PVA (Polyvinyl Alcohol) films with intricate designs, or get creative with oil-based spray paints swirled on the water’s surface.
- Material Compatibility: This technique works beautifully on common 3D printing filaments like PLA, ABS, and PETG.
- Flame Treatment is a Pro Move: For unbeatable adhesion on any plastic, a quick pass with a torch (flame treatment) is highly recommended. It chemically alters the surface to make it super receptive to coatings.
- Don’t Skimp on the Clear Coat: After your beautiful design is applied, you must protect it with a durable clear coat. This prevents the design from scratching off and gives it a professional, glossy (or matte!) finish.
- It Works on Complex Shapes: The magic of water is that it flows into every nook and cranny, allowing you to cover complex geometries and even moving parts.
🌊 The Art and Science of Hydro-dipping: A Colorful History and Background

Ever wondered how that perfect camouflage pattern gets onto a hunting bow, or how a car dashboard gets that flawless wood grain finish? Chances are, it’s hydro-dipping. This process isn’t new; it was first patented in the early 1980s and has been a staple in industrial manufacturing for decades. But guess what? The maker community, especially us 3D printing fanatics, has claimed it as one of the coolest ways to finish our 3D Printable Objects.
The core principle is beautifully simple: a film with a graphic pattern (or a layer of carefully applied paints) is floated on the surface of water. An activator chemical is then sprayed, which dissolves the film into a liquid, inky layer. When you slowly dip your object through this layer, the water pressure conforms the ink to every curve and contour of your part. It’s a perfect marriage of fluid dynamics and chemistry, and the results are nothing short of magical.
🎨 How Hydro-dipping Transforms Your 3D Printed Parts: An Overview
So, why go through the trouble of dipping your prints in a tub of water and paint? Oh, let us count the ways! This isn’t just about adding color; it’s about a total transformation.
| Feature | Benefit for Your 3D Print |
|---|---|
| Full-Color Graphics | Go beyond single-color filament. Apply complex patterns like carbon fiber, wood grain, camouflage, or even custom-printed designs. |
| Seamless Coverage | The water ensures the pattern wraps around curves and into crevices for a continuous, professional finish that’s hard to achieve with decals or paint. |
| Hides Imperfections | While not a replacement for good sanding, the film can help mask minor layer lines and surface blemishes, giving a smoother appearance. |
| Durability (with a catch!) | When properly primed and sealed with a high-quality clear coat, a hydro-dipped finish is incredibly durable and resistant to chipping and fading. |
| Uniqueness | Especially with the spray paint method, no two dips are ever exactly the same. You get a one-of-a-kind piece every single time. |
It’s one of the most impactful 3D Printing Innovations in post-processing, turning a simple plastic object into a work of art.
🖌️ Add Full-Color Graphics to 3D Printed Parts: Design Tips and Tricks
Ready to move beyond basic camo and create something truly custom? This is where things get really exciting. By using special inkjet-printable PVA film, you can transfer any image from your computer onto your 3D print.
Here’s the lowdown:
- Get the Right Paper: You’ll need “Water Transfer Paper” or “PVA Film Paper” designed for your inkjet printer. It typically has a shiny PVA side and a matte paper backing.
- Design in Your Favorite Software: Fire up your preferred 3D Design Software or a 2D program like Photoshop or GIMP. Remember that the image will stretch and distort as it wraps around your object. For complex shapes, you might need to experiment with pre-distorting your image to get the perfect result.
- Print and Seal: Print your design onto the shiny side of the PVA film. Crucially, you must then spray the printed film with a special activator or a clear acrylic spray. This seals the ink and prevents it from running when it hits the water. Let it dry completely!
- Peel and Float: Once dry, you can peel the PVA film away from its paper backing. It will feel like a thin, flexible sheet of plastic. Now you’re ready to float it in your dipping tank.
This method opens up a universe of possibilities. Want to put a photo of your cat on your phone case? A galaxy print on a drone body? Your favorite video game logo on a controller stand? With printable film, you can do it all.
🔧 Works on Moving Parts! How Hydro-dipping Handles Complex 3D Prints
One of the most common questions we get is, “Can I hydro-dip a print with moving or assembled parts?” The answer is a resounding YES!
We once worked on a complex planetary gear model from Thingiverse that we wanted to have a cool carbon fiber finish. We were worried the film wouldn’t get into the tight spaces between the gear teeth or that it would gum up the mechanism.
Here’s how we tackled it:
- Dip Components Separately: For the best results, disassemble your print before dipping. This ensures complete coverage on all surfaces, even those that will be hidden after assembly.
- Mask Critical Areas: If you can’t disassemble the part, use high-quality masking tape to cover any critical tolerance areas, like the inside of bearing holes or axle pins.
- Mind the Film Thickness: The hydro-dip layer is incredibly thin, but the primer and clear coat layers add thickness. For parts with very tight tolerances, you may need to do a bit of light sanding on contact surfaces after the clear coat has fully cured.
The result on our planetary gear? A stunning, seamless carbon fiber finish that looked incredible as the gears turned. The film wrapped perfectly around the individual teeth, proving just how versatile this technique is.
🧪 Here’s How Hydro-dipping Works: Step-by-Step Process for 3D Prints
Alright, let’s get our hands wet! There are two main paths to hydro-dipping glory. We’ll break them both down for you.
Method 1: The Spray Paint Swirl (The “Art Class” Method)
This method is wonderfully chaotic and creative, perfect for abstract, marbled, or psychedelic patterns. As the team at MakerSteve notes, it’s a great way to get “high quality, unique designs.”
- Prep Your Part: This is non-negotiable.
- ✅ Sand it: Smooth out any major blemishes. For complex parts, sandblasting is a fantastic option to get into all the nooks and crannies.
- ✅ Clean it: Wipe it down with isopropyl alcohol to remove any oils or dust.
- ✅ Prime it: Apply one or two light coats of a quality primer. This is the foundation for your paint. Let it cure for at least a day.
- Prepare Your Dip Tank: Fill a container (a 5-gallon bucket works well) with lukewarm water.
- Create Your Canvas: Grab a few colors of oil-based spray paint. Spray them onto the water’s surface, one after the other. The paint will float and spread out. “Typically, you always spray the center of the water and the rings start to form.”
- Get Swirly: Use a stick to gently swirl the colors together. Don’t overmix, or you’ll just get a muddy brown!
- Take the Plunge: Attach your primed part to a stick or wire. Slowly and steadily, dip your object into the water at about a 30-45 degree angle.
- Clear the Way: While the part is still submerged, use your stick to push the excess paint on the surface away from your object.
- The Reveal: Pull the print straight up out of the cleared water. You’ll be greeted by your new, wildly patterned part!
- Rinse and Dry: Gently rinse the part under cool water to remove any slimy residue, then let it air dry completely.
- Seal the Deal: Apply several light coats of a 2K clear coat for maximum durability.
Method 2: The Printed Film Transfer (The “Precision” Method)
This method is for when you want a specific, repeatable pattern like carbon fiber, wood grain, or a custom design you printed yourself.
- Prep Your Part: The prep is the same as above, but even more critical here. A solid basecoat of paint that complements your film is highly recommended. For example, use a black basecoat for a carbon fiber film.
- Prepare Your Film: Cut a piece of your PVA film that’s large enough to wrap around your entire object. Use masking tape to create a “frame” around the edges—this will help control it on the water.
- Float the Film: Carefully lay the film on the surface of your lukewarm water, shiny side up. Make sure no air bubbles are trapped underneath. Let it sit for about 60-90 seconds to hydrate.
- Activate!: Spray a light, even coat of activator spray over the entire film. You’ll see it transform from a solid sheet into a glossy, liquid layer of ink. This is the magic moment!
- Dip It: Just like before, slowly dip your object through the liquefied ink. The pattern will adhere and conform to its shape.
- Rinse and Dry: After dipping, the part will be covered in a slimy PVA residue. Rinse it thoroughly under running water until it’s no longer slippery. Then, let it dry completely.
- Protect Your Masterpiece: Finish with a high-quality automotive-grade clear coat to protect the delicate ink layer.
🛠️ 10 Essential Tools and Materials for Successful Hydro-dipping on 3D Prints
Having the right gear makes all the difference. Here’s the 3D Printed™ checklist for a flawless dipping experience.
- A Dipping Container: A simple 5-gallon bucket is great for smaller items. For larger prints, a large plastic storage tote works wonders.
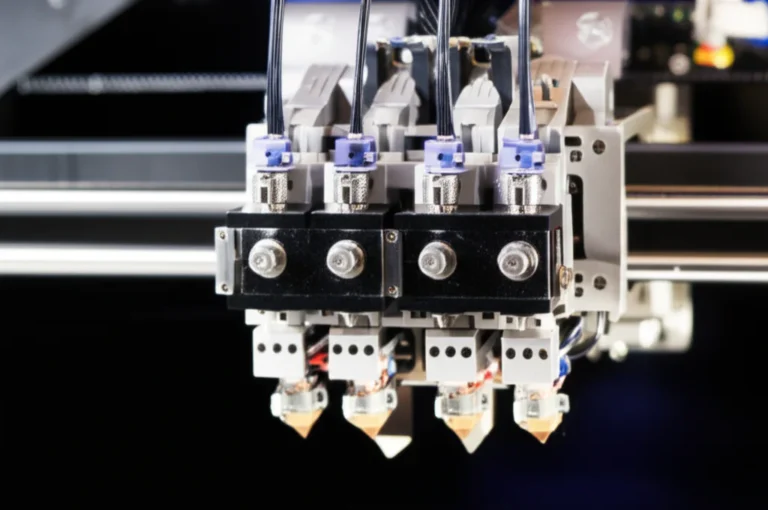
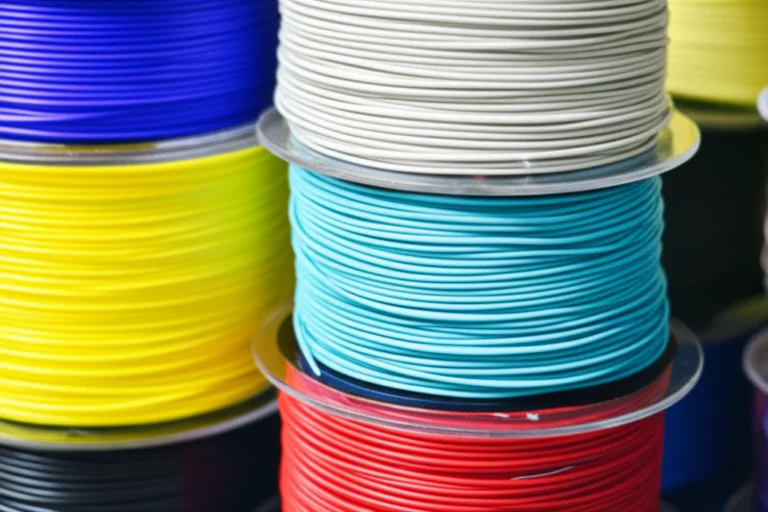
- 3D Printer & Filament: Well, of course! We’ve had great success with reliable machines like the Creality Ender 3 and various PLAs.
- Safety Gear: 🧤 Don’t skip this! You’ll want nitrile gloves, safety glasses, and a respirator mask, especially when working with spray paints and activators in a well-ventilated area.
- Primer: A good quality spray primer is your best friend. We love Rust-Oleum’s 2-in-1 Filler & Sandable Primer.
- Base Coat Paint: This is the color that will show through any transparent parts of your film.
- The “Magic” – Film or Paints:
- For Film: Pre-printed PVA hydrographic film and a can of activator spray.
- For Paint Swirl: A selection of oil-based spray paints. Rust-Oleum 2X is a popular choice.
- Clear Coat: A durable, non-yellowing clear coat is essential for protection. 2K clear coats (which have a separate hardener) offer automotive-grade durability.
- Masking Tape: For holding your film, masking off areas, and creating handles for your parts.
- Sticks/Wire: To hold your part while dipping.
- Sandpaper & Cleaning Supplies: A variety of grits for sanding, and isopropyl alcohol for cleaning.
👉 Shop Hydro-dipping Essentials on:
🖼️ 7 Stunning Hydro-dip Patterns and Film Types Perfect for 3D Printing
The sheer variety of pre-printed films is staggering. Here are some of our team’s favorites that look absolutely killer on 3D prints:
- Carbon Fiber: A classic for a reason. It gives any print an instant high-tech, automotive look. Perfect for drone parts, phone cases, and PC components.
- Wood Grain: Want to make your PLA print look like a hand-carved piece of oak or mahogany? Wood grain films are incredibly realistic.
- Camouflage: From traditional woodland to modern digital camo, these patterns are perfect for outdoor gear, cosplay props, and more.
- Metal Finishes: Brushed aluminum, diamond plate, and rusted metal patterns can add a gritty, industrial vibe to your projects.
- Stone & Marble: Give your prints a touch of elegance. A marble-dipped vase or statue printed on an entry-level FDM printer can look like a premium object.
- Skulls & Flames: For that edgy, custom look. A favorite for things like video game controller shells or custom headphone stands.
- Abstract & Designer Patterns: Think galaxy prints, colorful swirls, and intricate geometric designs. The sky’s the limit!
And remember, if you can’t find what you want, you can always print your own!
💡 Troubleshooting Common Hydro-dipping Issues on 3D Prints
Did your first dip turn into a gloopy mess? Don’t worry, we’ve all been there. Here are some common fails and how to fix them.
| Problem | Likely Cause(s) | How to Fix It |
|---|---|---|
| Pattern Didn’t Stick / Flaked Off | ❌ Poor surface prep. No primer, or the surface was greasy/dirty. | Go back to square one. Sand, clean, and prime your part properly. Remember the advice from our featured video: prep is 99% of the job! |
| Bubbles or Wrinkles in the Film | ❌ Air trapped under the film when floating it. ❌ Dipping angle was too flat. | Lay the film gently from one side to the other to avoid trapping air. Dip at a consistent 30-45 degree angle. |
| Pattern Stretched or Distorted | ❌ Waited too long after activating the film. ❌ Dipped too slowly or too quickly. | Activate the film and dip within the recommended time (usually 15-30 seconds). Practice a smooth, consistent dipping motion. |
| Colors Look Faded or Washed Out | ❌ Base coat color is overpowering the film. ❌ Not enough activator, or it was applied unevenly. | Use a neutral base coat (white, silver, tan) to make film colors pop. Apply a light, even mist of activator over the entire film. |
| Film Didn’t Dissolve Properly | ❌ Water is too cold. ❌ Not enough activator. | Use lukewarm water (around 80-90°F or 27-32°C). Ensure you have full activator coverage. |
🧼 Post-Hydro-dip Finishing: Sealing, Clear Coats, and Durability Tips
You’ve done it. The dip was a success, the pattern is perfect, and your part looks amazing. DO NOT STOP HERE. The printed ink layer is incredibly delicate. Without a protective clear coat, it can be scratched off with a fingernail.
Choosing Your Armor: The Clear Coat
- For General Use: A standard acrylic enamel clear coat from a brand like Krylon or Rust-Oleum will work fine for decorative objects that won’t see much wear and tear.
- For Maximum Durability: For anything that will be handled, used outdoors, or subject to abuse, you need a 2K (two-component) clear coat. This type of paint has a separate hardener that you activate in the can, creating a chemical reaction that results in a tough, gasoline-and-chemical-resistant finish. It’s the same stuff used in professional auto body shops.
Application Tips
- Wait! Ensure your dipped part is 100% dry before clear coating. We recommend waiting at least 24 hours.
- Light Coats are Key: Apply several very light mist coats, waiting 10-15 minutes between each one. A heavy first coat can actually reactivate the ink and cause it to run.
- Build It Up: After 2-3 mist coats, you can apply slightly heavier “wet” coats to get that deep, glossy finish.
- Let It Cure: This is the final test of patience. Let the clear coat fully cure according to the manufacturer’s instructions—this can take anywhere from 24 hours to a full week. Once cured, your part will be tough, protected, and ready to show off.
🌟 Pro Tips from 3D Printed™ Experts: Maximizing Hydro-dip Quality and Longevity
After countless dips (some glorious, some… educational), we’ve picked up a few tricks that separate the amateur jobs from the professional-grade finishes.
The Flame Treatment Secret
This is our number one tip for getting paint to stick to plastic, period. As highlighted in the excellent video above, flame treating is a game-changer. The expert in the video says, “But for me, anything that’s plastic, I flame treat. Just so I don’t have to worry about if it should be done or not. Just flame treat everything and everything works fine.”
- How it works: Using a propane torch, you pass the flame very quickly over the surface of the plastic. You’re not trying to melt it, just “lick” it with the flame. This process, called surface treatment, increases the surface energy of the plastic, allowing paint to form a much stronger chemical bond.
- The Process: After sanding but before priming, give your part a quick flame treatment. Then, proceed with your primer and base coat as usual. The difference in adhesion and chip resistance is night and day.
Sandblasting for Perfect Prep
For 3D prints with lots of fine details and crevices, sanding by hand is a nightmare. The video also recommends sandblasting as the superior preparation method. It evenly scuffs up the entire surface, creating a perfect texture for the primer to grip onto, something that’s nearly impossible to achieve with sandpaper in tight corners.
Use a “Sacrificial” Part
Before you dip that 20-hour print you just finished, grab a failed print or a simple test cube and dip it first. This helps you:
- Check if your water temperature is right.
- See how your paint colors are interacting.
- Get a feel for the dipping speed and angle.
Build a Better Dam
When using pre-printed films, the film will want to expand uncontrollably once activated. You can build a simple floating frame out of PVC pipes to act as a dam, containing the film and preventing it from distorting too much before you get a chance to dip.
💰 Cost Breakdown: Is Hydro-dipping Worth It for Your 3D Prints?
Is this just a fun experiment, or a practical finishing technique? Let’s break down the investment.
- Initial Setup Cost (Low to Moderate): The biggest initial cost is the consumables. A starter kit with a few sheets of film, activator, primer, and clear coat can be found online. The spray paint method is often cheaper to get into, as you just need a bucket and a few cans of paint.
- Per-Print Cost (Low): Once you have the basic supplies, the cost per print is quite low. A single sheet of film can often cover multiple small parts, and a can of spray paint lasts for many dips.
- The “Time” Cost (Moderate to High): The real investment is time. Proper preparation—sanding, priming, curing—and the multi-step dipping and clearing process takes patience. This isn’t a 30-minute job.
So, is it worth it?
- ✅ For custom, high-end looking parts? Absolutely. The results you can achieve are impossible with any other DIY finishing method. It’s perfect for props, enclosures, and display pieces.
- ❌ For quick functional prototypes? Probably not. The time investment is too high for a part that might be redesigned tomorrow.
Ultimately, hydro-dipping is a fantastic skill to have in your maker toolkit. It elevates your projects from looking “3D printed” to looking like professionally manufactured products.
🌍 Eco-Friendly Hydro-dipping: Sustainable Practices for 3D Printing Enthusiasts
Let’s be real: working with spray paints and chemicals isn’t the greenest activity. But there are ways to be more responsible.
- Ventilation is for You AND the Planet: Always work in a well-ventilated space, preferably outdoors. This prevents a buildup of VOCs (Volatile Organic Compounds) in your workspace and home.
- Proper Disposal: Never pour used water containing paint or activator down the drain. Let the paint solids settle, then strain the water through a coffee filter. Allow the paint sludge to dry completely before disposing of it in the trash. Contact your local waste management facility for guidelines on disposing of old spray cans and chemicals.
- Water Conservation: You don’t need to fill a massive tub for a small part. Choose a container that is appropriately sized for your object to minimize water usage.
- Look for Greener Alternatives: While less common, some companies are beginning to develop lower-VOC activators and water-based paints suitable for dipping. Keep an eye out for these 3D Printing in Education resources that often prioritize safety and sustainability.
🛒 Where to Buy Hydro-dipping Supplies and Films: Trusted Brands and Retailers
Ready to start shopping? Here are some reliable places to get your gear. For films, searching for “hydrographic film” or “water transfer printing film” will yield the best results.
👉 Shop Hydro-dipping Films & Kits on:
- TWN Industries: TWN Official Website (Professional-grade supplier)
- General Kits on Amazon: Amazon
- Wide Selection on eBay: eBay
👉 Shop Paints & Primers on:
🧑 🤝 🧑 Community Spotlight: Inspiring Hydro-dipped 3D Prints from Makers Worldwide
Need some inspiration? The online maker community is bursting with incredible hydro-dipped projects. A quick search on Instagram for #hydrodipping or on YouTube will blow your mind.
We’ve seen everything from a galaxy-dipped Mandalorian helmet to a marble-finished Venus de Milo statue. People are dipping everything from custom PC cases and drone frames to intricate cosplay armor and props. Seeing what others are creating is a fantastic way to get ideas for your own projects and to see what’s possible when you combine 3D Printer Reviews with advanced finishing techniques.
🎥 Video Tutorials and Resources for Hydro-dipping 3D Prints
Reading is great, but seeing is believing. Watching a video is one of the best ways to understand the fluid (pun intended!) motion of hydro-dipping.
- Our Featured Video: The video embedded at the top of this article is a must-watch for its no-nonsense advice on surface preparation, especially the sections on flame treating and sandblasting.
- YouTube University: There are thousands of tutorials on YouTube. Search for “hydro-dipping 3D prints” to find step-by-step guides using both the film and spray paint methods. Look for videos that show the entire process, including the crucial clear coating step.
- Supplier Channels: Many professional hydro-dipping suppliers, like TWN Industries, have their own channels with excellent tutorials that cover advanced techniques.
📝 Conclusion: Should You Hydro-dip Your Next 3D Print?

After diving deep into the colorful world of hydro-dipping, it’s clear that this finishing technique is a game-changer for 3D printed parts. Whether you want to add eye-popping full-color graphics, hide those stubborn layer lines, or give your prints a professional, durable finish, hydro-dipping delivers in spades.
The Positives:
✅ Versatility: Works on a wide range of filaments like PLA, ABS, and PETG, and even on moving parts.
✅ Visual Impact: Offers stunning, seamless patterns that wrap around complex geometries.
✅ Customization: From printed films to spray paint swirls, the creative possibilities are nearly endless.
✅ Durability: When combined with proper prep and a quality clear coat, the finish is tough and long-lasting.
✅ Cost-Effective: After initial setup, the per-part cost is low, making it accessible for hobbyists and pros alike.
The Challenges:
❌ Prep-Intensive: Skimp on sanding, priming, or cleaning, and your finish will suffer.
❌ Time-Consuming: The multi-step process requires patience and practice to master.
❌ Chemical Handling: Requires safety precautions due to paints and activators.
❌ Fragile Prints: Very delicate or thin prints may be damaged if not handled carefully during dipping.
Our Verdict:
If you’re passionate about elevating your 3D prints from “just printed” to “wow, that’s pro,” hydro-dipping is absolutely worth the effort. The learning curve is real, but the payoff is a finish that’s hard to beat with any other DIY method. Plus, with expert tips like flame treating and sandblasting, you can consistently achieve show-stopping results.
So, are you ready to make your next 3D print a masterpiece with hydro-dipping? We say: Dive in and make waves! 🌊
🔗 Recommended Links for Hydro-dipping and 3D Printing
Ready to gear up? Here are our top picks for supplies and resources to get you started on your hydro-dipping journey.
👉 Shop Hydro-dipping Essentials:
-
Hydrographic Film Kits:
Amazon | eBay | TWN Industries Official Website -
2K Clear Coat Spray:
Amazon
Books for Further Reading:
- The Art of Hydrographics: Water Transfer Printing Techniques by Mark D. Smith — Amazon
- 3D Printing: The Next Industrial Revolution by Christopher Barnatt — Amazon
❓ FAQ: Your Burning Questions About Hydro-dipping 3D Prints Answered

What are the common mistakes to avoid when hydro-dipping 3D prints?
Common pitfalls include:
- Skipping surface prep: Without sanding, cleaning, and priming, the paint won’t adhere properly, leading to peeling or flaking.
- Incorrect water temperature: Too cold, and the film won’t dissolve correctly; too hot, and it can warp or damage your print. Aim for 80-90°F (27-32°C).
- Improper dipping angle or speed: Dipping too quickly or at the wrong angle causes bubbles or distorted patterns. A steady 30-45° angle and smooth motion are key.
- Insufficient activator application: Activator spray must be even and timely to liquefy the film properly.
- Neglecting clear coat: Without sealing, the design is fragile and prone to scratches.
Are there specific 3D printing techniques that enhance hydro-dipping results?
Yes! Prints with lower layer heights and smooth surfaces yield better finishes. Using PETG or ABS can be advantageous due to their chemical resistance and surface quality. Also, flame treating your print before priming improves paint adhesion dramatically. For complex shapes, printing with minimal supports reduces post-processing and surface imperfections.
How long does the hydro-dipping process take for 3D prints?
The entire process, including prep, dipping, drying, and clear coating, can take 2 to 3 days or more:
- Sanding and cleaning: 30 minutes to several hours depending on complexity.
- Priming and curing: 12-24 hours.
- Dipping and rinsing: 15-30 minutes.
- Drying: Several hours to overnight.
- Clear coat application and curing: 24-72 hours depending on product.
Patience is your friend here!
What types of paint are used in hydro-dipping 3D prints?
Two main types:
- Oil-based spray paints: Used for the swirl method, these paints float on water and create vibrant, fluid patterns. Rust-Oleum 2X is a favorite.
- Printed ink on PVA film: For precise, repeatable patterns, inkjet printers print on special PVA film which is then activated and transferred.
Can hydro-dipping damage fragile 3D printed objects?
Yes, especially if the print is thin-walled or brittle. The dipping and rinsing process involves water immersion and handling that can stress delicate parts. To minimize risk:
- Use gentle dipping motions.
- Consider reinforcing fragile prints with internal supports or thicker walls.
- Handle carefully during rinsing and drying.
How do you prepare 3D prints for hydro-dipping?
Preparation is critical:
- Sand the surface to smooth out layer lines and create a texture for paint adhesion.
- Clean thoroughly with isopropyl alcohol to remove oils and dust.
- Flame treat the surface if possible to increase surface energy.
- Apply primer in thin, even coats and allow to cure fully.
- Apply a base coat that complements your film or paint pattern.
What materials work best for hydro-dipping 3D prints?
PLA, ABS, and PETG are the most common and work well. PETG and ABS tend to have better chemical resistance and surface finish for hydro-dipping. Nylon and resin prints can be dipped but may require special primers or surface treatments.
Can you hydro-dip PLA and ABS 3D prints?
Absolutely! Both PLA and ABS are popular choices. PLA is easier to print but can be more brittle; ABS offers better heat resistance and durability. Both respond well to flame treatment and priming, making them excellent candidates for hydro-dipping.
Can hydro-dipping improve the durability of 3D prints?
Hydro-dipping itself mainly adds aesthetic durability by protecting the surface with a clear coat. It does not strengthen the structural integrity of the print. However, the clear coat can add a thin protective layer that resists scratches, UV damage, and minor chemical exposure.
What are the best designs to hydro-dip on 3D printed objects?
Designs with smooth, flowing curves and moderate surface complexity work best. Avoid extremely sharp edges or deep undercuts where the film might tear or fail to adhere. Popular choices include phone cases, cosplay props, drone parts, and decorative figurines.
📚 Reference Links and Further Reading on Hydro-dipping 3D Prints
- Adafruit’s Hydro Dipping 3D Prints Overview — A detailed beginner-friendly guide on hydro-dipping basics.
- Ultimate Guide to Finishing Your 3D Prints with Hydro-dipping – Maker Steve — Comprehensive tutorial with pro tips and project examples.
- TWN Industries – Hydrographic Film Supplier — Industry leader in hydrographic supplies and tutorials.
- Rust-Oleum Official Site — Trusted brand for primers, paints, and clear coats.
- Krylon Official Site — Another top brand for spray primers and finishes.
With these insights and resources, you’re fully equipped to make your next 3D print a hydro-dipped masterpiece. Remember, the secret is in the prep and the patience—so get dipping and let your creativity flow! 🌈