Support our educational content for free when you purchase through links on our site. Learn more
How Do You 3D Print Something? Discover 20 Essential Steps for Success in 2024! 🚀
Have you ever dreamed of creating your own custom toys, tools, or even intricate art pieces right from the comfort of your home? 3D printing makes this possible, and it’s not just for tech wizards anymore! In this comprehensive guide, we’ll walk you through 20 essential steps to successfully 3D print anything your imagination can conjure. From understanding the basics of Fused Filament Fabrication (FFF) to exploring the latest innovations in the industry, we’ll cover it all.
Picture this: Last summer, my friend decided to 3D print a replacement part for his old lawnmower. He was amazed not only by how quickly he could get the part made but also by how much money he saved compared to ordering a new one online. This experience sparked a newfound passion for 3D printing, and now he’s creating everything from custom phone cases to unique decor items! Ready to dive into the world of 3D printing? Let’s get started!
Key Takeaways
- Understand the Basics: 3D printing is an additive manufacturing process that builds objects layer by layer.
- Choose the Right Printer: Select a printer that fits your needs, whether it’s for hobby projects or professional applications.
- Design Matters: Use CAD software to create or modify 3D models before printing.
- Slicing Software: Prepare your models for printing using slicing software to convert them into a format your printer can understand.
- Post-Processing: Don’t forget to clean and finish your prints for the best results!
Ready to start your 3D printing journey? Check out our recommended printers like the Creality Ender 3 or Anycubic i3 Mega—perfect for beginners and enthusiasts alike! Shop 3D Printers and unleash your creativity today!
Table of Contents
- Quick Tips and Facts
- The Evolution of 3D Printing: A Brief History
- How Does 3D Printing Work? A Step-by-Step Guide
- Understanding Fused Filament Fabrication (FFF) 3D Printing
- What Can You 3D Print? A Comprehensive List
- 3D Printing in Consumer Goods: Transforming the Market
- 3D Printing in the Medical Field: Innovations and Applications
- 3D Printing in the Automotive Industry: Revolutionizing Production
- 3D Printing in Aerospace: Pushing the Boundaries
- 3D Printing in Dental Applications: Crafting Perfect Smiles
- 3D Printing for Prosthetics: Changing Lives
- 3D Printing in Architecture: Designing the Future
- 3D Printing in Archaeology: Uncovering the Past
- 3D Printing in Art Restoration: Preserving Masterpieces
- 3D Printing in Forensics: Solving Crimes with Precision
- 3D Printing in the Film Industry: Creating Visual Magic
- 3D Printing in Education: Inspiring the Next Generation
- How to Print with a 3D Printer: A Beginner’s Guide
- Where to Find 3D Printing Files: Your Go-To Resources
- Conclusion
- Recommended Links
- FAQ
- Reference Links
Quick Tips and Facts
🤔 Are you new to 3D printing? Here are some quick tips and facts to get you started:
- 3D printing is an additive manufacturing process, meaning it creates objects layer by layer, adding material to create a 3D shape.
- 3D printing is computer-controlled, using CNC (Computer Numerical Controlled) machines to operate.
- 3D printing has a wide range of applications, including prototyping, manufacturing, and DIY projects.
- 3D printing is relatively inexpensive, easy to use, and allows for rapid prototyping, intricate geometries, and customizability.
- 3D printing has some drawbacks, including relatively slow production, weak parts, and often requires support structures.
Types of 3D Printing:
- Fused Deposition Modeling (FDM): Most common type, uses melted plastic filament extruded onto a build plate.
- Stereolithography (SLA): Uses a laser to solidify liquid resin layer by layer.
- Selective Laser Sintering (SLS): Uses a laser to fuse powdered material.
- Laminated Object Manufacturing (LOM): Uses a laser or knife to cut slices out of sheets of material, which are then glued together.
Designing for 3D Printing:
- Part Orientation: Design with the build face in mind, consider the direction of force, and maximize surface area on the build plate.
- Overhangs and Arches: Avoid flat overhangs over 45 degrees, use angled overhangs or arches for support.
- Interfacing with Other Parts: Leave tolerances for shrinkage, drill holes slightly undersized, tap threads, and be aware of material corrosion.
Resources:
- Desktop Printers: MakerBot, FormLabs, RepRap, Ember.
- Industrial Printers: Stratasys, 3D Systems, Solidscape, Mcor.
- 3D Printing Services: Shapeways, Ponoko, i.materialize, Sculpteo.
- 3D Model Sites: Thingiverse, Pinshape, MyMiniFactory, Shapeways.
- Free 3D Design Software: Autodesk 123D, Tinkercad, SketchUp, OpenSCAD, Blender.
The Evolution of 3D Printing: A Brief History

🔙 Let’s take a brief look at the history of 3D printing:
- Early Development: 3D printing has its roots in the 1970s, but commercialization didn’t occur until the 1990s.
- First Self-Replicating 3D Printer: The first self-replicating 3D printer model was created around 2008.
- Additive Manufacturing Gained Popularity: 3D printing gained popularity in the 2000s, with applications ranging from medical implants to prosthetic limbs.
How Does 3D Printing Work? A Step-by-Step Guide
🤔 Here’s a step-by-step guide on how 3D printing works:
- Create a CAD (Computer-Aided Design) file: Design the object using software or a 3D scanner.
- Convert the CAD file: Convert the design into a format readable by the 3D printer, typically an STL file.
- Manipulate the STL file: Set the orientation and size of the object, and repair any inconsistencies.
- Prepare the 3D printer: Load the filament and process the STL file using slicing software to convert it into layers.
- Build the object: The 3D printer builds the object layer by layer.
- Process the final piece: Handle the finished object carefully and remove any residual powder.
Understanding Fused Filament Fabrication (FFF) 3D Printing
🔩 FFF is the most common type of 3D printing. Here’s how it works:
- Heated Nozzle: A heated nozzle moves across a platform, depositing molten plastic in thin layers.
- Slicing Software: Separates the design into layers for 3D printing optimization.
- Filament Materials: Thermoplastics, ABS, PLA, HIPS, TPU, ASA, PETG, PLA, etc.
What Can You 3D Print? A Comprehensive List
🤔 Here’s a comprehensive list of what you can 3D print:
- Rapid Prototyping (RP): Creates models and prototypes quickly, often within hours.
- Wide Range of Applications: From consumer goods to medical devices, aerospace parts, and more.
- Growing Market: The global market for 3D printing products and services is expected to exceed $40 billion by 2024.
3D Printing in Consumer Goods: Transforming the Market
🛍️ 3D printing is transforming the consumer goods market. Here’s how:
- Customization: 3D printing allows for customization, design innovation, and faster product launches.
- Design Innovation: 3D printing enables the creation of complex geometries and structures that cannot be produced using traditional manufacturing methods.
3D Printing in the Medical Field: Innovations and Applications
🏥 3D printing is revolutionizing the medical field. Here are some innovations and applications:
- Organ Printing: 3D printing is being used to create organs for transplantation.
- Prosthetics: 3D printing is being used to create custom prosthetics.
- Surgical Planning and Training: 3D printing is being used to create models for surgical planning and training.
3D Printing in the Automotive Industry: Revolutionizing Production
🚗 3D printing is revolutionizing the automotive industry. Here’s how:
- Rapid Prototyping: 3D printing allows for rapid prototyping, reducing the time and cost of product development.
- Custom Parts: 3D printing enables the creation of custom parts, reducing inventory and lead times.
3D Printing in Aerospace: Pushing the Boundaries
🚀 3D printing is pushing the boundaries in the aerospace industry. Here’s how:
- Lightweight Parts: 3D printing enables the creation of lightweight parts, reducing fuel consumption and increasing efficiency.
- Complex Geometries: 3D printing enables the creation of complex geometries and structures that cannot be produced using traditional manufacturing methods.
3D Printing in Dental Applications: Crafting Perfect Smiles
🦷 3D printing is being used in dental applications. Here’s how:
- Crowns and Aligners: 3D printing is being used to create custom crowns and aligners.
- Bridge Models: 3D printing is being used to create bridge models.
- Retainers and Orthodontic Models: 3D printing is being used to create retainers and orthodontic models.
3D Printing for Prosthetics: Changing Lives
🦾 3D printing is being used to create prosthetics. Here’s how:
- Custom Prosthetics: 3D printing enables the creation of custom prosthetics, improving the lives of individuals with amputations.
- Reducing Costs: 3D printing reduces the cost of prosthetics, making them more accessible to individuals in need.
3D Printing in Architecture: Designing the Future
🏢 3D printing is being used in architecture. Here’s how:
- Scale Models: 3D printing is being used to create scale models of buildings and structures.
- Complex Geometries: 3D printing enables the creation of complex geometries and structures that cannot be produced using traditional manufacturing methods.
3D Printing in Archaeology: Uncovering the Past
🏯 3D printing is being used in archaeology. Here’s how:
- Reproducing Artifacts: 3D printing is being used to reproduce artifacts for research and preservation.
- Fossil Reconstruction: 3D printing is being used to reconstruct fossils.
3D Printing in Art Restoration: Preserving Masterpieces
🎨 3D printing is being used in art restoration. Here’s how:
- Restoring Masterpieces: 3D printing is being used to restore masterpieces.
- Creating Art: 3D printing is being used to create art and furniture.
3D Printing in Forensics: Solving Crimes with Precision
🔍 3D printing is being used in forensics. Here’s how:
- Reconstructing Skulls: 3D printing is being used to reconstruct skulls.
- Shoe Prints: 3D printing is being used to create shoe prints.
- Facial Reconstruction: 3D printing is being used to create facial reconstructions.
3D Printing in the Film Industry: Creating Visual Magic
🎬 3D printing is being used in the film industry. Here’s how:
- Makeup Preps: 3D printing is being used to create makeup preps.
- Special Effects: 3D printing is being used to create special effects.
- Props: 3D printing is being used to create props.
3D Printing in Education: Inspiring the Next Generation
📚 3D printing is being used in education. Here’s how:
- STEM Education: 3D printing is being used to teach STEM subjects.
- Project-Based Learning: 3D printing is being used to create project-based learning experiences.
How to Print with a 3D Printer: A Beginner’s Guide
🤔 Here’s a beginner’s guide on how to print with a 3D printer:
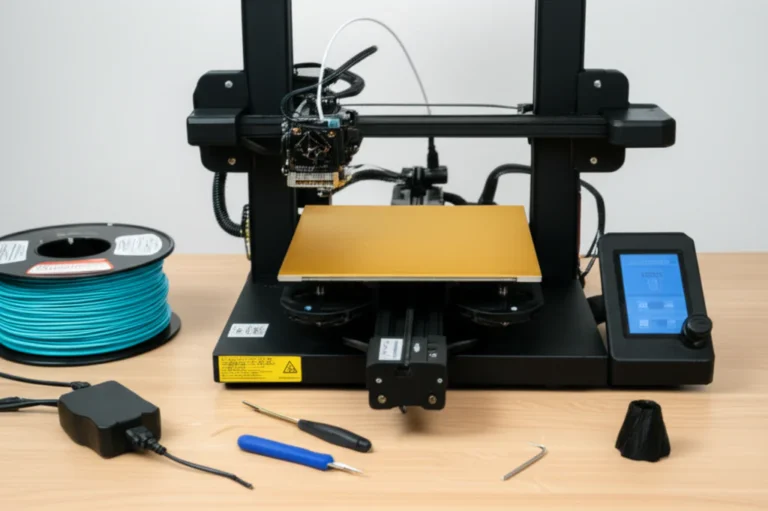
- Choose the Right 3D Printer: Consider your needs, budget, features, and print size.
- Choose a 3D Slicing Software: Select a software that is user-friendly, intuitive, and has the features you need.
- Set the Design for Printing: Prepare the STL file and ensure it has the correct resolution.
- Building the Object: The printer builds the object layer by layer using a filament material.
Where to Find 3D Printing Files: Your Go-To Resources
🤔 Here are some go-to resources for 3D printing files:
- ALL3DP: Offers a wide range of free STL files and 3D printing resources.
- Pinshape: A marketplace for 3D models and files.
- MyMiniFactory: A platform for sharing and downloading 3D printable models.
Recommended Links
🔗 Here are some recommended links for further reading:
- 3D Printed: A comprehensive guide to 3D printing.
- 3D Printing Forum: A community forum for 3D printing enthusiasts.
- 3D Printing News: A news site for 3D printing news and updates.
FAQ

🤔 Here are some frequently asked questions about 3D printing:
- What is 3D printing?: 3D printing is an additive manufacturing process that creates objects layer by layer.
- What are the benefits of 3D printing?: 3D printing is relatively inexpensive, easy to use, and allows for rapid prototyping, intricate geometries, and customizability.
- What are the drawbacks of 3D printing?: 3D printing has some drawbacks, including relatively slow production, weak parts, and often requires support structures.
Reference Links
🔗 Here are some reference links for further reading:
Conclusion

In summary, 3D printing is an exciting and transformative technology that has opened up a world of possibilities across various industries, from medical applications to art restoration. Whether you’re a hobbyist looking to create unique items or a professional seeking to innovate in your field, understanding how to 3D print can empower you to bring your ideas to life.
Positives:
- Customization: 3D printing allows for intricate designs and personalized objects.
- Cost-Effective: It can save both time and money compared to traditional manufacturing methods.
- Rapid Prototyping: Quickly iterate designs and bring concepts to reality.
Negatives:
- Learning Curve: There can be a steep learning curve for beginners.
- Print Quality: Depending on the printer and materials used, the quality may vary.
- Material Limitations: Not all materials are suitable for 3D printing, and some may require special handling.
Recommendation: If you’re ready to dive into the world of 3D printing, we confidently recommend starting with a user-friendly printer like the Creality Ender 3 or the Anycubic i3 Mega. These models offer great functionality without overwhelming you with complexity. So, roll up your sleeves and unleash your creativity! 🎉
Recommended Links
👉 Shop for 3D Printers:
- Creality Ender 3: Amazon | Walmart | Creality Official Website
- Anycubic i3 Mega: Amazon | Walmart | Anycubic Official Website
Books on 3D Printing:
- 3D Printing: The Next Industrial Revolution
- The 3D Printing Handbook: Technologies, design and applications
FAQ

How do I 3D print things?
To 3D print an object, follow these steps:
- Create a 3D model using CAD software or download one from a 3D model repository.
- Convert the model into an STL file format compatible with your printer.
- Slice the model using appropriate settings based on your printer and material.
- Set up your 3D printer, load the filament, and start the printing process.
- Post-process the print by cleaning and finishing it as needed.
How to 3D print any object?
To 3D print any object, you need to:
- Design or find a model that meets your needs.
- Ensure the model is manifold (no holes or non-manifold edges).
- Slice the model using appropriate settings based on your printer and material.
- Print the object and make adjustments if necessary.
Read more about “75 Most Useful 3D Printed Objects You Need to Try in 2024! 🚀”
Is 3D printing easy?
3D printing can be easy or challenging depending on your experience level and the complexity of the project. While basic printing can be straightforward, mastering the nuances of design, slicing, and printer settings may take time and practice.
What are the steps of 3D printing?
The steps of 3D printing include:
- Designing or obtaining a 3D model.
- Converting the model to STL format.
- Slicing the model for the printer.
- Setting up the printer with filament and calibration.
- Printing the object layer by layer.
- Finishing the object through cleanup and post-processing.
What materials can I use for 3D printing?
Common materials for 3D printing include:
- PLA: Biodegradable and easy to print.
- ABS: Strong and heat-resistant, but requires more careful handling.
- PETG: Combines the best of PLA and ABS, being strong and easy to print.
- Resins: Used in SLA printing for high detail, but can be more expensive.
What are the best 3D printers for beginners?
For beginners, consider these models:
- Creality Ender 3: Affordable and highly customizable.
- Anycubic i3 Mega: User-friendly with a touchscreen interface.
- Prusa Mini: Compact and reliable, ideal for beginners.
Read more about “Discover the 25 Best 3D Printing Software of 2024! 🖨️✨”
Reference Links