Support our educational content for free when you purchase through links on our site. Learn more
How to Print 3D Models from Thingiverse: 12 Expert Steps (2025) 🎯
If you’ve ever wondered how to turn those cool digital designs on Thingiverse into real-life 3D prints, you’re in the right place! At 3D Printed™, we’ve spent countless hours tinkering, troubleshooting, and perfecting the art of printing Thingiverse models — and we’re here to share the ultimate step-by-step guide with you. Whether you’re a total newbie or a seasoned maker looking to up your game, this article covers everything from finding the best models, slicing like a pro, to troubleshooting those pesky print fails.
Did you know that Thingiverse hosts over 2 million free 3D models? But here’s the kicker: not all prints come out perfect on the first try. Stick around as we reveal insider tips on how to avoid common pitfalls, customize your prints, and even share your own creations with the community. Plus, we’ll introduce you to some fantastic alternative repositories and must-have tools that will transform your 3D printing experience.
Key Takeaways
- Thingiverse is a treasure trove of free 3D models, but success starts with smart searching and checking user feedback (“Makes”).
- Slicing software like Cura and PrusaSlicer is your essential bridge from digital file to printable G-code — mastering settings like layer height and supports is key.
- Printer prep and filament choice matter: Level your bed, clean your nozzle, and start with beginner-friendly PLA filament from trusted brands like Hatchbox or Prusament.
- Troubleshooting common issues such as warping, stringing, and adhesion problems will save you time and filament.
- Respect licensing on Thingiverse to honor creators’ rights, especially if you plan to sell prints.
- Explore alternatives like Printables and MyMiniFactory for fresh designs and community vibes.
- Upgrade your toolkit with essentials like digital calipers, rotary tools, and ultrasonic cutters for professional-quality finishes.
👉 Shop Filaments & Tools:
- PLA Filament: Hatchbox on Amazon | Prusament Official
- Rotary Tools: Dremel on Amazon
- Digital Calipers: Amazon
Ready to turn pixels into plastic? Let’s get printing!
Table of Contents
- ⚡️ Quick Tips and Facts About Printing 3D Models from Thingiverse
- 🕰️ The Evolution of Thingiverse: From Idea to 3D Printing Powerhouse
- 🔍 How to Find the Best 3D Models on Thingiverse: Search, Filters, and Categories
- 📥 Step 1: Downloading 3D Models from Thingiverse – File Types and What They Mean
- 🛠️ Step 2: Preparing Your Thingiverse Models for Printing – Slicing Software and Settings
- 🖨️ Step 3: Printing Your Thingiverse Models – Printer Setup, Materials, and Tips
- 🎨 Customizing Thingiverse Models: Modifications, Supports, and Scaling
- 🚧 Troubleshooting Common Issues When Printing Thingiverse Models
- 💡 Expert Tips for Maximizing Quality and Efficiency with Thingiverse Prints
- 🛡️ Understanding Thingiverse Licensing and Copyright for 3D Prints
- 🌐 Alternatives to Thingiverse: Exploring Other 3D Model Repositories
- 🧰 Essential Tools and Accessories to Enhance Your Thingiverse 3D Printing Experience
- 📈 How to Share Your Own 3D Models on Thingiverse: Uploading and Community Engagement
- 🧩 Integrating Thingiverse Models with Popular 3D Printing Software and Hardware
- 🔗 Recommended Links for Thingiverse Users: Resources, Tutorials, and Communities
- ❓ Frequently Asked Questions About Printing 3D Models from Thingiverse
- 📚 Reference Links and Further Reading on Thingiverse and 3D Printing
- 🏁 Conclusion: Mastering the Art of Printing 3D Models from Thingiverse
Body
⚡️ Quick Tips and Facts About Printing 3D Models from Thingiverse
Welcome, fellow makers, to the 3D Printed™ workshop! So, you’re ready to dive into the wonderful world of printing models from Thingiverse? Fantastic! It’s a journey filled with triumphs, occasional spaghetti monsters (we’ve all been there), and the sheer joy of turning a digital file into a physical object. Before we get our hands dirty, here are some quick tips and essential facts to get you started on the right foot.
| Quick Fact 🧑🏫 | The Lowdown 👇 |
|---|---|
| What is Thingiverse? | It’s one of the largest and most popular online communities for discovering, making, and sharing 3D printable things. Think of it as a massive, free library for 3D models. |
| File Type | The most common file type you’ll download is the .STL (Stereolithography) file. This format describes the surface geometry of a 3D object using triangles. |
| Is it Free? | ✅ Yes! The vast majority of models on Thingiverse are free to download, shared by a generous community of makers. |
| What You Need | A 3D printer (like a Creality Ender 3 or Prusa i3 MK3S+), filament, and slicing software. |
| Slicer Software | This is crucial! A slicer (like Ultimaker Cura or PrusaSlicer) converts your STL file into G-code, the language your printer understands. |
| Check the “Makes” | Before printing, always check the “Makes” and “Comments” section on a Thingiverse page. This shows you how the model has printed for others and can save you a world of trouble. |
| Licensing Matters | Most models use Creative Commons licenses, which dictate how you can use and share the design. Pay attention to “Non-Commercial” tags! |
🕰️ The Evolution of Thingiverse: From Idea to 3D Printing Powerhouse
Ever wonder how this digital treasure trove came to be? Thingiverse was launched in 2008 by MakerBot Industries, a company at the forefront of the desktop 3D printing revolution. It was a radical idea at the time: a collaborative space where anyone could upload and download digital designs for physical objects. It was more than just a repository; it was a community hub built on open-source principles, designed to foster creativity and sharing among makers.
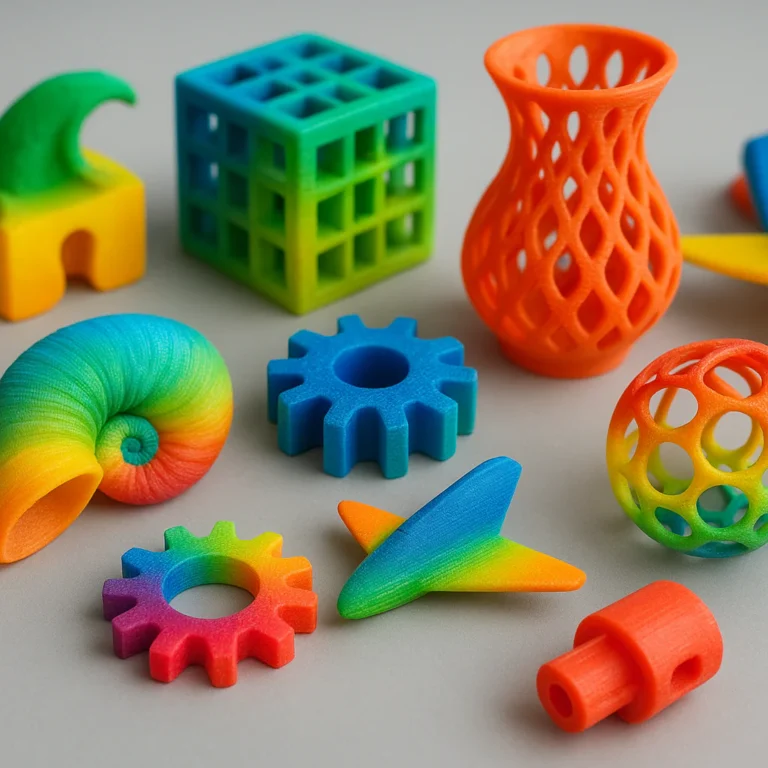
We remember the early days! It was a bit like the Wild West of 3D Printable Objects. The designs were simpler, the community was smaller, but the excitement was palpable. You could feel a new frontier opening up. Fast forward to today, and Thingiverse has become a sprawling universe of millions of designs, from practical household gadgets and intricate art pieces to educational models and mind-bending engineering projects. It truly is, as one source puts it, “a treasure trove of 3D printable designs.”
🔍 How to Find the Best 3D Models on Thingiverse: Search, Filters, and Categories
Navigating Thingiverse’s massive library can feel like searching for a specific book in the Library of Alexandria. But don’t worry, we’ve got the map!
### Using the Search Bar Effectively
Your first port of call is the search bar at the top of the page. It’s more powerful than it looks.
- Be Specific: Instead of “phone holder,” try “iPhone 15 car vent mount.” The more keywords, the better.
- Use Filters: After searching, you can filter results by “Popular,” “Newest,” or “Relevant.” We usually start with “Popular” to see what has worked well for the community.
### Browsing Categories and Collections
If you’re just looking for inspiration, the “Explore” tab is your best friend. Here you can browse curated collections and categories like “Home,” “Art,” “Toys & Games,” and more. It’s a great way to stumble upon your next favorite print.
### The Secret Weapon: Checking “Makes” and “Remixes”
This is our number one tip for success. Before you even think about hitting that download button:
- Click the “Makes” Tab: This is where users post pictures of their successful (and sometimes failed) prints of that exact model. It’s real-world proof that the design is printable. Look at the pictures, read the notes. Did people struggle? Did they use specific settings?
- Check the “Remixes” Tab: This shows you how other makers have adapted or improved the original design. Sometimes, a remix will fix a flaw in the original model or add a cool new feature you hadn’t considered.
📥 Step 1: Downloading 3D Models from Thingiverse – File Types and What They Mean
You’ve found the perfect model! Your trigger finger is hovering over the mouse. Let’s get that file.
### The Big Blue Button and Individual Files
On any model’s page, you’ll see a prominent “Download all files” button. This usually downloads a ZIP file containing everything the designer uploaded. Alternatively, you can click the “Files” tab to see a list of all the files and download them individually. This is useful if a project contains multiple parts and you only need one.
### Understanding STL, OBJ, and Other Files
- STL (.stl): This is the king of 3D printing files. STL stands for Stereolithography (or Standard Triangle Language) and it represents the surface of a model using a mesh of triangles. It’s the universal format that nearly all slicer software can read.
- OBJ (.obj): You might occasionally see OBJ files. They are similar to STL but have the added advantage of being able to store information about color and texture, though this isn’t always relevant for single-color FDM printing.
- 3MF (.3mf): A newer format that aims to be an improvement over STL. It’s an XML-based format that can bundle more information—like settings, materials, and author info—into a single file. Slicers like Cura and PrusaSlicer handle them beautifully.
Once you click download, the file will save to your computer, usually in your “Downloads” folder. Now, the real magic begins!
🛠️ Step 2: Preparing Your Thingiverse Models for Printing – Slicing Software and Settings
So, you have your STL file. Awesome! But your printer can’t read it directly. It needs instructions, a detailed, layer-by-layer blueprint. That’s where your slicer comes in. It’s the bridge between your digital model and your physical printer.
### What is a Slicer and Why Do You Need It?
A slicer is a piece of software that, well, slices your 3D model into hundreds or thousands of horizontal layers. It then generates a file called G-code. G-code is the programming language that tells your printer exactly what to do: where to move the print head, how fast to go, what temperature to set, and when to extrude plastic. Without a slicer, your printer is just a fancy paperweight.
### Popular Slicer Software: The Big Three
While there are many slicers out there, most of the 3D printing community relies on a few key players. The best part? The most popular ones are free!
| Slicer Software | Best For | Key Features |
|---|---|---|
|
Ultimaker Cura |
Beginners & All-Round Use | Extremely popular, huge community, compatible with most printers, tons of settings for advanced users. |
|
PrusaSlicer |
Prusa Owners & Advanced Users | Evolved from Slic3r, packed with advanced features, great for fine-tuning, excellent with Prusa printers. |
|
Orca Slicer |
Bambu Lab Users & Enthusiasts | A fork of Bambu Studio, it offers built-in calibration tools and works with a wide range of printers. |
### Essential Slicer Settings for Beginners
Opening a slicer for the first time can be overwhelming. There are literally hundreds of settings! But you only need to understand a few to get great prints. The video “How to 3D Print a Thingiverse File – Step by Step Tutorial” by 3D Print Dood, embedded above, provides a great visual walkthrough of this process and can be found here.
- Layer Height: This determines the vertical resolution of your print. A smaller layer height (e.g., 0.12mm) creates a smoother, more detailed surface but takes much longer to print. A larger layer height (e.g., 0.28mm) is faster but the layers will be more visible.
- Infill: This is the internal structure of your print. 100% infill makes a solid, heavy, and strong part, but it uses a lot of filament and time. For most decorative models, 15-20% infill is plenty.
- Supports: Does your model have parts that hang out in mid-air (overhangs)? If so, you’ll need supports. These are temporary structures that print underneath the overhangs to hold them up. Your slicer can generate them automatically. Tree supports are a fantastic, easy-to-remove option in many modern slicers.
- Adhesion: To prevent your print from lifting off the build plate mid-print (a dreaded problem called warping), you can add a brim or a raft. A brim is a single layer of filament that extends outward from the base of your model, giving it a wider footprint to stick to the bed.
Once you’ve adjusted your settings, you’ll hit the “Slice” button. The software will generate the G-code, which you can then save to an SD card or send directly to your printer.
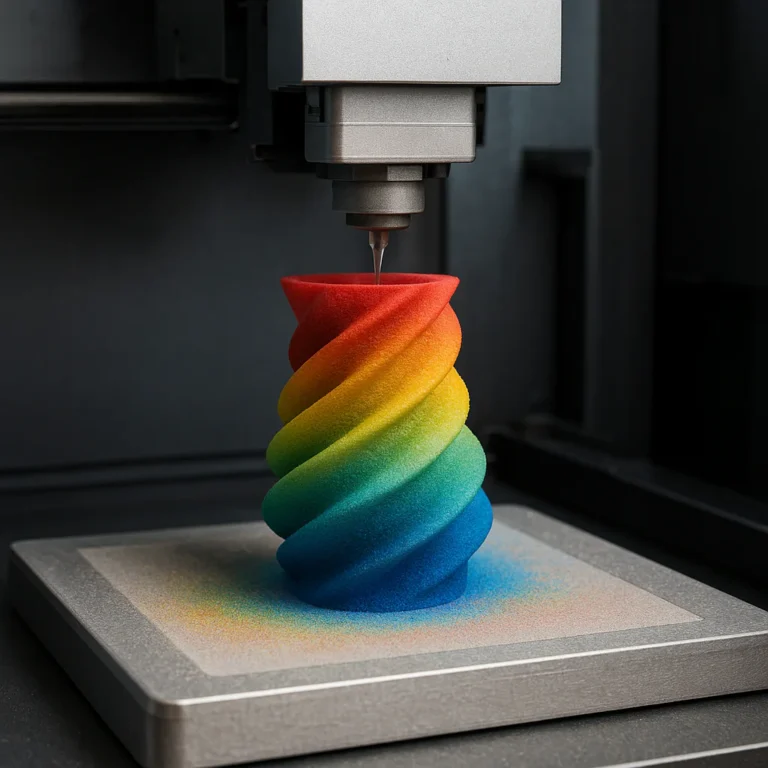
🖨️ Step 3: Printing Your Thingiverse Models – Printer Setup, Materials, and Tips
The G-code is ready. The printer is humming. It’s go-time! This is the moment of truth where your digital dream becomes a physical reality.
### Pre-Print Checklist
Before you hit “Print,” run through this quick checklist to save yourself potential headaches:
- ✅ Level the Bed: An unlevel bed is the #1 cause of first-layer failures. Ensure the nozzle is the same distance from the build plate at all points. Many modern printers have auto bed leveling, which is a lifesaver!
- ✅ Clean the Bed: A clean bed is a sticky bed. Wipe it down with isopropyl alcohol to remove any dust or oils from your fingerprints.
- ✅ Load Your Filament: Make sure your filament is loaded correctly and isn’t tangled on the spool.
- ✅ Check the Nozzle: Ensure the nozzle is clean and free of any old, burnt plastic.
### Choosing the Right Material (Filament)
The plastic you print with is called filament. For beginners, there are two main types you should know:
- PLA (Polylactic Acid): 🌎 This is the go-to filament for most people. It’s easy to print, comes in a rainbow of colors, is relatively inexpensive, and is biodegradable. It’s perfect for decorative models, toys, and general prototyping. The only downside is its lower heat resistance.
- PETG (Polyethylene Terephthalate Glycol): 💪 This is a step up from PLA in terms of strength and durability. It’s more heat and chemical resistant, making it great for functional parts that need to withstand some stress. It can be a little trickier to print than PLA, sometimes causing stringing.
We recommend starting with a high-quality PLA from a reputable brand like Hatchbox, eSUN, or Prusament.
### The First Layer is Everything!
Watch the first layer of your print like a hawk. This is the foundation of your entire model. It should be smooth and nicely “squished” onto the build plate.
- ❌ Nozzle too high? The lines of plastic won’t stick together and will look like spaghetti.
- ❌ Nozzle too low? The filament will be squashed too flat, or nothing will come out at all.
- ✅ Just right? You’ll have perfect, uniform lines that are well-adhered to the bed.
Once the first layer is down successfully, you can usually relax and let the printer do its thing!
🎨 Customizing Thingiverse Models: Modifications, Supports, and Scaling
One of the best things about 3D printing is that you’re not just stuck with the original design. You have the power to tweak and customize models to fit your exact needs.
### Simple Scaling and Mirroring
The easiest modification you can make is right in your slicer software.
- Scaling: Want that cool dragon statue to be twice as big? Or need a bracket to be 5% smaller to fit perfectly? Your slicer has a scaling tool that lets you resize the model on all three axes (X, Y, Z). Be careful not to scale just one axis, or you’ll distort the model!
- Mirroring: Need a left-handed version of a right-handed tool? The mirror function can flip the model for you in an instant.
### Getting Creative with Supports
While auto-supports are great, sometimes you need more control.
- Support Blockers: Is your slicer putting supports in a tiny hole where they’ll be impossible to remove? You can add a “support blocker” to tell the slicer not to generate supports in that specific area.
- Manual Supports: For complex models, you might want to place supports manually. This gives you ultimate control over where they go, ensuring delicate features are protected without wasting filament. Tree supports in Cura are a game-changer for this.
### Diving into Basic 3D Modeling
Want to go a step further? You can import an STL file into beginner-friendly 3D Design Software to make more significant changes.
- Tinkercad: This free, web-based tool is perfect for beginners. You can easily add text, cut holes, or combine the model with other shapes.
- Meshmixer: A slightly more advanced, but still free, tool that’s like a Swiss Army knife for editing STL files. It’s fantastic for smoothing surfaces, sculpting details, and repairing broken models.
🚧 Troubleshooting Common Issues When Printing Thingiverse Models
Even the most seasoned pros run into printing problems. It’s part of the hobby! The key is knowing how to diagnose and fix them. Here are some of the most common gremlins you might encounter.
| Problem 😭 | What it Looks Like | Common Causes & Solutions ✅ |
|---|---|---|
| Print Won’t Stick | The first layer is a mess of loose plastic; the print detaches mid-print. | Causes: Unlevel/dirty bed, Z-offset too high. Solutions: Re-level your bed, clean it with IPA, lower the Z-offset slightly, use a brim for adhesion. |
| Stringing / Oozing | Fine, spiderweb-like strings of plastic between different parts of the model. | Causes: Retraction settings are off, print temperature too high, wet filament. Solutions: Increase retraction distance/speed, lower nozzle temperature, dry your filament. |
| Warping | The corners of the print lift and curl up from the build plate. | Causes: Poor bed adhesion, uneven cooling (drafts). Solutions: Use a brim or raft, make sure the bed is clean and hot enough, use an enclosure to block drafts. |
| Layer Shifting | The top layers of the print are misaligned with the bottom layers, creating a “stair-step” effect. | Causes: Belts are too loose, print head snagged on something, printing too fast. Solutions: Tighten your X and Y belts, check for obstructions, reduce your print speed. |
| Under-Extrusion | Gaps in layers, thin and wispy walls, or missing layers entirely. | Causes: Clogged nozzle, incorrect filament diameter in slicer, tangled spool. Solutions: Clean or replace the nozzle (perform a “cold pull”), verify slicer settings, ensure the filament feeds smoothly. |
Don’t get discouraged by a failed print! Every failure is a learning opportunity. We’ve all created our fair share of plastic spaghetti. It’s a rite of passage!
💡 Expert Tips for Maximizing Quality and Efficiency with Thingiverse Prints
Ready to level up from beginner to pro? Here at 3D Printed™, we’ve picked up a few tricks over thousands of hours of printing.
- Dry Your Filament: Filament, especially PETG and Nylon, absorbs moisture from the air. Wet filament leads to pops, crackles, stringing, and weak prints. Investing in a filament dryer or even using your oven on a very low temperature can dramatically improve print quality.
- Calibrate, Calibrate, Calibrate: Your printer isn’t perfect out of the box. Take the time to calibrate your e-steps (how much filament the extruder pushes through) and flow rate (in the slicer). This ensures you’re extruding the perfect amount of plastic for dimensionally accurate parts.
- Nozzle Size Matters: Most printers come with a 0.4mm nozzle, which is a great all-rounder. But swapping to a larger 0.6mm nozzle can cut print times in half for large, simple models. For ultra-fine detail, a 0.25mm nozzle can produce stunning results, though it will be much slower.
- Learn to Read the G-code: You don’t need to be a programmer, but opening a G-code file in a text editor can be enlightening. You can see the temperature commands (M104/M109) and movement commands (G0/G1) your slicer is sending. This can be incredibly helpful for advanced troubleshooting.
- Embrace the Community: Got a problem you can’t solve? Ask! Communities on Reddit (like r/3Dprinting), Facebook groups, and official brand forums are filled with helpful people who love to solve printing puzzles.
🛡️ Understanding Thingiverse Licensing and Copyright for 3D Prints
This part is super important, especially if you ever consider selling your prints. Just because a file is free to download doesn’t mean it’s a free-for-all. Most designs on Thingiverse are protected by Creative Commons (CC) licenses.
Think of a CC license as the designer telling you exactly what you can and can’t do with their work. Here’s a simple breakdown of the most common terms you’ll see:
| CC License Term | What it Means | Can I Sell Prints? |
|---|---|---|
| BY (Attribution) | You must give credit to the original creator. | ✅ Yes, as long as you give credit. |
| NC (Non-Commercial) | You cannot use the work for commercial purposes. | ❌ No. This is the big one. You cannot sell prints of this model. |
| ND (No Derivatives) | You cannot share altered or remixed versions of the work. | ✅ Yes, but only of the original, unmodified model (if NC isn’t also present). |
| SA (Share Alike) | If you remix or adapt the work, you must share your new creation under the same license. | ✅ Yes, but your remix must also be available under the same SA license. |
Always check the license on the Thingiverse page before you print! Respecting the wishes of the designers is what keeps the community thriving. If you want to sell prints, filter your searches for models with commercial-friendly licenses or create your own amazing designs!
🌐 Alternatives to Thingiverse: Exploring Other 3D Model Repositories
While Thingiverse is the giant in the room, it’s not the only place to find incredible 3D models. Sometimes, exploring other galaxies in the 3D printing universe can yield amazing results. Here are some of our favorite alternatives:
- Printables: Created by Prusa Research, this site has a modern interface, excellent search filters, and a fantastic community. Many consider it a top contender and one of the best alternatives.
- Cults: A bustling marketplace with a strong focus on high-quality, artistic designs. It has a great mix of free and paid models.
- MyMiniFactory: Known for its curated and tested models, especially in the tabletop gaming and collectibles space. They guarantee that their models are printable.
- Thangs: This is more than a repository; it’s a powerful 3D model search engine that indexes files from all over the web. It also has great collaboration and version control features.
- Yeggi: Like Thangs, Yeggi is a search engine dedicated to finding 3D printable models across dozens of different websites.
Exploring these sites can expose you to different designers and styles, broadening your printing horizons.
🧰 Essential Tools and Accessories to Enhance Your Thingiverse 3D Printing Experience
Your 3D printer is the star of the show, but a few supporting actors can make your life a whole lot easier. Here’s a list of must-have tools for every maker’s workbench.
### For Print Removal and Cleanup
- Flush Cutters/Snips: Absolutely essential for snipping away filament and trimming supports.
- Deburring Tool: This handy tool has a swiveling blade that’s perfect for cleaning up the edges of your print, especially the brim.
- Hobby Knife (e.g., X-Acto): For precision trimming and removing small imperfections. Always use a cutting mat!
- Needle-Nose Pliers: Great for pulling off stubborn support pieces and performing printer maintenance.
### For Finishing and Post-Processing
- Sandpaper: A variety of grits (from 120 to 1000+) will help you smooth out layer lines for a professional finish.
- Rotary Tool (e.g., Dremel): A powerhouse for sanding, polishing, and grinding your prints. A true game-changer for finishing work.
- Heat Gun: A quick pass with a heat gun can magically erase small blemishes and stringing, but be careful not to melt your print!
- Ultrasonic Cutter: For those who print a lot of complex models with intricate supports, a tool like the Phrozen Sonic Saber can slice through supports like butter, saving tons of time and effort.
### For Measurement and Maintenance
- Digital Calipers: Crucial for measuring parts and ensuring your prints are dimensionally accurate. An inexpensive but invaluable tool.
- Allen Wrenches/Hex Keys: Your printer came with them for a reason! Keep them handy for tightening bolts and making adjustments.
📈 How to Share Your Own 3D Models on Thingiverse: Uploading and Community Engagement
Ready to give back to the community? Sharing your own designs on Thingiverse is a rewarding experience. It’s how the ecosystem grows!
### The Uploading Process
The process is straightforward. After creating an account, you’ll see a “Create” button.
- Upload Your Files: Click “Upload a Thing” and select your STL file.
- Add Photos: This is so important! Take clear, well-lit photos of your actual printed model. People want to see what it looks like in real life.
- Write a Great Description: Be descriptive! Explain what your model is, why you designed it, and include your recommended print settings (layer height, infill, supports, etc.). This helps others have success with your design.
- Choose a Category and Tags: Select the most relevant category and add descriptive tags to help people find your model.
- Select a License: Choose the Creative Commons license that best fits how you want your work to be shared.
After a 24-hour waiting period for new accounts, you can hit “Publish,” and your design will be live for the world to see!
### Engaging with the Community
Don’t just upload and disappear!
- Check your comments: People may have questions or offer suggestions for improvement.
- Look at the “Makes”: It’s incredibly cool to see people from all over the world printing something you designed. Thank them for sharing!
- Remix others’ work: See a design you think you can improve? Remix it! It’s a fantastic way to collaborate and innovate.
🧩 Integrating Thingiverse Models with Popular 3D Printing Software and Hardware
The 3D printing ecosystem is becoming more connected. Many tools are now designed to work together seamlessly, making the journey from Thingiverse to finished print smoother than ever.
### Slicer Integrations
Some slicers offer direct integration with model repositories. For example, Ultimaker Cura has a plugin architecture that allows for connections to sites like Thingiverse. This can let you browse and import models directly into your slicer without having to manually download and open files.
### Remote Printing and Monitoring
Services like OctoPrint and Creality Cloud are changing the game. OctoPrint is a fantastic open-source software that runs on a Raspberry Pi connected to your printer. It gives you a web interface to control and monitor your printer from anywhere. You can upload the G-code you sliced from a Thingiverse model and start your print from your computer or phone.
Creality Cloud takes it a step further by combining a model library with a cloud-based slicer and remote printing capabilities, creating an all-in-one platform.
### Hardware Considerations
While almost any FDM 3D printer can print models from Thingiverse, some features make it easier.
- Auto Bed Leveling: As mentioned, this removes the biggest point of failure for many beginners.
- Flexible Build Plates: A magnetic, flexible build plate (often a PEI sheet) makes removing prints a breeze. Just wait for it to cool, pop it off, give it a slight bend, and your print will pop right off. No more scraping!
- Direct Drive Extruders: While not essential for PLA, a direct drive extruder (where the motor pushing the filament is right above the hotend) can handle flexible filaments (like TPU) and may improve retraction, reducing stringing.
These integrations and hardware features are all part of the amazing 3D Printing Innovations that are making this hobby more accessible and enjoyable every day.
🏁 Conclusion: Mastering the Art of Printing 3D Models from Thingiverse
And there you have it — your ultimate roadmap to conquering the world of 3D printing with Thingiverse models! From hunting down the perfect design to slicing, printing, troubleshooting, and even sharing your own creations, we’ve covered every twist and turn on this exciting journey. Remember, Thingiverse is more than just a file repository; it’s a vibrant community where creativity and collaboration fuel innovation.
If you’re just starting out, don’t be daunted by the technical jargon or the occasional print failure. Every maker has been there — those first-layer mishaps, the stringing nightmares, and the warping woes are all part of the rite of passage. With patience, practice, and the expert tips we’ve shared, you’ll soon be turning digital dreams into tangible reality.
We also touched on the importance of respecting licenses and copyrights — a crucial step to keeping this ecosystem thriving and fair for all creators. And if Thingiverse ever feels overwhelming or you want to explore fresh designs, remember there are fantastic alternatives like Printables and MyMiniFactory waiting for you.
So, what’s next? Grab your favorite filament, fire up your slicer, and start printing! Whether it’s a quirky gadget, a cosplay prop, or a practical tool, the possibilities are endless. And when you’re ready, don’t forget to share your masterpieces back with the community — because that’s what makes 3D printing truly magical.
Happy printing, and may your layers always stick perfectly! 🎉
🔗 Recommended Links for Thingiverse Users: Resources, Tutorials, and Communities
Ready to gear up or dive deeper? Here are some handpicked links to help you on your 3D printing adventure:
Shop Filaments and Tools
- Hatchbox PLA Filament: Thingiverse | Amazon | Hatchbox Official Website
- eSUN PETG Filament: Thingiverse | Amazon | eSUN Official Website
- Prusament Filament: Thingiverse | Prusa Official Website
Essential Tools
- Dremel Rotary Tool: Amazon | Walmart
- Digital Calipers: Amazon | eBay
- Phrozen Sonic Saber Ultrasonic Cutter: Amazon | Phrozen Official Website
Books and Tutorials
- “3D Printing Failures: How to Diagnose and Repair All 3D Printing Issues” by Sean Aranda: Amazon
- “3D Printing Projects” by DK Publishing: Amazon
- Ultimaker Cura Official Tutorials: Ultimaker Cura
- PrusaSlicer Guides: Prusa3D
❓ Frequently Asked Questions About Printing 3D Models from Thingiverse
What are the best 3D printers for printing models from Thingiverse?
Choosing the right printer depends on your budget, experience level, and what you want to print. Here are some top picks:
- Creality Ender 3 V2: A budget-friendly, reliable printer with a large community and tons of upgrades available. It’s perfect for beginners and intermediate users.
- Prusa i3 MK3S+: Known for its exceptional print quality, reliability, and excellent customer support. It includes features like auto bed leveling and filament sensors.
- Anycubic Vyper: Offers fast printing speeds and auto bed leveling at a competitive price.
- Bambu Lab X1 Carbon: A premium printer with advanced features like multi-material printing and AI-assisted calibration.
Each of these printers works well with Thingiverse models, but your choice should factor in your specific needs and willingness to tinker. For more detailed reviews, check out our 3D Printer Reviews.
How do I prepare a 3D model from Thingiverse for printing?
Preparation involves several key steps:
- Download the STL or compatible file from Thingiverse.
- Open the file in slicing software like Ultimaker Cura or PrusaSlicer.
- Adjust print settings: layer height, infill, supports, and adhesion based on your printer and filament.
- Slice the model to generate G-code.
- Transfer the G-code to your printer via SD card, USB, or Wi-Fi.
- Calibrate your printer (bed leveling, nozzle temperature) before printing.
This process ensures your model prints successfully and looks great. For a detailed walkthrough, see our Step 2 and Step 3 sections.
What are some popular and easy-to-print 3D models on Thingiverse for beginners?
Beginners should start with simple, low-support models to build confidence. Some favorites include:
- Calibration cubes: Perfect for testing printer calibration.
- Phone stands and holders: Functional and straightforward.
- Keychains and simple toys: Small, quick prints that teach basic skills.
- Planters and vases: Great for practicing smooth curves.
- Cable organizers: Useful and easy to print.
These models often have many “Makes” and community feedback, which helps you avoid common pitfalls. Browse our 3D Printable Objects for inspiration.
How can I customize and modify 3D models from Thingiverse to fit my printing needs?
Customization can be as simple or complex as you like:
- Scaling and mirroring: Use your slicer to resize or flip models.
- Adding/removing supports: Customize support structures for easier removal.
- Editing STL files: Use free tools like Tinkercad or Meshmixer to add text, combine parts, or fix errors.
- Remixing: Download models with permissive licenses and create your own versions to better suit your needs.
Remember to respect the original creator’s license when modifying and sharing your remixes.
How do I ensure the best print quality from Thingiverse models?
Print quality depends on multiple factors:
- Printer calibration: Regularly level your bed and calibrate extrusion.
- Filament quality: Use reputable brands and keep filament dry.
- Slicer settings: Optimize layer height, print speed, and temperature.
- Model selection: Choose well-reviewed models with many successful prints.
- Post-processing: Sanding, painting, and finishing can elevate your prints.
Following these practices will help you get the most out of your Thingiverse downloads.
📚 Reference Links and Further Reading on Thingiverse and 3D Printing
- MakerBot’s official Thingiverse website: https://www.thingiverse.com/
- Ultimaker Cura slicing software: https://ultimaker.com/software/ultimaker-cura/
- PrusaSlicer software and guides: https://www.prusa3d.com/page/prusaslicer_424/
- Creative Commons licenses explained: https://creativecommons.org/licenses/
- Printables by Prusa Research: https://www.printables.com/
- MyMiniFactory curated models: https://www.myminifactory.com/
- Treatstock article on Thingiverse 3D Printing Service: https://www.treatstock.com/help/article/91-thingiverse-3d-printing-service
For more expert insights and reviews, visit our 3D Printed™ Thingiverse category.
We hope this guide has empowered you to confidently print amazing models from Thingiverse. Now, go forth and create! 🚀