Support our educational content for free when you purchase through links on our site. Learn more
Discover the 5 Essential Elements of 3D Printing That Will Transform Your Projects! 🚀
Have you ever marveled at the intricate designs and functional prototypes that 3D printing can produce? If you’re just stepping into the world of 3D printing or looking to enhance your skills, understanding the 5 essential elements of 3D printing is your golden ticket! From the size of your prints to the materials you choose, each element plays a pivotal role in determining the success of your projects. Did you know that the right orientation can save you hours of print time and material waste? 🤯
In this comprehensive guide, we’ll explore these five elements in depth, providing you with practical tips, insights from seasoned enthusiasts, and even some troubleshooting advice. Whether you’re a hobbyist or a professional, mastering these elements will elevate your 3D printing game to new heights. So, grab your filament and let’s dive in!
Key Takeaways
- Size Matters: Understand your printer’s build volume to optimize your designs.
- Resolution is Key: Thinner layers yield finer details but increase print time.
- Wall Thickness: Balance between strength and weight is crucial for durability.
- Orientation: Positioning your model wisely can enhance quality and reduce supports.
- Material Selection: Choose the right filament to suit your project’s needs.
Ready to elevate your 3D printing experience? 👉 Shop top-rated 3D printers like the Prusa Mini+ or the Creality CR-10 Smart Pro to get started! Happy printing! 🖨️✨
Table of Contents
Quick Tips and Facts
Understanding the Core Elements of 3D Printing
1. Size: The Dimensions That Matter
2. Resolution: The Detail in Your Prints
3. Wall Thickness: Strength vs. Weight
4. Orientation: Positioning for Perfection
5. Material Selection: Choosing the Right Filament
Design Balance: Crafting Functional and Aesthetic Prints
The Importance of Print Settings: Fine-Tuning for Success
Post-Processing: The Finishing Touches
Common Challenges in 3D Printing: Troubleshooting Tips
Future Trends in 3D Printing: What’s on the Horizon?
Conclusion
Recommended Links
FAQ
Reference Links
Quick Tips and Facts (Jump back to Table of Contents)
Want to dive into the fascinating world of 3D printing? Check out our related article about What are 5 facts about 3D printing?. Five key elements greatly influence the outcome of your prints: size, resolution, wall thickness, orientation, and material selection. 🤔 Mastering these will significantly improve your print quality and success rate! 🚀
- ✅ Start Small: Begin with smaller prints to get a feel for your printer’s capabilities.
- ✅ Layer Up: Thicker layers print faster, but thinner layers offer finer details.
- ✅ Strong Foundations: Adequate wall thickness is crucial for structural integrity.
- ✅ Orient Wisely: How you position your model impacts support needs and print quality.
- ✅ Material Matters: Choose the right filament for your project’s requirements.
Understanding the Core Elements of 3D Printing (Jump back to Table of Contents)
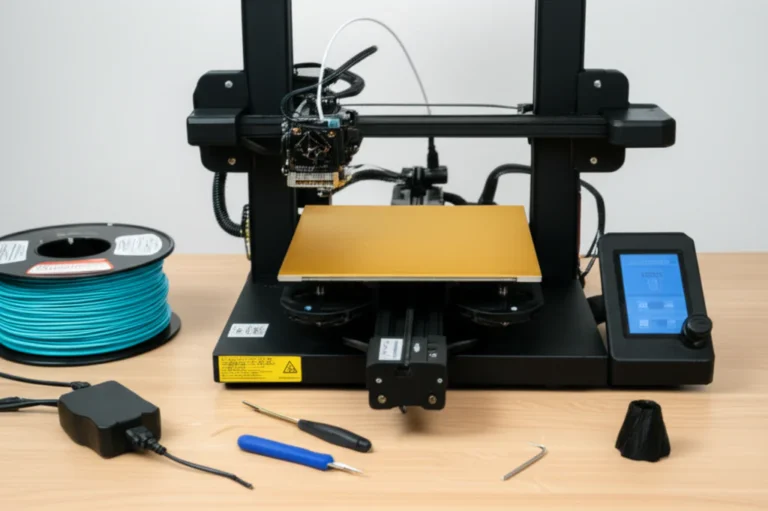
3D printing, also known as additive manufacturing, is transforming how we create objects. From 3D Printable Objects to 3D Printing Innovations, the possibilities seem endless. But before you embark on your 3D printing journey, understanding the core elements that govern this technology is paramount. These elements work in concert, influencing the final product’s quality, durability, and functionality. Let’s explore each element in detail, offering insights and tips from our team at 3D Printed™.
1. Size: The Dimensions That Matter (Jump back to Table of Contents)
“The size of your pieces will have an impact on the fabrication time,” states FabLab Inc. (Source). This couldn’t be truer! The size of your 3D model is the first fundamental element to consider. Your printer’s build volume dictates the maximum size you can print. A larger print naturally requires more time, material, and therefore, a higher cost. Pushing the limits of your build volume can lead to print failures, so it’s always wise to leave some margin.
Considering Build Volume
Different 3D printers boast different build volumes. From compact desktop printers like the Prusa Mini+ to larger format printers like the Creality CR-10 Smart Pro, your choice depends on your project needs. Think big, but print smart! 😉
Scaling Your Models
Sometimes, you might need to scale your model up or down. 3D Design Software like Tinkercad or Fusion 360 allow you to easily adjust the dimensions of your design. Remember, scaling affects not only the overall size but also wall thickness and other crucial elements.
2. Resolution: The Detail in Your Prints (Jump back to Table of Contents)
Resolution, often defined by layer height, determines the level of detail in your prints. As Tom’s Hardware explains, “Lower layer height and smaller nozzle result in higher resolution” (Source). Thinner layers create smoother surfaces and capture finer details, but they also increase print time. Thicker layers print faster but can result in a more “stair-stepped” appearance.
Finding the Right Balance
The ideal resolution depends on your project. A highly detailed miniature might demand layers as thin as 0.1mm, while a functional prototype could be printed at 0.3mm without sacrificing much quality. Experimentation is key! 🧪
Technology and Resolution
Different 3D printing technologies offer varying resolutions. SLA (stereolithography) printers are known for their high resolution, making them ideal for intricate designs. FDM (fused deposition modeling) printers, while generally offering lower resolution, have significantly improved in recent years.
3. Wall Thickness: Strength vs. Weight (Jump back to Table of Contents)
Wall thickness is a critical element that directly impacts the strength and durability of your prints. Tom’s Hardware recommends an “optimal thickness: 0.8 to 2.0mm for moderately strong parts” (Source). Thinner walls use less material and print faster, but they can be fragile. Thicker walls provide robustness but increase print time and material consumption.
Balancing Act
Finding the right wall thickness is a balancing act between strength, weight, and print time. Consider the intended use of your print. A decorative item might require thinner walls, while a functional part needs sufficient thickness to withstand stress.
Material Considerations
The material you choose also influences the required wall thickness. Some materials are inherently stronger than others, allowing for thinner walls without compromising structural integrity.
4. Orientation: Positioning for Perfection (Jump back to Table of Contents)
Orientation, or how you position your model on the print bed, plays a crucial role in print success and quality. As FabLab Inc. points out, orientation “affects final quality, geometric dimension, error tolerance, energy usage, and support structures” (Source). A well-chosen orientation can minimize support structures, improve surface finish, and enhance the strength of your print.
Support Structures: Friend or Foe?
Overhangs and intricate geometries often require support structures. While essential, supports can be tricky to remove and can leave blemishes on your print. Clever orientation can reduce or even eliminate the need for supports.
Surface Finish: A Smooth Operator
Orientation also affects the surface finish of your print. Positioning curved surfaces parallel to the print bed can result in visible layer lines, while orienting them perpendicularly can create a smoother finish.
5. Material Selection: Choosing the Right Filament (Jump back to Table of Contents)
The choice of material is arguably the most exciting element of 3D printing! From the everyday PLA and ABS to the more exotic PETG, TPU, and carbon fiber composites, the range of materials available is constantly expanding. FabLab Inc. rightly emphasizes that the choice “depends on the constraints of the component” (Source).
Material Properties: A World of Possibilities
Each material possesses unique properties, such as strength, flexibility, temperature resistance, and chemical resistance. Understanding these properties is crucial for selecting the right material for your project. Need a flexible phone case? TPU is your friend. A heat-resistant part? Consider high-temperature materials like ULTEM.
Experimentation and Discovery
The world of 3D printing filaments is a playground for experimentation. Don’t be afraid to try new materials and discover their unique characteristics. You might be surprised by what you find!
Design Balance: Crafting Functional and Aesthetic Prints (Jump back to Table of Contents)
Balancing design for both functionality and aesthetics is where the art of 3D printing truly shines. A beautifully designed object that fails to perform its intended function is as disappointing as a functional but visually unappealing one. Consider the interplay between form and function throughout the design process.
Form Follows Function
While aesthetics are important, functionality should often take precedence. Ensure your design meets its intended purpose before focusing on visual appeal. A well-designed object is a harmonious blend of both.
The Importance of Print Settings: Fine-Tuning for Success (Jump back to Table of Contents)
Print settings are the control panel of your 3D printer. They dictate how the printer behaves, influencing everything from print speed and temperature to layer adhesion and infill density. Dialing in the right settings is crucial for achieving optimal print quality and avoiding frustrating failures.
Slicing Software: Your Command Center
Slicing software like Cura, PrusaSlicer, and Simplify3D translates your 3D model into a set of instructions that the printer can understand. These programs offer a plethora of settings that allow you to fine-tune the printing process.
Experimentation and Calibration
Finding the perfect print settings often involves experimentation and calibration. Start with recommended settings for your material and printer, and then adjust them based on your observations. Don’t be afraid to tweak and test!
Post-Processing: The Finishing Touches (Jump back to Table of Contents)
Post-processing encompasses all the steps you take after the print is complete to enhance its appearance and functionality. This can include removing support structures, sanding rough surfaces, painting, and applying finishes.
Support Removal: A Delicate Dance
Removing support structures requires patience and precision. Use appropriate tools like pliers, flush cutters, and sandpaper to carefully detach the supports without damaging the print.
Surface Finishing: Smoothing Things Out
Sanding, polishing, and painting can transform a rough print into a polished masterpiece. Experiment with different techniques to achieve the desired finish.
Common Challenges in 3D Printing: Troubleshooting Tips (Jump back to Table of Contents)
3D printing, while rewarding, can also be challenging. From warping and stringing to clogged nozzles and bed adhesion issues, various problems can arise. But fear not! Most challenges can be overcome with a little troubleshooting.
Community Support: A Helping Hand
The 3D printing community is a vast and supportive network. Online forums, social media groups, and maker spaces offer a wealth of knowledge and assistance. Don’t hesitate to reach out for help!
Future Trends in 3D Printing: What’s on the Horizon? (Jump back to Table of Contents)
The future of 3D printing is brimming with possibilities. From new materials and processes to innovative applications in various industries, the technology is constantly evolving. AMFG highlights the trend towards “higher-volume additive manufacturing” (Source).
Expanding Horizons
3D printing is no longer confined to prototyping. It’s increasingly being used for end-use parts in industries like aerospace, automotive, and healthcare. The possibilities are truly limitless!
Conclusion (Jump back to Table of Contents)
In this deep dive into the 5 elements of 3D printing, we’ve explored the critical factors that influence your printing success: size, resolution, wall thickness, orientation, and material selection. Each element plays a pivotal role in determining the quality, durability, and functionality of your prints. By mastering these components, you can elevate your 3D printing game from novice to pro! 🎉
To recap, here are the positives and negatives of what we discussed:
Positives:
- Size: Understanding your printer’s build volume allows for better planning and execution of larger projects.
- Resolution: Higher resolution leads to finer details, enhancing the aesthetic appeal of your prints.
- Wall Thickness: Proper wall thickness ensures structural integrity without wasting material.
- Orientation: Smart positioning can reduce support needs and improve print quality.
- Material Selection: Choosing the right filament opens up a world of possibilities for your projects.
Negatives:
- Size Limitations: Larger prints can be time-consuming and costly.
- Resolution Trade-offs: Higher resolution means longer print times.
- Wall Thickness Dilemmas: Finding the right balance can be tricky.
- Orientation Challenges: Poor orientation can lead to print failures.
- Material Complexity: The vast array of materials can be overwhelming for beginners.
With these insights, you’re now equipped to tackle your 3D printing projects with confidence! So, what are you waiting for? Get printing! 🖨️
Recommended Links (Jump back to Table of Contents)
- 👉 Shop Prusa Mini+ on: Amazon | Official Site
- 👉 Shop Creality CR-10 Smart Pro on: Amazon | Official Site
- Explore 3D Design Software: Tinkercad | Fusion 360
- Books on 3D Printing: 3D Printing for Dummies | The 3D Printing Handbook
FAQ (Jump back to Table of Contents)
What are the different types of 3D printing technologies available? (Jump back to Table of Contents)
3D printing technologies can be broadly categorized into several types:
Fused Deposition Modeling (FDM)
- How it works: Melts and extrudes thermoplastic filament layer by layer.
- Best for: Prototyping, functional parts, and hobbyist projects.
Stereolithography (SLA)
- How it works: Uses a laser to cure liquid resin into solid layers.
- Best for: High-detail prints, jewelry, and dental applications.
Selective Laser Sintering (SLS)
- How it works: Uses a laser to fuse powdered material into solid structures.
- Best for: Functional prototypes and complex geometries.
Digital Light Processing (DLP)
- How it works: Projects light onto resin to cure it layer by layer.
- Best for: Fast, high-resolution prints.
How do I choose the right 3D printing material for my project? (Jump back to Table of Contents)
Choosing the right material involves considering several factors:
Project Requirements
- Strength: For functional parts, consider materials like ABS or Nylon.
- Flexibility: For items like phone cases, TPU is ideal.
- Temperature Resistance: For high-heat applications, look into ULTEM or PETG.
Aesthetic Considerations
- Color and Finish: Some materials can be painted or finished differently.
Printer Compatibility
- Filament Type: Ensure your printer is compatible with the material you choose.
What are the basic steps involved in the 3D printing process? (Jump back to Table of Contents)
- Design: Create a 3D model using design software.
- Slicing: Convert the model into G-code using slicing software.
- Setup: Prepare your printer, including bed leveling and material loading.
- Printing: Start the print and monitor for any issues.
- Post-Processing: Clean up supports, sand, and finish your print as needed.
What are some common applications and uses of 3D printing in various industries? (Jump back to Table of Contents)
Aerospace
- Use: Lightweight components and prototypes.
Healthcare
- Use: Custom prosthetics, dental models, and surgical guides.
Automotive
- Use: Prototyping parts and tools.
Education
- Use: Hands-on learning and project-based activities.
Consumer Products
- Use: Customized items, toys, and household goods.
Reference Links (Jump back to Table of Contents)
- FabLab Inc. – 5 Important Elements When 3D Printing
- Tom’s Hardware – 5 Key Design Rules for 3D Printing
- AMFG – Application Spotlight: 5 Electronic Components That Can Benefit from 3D Printing
- 3D Printing Industry
- 3D Print.com
With these insights and resources, you’re now ready to embark on your 3D printing adventure! Happy printing! 🖨️✨