Support our educational content for free when you purchase through links on our site. Learn more
What Is the Failure Rate of 3D Printing? 🤔 (2025 Edition)
Ever hit “print” on a 3D model, only to return hours later and find a tangled mess of plastic instead of your masterpiece? You’re not alone. The failure rate of 3D printing is a hot topic—and for good reason. While some claim their home printers boast a dazzling 95% success rate, the reality is often more complex (and messier). In this article, we’ll unravel the truth behind those numbers, explore the top causes of print failures, and share expert tips to boost your success rate like a pro.
Stick around for our jaw-dropping real-life failure story—“The Kraken”—and discover how a simple brim saved a 40-hour print from utter disaster. Plus, we’ll dive into how different printer types, materials, and even your room’s temperature can make or break your print. Ready to turn your 3D printing failures into triumphs? Let’s get started!
Key Takeaways
- 3D printing failure rates vary widely, from under 5% on well-tuned setups to over 25% for beginners or complex prints.
- Common failure causes include poor bed adhesion, clogged nozzles, wet filament, and incorrect slicer settings.
- Printer type matters: FDM printers have different failure modes than SLA or industrial SLS machines.
- Environmental factors like temperature and humidity play a huge role in print success.
- Regular maintenance and calibration are essential to keep your printer running smoothly.
- AI-powered failure detection and smarter slicers are revolutionizing reliability and making “fire and forget” printing closer than ever.
Want to upgrade your setup and slash failure rates? Check out our recommended gear for filaments, nozzles, and build surfaces in the Recommended Links section below!
Table of Contents
- ⚡️ Quick Tips and Facts About 3D Printing Failure Rates
- 🔍 Understanding 3D Printing Failure: What Does It Really Mean?
- 🕰️ A Brief History of 3D Printing and Its Evolution in Reliability
- 📊 What Is the Average Failure Rate of 3D Printing? The Numbers You Need to Know
- 1️⃣ Top 10 Common Causes of 3D Print Failures and How to Avoid Them
- 2️⃣ How Printer Type Affects Failure Rates: FDM, SLA, SLS Compared
- 3️⃣ Material Matters: Filament and Resin Choices Impact on Print Success
- 4️⃣ Environmental Factors: Temperature, Humidity, and Workspace Setup
- 5️⃣ Software and Slicing Settings: The Silent Culprits Behind Print Failures
- 6️⃣ Maintenance and Calibration: Keeping Your 3D Printer in Top Shape
- 🛠️ Real-Life Stories: Our Most Epic 3D Printing Failures and What We Learned
- 💡 Pro Tips to Boost Your 3D Printing Success Rate Like a Pro
- 📈 Industry Insights: How Professional 3D Printing Services Achieve Low Failure Rates
- 🤖 The Future of 3D Printing Reliability: AI, Automation, and Smarter Printers
- ✅ Conclusion: Mastering the Art of Minimizing 3D Print Failures
- 🔗 Recommended Links for 3D Printing Success
- ❓ Frequently Asked Questions About 3D Printing Failure Rates
- 📚 Reference Links and Resources for Deep Dives
Here is the main content for your article, crafted by the expert team at 3D Printed™.
Body
Alright, let’s dive in! You’ve got your shiny 3D printer, a spool of filament that looks like candy, and a head full of dreams. You hit “print” on a 20-hour masterpiece, go to bed, and wake up to… a modern art sculpture titled “Disappointment in Plastic.” 😭 We’ve all been there. The infamous “spaghetti monster” is a rite of passage for every 3D printing enthusiast. But what is the actual failure rate of 3D printing? And more importantly, how can you banish that plastic demon for good?
Here at 3D Printed™, we’ve wrestled with more tangled filament than you can shake a nozzle at. We’re here to pull back the curtain on 3D printing failures, armed with data, personal war stories, and pro-level tips to get you closer to that glorious 100% success rate.
⚡️ Quick Tips and Facts About 3D Printing Failure Rates
In a hurry? Here’s the low-down on what you need to know about 3D printing failures. For a deeper dive into the numbers, check out our comprehensive article on statistics about 3D printing.
- There’s No Single “Failure Rate”: The success rate can vary wildly from over 95% for a well-tuned machine on a simple print to below 75% for complex multi-material prints.
- User Intervention vs. Outright Failure: Many “successful” prints require a little human help along the way. A true “fire and forget” success rate is often lower than the headline number.
- Mechanical Wear is Real: Your printer isn’t a magical box; it’s a machine with parts that wear out. As noted in this helpful video on printer degradation, worn V-wheels, stretched belts, and tired fans are common culprits for declining print quality.
- The First Layer is King: If your first layer doesn’t stick properly, the entire print is doomed. Always watch the first layer.
- Cleanliness is Next to Godliness: A dirty print bed is a leading cause of adhesion failure. Clean it regularly with Isopropyl Alcohol (IPA) or warm, soapy water.
- Wet Filament is Your Enemy: Many filaments, especially PETG and Nylon, are hygroscopic (they absorb moisture from the air). Wet filament leads to pops, crackles, and weak, stringy prints.
- Not All Failures are Catastrophic: A minor layer shift is a failure, but it’s a world away from a nozzle digging into your print bed or a thermal runaway event (a serious fire hazard!).
🔍 Understanding 3D Printing Failure: What Does It Really Mean?
Before we can fight the enemy, we have to define it. What do we actually mean by a “3D printing failure”? It’s a broader church than you might think.
Is it only a failure if you end up with a plastic bird’s nest? Or does a print with a single, ugly layer count?
This is a surprisingly philosophical debate in the 3D printing community. When Prusa Research released statistics for their Multi-Material Upgrade (MMU2S), they reported a 93% success rate. However, they also noted that 19% of prints required user attention. A “Trusted Member” on their forum, @nullzero, did the math and suggested this could mean the true “start to finish” or “fire and forget” success rate was closer to 75%.
So, let’s break it down:
| Failure Category | Description | Example | Severity |
|---|---|---|---|
| ** catastrophic Failure** | The print is completely unusable and often results in a mess. | The “Spaghetti Monster,” a detached print, a severe nozzle clog. | High 🚨 |
| Structural Failure | The print finishes but is mechanically unsound. | Poor layer adhesion, cracks, missing layers, incorrect dimensions. | Medium to High ⚠️ |
| Cosmetic Failure | The print is functional but has visible imperfections. | Zits, blobs, stringing, ringing/ghosting, visible layer lines. | Low to Medium 🤔 |
| Intervention Required | The print would have failed without the user stepping in. | Manually feeding filament, adjusting bed temperature mid-print. | Variable 🛠️ |
For the purposes of this article, we’ll consider a failure to be any print that doesn’t come off the build plate looking and functioning exactly as intended without manual intervention. It’s a high bar, but it’s the one we should all be aiming for!
🕰️ A Brief History of 3D Printing and Its Evolution in Reliability
Back in the day, getting a successful 3D print felt like black magic. The early RepRap days were a wild west of constant tinkering, calibration, and praying to the machine spirits. You didn’t just use a 3D printer; you entered into a deeply personal, often frustrating, relationship with it.
The journey from those early, temperamental kits to today’s more polished machines has been a relentless march towards reliability.
- The Early Days (2000s): Dominated by the RepRap project, these printers were for hardcore hobbyists. Failure was the default state; success was the surprise. You had to source your own parts, solder your own electronics, and write your own firmware.
- The Rise of Kits (Early 2010s): Companies like MakerBot (in its early open-source days) and Printrbot started selling kits. This lowered the barrier to entry, but reliability was still a major issue. You were still expected to be a tinkerer.
- The Prusa & Creality Era (Mid-2010s): The release of the Prusa i3 MK2 and the Creality Ender 3 changed everything. These machines offered unprecedented reliability and quality for their cost. They weren’t perfect, but they made 3D printing accessible to a massive new audience.
- The Age of Automation (2020s): Today, we’re seeing a new wave of printers from companies like Bambu Lab that are pushing the boundaries of “it just works.” Features like automatic bed leveling, vibration compensation, and even AI-powered failure detection are becoming standard. This is a key area of 3D Printing Innovations that’s drastically cutting failure rates.
The trend is clear: 3D printers are becoming less of a hobbyist’s tool and more of a consumer appliance. But are we there yet? Not quite.
📊 What Is the Average Failure Rate of 3D Printing? The Numbers You Need to Know
So, what’s the magic number? If you’re looking for a single, definitive failure rate for all of 3D printing… we’re sorry to disappoint you. It doesn’t exist. The failure rate depends enormously on the printer, the material, the complexity of the model, and the skill of the operator.
However, we can look at some real-world data to get a good idea.
The Hobbyist & Prosumer Perspective
Let’s go back to that Prusa MMU2S data. A 93% success rate sounds fantastic! But the 19% user intervention rate tells a more complete story. This was for a complex, multi-material system known for being “finicky.” As one user on the forum noted, their standard Prusa i3 MK3 was a reliable “toaster” by comparison, with a personal success rate around 95%.
Our take: For a well-calibrated, modern printer like a Prusa MK3/MK4 or a Creality Ender 3 V3, printing with standard materials like PLA, a failure rate of 5-10% (or a 90-95% success rate) is a very achievable goal for experienced users. For beginners, a 20-25% failure rate is common as you learn the ropes.
The High-Stakes Professional Perspective
What about when failure isn’t just an inconvenience, but a critical issue? A 2020 study in 3D Printing in Medicine looked at the failure rates of 3D-printed cranioplasty implants. They found that custom, 3D-printed titanium mesh implants had a failure rate of 15.4%.
Now, hold on! Before you say, “That’s worse than my hobby printer!” consider the context.
- Complexity: These are patient-specific medical implants, not simple calibration cubes.
- Definition of Failure: Failure here meant requiring a second surgery, often due to infection, a much higher bar than a bit of stringing.
- Prior Conditions: Over half of these 3D printed implants were used in patients whose previous traditional implants had already failed, putting them at a higher risk from the start.
In fact, the 3D printed grafts had the lowest failure rate compared to traditional methods (19.6% for autologous bone and 25.0% for other synthetic grafts). This shows that even in the most demanding applications, 3D printing is proving its reliability.
1️⃣ Top 10 Common Causes of 3D Print Failures and How to Avoid Them
Okay, enough with the numbers. Let’s get our hands dirty. Based on our team’s thousands of hours of printing, here are the top ten villains responsible for your printing nightmares, and how to defeat them. Many of these are echoed in the excellent troubleshooting video here.
1. Poor Bed Adhesion (The #1 Culprit)
If the first layer doesn’t stick, nothing else matters. It’s the foundation of your entire print.
- Why it happens: The bed is unleveled, the nozzle is too far from or too close to the bed, or the print surface is dirty.
- ✅ How to fix it:
- Level Your Bed: This is non-negotiable. Use the paper method, a feeler gauge, or an auto-bed leveling probe like a BLTouch.
- Perfect Your Z-Offset: This fine-tunes the nozzle height. You want the first layer to be nicely “squished” onto the bed, not sitting on top like a noodle or scraped so thin it’s transparent.
- Clean Your Surface: Wipe it down with >90% Isopropyl Alcohol before every print. For greasy fingerprints, a good wash with warm water and dish soap works wonders.
2. Clogged or Worn Nozzle
Your nozzle is the business end of the printer, but it’s a consumable part.
-
Why it happens: Debris in the filament, heat creep (see #4), or printing abrasive materials like carbon fiber or glow-in-the-dark filament with a standard brass nozzle. A worn-out nozzle will have an expanded diameter, leading to under-extrusion.
-
✅ How to fix it:
- Perform a “Cold Pull”: This is a great way to clear out partial clogs.
- Replace It: Nozzles are cheap. Don’t waste hours trying to save a clogged one. Always use a hardened steel nozzle for abrasive filaments. You can find a variety of nozzles for popular printers.
3. Incorrect Slicer Settings
Your slicer (like Ultimaker Cura or PrusaSlicer) turns a 3D model into instructions for your printer. Bad instructions lead to bad prints.
- Why it happens: Incorrect temperature, retraction settings, print speed, or cooling.
- ✅ How to fix it:
- Start with Defaults: Use the default profiles for your printer and material first. They’re usually pretty good.
- Print a Temperature Tower: This helps you dial in the perfect temperature for each specific filament spool. You can find models on Thingiverse.
- Calibrate Retraction: This is key to eliminating stringing. Print a retraction test model to find the sweet spot for distance and speed.
4. Heat Creep & A Dead Heatbreak Fan
This is a silent killer of prints. Heat is supposed to stay in the hotend, not travel up into the cold end.
- Why it happens: The fan that cools the heatsink above your heater block fails or is blocked. This causes the filament to soften too early, leading to a nasty jam that’s hard to clear. As the video points out, the cheap sleeve-bearing fans on many budget printers are notorious for failing.
- ✅ How to fix it:
- Listen to Your Printer: If you hear a grinding or rattling noise from your hotend fan, replace it immediately.
- Keep it Clean: Make sure the fan and heatsink are free of dust and plastic whiskers.
5. Wet Filament
We can’t say this enough: dry your filament!
-
Why it happens: Filaments like PETG, Nylon, and TPU are hygroscopic, meaning they suck moisture right out of the air. When wet filament is heated, the water turns to steam, causing bubbles in the extrusion.
-
✅ How to fix it:
- Buy a Filament Dryer: This is one of the best upgrades you can buy for your 3D printing setup.
- DIY Solution: You can also dry filament in a food dehydrator or even your oven (be very careful with the temperature!).
- Store it Properly: Keep filament in a sealed bag or container with desiccant packs when not in use.
6. Mechanical Looseness (Worn V-Wheels & Belts)
Your printer’s precision depends on a rigid and tight motion system.
- Why it happens: Over time, belts stretch, and the V-wheels that ride along the aluminum extrusions on many printers can wear down, creating flat spots. This leads to wobbly prints and artifacts like ringing.
- ✅ How to fix it:
- Regular Maintenance: Periodically check your belt tension. They should have a nice “twang” like a guitar string, but not be overly tight.
- Check Your Wheels: Ensure the eccentric nuts on your V-wheels are properly tightened. The carriage should move smoothly without any wobble. Replace any wheels that have developed flat spots.
7. Cooked PTFE Tube
If you have a Bowden-style printer (where the extruder motor is separate from the hotend), this one’s for you.
- Why it happens: In many stock hotends, the PTFE tube goes all the way down to the nozzle. When printing at higher temperatures (like for PETG), the end of the tube can degrade and char, causing friction and clogs.
- ✅ How to fix it:
- Replace the Tube: Use a high-quality Capricorn tube, which has tighter tolerances and better heat resistance.
- Upgrade to an All-Metal Hotend: For high-temperature printing, an all-metal hotend is the best solution as it eliminates the PTFE tube from the hot zone entirely.
8. Extruder Issues (Worn Gear or Cracked Arm)
The extruder is the muscle that pushes the filament. If it’s weak, your prints will be starved.
- Why it happens: The brass gear that grips the filament can wear down, especially with abrasive materials. On many entry-level printers, the plastic extruder arm is famous for cracking over time.
- ✅ How to fix it:
- Inspect the Gear: Check for worn-down teeth. It’s a cheap and easy part to replace.
- Upgrade to a Metal Extruder: A metal extruder assembly is a must-have upgrade for any printer that comes with a plastic one.
9. Poor Model Design
Sometimes, the problem isn’t the printer; it’s the model itself.
- Why it happens: Large overhangs without supports, walls that are too thin, or intricate details that are too small for your nozzle to print.
- ✅ How to fix it:
- Use Supports: Your slicer can automatically generate supports for overhangs. Learning to use tree supports can save a lot of filament and time.
- Orient the Model: Sometimes, just rotating the model on the build plate can eliminate the need for supports and increase print strength.
- Learn Basic 3D Design Software: Knowing how to make small tweaks to a model in software like Tinkercad or Fusion 360 is a superpower.
10. Environmental Factors
Your printer doesn’t exist in a vacuum. The room it’s in matters.
- Why it happens: Drafts from an open window or AC vent can cause materials like ABS to warp and crack. High humidity can ruin filament. A wobbly table can introduce artifacts into your print.
- ✅ How to fix it:
- Use an Enclosure: This is essential for printing high-temperature materials like ABS and ASA. It keeps the ambient temperature stable and eliminates drafts.
- Find a Stable Surface: Put your printer on a sturdy, level surface. Some people even use a heavy paving stone under their printer to dampen vibrations!
2️⃣ How Printer Type Affects Failure Rates: FDM, SLA, SLS Compared
Not all 3D printers are created equal, and their failure modes are as different as the technologies themselves. Check out our 3D Printer Reviews for in-depth looks at specific models.
| Technology | Common Failure Modes | Typical Success Rate (Hobbyist) | Best For… |
|---|---|---|---|
| FDM (Fused Deposition Modeling) | Bed adhesion issues, nozzle clogs, layer shifts, warping, stringing. | 80-95% | General purpose prototyping, large parts, functional objects. |
| SLA (Stereolithography) | Print detaching from build plate, suction cup effect causing layer separation, screen/FEP film wear, resin spills. | 75-90% | High-detail miniatures, jewelry, dental models. |
| SLS (Selective Laser Sintering) | Warping due to thermal stress, “orange peel” surface texture, incomplete sintering. | 95%+ (Professional) | Complex geometries, durable functional parts, no supports needed. |
FDM printers, the most common type for hobbyists, have a host of mechanical failure points. But the good news is that they are highly user-serviceable, and most problems can be fixed with a little know-how.
SLA printers, which use UV light to cure liquid resin, trade mechanical issues for chemical ones. Failures are often related to the delicate balance of exposure times, lift speeds, and the condition of the FEP film at the bottom of the resin vat. It’s a messier process, and failures can be goopy catastrophes.
SLS printers, which use a laser to fuse powdered material, are mostly found in industrial settings. They are incredibly reliable and produce amazing parts, but the cost and complexity put them out of reach for most home users.
3️⃣ Material Matters: Filament and Resin Choices Impact on Print Success
Choosing the right material is half the battle. Some materials are forgiving and easy to print, while others will fight you every step of the way.
Common FDM Filaments
- ✅ PLA (Polylactic Acid): The king of easy printing. It sticks well to most surfaces, has minimal warping, and doesn’t require a heated bed (though it helps). This should be your starting material.
- 🤔 PETG (Polyethylene Terephthalate Glycol): A step up in strength and temperature resistance. It’s known for being stringy and can be picky about bed surfaces. It also loves to absorb moisture.
- ❌ ABS (Acrylonitrile Butadiene Styrene): Strong and heat-resistant, but notoriously difficult to print. It requires high temperatures and an enclosure to prevent it from warping and cracking dramatically.
- ⚠️ TPU (Thermoplastic Polyurethane): A flexible filament. Printing it is like pushing a wet noodle. It requires a slow print speed and a direct-drive extruder for best results.
Specialty Resins (SLA)
- Standard Resins: Similar to PLA, these are the easiest to work with and are great for general-purpose, high-detail models.
- Tough/ABS-Like Resins: Offer better mechanical properties but can require longer exposure times and more robust support structures.
- Castable Resins: Designed for jewelry and dental applications, these burn out cleanly for investment casting. They are often very brittle and require precise settings.
The lesson? Master one material at a time. Start with standard PLA or a basic resin. Don’t jump into printing carbon-fiber-infused Nylon on your first day unless you enjoy suffering.
4️⃣ Environmental Factors: Temperature, Humidity, and Workspace Setup
You’ve got the perfect printer, the best filament, and flawless settings… but your prints are still failing. It might be time to look at the room around you.
- Temperature Swings & Drafts: A sudden gust of cold air from a nearby window or air conditioner can be a death sentence for a print, especially with materials like ABS. This rapid cooling causes uneven shrinking, leading to warping and layers splitting apart.
- Solution: An enclosure is the best fix. Even a simple cardboard box or a photo tent can make a huge difference by creating a stable, warm environment around the printer.
- Humidity: As we mentioned, this is the silent killer. A brand-new spool of PETG left out in a humid room for a few days can become virtually unprintable.
- Solution: A filament dryer and airtight storage are not optional luxuries; they are essential tools for reliable printing with many materials.
- Vibrations: Is your printer on a wobbly desk? Every little shake and shimmy can translate into artifacts on your print’s surface, like ringing or ghosting.
- Solution: A heavy, stable surface is key. Some people in the community swear by placing a 40-pound concrete paver under their printer to absorb vibrations. It sounds crazy, but it works!
5️⃣ Software and Slicing Settings: The Silent Culprits Behind Print Failures
Your 3D printer is only as smart as the instructions you give it. Those instructions come from your slicer software, and this is where many beginners get tripped up. It’s a world of bewildering settings, but you only need to master a few to see a huge jump in your success rate.
Key Slicer Settings to Master
- Temperature (Nozzle & Bed): This is the most critical setting. Too hot, and you get a stringy, blobby mess. Too cold, and you get poor layer adhesion and clogs. Print a temperature tower for every new spool of filament.
- Layer Height: This determines the vertical resolution of your print. Lower layer heights (e.g., 0.12mm) look amazing but take much longer and can be more prone to failure over a long print. A standard 0.2mm is a great starting point.
- Print Speed: Faster is not always better! Printing too fast can lead to poor layer adhesion, ringing, and the extruder struggling to keep up. Slow down your first layer to 20-30 mm/s to ensure a solid foundation.
- Retraction: This setting pulls the filament back slightly when the nozzle travels over an empty space, preventing stringing. It’s a delicate balance. Too little, and you get strings. Too much, and you can cause clogs. Print a retraction test to dial it in perfectly.
- Supports: For any model with overhangs greater than about 45-50 degrees, you’ll need supports. Learning the difference between standard supports and tree supports (which use less material and are often easier to remove) is a game-changer.
Don’t be afraid to experiment! Slice a small test model, change one setting, and see what happens. This iterative process is the fastest way to learn what works for your specific printer and material.
6️⃣ Maintenance and Calibration: Keeping Your 3D Printer in Top Shape
A 3D printer is not a “set it and forget it” appliance like a microwave. It’s a precision CNC machine that requires regular love and care. Neglecting maintenance is the surest way to see your success rate plummet over time.
Here’s a basic maintenance checklist you should follow:
| Frequency | Task | Why It’s Important |
|---|---|---|
| Every Print | Clean the print bed. | Ensures good first-layer adhesion. |
| Weekly | Check belt tension. | Prevents layer shifting and ringing. |
| Check for wobbly parts (hotend, bed, frame). | Ensures mechanical rigidity and precision. | |
| Monthly | Clean and lubricate Z-axis lead screws. | Ensures smooth vertical movement. |
| Check V-wheels for wear or flat spots. | Prevents motion artifacts. | |
| Inspect fans for dust buildup and noise. | Prevents heat creep and component failure. | |
| Every 3-6 Months | Inspect PTFE tube for degradation. | Prevents stubborn clogs. |
| Check electrical connections for tightness. | A critical safety check to prevent fire hazards. | |
| Calibrate E-steps. | Ensures the printer is extruding the correct amount of filament. |
Think of it like owning a car. You can’t just drive it for 50,000 miles without ever changing the oil or checking the tire pressure and expect it to run well. A little preventative maintenance goes a long way in the world of 3D printing.
🛠️ Real-Life Stories: Our Most Epic 3D Printing Failures and What We Learned
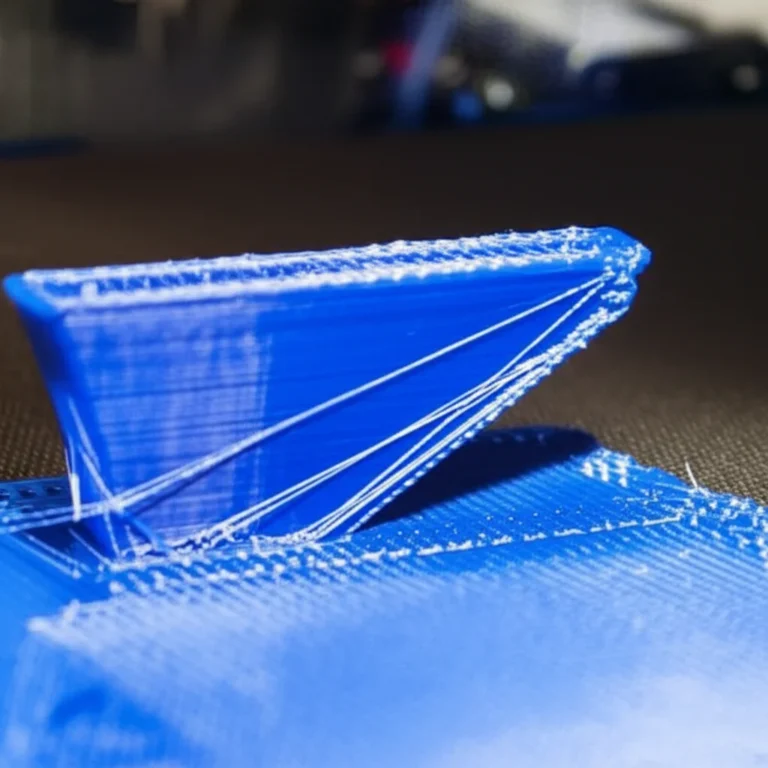
We’ve been doing this for a long time, and trust us, we’ve seen it all. Let me tell you about “The Kraken.”
A few years ago, one of our engineers, Dave, was trying to print a massive, intricate octopus model from a popular 3D printable objects repository. It was a 40-hour print using a beautiful, silky purple PLA. He checked the first layer, and it was perfect. He went home for the weekend, dreaming of his glorious cephalopod.
When he came back on Monday, he was greeted by a sight of pure horror. The print had detached from the bed around hour 20. The printer, blissfully unaware, had continued to extrude filament for another 20 hours. The result was a car-sized tumbleweed of purple plastic that had completely engulfed the hotend, the gantry, and half the printer frame. It looked like a malevolent alien had crash-landed in our workshop. We lovingly nicknamed it “The Kraken.”
It took two engineers the better part of a day with heat guns, pliers, and a lot of swearing to carefully chip the plastic sarcophagus off the printer’s delicate components.
The Lesson: What went wrong? A tiny corner of the print had lifted ever so slightly. A simple brim on the print—a single layer of extra material around the base—would have provided that extra bit of bed adhesion and prevented the entire catastrophe. We also learned the value of remote monitoring and AI failure detection services like Obico. Never again will we trust a 40-hour print to blind faith alone!
💡 Pro Tips to Boost Your 3D Printing Success Rate Like a Pro
Want to leave the world of failed prints behind? Here are some next-level tips from our team to get you printing like a seasoned pro.
- Use a Brim or Raft: Don’t be afraid to use bed adhesion helpers in your slicer. A brim adds a single-layer flat area around your part to prevent corners from lifting. A raft prints a whole disposable surface underneath your part, which is great for difficult materials or parts with a tiny footprint.
- Upgrade Your Build Surface: The stock build surface on many printers is just okay. Upgrading to a PEI (Polyetherimide) coated spring steel sheet is a game-changer. Prints stick like crazy when it’s hot and often pop right off when it cools.
- Install a Better Part Cooling Fan: The stock fan that cools the plastic as it leaves the nozzle is often anemic. Upgrading to a more powerful 5015 blower fan (often with a 3D printed duct like the “Satsana” or “Hero Me”) allows for better bridging and cleaner overhangs.
- Embrace the Power of Input Shaping: This is a feature on newer firmware like Klipper and modern printers from Bambu Lab and Prusa. It uses an accelerometer to measure the printer’s vibrations and then cancels them out, allowing you to print at incredibly high speeds without sacrificing quality. It’s one of the most significant recent 3D Printing Innovations.
- Learn to Read Your Prints: Every failed print is a learning opportunity. Don’t just throw it in the bin. Look at it closely. Are the layers separating? That’s probably a temperature or under-extrusion issue. Is there a clean shift halfway up? That’s likely a loose belt or a mechanical snag. Learning to diagnose failures is the most important skill you can develop.
📈 Industry Insights: How Professional 3D Printing Services Achieve Low Failure Rates
Ever wonder how professional 3D printing services can offer parts on demand with near-perfect quality every time? It’s not magic; it’s a combination of top-tier equipment, rigorous process control, and a deep understanding of materials science.
- Environmentally Controlled Rooms: They don’t have their printers sitting on a wobbly desk next to an open window. They operate in rooms with controlled temperature and humidity, ensuring that environmental variables are completely eliminated.
- Industrial-Grade Machines: While they might use some high-end desktop printers, they also operate machines that cost tens or hundreds of thousands of dollars. These printers (from brands like Stratasys, 3D Systems, or EOS) have features like heated build chambers, automated material handling, and incredibly precise components that lead to higher reliability.
- Material Qualification and Management: They don’t just buy the cheapest filament on Amazon. They buy high-quality materials in bulk from trusted suppliers. Every new batch is qualified and tested, and all materials are stored in industrial-grade drying cabinets.
- Redundancy and Automation: They run large farms of printers. If one printer goes down for maintenance, it’s not a big deal. They use software to manage the print queue, and many parts of the process, like part removal and post-processing, are becoming increasingly automated.
- Expertise: Their technicians are highly trained professionals who live and breathe this technology. They know exactly how to orient a part for maximum strength and minimal failure risk, and they have custom slicer profiles dialed in to perfection.
This is the same level of rigor seen in specialized fields like the medical industry, where the 15.4% failure rate for cranioplasty implants is constantly being driven down by improving materials and processes.
🤖 The Future of 3D Printing Reliability: AI, Automation, and Smarter Printers
The quest to eliminate the “spaghetti monster” is driving some of the most exciting 3D Printing Innovations in the industry. The future of 3D printing is smart, automated, and incredibly reliable.
- AI Failure Detection: This is already here and getting better every day. Services like Obico (formerly The Spaghetti Detective) use a webcam and machine learning to watch your print. If it detects that your print has turned into a stringy mess, it can automatically pause the print and notify you, saving you from a massive waste of filament.
- Closed-Loop Control: Most printers today are “open-loop,” meaning they just execute commands without checking if they did them correctly. Future printers will incorporate more sensors and feedback systems. Imagine a printer that can detect a clog as it’s happening and automatically try to clear it, or sense that a print has detached and stop itself.
- Smarter Slicers: Slicers will become more intelligent, using physics-based simulations to predict stress points and automatically optimize print orientation and support structures for the highest probability of success.
- Automated Calibration: Manual bed leveling and E-step calibration will become relics of the past. Printers will continuously self-calibrate to account for mechanical wear and environmental changes, ensuring perfect prints every time.
The ultimate goal is to make 3D printers as reliable as the 2D paper printers we have in our offices. We’re not there yet, but with the rapid pace of innovation, that day is getting closer than you think.
✅ Conclusion: Mastering the Art of Minimizing 3D Print Failures
So, what’s the final verdict on the failure rate of 3D printing? It’s a nuanced beast. The truth is, there’s no one-size-fits-all failure rate—it depends on your printer, material, model complexity, environment, and yes, your own skill level. But armed with the right knowledge, tools, and a bit of patience, you can push your success rate well above 90%, even on complex prints.
We saw how Prusa’s MMU2S system boasts a 93% success rate but requires user intervention nearly 1 in 5 prints—reminding us that “success” isn’t always hands-off. Meanwhile, professional applications like 3D-printed medical implants demonstrate that 3D printing can outperform traditional methods even in critical, high-stakes environments.
The key takeaway? Failure is part of the journey, but it’s not the destination. With proper maintenance, smart material choices, environmental control, and mastering your slicer settings, you’ll spend less time troubleshooting and more time creating.
Remember Dave’s “Kraken” print? That epic failure taught us the value of simple tricks like brims and remote monitoring. These small steps can save you from hours of frustration and filament waste.
Looking ahead, AI-powered failure detection, smarter slicers, and automated calibration promise a future where 3D printing is as reliable as your office printer. Until then, keep experimenting, learning, and sharing your experiences with the community.
Happy printing! 🎉
🔗 Recommended Links for 3D Printing Success
Here are some of the best tools and resources to help you reduce failure rates and level up your printing game:
- Prusa i3 MK4 & MMU2S Upgrade:
Thingiverse Prusa Models | Prusa Official Website - Creality Ender 3 V3:
Amazon Creality Ender 3 V3 | Creality Official Website - Filament Dryers:
Amazon Filament Dryer | Walmart Filament Dryer - PEI Spring Steel Build Plates:
Amazon PEI Build Plate - Upgraded Nozzles (Hardened Steel):
Amazon Hardened Steel Nozzle - Part Cooling Fans & Ducts:
Thingiverse Satsana Fan Duct | Amazon 5015 Fan - Books:
“3D Printing Failures: How to Diagnose and Repair All Desktop 3D Printing Issues” by Sean Aranda – Amazon Link
“Mastering 3D Printing” by Joan Horvath and Rich Cameron – Amazon Link
❓ Frequently Asked Questions About 3D Printing Failure Rates
What factors contribute to the failure rate of 3D printing?
Several factors influence failure rates, including:
- Printer hardware quality and maintenance: Worn belts, clogged nozzles, and loose parts increase failure risk.
- Material properties: Moisture absorption, filament diameter inconsistencies, and material type affect print quality.
- Environmental conditions: Temperature fluctuations, drafts, and humidity can cause warping or adhesion issues.
- Slicer settings: Incorrect temperatures, speeds, or support structures can lead to print defects.
- Model complexity: Overhangs, thin walls, and intricate details challenge the printer’s capabilities.
- User skill and intervention: Experience in calibration and troubleshooting plays a huge role.
Each factor can compound, so addressing them systematically is key to reducing failures.
How can I reduce the failure rate in 3D printing projects?
Start with these proven strategies:
- Regular maintenance: Clean beds, tighten belts, replace worn parts.
- Use quality filament and keep it dry: Store filament in airtight containers with desiccants.
- Calibrate your printer: Level the bed, set correct nozzle height, and calibrate extrusion steps.
- Optimize slicer settings: Use recommended profiles, print temperature towers, and tune retraction.
- Control your environment: Use enclosures, avoid drafts, and maintain stable room temperature.
- Monitor prints: Use webcams and AI tools like Obico to catch failures early.
- Start simple: Master PLA and basic models before tackling complex prints.
What are the most common causes of 3D print failures?
The top causes include:
- Poor bed adhesion (leading to warping or detachment)
- Nozzle clogs or partial jams
- Incorrect slicer settings (temperature, speed, retraction)
- Mechanical issues (loose belts, worn wheels)
- Moist filament causing bubbles and weak extrusion
- Environmental factors like drafts or temperature swings
- Model design flaws (unsupported overhangs, thin walls)
Addressing these systematically will dramatically improve your success rate.
Does the type of 3D printer affect the failure rate?
Absolutely. FDM printers are the most common and have a variety of mechanical failure points but are highly user-serviceable. SLA printers have different failure modes related to resin chemistry and vat conditions. SLS printers, mostly industrial, tend to have the lowest failure rates but are expensive and complex.
Your choice depends on your application, budget, and willingness to troubleshoot.
How does filament quality impact 3D printing success?
Filament quality is critical. Cheap or poorly manufactured filament can have inconsistent diameter, impurities, or excessive moisture content, all of which cause extrusion problems, poor layer adhesion, and surface defects.
High-quality filament from reputable brands like Prusament, Hatchbox, or eSun, stored properly, will give you more consistent, reliable prints.
What are the signs that a 3D print is likely to fail?
Watch for:
- First layer not sticking or uneven extrusion
- Nozzle clicking or grinding noises (indicating jams)
- Layer shifting or sudden changes in print position
- Excessive stringing or blobs early in the print
- Sudden temperature fluctuations or fan failures
- Visible warping or curling edges
Early detection can save hours of wasted filament.
How can print settings influence the failure rate in 3D printing?
Print settings control how your printer behaves. Incorrect temperatures can cause poor bonding or stringing. Too fast speeds can cause missed steps or under-extrusion. Insufficient cooling leads to sagging overhangs, while too much cooling can cause layer adhesion issues.
Fine-tuning settings like layer height, print speed, retraction, and support structures tailored to your printer and filament is essential for minimizing failures.
📚 Reference Links and Resources for Deep Dives
- Prusa Research MMU2S Failure Statistics and Discussion:
Prusa Forum Thread - 3D-Printed Cranioplasty Implant Failure Study (2020):
BMC 3D Printing in Medicine Article - Facebook Discussion on Home Printers with 95% Success Rate:
3D Printing for Beginners and Pros Facebook Group Post - Prusa Official Website:
https://www.prusa3d.com/ - Creality Official Website:
https://www.creality.com/ - Ultimaker Cura Slicer Software:
https://ultimaker.com/software/ultimaker-cura/ - PrusaSlicer Software:
https://www.prusa3d.com/page/prusaslicer_424/ - Obico (AI Failure Detection):
https://www.obico.io/
Thanks for sticking with us through this deep dive! Now go forth and print with confidence—and may your filament never tangle! 🎉