Support our educational content for free when you purchase through links on our site. Learn more
🚀 How to Prepare a 3D Model File for Printing: 12 Critical Steps (2026)
Ever spent three hours printing a masterpiece, only to watch it turn into a tangled “spaghetti monster” on your build plate? We’ve been there. At 3D Printed™, we’ve seen countless digital dreams crash into reality because of a single, tiny hole in the geometry or a unit mismatch that turned a coffee mug into a microscopic speck. The truth is, the magic of 3D printing doesn’t just happen in the slicer; it starts long before, in the careful preparation of your 3D model file.
In this comprehensive guide, we’re skipping the fluff and diving deep into the 12 critical steps that separate a successful print from a waste of filament. From ensuring your model is watertight and manifold to mastering the art of scaling and orientation, we’ll walk you through the entire pipeline. We’ll even reveal the secret tools we use to fix non-manifold geometry in seconds and why 3MF files are quietly stealing the show from the old-school STL. Whether you’re a CAD newbie or a seasoned engineer, this is the definitive roadmap to turning your pixels into plastic perfection.
Key Takeaways
- ✅ Watertight Geometry is Non-Negotiable: Your model must be a closed manifold with no holes or gaps, or the slicer will fail to generate toolpaths.
- ✅ Scale and Units Matter: Always design and export in millimeters; a unit mismatch is the #1 cause of “tiny print” disasters.
- ✅ Wall Thickness Rules: For FDM printing, maintain a minimum wall thickness of 1.2mm (3x nozzle diameter) to avoid structural failure.
- ✅ The Slicer is Your Final Check: Never skip the Preview mode; it reveals hidden errors, support issues, and orientation problems before you print.
- ✅ Choose the Right Format: Upgrade from STL to 3MF for better data integrity, color support, and smaller file sizes.
Table of Contents
- ⚡️ Quick Tips and Facts
- 📜 From CAD to Plastic: A Brief History of 3D Model Preparation
- 🧠 The Mental Shift: Understanding Your Digital Twin
- 🛠️ Choosing the Right 3D Modeling Software for Your Needs
- 👶 Beginner-Friendly Tools: Where to Start Without Tears
- 🚀 Intermediate Options: Leveling Up Your Design Game
- 🏆 Professional Software: When You Need Military-Grade Precision
- 🎨 The Creation Phase: Sketching, Modeling, and Scaling
- ✏️ Sketch Your Concept: The Blueprint of Success
- 💻 Digital Modeling: Bringing Ideas to Life
- 📏 Dimension and Scale: Why 1:1 Matters More Than You Think
- 🔍 The Critical Inspection: Is Your Model Ready for the Real World?
- 🌊 Watertight Geometry: The Holy Grail of 3D Printing
- 🕳️ Non-Manifold Edges: The Silent Killers of Print Success
- 🧱 Wall Thickness: Avoiding the “Spaghetti Monster” Syndrome
- 🔧 Fixing Non-Manifold Geometry: Tools of the Trade
- ⚙️ Optimizing the Model: Support Structures and Overhangs
- 📤 Exporting 3D Files: Choosing the Correct Format and Parameters
- 📁 Choosing the Correct File Format: STL, OBJ, 3MF, or AMF?
- ⚙️ Setting Export Parameters: Resolution and Units Explained
- 🚫 Common Exporting Issues and How to Dodge Them
- 🔪 Slicing the 3D File: The Magic Between Digital and Physical
- 🖨️ Understanding Slicing Software: Your New Best Friend
- 📉 Slicing Problems: When the G-Code Goes Wrong
- 🚫 12 Common Mistakes in 3D Model Preparation (And How to Fix Them)
- 1. Ignoring the Build Volume Limits
- 2. Forgetting to Check for Holes and Gaps
- 3. Setting Wall Thickness Too Thin
- 4. Neglecting Orientation and Gravity
- 5. Overlooking Support Requirements
- 6. Using the Wrong File Format for the Job
- 7. Exporting with Low Resolution (Faceted Looks)
- 8. Mixing Units (Millimeters vs. Inches)
- 9. Creating Inverted Normals
- 10. Designing Without Considering Layer Height
- 1. Failing to Account for Tolerances
- 12. Skipping the Preview in the Slicer
- ✅ Final Checklist Before Printing: The Last Line of Defense
- 🏁 Conclusion: From Pixels to Plastic Perfection
- 🚀 Take the Next Step with Creality!
- 📱 Social Media: Join the Community
- 🛠️ Recommended Links
- ❓ FAQ: Your Burning Questions Answered
- 📚 Reference Links
⚡️ Quick Tips and Facts
Before we dive into the deep end of the digital ocean, let’s splash around with some golden nugets of wisdom that will save you hours of frustration and gallons of wasted filament. At 3D Printed™, we’ve seen it all: from the “spaghetti monster” disasters to the flawless prints that make you want to high-five your printer.
Here is the TL;DR for preparing your 3D model:
- ✅ Watertight is Non-Negotiable: If your model has holes, your printer will have a meltdown. Think of it like a boat; if it leaks, it sinks. Your model must be a closed manifold.
- ✅ Scale Matters (A Lot): 3D printers speak millimeters, not inches. If you design inches and export without converting, you’ll end up with a microscopic toy or a part that doesn’t fit your bed.
- ✅ Wall Thickness is King: Nothing prints thinner than your nozzle can extrude. Generally, keep walls at least 1.2mm (or 3x your nozzle diameter) for FDM printing.
- ✅ STL isn’t the Only Option: While STL is the classic, 3MF is the modern hero that saves texture and color data without the bloat.
- ✅ The “Slicer” is Your Final Boss: No matter how perfect your CAD model is, the slicing software (like Cura or PrusaSlicer) is where the magic (or disaster) happens. Always preview!
Did you know? The term “manifold” in 3D printing comes from fluid dynamics. A manifold object is one where every edge is shared by exactly two faces, creating a continuous volume. If an edge is shared by only one face, it’s a “naked edge,” and your printer will likely ignore it or crash.
For more on the incredible world of 3D Printable Objects, check out our curated collection at 3D Printable Objects. And if you’re just starting your journey, read our guide on 3D Printed to understand the ecosystem.
📜 From CAD to Plastic: A Brief History of 3D Model Preparation

You might think preparing a 3D model is a modern headache, but the roots go back to the 1980s. When Chuck Hull invented Stereolithography (SLA), he needed a way to describe a 3D object to a machine that only understood light and liquid resin. Enter the STL file format in 1987.
Before STL, engineers used NURBS (Non-Uniform Rational B-Splines), which are mathematically perfect curves. But early 3D printers couldn’t handle the complex math of NURBS. They needed something simple: a mesh of triangles.
- The STL Era: For decades, STL was the only game in town. It was great for geometry but terrible for color, texture, or units. It was like sending a letter without a return address.
- The OBJ Revolution: In the late 90s, Wavefront introduced OBJ, which added support for textures and materials. Suddenly, we could print colorful models!
- The 3MF Renaissance: Fast forward to 2015, and the industry realized STL was holding us back. The 3D Manufacturing Format (3MF) was born, developed by a consortium including Microsoft, Autodesk, and HP. It packs everything—color, material, lattice structures—into a single, efficient file.
Why does this matter to you? Because understanding the history explains why you still see so many STL files floating around on Thingiverse and why your slicer sometimes acts weird with old files. We’ve come a long way from the “naked edges” of the early days to the precision of today’s 3MF files.
🧠 The Mental Shift: Understanding Your Digital Twin
Here is the secret that separates the pros from the “I-just-want-to-print-a-keychain” crowd: You are not designing for a screen; you are designing for a machine.
When you look at a model in your CAD software, you see a perfect, smooth, mathematical object. But when that file hits your printer, it becomes a physical reality subject to gravity, heat, and the laws of physics.
- The Digital Twin: This is your model in the computer. It has infinite resolution.
- The Physical Twin: This is the plastic object. It has layer lines, thermal expansion, and support scars.
The Conflict: A perfect 90-degree overhang in CAD is a disaster in real life. A 45-degree angle is fine. A 10-degree overhang needs support.
Pro Tip: Always ask yourself, “How would gravity affect this if I built it out of clay?” If the answer is “it would collapse,” your digital model needs support structures or a design change.
We often see beginners design a model that looks amazing in the viewport, only to watch it fail because they forgot that overhangs need support. This is where the mental shift happens: you stop thinking like an artist and start thinking like an engineer.
🛠️ Choosing the Right 3D Modeling Software for Your Needs
Not all software is created equal. Choosing the wrong tool is like trying to perform brain surgery with a butter knife. Let’s break down the landscape based on your skill level and goals.
👶 Beginner-Friendly Tools: Where to Start Without Tears
If you’ve never touched a CAD program, don’t panic. The barrier to entry has never been lower.
-
TinkerCAD: The absolute king of beginners. It’s web-based, free, and uses a “drag-and-drop” logic. You combine basic shapes (cubes, spheres) to create complex forms.
Best for: Simple functional parts, educational projects, and quick prototypes.
Limitation: Not great for organic shapes or complex engineering.
Where to find models: Check out TinkerCAD designs on Thingiverse. -
SketchUp (Free Web Version): Great for architectural models and boxy designs. It has a steeper learning curve than TinkerCAD but offers more precision.
🚀 Intermediate Options: Leveling Up Your Design Game
Ready to stop building with blocks and start sculpting?
-
Fusion 360: The holy grail for hobbyists and engineers. It combines parametric modeling (where you can change dimensions later and the whole model updates) with direct modeling.
Why we love it: It handles complex assemblies and mechanical parts with ease.
Cost: Free for personal use (with some limitations).
Learn more: Explore 3D Design Software for more Fusion 360 tutorials. -
Blender: The open-source powerhouse. While famous for animation, it’s incredible for organic modeling (characters, statues, artistic prints).
Warning: The learning curve is step. It uses a different logic (mesh editing) than CAD software.
Tip: Watch the famous “Blender Guru Donut” tutorial to get started.
🏆 Professional Software: When You Need Military-Grade Precision
When failure isn’t an option (e.g., aerospace, medical devices), you need the big guns.
- SolidWorks: The industry standard for mechanical engineering. It’s expensive but offers unmatched precision for assemblies and stress analysis.
- AutoCAD: Still the king of 2D drafting and 3D architectural design.
Comparison Table: Software Showdown
| Feature | TinkerCAD | Fusion 360 | Blender | SolidWorks |
|---|---|---|---|---|
| Learning Curve | 🟢 Very Easy | 🟡 Moderate | 🔴 Step | 🔴 Very Step |
| Best For | Simple Parts | Engineering/Mechanical | Organic/Art | Industrial/Complex |
| Parametric? | ❌ No | ✅ Yes | ❌ No (mostly) | ✅ Yes |
| Cost | Free | Free (Hobby) / Paid | Free | Expensive |
| File Export | STL, OBJ | STL, STEP, 3MF | STL, OBJ, 3MF | STL, STEP, 3MF |
🎨 The Creation Phase: Sketching, Modeling, and Scaling
You’ve picked your software. Now, let’s build. But wait! Don’t just start clicking.
✏️ Sketch Your Concept: The Blueprint of Success
Before you touch a mouse, grab a pencil. Sketching forces you to think about dimensions and proportions without the distraction of 3D tools.
- Define the “Critical Dimensions”: What is the maximum width? The height? The hole diameter?
- Pro Tip: If you are printing a part that needs to fit into an existing mechanism, measure the existing part twice and sketch it to scale.
💻 Digital Modeling: Bringing Ideas to Life
Now, translate your sketch into the digital realm.
- Break it Down: As mentioned in the “First Video” summary, complex objects are just simple shapes combined. A Gengar is just a sphere, some cones for spikes, and a cylinder for the body.
- Boolean Operations: Learn to Union, Subtract, and Intersect. These are the building blocks of 3D design.
📏 Dimension and Scale: Why 1:1 Matters More Than You Think
This is where 90% of beginners fail.
- The Unit Trap: If you model in inches but your slicer expects millimeters, your print will be 25.4 times smaller than intended.
- The Fix: Always set your document units to millimeters (mm) in your CAD software before you start.
- Verification: Export a small test cube (10x10x10mm). Print it. Measure it with calipers. If it’s not 10mm, your scale is off.
Question: Have you ever printed a model that was the size of a thumbtack when you wanted a coffee mug? That’s a scale error. We’ll fix this in the “Common Mistakes” section.
🔍 The Critical Inspection: Is Your Model Ready for the Real World?
You’ve modeled your masterpiece. It looks perfect on the screen. Is it? Probably not. This is the most critical step in the entire process.
🌊 Watertight Geometry: The Holy Grail of 3D Printing
A model must be watertight (or manifold). Imagine filling your model with water. If it leaks, it’s not watertight.
- Why it matters: Slicers need to know what is “inside” and what is “outside.” If there’s a hole, the slicer gets confused and might print nothing, or worse, print a mess.
- The Test: Most slicers (like Cura) have a “Check for Errors” feature. If it says “Non-manifold,” you have a problem.
🕳️ Non-Manifold Edges: The Silent Killers of 3D Print Success
Non-manifold geometry occurs when:
- Holes exist: An edge is shared by only one face.
- Intersecting geometry: Two objects overlap without merging (Boolean union).
- Inverted Normals: The “inside” of the model is facing out.
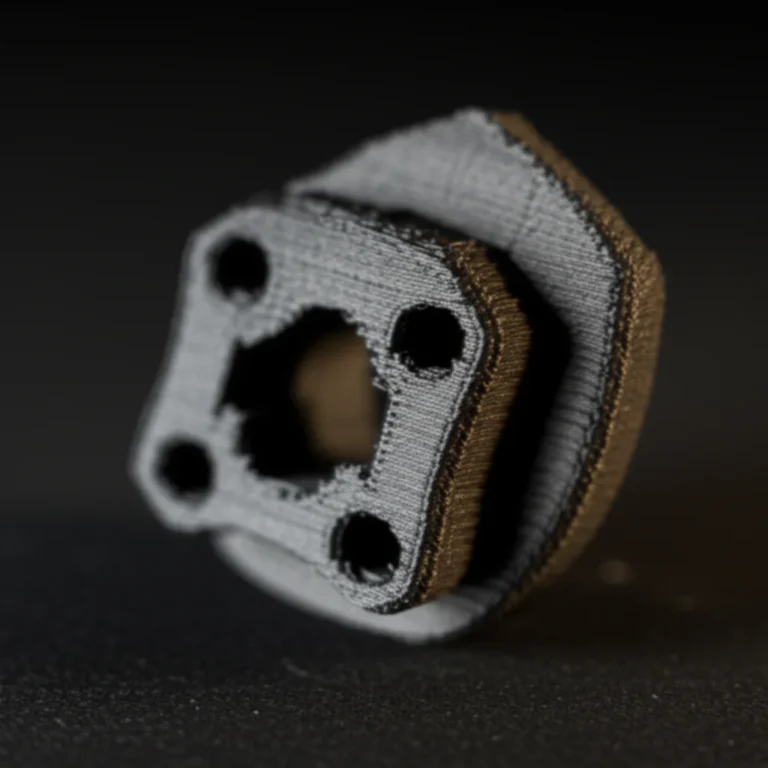
Real Story: We once tried to print a complex gear assembly. The slicer kept crashing. It turned out we had a tiny, invisible hole in the center of the gear. We fixed it in Meshmixer, and the print was flawless.
🧱 Wall Thickness: Avoiding the “Spaghetti Monster” Syndrome
Your printer nozzle has a physical width (usually 0.4mm). It cannot print a wall that is 0.1mm thick.
- The Rule of Thumb: Minimum wall thickness should be 3x the nozzle diameter. For a 0.4mm nozzle, that’s 1.2mm.
- Thin Walls: If you design a wall thinner than this, the printer will either skip it or print a weak, stringy mess.
🔧 Fixing Non-Manifold Geometry: Tools of the Trade
Don’t panic if your model has errors. You have tools to fix them:
- Meshmixer: The “Swiss Army Knife” of mesh repair. Use the “Analysis > Inspector” tool to automatically find and fill holes.
- Blender: Use the “3D Print Toolbox” add-on to check for non-manifold edges and fix them with “Fill Holes.”
- Online Tools: Websites like Netfabb (free online version) or Microsoft 3D Builder can automatically repair STL files.
⚙️ Optimizing the Model: Support Structures and Overhangs
- Overhangs: Anything angled more than 45 degrees from vertical usually needs support.
- Design for Printing (DfAM): Can you redesign the part to avoid supports?
Example: Instead of a 90-degree overhang, split the part into two and glue them together.
Example: Add a chamfer (beveled edge) to the base of a vertical pillar to reduce support material.
📤 Exporting 3D Files: Choosing the Correct Format and Parameters
You’ve fixed the geometry. Now, how do you get it out of your CAD software?
📁 Choosing the Correct File Format: STL, OBJ, 3MF, or AMF?
| Format | Best For | Pros | Cons |
|---|---|---|---|
| STL | FDM Printing | Universal compatibility, small file size. | No color/texture, no units, large files for high detail. |
| OBJ | Resin/Color Printing | Supports textures and colors. | Larger file size, can be tricky with units. |
| 3MF | Modern FDM/Resin | Compressed, supports color, material, and units. | Newer, not supported by very old slicers. |
| STEP/IGES | Engineering/CNC | Exact math (NURBS), editable. | Not for 3D printing (must be converted to mesh first). |
Our Recommendation: Use 3MF whenever possible. It’s the future. If your slicer is ancient, stick to STL.
⚙️ Setting Export Parameters: Resolution and Units Explained
When exporting as STL, you often get a “Chord Tolerance” or “Deviation” setting.
- Low Resolution: Large triangles. The model looks blocky (faceted). Good for large, simple parts.
- High Resolution: Tiny triangles. The model looks smooth. Good for small, detailed parts.
- The Sweet Spot: Don’t go too high! A file that is 50MB is unnecessary for a simple bracket. Aim for a file size under 50MB if possible.
🚫 Common Exporting Issues and How to Dodge Them
- Unit Mismatch: Always double-check the export unit. If your CAD is in mm, export in mm.
- Scale Factor: Some software exports in meters by default. If you export a 10mm model as 10 meters, your print will be the size of a building.
- Duplicate Vertices: Sometimes, merging objects leaves duplicate points. Use “Merge Vertices” or “Weld” in your software before exporting.
🔪 Slicing the 3D File: The Magic Between Digital and Physical
The slicer is the bridge between your digital model and the physical print. It converts the 3D mesh into G-code (instructions for the printer).
🖨️ Understanding Slicing Software: Your New Best Friend
Popular slicers include:
- Ultimaker Cura: The most popular, open-source, and versatile.
- PrusaSlicer: Excellent for Prusa printers but works with others. Great for organic supports.
- Creality Slicer: Based on Cura, optimized for Creality machines.
- Lyche Slicer: The go-to for resin (SLA/DLP) printing.
📉 Slicing Problems: When the G-Code Goes Wrong
- Hollow Models: If your model is a shell (like a vase), ensure the slicer is set to “Vase Mode” or “Spiralize Outer Contour.”
- Infill Issues: If the infill is too low, the part is weak. If too high, it wastes time and material.
- Support Generation: Sometimes the slicer puts supports where they aren’t needed, or misses them where they are critical. Always use the Preview mode to check.
🚫 12 Common Mistakes in 3D Model Preparation (And How to Fix Them)
We’ve seen it all. Here are the top 12 ways people mess up their prints before they even hit “Print.”
1. Ignoring the Build Volume Limits
The Mistake: Designing a 20cm model for a printer with a 15cm bed.
The Fix: Check your printer’s Build Volume in the slicer. If the model is too big, split it into parts and glue them later.
2. Forgetting to Check for Holes and Gaps
The Mistake: Assuming the model is perfect.
The Fix: Run the model through Meshmixer or the slicer’s error checker. Look for red highlights indicating holes.
3. Setting Wall Thickness Too Thin
The Mistake: Designing a 0.2mm wall with a 0.4mm nozzle.
The Fix: Ensure walls are at least 1.2mm (3x nozzle) for FDM. For resin, 0.5mm is usually fine.
4. Neglecting Orientation and Gravity
The Mistake: Printing a tall, thin tower standing up. It will wobble or snap.
The Fix: Rotate the model to lie flat or at angle to minimize overhangs and maximize stability.
5. Overlooking Support Requirements
The Mistake: Printing a 60-degree overhang without supports.
The Fix: Enable supports in the slicer. For better results, design self-supporting angles (under 45 degrees).
6. Using the Wrong File Format for the Job
The Mistake: Trying to print a color model in STL (which has no color data).
The Fix: Use 3MF or OBJ for color prints. Use STL for simple functional parts.
7. Exporting with Low Resolution (Faceted Looks)
The Mistake: A curved surface looks like a pyramid.
The Fix: Increase the chord tolerance or deviation setting in your export dialog.
8. Mixing Units (Millimeters vs. Inches)
The Mistake: Designing inches, exporting as inches, but the slicer expects mm.
The Fix: Always work in millimeters. If you must use inches, convert the file in the slicer (most slicers have a “Scale” feature).
9. Creating Inverted Normals
The Mistake: The inside of the model is facing out.
The Fix: Use the “Flip Normals” tool in Blender or Meshmixer. The outside should be blue (or green), not red.
10. Designing Without Considering Layer Height
The Mistake: Designing a hole with a diameter that isn’t a multiple of the layer height.
The Fix: While not always critical, try to keep critical dimensions compatible with your layer height (e.g., 0.2mm) to avoid “stair-stepping” artifacts.
1. Failing to Account for Tolerances
The Mistake: Designing a peg and hole with the exact same dimension (e.g., 5mm). The peg won’t fit.
The Fix: Add a tolerance (gap). For FDM, add 0.2mm – 0.3mm to the hole size. For a 5mm peg, make the hole 5.2mm.
12. Skipping the Preview in the Slicer
The Mistake: Clicking “Print” without looking at the layers.
The Fix: ALWAYS use the Preview tab. It shows you exactly where the printer will go, where supports are, and if there are any errors.
✅ Final Checklist Before Printing: The Last Line of Defense
Before you hit that button, run through this checklist. It’s the difference between a successful print and a 3-hour failure.
- ✅ Model is Watertight: No holes, no naked edges.
- ✅ Scale is Correct: Measured in mm, matches real-world dimensions.
- ✅ Wall Thickness is Adequate: At least 1.2mm for FDM.
- ✅ Orientation is Optimized: Minimal supports, strong Z-axis orientation.
- ✅ Supports are Enabled: If needed, and placed correctly.
- ✅ File Format is Correct: STL, OBJ, or 3MF as appropriate.
- ✅ Slicer Settings are Verified: Temperature, speed, infill, and layer height.
- ✅ Preview Checked: No weird artifacts or missing layers in the preview.
- ✅ Bed Leveling: Your printer’s bed is level (this is a printer check, but crucial).
- ✅ Filament Loaded: You have enough material for the job.
Final Thought: If you skip even one of these, you’re rolling the dice. But if you follow them, you’re setting yourself up for success.
🏁 Conclusion: From Pixels to Plastic Perfection

So, there you have it! You’ve journeyed from the humble sketch on a napkin to the final G-code ready for your printer. We started with the question: “How do I prepare a 3D model file for printing?” and now you know the answer is a blend of art, engineering, and a little bit of magic.
Remember, the most important tool in your arsenal isn’t the slicer or the CAD software—it’s your mindset. Embrace the failures. Every spaghetti monster teaches you something new. Every failed print is a lesson in geometry, physics, and patience.
Whether you are printing a functional bracket for your car, a custom cosplay prop, or a miniature for your D&D campaign, the principles remain the same: Watertight, Scaled, and Optimized.
Ready to take the next step? Don’t just dream about it—print it!
🚀 Take the Next Step with Creality!
Looking for the perfect machine to bring your models to life? Creality offers a range of printers that are perfect for beginners and pros alike. From the reliable Ender 3 series to the high-speed K1 and K2 Plus, they have a printer for every budget and skill level.
👉 Shop Creality Printers on:
- Amazon: Creality 3D Printers on Amazon
- Official Store: Creality Official Website
- eBay: Creality Deals on eBay
📱 Social Media: Join the Community
Don’t print in isolation! Join the massive community of makers.
- Reddit: r/3Dprinting, r/PrintedMinis
- Discord: Join the 3D Printed™ community server for live help.
- Instagram: Follow #3DPrinting for daily inspiration.
🛠️ Recommended Links
Books & Guides:
Software & Tools:
Model Repositories:
❓ FAQ: Your Burning Questions Answered

What settings should I adjust in slicer software before printing a 3D model?
Before printing, you must adjust Layer Height (resolution), Infill Density (strength vs. speed), Print Speed, Temperature (based on filament), and Support Settings. Always run a Preview to ensure the slicer has generated the correct paths.
Read more about “📉 What is the Failure Rate of 3D Printing? (2026 Data)”
How do I scale and orient a 3D model for optimal printing?
Scaling: Use the scale tool in your slicer to match real-world dimensions. Always measure a test print.
Orientation: Orient the model to minimize overhangs (reduce supports) and maximize the strength of the part (align layers with stress points). For example, a vertical pillar is weaker than a horizontal one.
Read more about “🏭 7 Large-Format Industrial 3D Printers Dominating 2026”
What are common issues to avoid when preparing a 3D model for printing?
Avoid non-manifold geometry (holes), thin walls (below 1.2mm), inverted normals, and incorrect units. Also, avoid designing parts that are too large for your build volume without splitting them.
Read more about “🚀 12 Top Digital Inventories for 3D Printing (2026)”
How can I fix errors in my 3D model before printing?
Use tools like Meshmixer, Blender, or Microsoft 3D Builder to automatically repair holes and non-manifold edges. Most slicers also have a “Repair” function.
Read more about “🚀 What is the Current Status of 3D Printing? (2026)”
What file formats are compatible with 3D printers?
STL is the most universal. OBJ supports color/texture. 3MF is the modern standard for FDM and resin. STEP/IGES are for CAD/CNC and must be converted to mesh first.
Read more about “🧬 Micro 3D Printing Applications: 7 Ways to Shrink the Future (2026)”
How do I check if my 3D model is printable?
Run the model through a slicer and check the “Preview” for errors. Use the “Check for Errors” feature in the slicer or a dedicated tool like Meshmixer to ensure the model is watertight.
Read more about “What Websites Have Free 3D Models? Top 7 Sites to Explore in 2025 🎉”
What software is best for preparing 3D models for printing?
For beginners: TinkerCAD. For engineering: Fusion 360. For organic/artist models: Blender. For repair: Meshmixer.
Read more about “🚀 Consumer 3D Printing Market 2026: The Ultimate Guide”
What is the best file format for 3D printing?
3MF is the best overall due to its support for color, material, and units. STL is the most compatible if you have an older printer.
Read more about “🚀 How to Choose the Right 3D Printer for Beginners (2026 Guide)”
How do I fix errors in my 3D model before slicing?
Import the model into Meshmixer or Blender, use the “Inspector” or “3D Print Toolbox” to find and fill holes, and ensure all normals are facing outward.
What wall thickness is best for 3D printed parts?
For FDM, a minimum of 1.2mm (3x nozzle diameter) is recommended. For resin, 0.5mm is usually sufficient.
Read more about “🔥 SLM 3D Printing: The Ultimate 2026 Guide to Metal Melting”
How do I orient a model for the strongest print?
Orient the part so that the layers run perpendicular to the stress. For example, if a part is being pulled apart, the layers should run across the width, not the length.
Read more about “⏱️ How Long Does It Take to 3D Print Common Objects? (2026 Guide)”
Do I need to add support structures to my 3D model?
Yes, if you have overhangs greater than 45 degrees. However, try to design your model to be self-supporting to save material and time.
Read more about “What Software Do I Need for 3D Printing? The Ultimate 12-Tool Guide (2026) 🖥️”
What is the ideal infill percentage for functional prints?
For functional parts, 20-40% is usually sufficient. For very strong parts, go up to 60-10%, but this increases print time and material use.
Read more about “📊 10 Essential 3D Printing Statistics for Beginners (2026)”
How do I scale a 3D model to fit my printer bed?
Check the Build Volume of your printer in the slicer. If the model is too big, use the “Split” tool in your CAD software or slicer to divide it into smaller parts.
Read more about “How Long Does 3D Printing Take? ⏳ 12 Factors That Decide (2025)”
📚 Reference Links
- Creality Blog: How to Make 3D Files for Printing
- Instructables: Prepare 3d Model for 3d Print : 9 Steps
- Rhino 3D Forum: Preparing for 3D Print
- Ultimaker Cura Documentation
- Blender 3D Documentation
- Fusion 360 Help
- Meshmixer Tutorials
- Thingiverse: 3D Models
- Printables: 3D Models
- 3D Printed: 3D Printable Objects
- 3D Printed: 3D Design Software
- 3D Printed: 3D Printer Reviews