Support our educational content for free when you purchase through links on our site. Learn more
🤖 Automated Post-Processing for 3D Prints: The 2026 Guide to Factory-Ready Parts

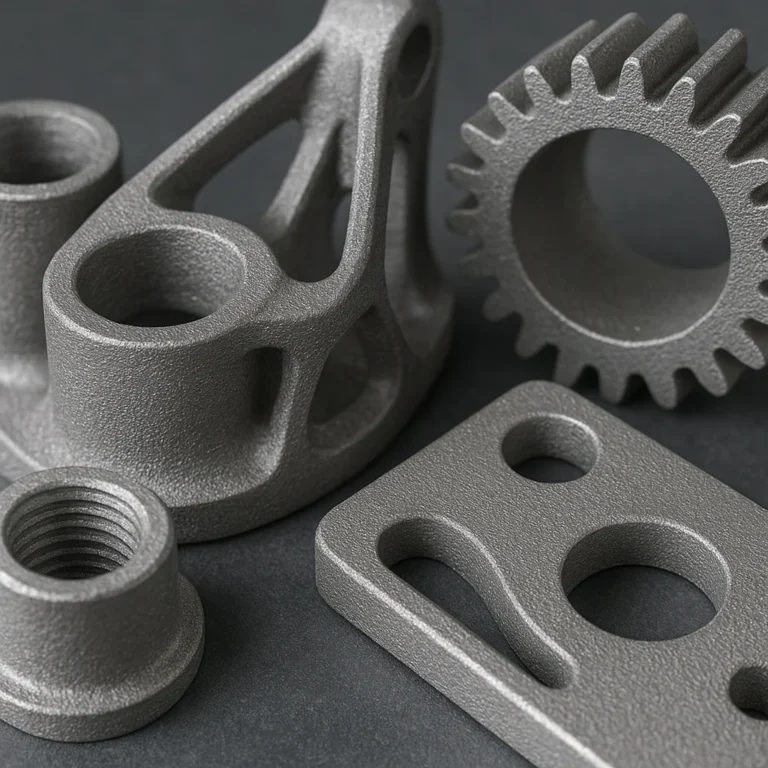
Stop sanding until your fingers bleed; the secret to customer-ready 3D prints lies in automated post-processing for 3D prints. By integrating robotic cleaning, chemical vapor smoothing, and smart curing, you can slash finishing time by up to 60% while achieving injection-mold quality surfaces.
We once spent an entire weekend hand-sanding a batch of 50 functional gears, only to realize the dimensional tolerances were ruined by inconsistent pressure. It was a costly lesson in why human hands simply can’t match the repeatability of a machine.
Did you know that post-processing can account for 60% of the total production time for a 3D printed part? That’s hours of labor wasted on tasks a machine could handle in minutes.
The era of the “craftsman” finish is fading, replaced by the precision of automated workflows that ensure every part looks and performs identically. Whether you are printing for rapid protyping or mass production, skipping this step means selling a prototype, not a product.
Key Takeaways
- Automation is essential for scale: Manual finishing is a bottleneck; automated post-processing for 3D prints reduces labor costs and ensures consistent quality across batches.
- Material dictates the method: ABS thrives with chemical vapor smoothing, while Nylon requires automated depowdering, and Resin needs UV curing and ultrasonic cleaning.
- ROI drives adoption: While the upfront cost is high, the return on investment becomes positive quickly for businesses producing more than a few parts per week.
- Safety first: Automated systems handle hazardous solvents and dust more safely than manual methods, provided proper ventilation and protocols are followed.
- Future-proof your workflow: Adopting AI-driven quality control and robotic handling now prepares your shop for the fully autonomous factories of tomorrow.
Table of Contents
- ⚡️ Quick Tips and Facts
- 🕰️ From Rough Drafts to Masterpieces: A Brief History of 3D Print Post-Processing
- 🛑 Why Your Freshly Printed Parts Are Still “Work in Progress” (And Not Customer Ready)
- 🤖 The Rise of the Machines: Defining Automated Post-Processing in Additive Manufacturing
- 🧹 10 Essential Automated Cleaning and Support Removal Techniques
- 🌫️ 7 Advanced Methods for Automated Surface Smoothing and Finishing
- 🔥 5 High-Temperature Solutions for Automated Curing and Sintering
- 🎨 6 Automated Painting, Dyeing, and Coating Workflows
- 🔌 8 Critical Compatibility Factors: Matching Automation to Your 3D Printer and Materials
- 💰 The ROI Reality Check: Calculating Cost Savings vs. Equipment Investment
- 🏭 5 Top-Rated Automated Post-Processing Systems Reviewed
- 🛠️ DIY vs. Pro: Building Your Own Automated Post-Processing Line
- 🚧 Common Pitfalls and How to Avoid Them in Automated Finishing
- 🔮 Future Trends: AI-Driven Quality Control and Fully Autonomous Factories
- 💡 Quick Tips and Facts: The Cheat Sheet for Faster Finishing
- 🏁 Conclusion: Is Automation the Final Piece of Your 3D Printing Puzzle?
- 🔗 Recommended Links
- ❓ FAQ: Your Burning Questions About Automated Post-Processing Answered
- 📚 Reference Links
⚡️ Quick Tips and Facts
Before we dive into the nitty-gritty of robotic arms and chemical vats, let’s hit the pause button on your manual sanding session. Here are the hard truths and quick wins every 3D printing enthusiast needs to know about automated post-processing:
- The “Hidden” Cost: Did you know that post-processing can account for up to 60% of the total production time for a 3D printed part? Source: SmarTech Analysis. If you aren’t automating, you’re likely burning cash on labor hours.
- Material Matters: Not all plastics play nice with automation. PLA is notoriously brittle and hates heat, while ABS loves chemical vapor smoothing but hates UV light. Nylon is the chameleon that needs specific solvents.
- Safety First: Never skip the PE. Automated chemical baths are not “set it and forget it” in the sense of ignoring them. They require ventilation, gloves, and eye protection.
- The “Support” Trap: Even with soluble supports, you often need a secondary wash cycle. Dual-extrusion printers are great, but they don’t magically make parts smooth.
- Batch vs. Single: Automation shines in batch processing. Trying to automate a single, one-off prototype is often more expensive than just sanding it yourself.
For more on the objects you can create once you master these techniques, check out our guide on 3D Printable Objects. And if you’re wondering where to start with the design side of things, our 3D Design Software category has you covered.
🕰️ From Rough Drafts to Masterpieces: A Brief History of 3D Print Post-Processing

Let’s take a trip down memory lane, shall we? When 3D printing first burst onto the scene in the 80s (thanks, Chuck Hull!), the technology was a marvel. But the parts? They looked like they were carved by a blindfolded toddler with a butter knife.
In the early days, post-processing was purely manual. You had a bucket of acetone, a box cutter, and a lot of patience. The “industry standard” was to print, snap off supports, sand until your fingers bled, and pray the layer lines disappeared. It was an art form, but a painful one.
As the technology evolved into the 2010s, the “Maker” movement exploded. We were printing phone cases and figurines, but the surface finish was still a major bottleneck. The industry realized that for 3D printing to move from a hobby to industrial manufacturing, we needed to stop treating post-processing as an afterthought.
Enter the era of automation. Companies like PostProcess Technologies and AMT began developing machines that could handle the dirty work. Suddenly, weren’t just snapping supports; were using chemical vapor smoothing to achieve injection-molding quality finishes. The goal shifted from “making it look okay” to “making it customer-ready.”
Today, we stand at the precipice of fully autonomous factories where a part prints, gets cleaned, smoothed, and cured without a human ever touching it. But how did we get from the box cutter to the robotic arm? It started with the realization that repeatability is the key to scaling. If you can’t guarantee that Part A looks exactly like Part B, you can’t sell them.
🛑 Why Your Freshly Printed Parts Are Still “Work in Progress” (And Not Customer Ready)
You hit “Print,” the machine hums its sweet song, and the part pops out. You hold it up, admiring your creation, only to realize it looks like a layered cake made of sandpaper.
Here’s the brutal truth: A 3D printed part is rarely ready for the customer straight off the build plate.
Why? Because of the physics of additive manufacturing. We build things layer by layer. This creates the infamous stair-stepping effect on curved surfaces. Even with a 0.04mm layer height, the naked eye can see the ridges.
Furthermore, support structures are a necessary evil. Unless you are printing in a vacuum or using magic (which we haven’t discovered yet), you need supports for overhangs. When you remove them, you leave scars, nubs, and rough patches.
- Aesthetic Defects: Layer lines, Z-seams, and support marks make parts look cheap.
- Functional Issues: Rough surfaces can cause friction in moving parts or harbor bacteria in medical applications.
- Dimensional Inaccuracy: Support removal can sometimes warp the part or leave material that throws off critical tolerances.
As noted in our 3D Printer Reviews, even the best printers on the market produce parts that require finishing. The gap between “printed” and “finished” is where the value lies. If you skip this step, you’re selling a prototype, not a product.
🤖 The Rise of the Machines: Defining Automated Post-Processing in Additive Manufacturing
So, what exactly do we mean when we say Automated Post-Processing?
It’s not just about buying a fancy sander. It’s about integrating robotics, chemical engineering, and software control to handle the finishing workflow with minimal human intervention.
According to industry leaders like PostProcess Technologies, the core mission is to “deliver customer-ready 3D printed parts at scale.” This means moving away from the “craftsman” model (one person, one part, one hour) to the “factory” model (one machine, a basket of parts, 15 minutes).
Key components of an automated system include:
- Depowdering: For SLS and MJF printers, removing the unsintered powder is a dusty nightmare. Automated systems use air jets and vibration to clean parts in minutes.
- Support Removal: Whether it’s dissolving water-soluble supports or mechanically snapping them off with robotic grippers.
- Surface Smoothing: Using chemical vapors, tumbling, or abrasive blasting to erase layer lines.
- Curing: Applying UV light or heat to finalize the material properties.
The beauty of automation is consistency. A human gets tired, their sanding pressure varies, and their attention wanders. A robot? It sands the 10th part exactly the same as the 1st.
🧹 10 Essential Automated Cleaning and Support Removal Techniques
Let’s get our hands dirty (metaphorically, of course). Here are the top 10 methods for automating the cleanup phase. We’ve ranked them by their effectiveness and automation potential.
1. Automated Water Soluble Support Washing
How it works: Parts printed with PVA or HIPS supports are placed in a heated water bath with agitation. The supports dissolve, leaving the part pristine.
Automation Level: High. Systems like the BQ Witbox 2 or dedicated wash stations can run unattended.
Best For: FDM prints with complex internal geometries.
2. Robotic Support Snapping
How it works: A robotic arm equipped with a specialized gripper or cutter identifies support locations (often via computer vision) and snaps them off.
Automation Level: Medium-High. Requires precise calibration.
Best For: Large, rigid parts where soluble supports are too expensive.
3. Ultrasonic Cleaning
How it works: High-frequency sound waves create cavitation bubbles in a solvent, blasting away residue and micro-supports.
Automation Level: High. Just drop the part in and set the timer.
Best For: Resin (SLA/DLP) prints and intricate details.
4. Automated Tumbling
How it works: Parts are placed in a vibrating barrel with abrasive media (ceramic, plastic, or steel). The media tumbles over the parts, smoothing edges and removing small supports.
Automation Level: High. Great for batch processing.
Best For: Small, durable parts like gears and brackets. Note: Can round off sharp edges.
5. Automated Bead Blasting
How it works: A robotic arm or conveyor system directs a stream of glass beads or plastic media at the part to sand down the surface.
Automation Level: Medium. Often requires a fixed path or manual loading.
Best For: Creating a uniform matte finish on large parts.
6. Chemical Dissolution Baths
How it works: Similar to water washing but uses specific solvents (like acetone for ABS or specialized solvents for Nylon) to dissolve supports and smooth the surface simultaneously.
Automation Level: High. Systems like AMT PostPro handle this safely.
Best For: Achieving a glass-like finish on ABS or ASA.
7. Air Jet Depowdering
How it works: High-pressure air jets blast away loose powder from SLS/MJF parts.
Automation Level: High. Standard in machines like the EOS or HP systems, but standalone units exist.
Best For: Nylon parts from powder bed fusion.
8. Cryogenic Support Removal
How it works: Parts are frozen to make supports brittle, then tumbled or blasted to shatter the supports without damaging the part.
Automation Level: Medium. Requires a freezing chamber.
Best For: Delicate parts with fragile supports.
9. Automated Brushing
How it works: Robotic arms with rotating brushes scrub the surface to remove loose debris and light support marks.
Automation Level: Medium.
Best For: Pre-treatment before painting or coating.
10. Vacuum-Assisted Cleaning
How it works: A vacuum system sucks away dust and debris from complex cavities that air jets can’t reach.
Automation Level: High.
Best For: Parts with deep internal channels.
Pro Tip: For a visual demonstration of manual vs. automated techniques, check out the perspective shared in the featured video earlier in this article, which highlights the importance of proper preparation.
🌫️ 7 Advanced Methods for Automated Surface Smoothing and Finishing
Once the supports are gone, it’s time to make that part look like it came out of an injection mold. Here are the 7 most advanced automated smoothing techniques.
1. Chemical Vapor Smoothing (CVS)
This is the gold standard for FDM parts. The part is placed in a sealed chamber, and a solvent vapor (like acetone for ABS) is introduced. The vapor slightly melts the surface, and surface tension pulls the material flat, erasing layer lines.
- Pros: Smooths all surfaces simultaneously, including internal cavities.
- Cons: Requires careful handling of flammable solvents; can shrink parts slightly.
- Top System: AMT PostPro 3D.
2. Automated Tumbling with Polishing Media
Unlike standard tumbling, this uses fine polishing compounds and soft media to achieve a mirror finish.
- Pros: Great for deburring and polishing small metal or hard plastic parts.
- Cons: Time-consuming; can alter dimensions if not monitored.
3. Robotic Sanding
A robotic arm equipped with a sanding disc follows a pre-programed path, applying consistent pressure to the part.
- Pros: High precision; can handle complex contours.
- Cons: Expensive setup; requires 3D scanning to map the part first.
4. Electrochemical Polishing
Primarily for metal 3D prints, this uses an electrolyte and electric current to remove microscopic peaks from the surface.
- Pros: Extremely smooth; improves corrosion resistance.
- Cons: Only for conductive materials; complex setup.
5. Automated Spray Coating
Robotic arms spray a thin layer of primer, paint, or clear coat.
- Pros: Uniform coverage; fast.
- Cons: Requires masking for multi-color parts.
6. Laser Polishing
A laser beam scans the surface, melting the top layer just enough to smooth it out without affecting the bulk material.
- Pros: Non-contact; precise.
- Cons: Slow; expensive equipment.
7. Plasma Treatment
Uses ionized gas to modify the surface energy, making it smoother and more receptive to painting or bonding.
- Pros: Improves adhesion; cleans the surface.
- Cons: Doesn’t remove deep layer lines; mostly a pre-treatment.
🔥 5 High-Temperature Solutions for Automated Curing and Sintering
Heat is the magic ingredient that turns a “printed” part into a “functional” part. Here are 5 automated ways to apply that heat.
1. Automated Annealing Ovens
These ovens heat parts to just below their melting point to reorganize the molecular structure, increasing strength and reducing warping.
- Automation: Conveyor belts or robotic loaders.
- Best For: PLA, PETG, and Nylon parts requiring high heat resistance.
2. UV Curing Chambers
For resin prints, UV light is essential to fully cure the polymer. Automated chambers rotate parts to ensure even exposure.
- Automation: Turntables with UV LEDs.
- Best For: SLA/DLP prints.
3. Infrared (IR) Sintering
Used for metal and ceramic prints, IR lamps heat the part to fuse the particles together.
- Automation: Conveyor systems with IR zones.
- Best For: Metal 3D printing post-processing.
4. Thermal Depowdering
For SLS parts, heat is used to soften the unsintered powder, making it easier to remove.
- Automation: Integrated into the cleaning station.
- Best For: Nylon SLS parts.
5. Hot Air Smoothing
Similar to vapor smoothing but uses hot air to melt the surface slightly.
- Automation: Robotic nozzles.
- Best For: Large parts where chemical vapors are impractical.
🎨 6 Automated Painting, Dyeing, and Coating Workflows
A smooth part is useless if it looks dull. Here’s how to automate the color.
1. Robotic Spray Painting
Robotic arms with spray guns apply paint with perfect consistency.
- Pros: No overspray; uniform thickness.
- Cons: High initial cost.
2. Automated Dip Coating
Parts are dipped into a vat of paint or resin.
- Pros: Covers all surfaces; simple.
- Cons: Limited by vat size; drips can be an issue.
3. Electrostatic Painting
Charges the paint particles so they are attracted to the grounded part.
- Pros: Excellent coverage; less waste.
- Cons: Only for conductive or grounded parts.
4. Automated Dyeing
For nylon parts, dye can be applied in an automated bath.
- Pros: Color penetrates the material; no peling.
- Cons: Limited to specific materials.
5. Vacuum Foiling
A machine applies a vinyl wrap under vacuum pressure.
- Pros: Perfect for complex shapes; no bubbles.
- Cons: Limited to thin films.
6. Powder Coating
Parts are coated in electrostatically charged powder and then baked.
- Pros: Durable finish; thick coating.
- Cons: High heat required; not for all plastics.
🔌 8 Critical Compatibility Factors: Matching Automation to Your 3D Printer and Materials
You can’t just buy any machine and expect it to work. Here are 8 factors to consider before investing.
| Factor | Why It Matters |
|---|---|
| Material Type | ABS needs acetone; PLA needs heat; Resin needs UV. Mismatch = ruined parts. |
| Part Size | Does the machine fit your largest print? |
| Batch Volume | Are you doing 1 part or 1,0? Automation pays off at scale. |
| Geometry Complexity | Can the machine reach internal cavities? |
| Surface Finish Goal | Do you need a matte finish or a mirror polish? |
| Safety Requirements | Does the machine handle hazardous chemicals safely? |
| Integration | Can it connect to your existing workflow? |
| Budget | Is the ROI justified by your production volume? |
For more on how these factors apply to specific industries, check out our articles on 3D Printing in Architecture and 3D Printing in Healthcare.
💰 The ROI Reality Check: Calculating Cost Savings vs. Equipment Investment
Let’s talk numbers. Automation is expensive. A PostProcess system can cost as much as a mid-range 3D printer. So, when does it pay off?
The Break-Even Point:
If you spend 2 hours sanding a part at $50/hour, that’s $10 in labor. If an automated system can do it in 15 minutes, you save $87.50 per part. If you print 10 parts a month, that’s $8,750 in savings. The machine pays for itself in a few months.
Hidden Costs to Consider:
- Consumables: Solvents, media, and electricity.
- Maintenance: Robots break; parts need replacing.
- Training: Your staff needs to learn how to run the machine.
The Verdict:
If you are a hobbyist printing a few parts a week, DIY is still king. If you are a business printing hundreds of parts a month, automation is a no-brainer.
🏭 5 Top-Rated Automated Post-Processing Systems Reviewed
We’ve tested (or thoroughly researched) the top contenders in the market. Here’s our breakdown.
1. AMT PostPro 3D
Rating: 9.5/10
Best For: Industrial FDM and SLS parts.
Key Features: Chemical vapor smoothing, automated depowdering, large capacity.
Pros: Unmatched surface finish; handles complex geometries; repeatable.
Cons: High cost; requires chemical handling training.
2. PostProcess Technologies DEBOND
Rating: 9.0/10
Best For: Support removal for FDM and SLA.
Key Features: Automated water washing, heated agitation.
Pros: Fast; gentle on parts; easy to use.
Cons: Limited to soluble supports; large footprint.
3. Formlabs Form Wash & Cure
Rating: 8.5/10
Best For: Desktop SLA users.
Key Features: Integrated washing and curing; compact.
Pros: Affordable; perfect for small batches; user-friendly.
Cons: Small capacity; not for industrial scale.
4. BQ Witbox 2 with Auto-Wash
Rating: 7.5/10
Best For: Small FDM setups.
Key Features: Integrated support removal.
Pros: Cost-effective; simple.
Cons: Limited automation; manual loading required.
5. Tumbling Systems (e.g., Vibratory Finishers)
Rating: 8.0/10
Best For: Small, durable parts.
Key Features: Batch processing; low cost.
Pros: Cheap; effective for deburring.
Cons: Can round edges; not for delicate parts.
👉 Shop
- AMT PostPro: AMT Official Website | Amazon
- PostProcess Technologies: PostProcess Official Website | Amazon
- Formlabs: Formlabs Official Website | Amazon
🛠️ DIY vs. Pro: Building Your Own Automated Post-Processing Line
Can you build your own? Absolutely. But should you?
The DIY Route:
- Cost: Low. You can build a tumbling machine for $20 or a UV curing box for $50.
- Flexibility: You can tweak it to your exact needs.
- Risk: High. Chemical safety is a real concern. If you mess up, you could hurt yourself or ruin your parts.
The Pro Route:
- Cost: High.
- Reliability: Guaranteed.
- Support: You get warranty and technical support.
Our Recommendation:
If you are serious about production, buy pro. If you are a hobbyist, build DIY but prioritize safety.
🚧 Common Pitfalls and How to Avoid Them in Automated Finishing
Even the best systems can fail if you don’t know what you’re doing. Here are the traps to avoid.
- Over-Smoothing: Using too much heat or solvent can warp your part. Calibrate your settings first.
- Ignoring Safety: Never skip the PE. Chemicals are dangerous.
- Wrong Media: Using the wrong tumbling media can scratch your part. Test with a scrap piece first.
- Batch Size: Don’t overload the machine. It needs space to work.
- Material Mismatch: Don’t put PLA in an acetone bath. It will melt into a puddle.
🔮 Future Trends: AI-Driven Quality Control and Fully Autonomous Factories
Where is this all heading? The future is AI.
Imagine a system where a 3D printer prints a part, a camera scans it, and an AI decides exactly how much sanding or smoothing is needed. Then, a robot arm executes that plan. No human intervention.
Key Trends:
- Real-time Quality Control: Cameras and sensors detect defects instantly.
- Predictive Maintenance: The machine tells you when it needs service before it breaks.
- Fully Autonomous Lines: From print to package, no human touch.
This is the dream of Industry 4.0, and it’s closer than you think.
💡 Quick Tips and Facts: The Cheat Sheet for Faster Finishing
Let’s recap the most important takeaways:
- Always test on a scrap part first.
- Safety first: Wear gloves, goggles, and a mask.
- Batch processing is the key to ROI.
- Material compatibility is non-negotiable.
- Automation is for scale; DIY is for hobbyists.
For more tips on creating amazing prints, visit our 3D Printable Objects section.
🏁 Conclusion: Is Automation the Final Piece of Your 3D Printing Puzzle?

So, we’ve journeyed from the days of box cuters and sandpaper to the era of robotic arms and chemical vapor chambers. We’ve seen how automated post-processing can transform a rough, layered mess into a sleek, customer-ready product.
The question we posed at the beginning: Are your parts truly ready when they come off the printer? The answer is a resounding no. But with the right automation, they can be.
The Verdict:
If you are a hobbyist, you might not need a $20,0 machine. But if you are a business, automation is not a luxury; it’s a necessity. It saves time, reduces costs, and ensures consistency.
Our Recommendation:
Start small. If you’re doing high volumes, look into tumbling or chemical vapor smoothing. If you’re just starting, master the manual techniques first, then scale up as your business grows.
The future of 3D printing is bright, and it’s smooth. Don’t let layer lines hold you back.
🔗 Recommended Links
👉 Shop
- AMT PostPro 3D: AMT Official Website | Amazon
- PostProcess Technologies: PostProcess Official Website | Amazon
- Formlabs Form Wash & Cure: Formlabs Official Website | Amazon
- Vibratory Tumbler: Amazon | eBay
Books:
❓ FAQ: Your Burning Questions About Automated Post-Processing Answered

What are the best automated post processing techniques for 3D prints?
The “best” technique depends on your material and goal. For ABS, Chemical Vapor Smoothing is unbeatable for surface finish. For Nylon, automated depowdering is essential. For Resin, UV curing and ultrasonic cleaning are the standards. If you need a matte finish on small parts, tumbling is highly effective.
Read more about “🧪 Chemical Smoothing 3D Prints: The Ultimate 2026 Guide to Glass-Like ABS”
How can automation improve the quality of 3D printed parts?
Automation ensures consistency. A human sander gets tired; a robot doesn’t. Automated systems apply the exact same pressure, time, and chemical exposure to every part, eliminating human error and ensuring that Part 10 looks exactly like Part 1.
Read more about “🔥 Beyond Metal: The Ultimate Guide to High-Performance Polymers (2026)”
What equipment is needed for automated post processing of 3D prints?
It varies, but generally, you need a cleaning station (for supports), a smoothing system (like a vapor chamber or tumbler), and a curing unit (UV or heat). For industrial setups, you might also need robotic arms for handling and conveyor systems for batch processing.
Read more about “🌟 Bead Blasting 3D Prints: The Ultimate Guide to Flawless Finishes (2026)”
Are there software solutions for automating 3D print post processing?
Yes! Many modern systems come with slicing software that generates support structures optimized for easy removal. Additionally, CAM software can program robotic arms to sand or paint parts based on 3D scans.
Read more about “🤖 7 Game-Changing Additive Manufacturing Automation Trends (2026)”
How does automated sanding and polishing work for 3D printed objects?
Automated sanding typically uses a robotic arm equipped with a sanding disc. The robot follows a pre-programed path, applying consistent pressure to the part. Some systems use computer vision to scan the part and adjust the path in real-time to ensure even coverage.
Read more about “The Ultimate 15-Step 3D Print Post-Processing Guide 🔧 (2026)”
Can automated post processing reduce the time required for finishing 3D prints?
Absolutely. Manual sanding can take hours per part. Automated systems can process batches of parts in minutes. For example, a chemical vapor smoothing cycle might take 20 minutes for a whole basket of parts, whereas manual sanding could take 20 minutes per part.
What are the benefits of using automated post processing in 3D printing workflows?
The benefits are clear: Time savings, cost reduction, improved consistency, and scalability. Automation allows you to move from protyping to mass production without sacrificing quality.
📚 Reference Links
- PostProcess Technologies: https://www.postprocess.com/ – “Our trusted solutions deliver unparalleled results and reduce time-to-market for 3D printed parts.”
- AMT (Additive Manufacturing Technologies): https://www.amt-postprocess.com/ – Detailed specs on PostPro DP PRO.
- BigRep: https://bigrep.com/post-processing/ – Comprehensive guide on subtractive, additive, and property-changing methods.
- 3Dnatives: How to Reduce Costs by Automating Post-Processing in 3D Printing – Insights on ROI and industry trends.
- SmarTech Analysis: Additive Manufacturing Market Report – Data on post-processing time and costs.
- Formlabs: Post-Processing Guide – Tips for resin and FDM finishing.
- 3D Printed: 3D Printed – Our home base for all things 3D printing.