Support our educational content for free when you purchase through links on our site. Learn more
⏱️ How Long Does It Take to 3D Print Common Objects? (2026 Guide)

Ever stared at your 3D printer’s progress bar, wondering if that “12-hour” print will actually finish before your coffee gets cold? You’re not alone. We’ve all been there: planning a quick prototype that somehow turns into an overnight marathon, or trying to print a tiny keychain that inexplicably takes longer than baking a lasagna. The truth is, the answer to “how long does it take to 3D print common objects?” isn’t a single number—it’s a complex dance of geometry, material, and machine settings. In this definitive 2026 guide, we’ve crunched the numbers on 10 real-world objects, from a 20mm calibration cube to a life-size bust, revealing exactly how variables like layer height and infill can slash your wait time by 50% or double it. Whether you’re a hobbyist trying to fit a print between meetings or a pro optimizing a production run, we’ll show you how to predict print times with laser precision and even share the secret settings that turn a 10-hour slog into a 4-hour sprint.
Key Takeaways
- Volume is King: The total amount of material (volume) is the single biggest factor; a solid object takes significantly longer than a hollow one of the same size.
- Layer Height Matters: Dropping from 0.2mm to 0.1mm layer height can double or triple your print time, while increasing to 0.28mm can cut it by nearly half.
- Technology Trade-offs: FDM printers are generally faster for large, simple objects, while SLA/Resin printers excel at speed for small, highly detailed miniatures.
- Infill Impact: Reducing infill from 50% to 15% can save hours on medium-sized functional parts without sacrificing structural integrity.
- Real-World Estimates: A standard phone stand takes 1.5–3 hours, while a detailed miniature can range from 2–4 hours on FDM or 1–2 hours on resin.
Ready to stop guessing? Scroll down to our 10 Real-World Print Time Estimates to see exactly how long your next project will take and learn the Pro Tips to speed it up.
Table of Contents
- ⚡️ Quick Tips and Facts
- 🕰️ The Evolution of Print Speed: From Days to Minutes
- 🧮 The Big Variables: What Actually Dictates Your Print Time?
- 📏 Size Matters: Estimating Time for Common Object Dimensions
- 🎨 Layer Height & Infill: The Speed vs. Quality Trade-Off
- 🧱 Material Matters: How PLA, PETG, ABS, and Resin Compare
- 🖨️ Printer Technology Showdown: FDM vs. SLA vs. SLS Durability & Speed
- 📋 10 Real-World Print Time Estimates for Everyday Objects
- The Classic 20mm Calibration Cube
- A Functional Phone Stand
- A Detailed Miniature for Tabletop Gaming
- A Custom Phone Case
- A Large Decorative Vase
- A Replacement Gear for a Kitchen Apliance
- A Full-Scale Helmet Prop
- A Set of Interlocking Storage Boxes
- A Complex Mechanical Assembly
- A Life-Size Bust
- ⚙️ Slicer Settings Deep Dive: Acceleration, Jerk, and Travel Speed
- 🛠️ Troubleshooting: Why Is My Print Taking Forever (or Failing)?
- 🚀 Pro Tips to Slash Your Print Times Without Sacrificing Quality
- 🤔 Conclusion
- 🔗 Recommended Links
- ❓ FAQ
- 📚 Reference Links
⚡️ Quick Tips and Facts
Before you fire up your printer and start staring at the progress bar like it’s a slow-loading webpage, let’s hit the hard truths about 3D printing time. We’ve spent countless nights (and days) watching our machines hum, and here is what we’ve learned:
- The “One Hour” Myth: You might hear that a 4″x4″x4″ object takes an hour. True, but only if you are printing a hollow cube with 10% infill at a high speed. Add supports, increase infill to 50%, or switch to a detailed miniature, and that hour becomes a marathon.
- Volume is King: The single biggest predictor of time isn’t the complexity of the shape, but the volume of material being deposited. A solid block takes forever; a hollow shell takes minutes.
- Layer Height is the Speed Dial: Dropping your layer height from 0.2mm to 0.1mm doesn’t just double the quality; it can double or triple the print time.
- Technology Matters: A resin (SLA) print of a detailed figurine might take 4 hours, while a similar FDM print could take 12+ hours. Conversely, a large, simple vase is often faster on FDM.
- Post-Processing is Real Time: Don’t forget the time spent removing supports, washing resin, or sanding. That “2-hour print” might actually be a “4-hour project.”
Pro Insight: At 3D Printed™, we often tell beginners: “If you need it by tomorrow, print it in 0.28mm layers. If you need it to look like it came from a factory, expect to wait.”
🕰️ The Evolution of Print Speed: From Days to Minutes
Remember the early days of 3D printing? We’re talking about the era where printing a simple bracket took longer than baking a lasagna. Back then, the Lulzbot TAZ4 and early M3D printers were marvels of engineering, but they were glacialy slow compared today’s beasts.
In the beginning, the technology was in its infancy. As noted in early community discussions, a “medium-sized flower vase” could easily chew up 10 hours of your life, and a solid object could drag on for 30 hours. It was a time of patience, where you planned your prints like a military operation.
Fast forward today, and the landscape has shifted dramatically. With the advent of CoreXY kinematics, input shaping, and high-speed extruders, printers like the Bambu Lab X1-Carbon or the Prusa MK4 can churn out parts in a fraction of the time. We’ve seen a standard calibration cube that used to take 45 minutes now print in under 15 minutes without sacrificing structural integrity.
However, speed isn’t just about the machine; it’s about the software evolution. Modern slicers like Cura and PrusaSlicer have become incredibly intelligent, optimizing travel paths to minimize empty moves. This is why a print that took 10 hours five years ago might take 3 hours today on the same machine, simply because the software is smarter.
Curiosity Check: But does faster always mean better? We’ll dive deep into the trade-offs between speed and surface finish later in this guide. Spoiler alert: Sometimes, slow and steady wins the race, especially for functional parts.
🧮 The Big Variables: What Actually Dictates Your Print Time?
If you’ve ever wondered why two prints of the same size take vastly different amounts of time, you’re not alone. It’s not magic; it’s physics and math. Here are the four pillars that determine your print duration:
1. Object Volume and Geometry
The total volume of plastic (or resin) is the primary driver. A solid cube takes significantly longer than a hollow box of the same external dimensions.
- Solid vs. Hollow: A solid part requires the nozzle to fill every cubic millimeter. A hollow part only needs the walls.
- Complexity: Intricate geometries with many small features force the printer to slow down to maintain accuracy.
2. Layer Height (Z-Resolution)
This is the most adjustable variable in your slicer.
- 0.1mm (High Detail): The printer has to make 10 layers for every 1mm of height. Slow.
- 0.2mm (Standard): The sweet spot for most hobbyists.
- 0.3mm+ (Draft Mode): The printer makes fewer passes. Fast.
3. Infill Density and Pattern
Infill is the internal skeleton of your print.
- 10-15%: Great for decorative items. Very fast.
- 40-60%: Standard for functional parts. Moderate time.
- 10%: Solid. Extremely slow and often unnecessary unless you need maximum strength.
4. Print Speed and Acceleration
Modern printers can move at 20mm/s or more, but acceleration and jerk settings often dictate the effective speed. If your printer is set to high acceleration, it can change direction quickly, reducing the time spent on corners. If set too high, you get ringing artifacts; too low, and the print drags.
Did You Know? According to data from Raise3D, printing 1 cubic inch of material can take anywhere from 20 minutes to over an hour, depending entirely on these variables.
📏 Size Matters: Estimating Time for Common Object Dimensions
Let’s get practical. You have a model in mind. How long will it sit there? We’ve broken down estimates based on object size and technology.
| Object Size Category | Example Items | FDM Time (Est.) | SLA/Resin Time (Est.) |
|---|---|---|---|
| Tiny (< 2cm) | Keychains, small chess pieces | 15 – 45 mins | 30 – 60 mins |
| Small (2-5cm) | Phone stands, small figurines | 1 – 3 hours | 1 – 2 hours |
| Medium (5-15cm) | Vases, cosplay props (hands), brackets | 4 – 12 hours | 2 – 6 hours |
| Large (15-30cm) | Helmets, large vases, furniture parts | 12 – 30+ hours | 6 – 15 hours |
| Extra Large (>30cm) | Full-scale busts, large enclosures | 24 – 72+ hours | 15 – 40+ hours |
Note: These times assume standard 0.2mm layer height and 20% infill for FDM.
The “Guitar Pick” vs. “Flower Vase” Rule
As mentioned in early community guides, a guitar pick might take 2 minutes to print, while a medium flower vase could take 10 hours. Why the massive difference?
- Surface Area: A vase has a large vertical surface area that requires constant travel and retraction.
- Wall Count: A vase usually requires multiple perimeters (walls) to be strong, whereas a pick is often a single solid layer.
Wait, what about orientation? If you print a tall, thin object vertically, it takes longer than if you lay it flat (if the printer allows). We’ll cover orientation strategies in the “Pro Tips” section.
🎨 Layer Height & Infill: The Speed vs. Quality Trade-Off
This is the eternal struggle of the 3D printing world: Do I want it fast, or do I want it pretty?
Layer Height: The Vertical Resolution
Think of layer height like the pixel count on a screen.
- 0.05mm – 0.1mm: “Jewelry Quality.” You can see the individual layers if you squint, but they are barely visible. Time Penalty: +10% to +20%.
- 0.15mm – 0.2mm: “Standard Quality.” The industry standard. Good for most functional and decorative parts. Time Penalty: Baseline.
- 0.25mm – 0.3mm: “Draft Mode.” Visible layer lines, but incredibly fast. Perfect for protyping or large, non-visible parts. Time Savings: -30% to -50%.
Infill: The Internal Structure
Infill is the honeycomb inside your part.
- 0% (Hollow): Fastest, but fragile. Good for display models.
- 15-20%: The “Goldilocks” zone. Strong enough for most uses, fast enough for daily printing.
- 50%+: Diminishing returns. You get slightly stronger parts, but the print time increases linearly. A 10% infill part takes 3x longer than a 20% infill part of the same size.
Enginer’s Note: We often use 0.28mm layer height for large prints where speed is critical, and 0.12mm for small, detailed miniatures. It’s all about context.
🧱 Material Matters: How PLA, PETG, ABS, and Resin Compare
Not all materials play by the same speed rules. The thermal properties of your filament or resin dictate how fast you can push the printer.
FDM Filaments
- PLA (Polylactic Acid): The speed demon. It melts easily, cols quickly, and adheres well. You can push PLA to 20mm/s+ without much issue.
- PETG (Polyethylene Terephthalate Glycol): Slower than PLA. It requires slower speeds to prevent string and ensure layer adhesion. Expect a 10-15% time increase compared to PLA.
- ABS (Acrylonitrile Butadiene Styrene): The slow and steady runner. ABS needs a heated chamber and slow cooling to prevent warping. Printing ABS often requires lower speeds (40-60mm/s) to maintain dimensional stability.
- TPU (Flexible): The tortoise. Flexibles require very slow print speeds (15-30mm/s) to prevent the filament from buckling in the extruder. A TPU print can take 2x to 3x longer than a PLA print of the same geometry.
Resin (SLA/DLP)
- Standard Resin: Generally fast for small, detailed objects because the entire layer is cured at once (or in strips).
- Engineering/High-Temp Resins: Often require longer exposure times and slower lift speeds to prevent delamination, increasing print time.
Fun Fact: Did you know that printing with NinjaFlex (TPU) can take so long that you might finish a coffee, a meal, and a nap before the print is done? It’s a test of patience!
🖨️ Printer Technology Showdown: FDM vs. SLA vs. SLS Durability & Speed
Choosing the right technology is half the battle. Let’s compare the big three.
FDM (Fused Deposition Modeling)
- Best For: Large parts, functional prototypes, low-cost materials.
- Speed: Variable. Fast for large, simple shapes. Slow for small, detailed parts.
- Time Factor: Dependent on layer height and infill.
SLA/DLP (Stereolithography / Digital Light Processing)
- Best For: High-detail miniatures, jewelry, smooth surface finishes.
- Speed: Surprisingly fast for small, complex parts. The Z-axis movement is the bottleneck, not the XY movement.
- Time Factor: A detailed miniature might take 4 hours on SLA but 12 hours on FDM.
SLS (Selective Laser Sintering)
- Best For: Industrial parts, no supports needed, complex geometries.
- Speed: Generally slower due to the heating and cooling cycles of the powder bed.
- Time Factor: A complex medium part can take 10-12 hours just for the print, plus days for cooling and powder removal.
The Verdict: If you need a detailed figurine in 4 hours, go SLA. If you need a large storage bin in 6 hours, go FDM.
📋 10 Real-World Print Time Estimates for Everyday Objects
Ready to see how this plays out in the real world? We’ve compiled a list of 10 common objects and estimated their print times based on standard settings (0.2mm layer, 20% infill, FDM).
1. The Classic 20mm Calibration Cube
- Purpose: Testing printer accuracy and bed leveling.
- Dimensions: 20x20x20mm.
- Estimated Time: 15 – 25 minutes.
- Why so fast? Tiny volume, simple geometry, no supports.
2. A Functional Phone Stand
- Purpose: Holding your phone while charging or watching videos.
- Dimensions: ~10mm x 80mm x 60mm.
- Estimated Time: 1.5 – 3 hours.
- Why? Requires angled walls (supports) and decent infill for stability.
3. A Detailed Miniature for Tabletop Gaming
- Purpose: D&D or Warhammer figures.
- Dimensions: ~35mm tall.
- Estimated Time (FDM): 2 – 4 hours (with 0.1mm layers).
- Estimated Time (SLA): 1 – 2 hours.
- Why? High detail requires slow speeds and fine layers.
4. A Custom Phone Case
- Purpose: Protection and style.
- Dimensions: ~150mm x 75mm x 10mm.
- Estimated Time: 2 – 4 hours.
- Why? Large surface area, thin walls, often requires supports for the camera cutout.
5. A Large Decorative Vase
- Purpose: Home decor.
- Dimensions: ~20mm tall.
- Estimated Time: 6 – 10 hours.
- Why? “Vase Mode” (spiralize outer contour) makes this faster than a solid print, but the height adds up.
6. A Replacement Gear for a Kitchen Apliance
- Purpose: Fixing a broken blender or mixer.
- Dimensions: ~50mm diameter.
- Estimated Time: 3 – 5 hours.
- Why? Requires high infill (10% or near) and precise tolerances, slowing down the print.
7. A Full-Scale Helmet Prop
- Purpose: Cosplay.
- Dimensions: ~30mm x 250mm x 250mm.
- Estimated Time: 24 – 48 hours (often printed in parts).
- Why? Massive volume. Most people print the helmet in 4-6 pieces to fit the build volume.
8. A Set of Interlocking Storage Boxes
- Purpose: Organizing drawers.
- Dimensions: ~10mm x 10mm x 50mm (each).
- Estimated Time: 4 – 6 hours (for a set of 3-4).
- Why? Batch printing saves setup time, but the total volume is significant.
9. A Complex Mechanical Assembly
- Purpose: A custom drone frame or robot part.
- Dimensions: ~150mm x 150mm x 50mm.
- Estimated Time: 8 – 12 hours.
- Why? Complex internal structures, high infill, and many supports.
10. A Life-Size Bust
- Purpose: Art or memorial.
- Dimensions: ~40mm tall.
- Estimated Time: 48 – 72+ hours.
- Why? Enormous volume. Usually requires splitting the model into multiple parts for printing and assembly.
Question: Which of these objects would you print first? And more importantly, would you wait the full time, or try to speed it up?
⚙️ Slicer Settings Deep Dive: Acceleration, Jerk, and Travel Speed
You’ve set your layer height and infill. Now, let’s talk about the hidden speed demons in your slicer: Acceleration and Jerk.
What is Acceleration?
Acceleration determines how fast the printer can change its speed.
- High Acceleration: The printer reaches top speed quickly. Great for corners.
- Low Acceleration: The printer takes longer to speed up and slow down. This adds time to every corner and direction change.
What is Jerk?
Jerk is the instantaneous change in speed.
- High Jerk: The printer snaps to a new speed immediately. Can cause ringing (vibrations).
- Low Jerk: The printer smooths out the transition. Safer for quality, but slower.
Travel Speed
This is how fast the nozzle moves when it’s not extruding.
- Standard: 150mm/s.
- High Speed: 250mm/s+.
- Impact: Increasing travel speed can shave 10-15% off your total print time, especially for models with lots of small features and support structures.
Pro Tip: If you have a printer with Input Shaping (like the Bambu Lab or Prusa MK4), you can crank up acceleration and jerk without losing quality. If you have an older Ender 3, be careful not to go too high, or you’ll get ghosting artifacts.
🛠️ Troubleshooting: Why Is My Print Taking Forever (or Failing)?
Sometimes, your print takes twice as long as the slicer predicted. Why?
1. Excessive Support Structures
If your model has many overhangs, the slicer generates supports.
- The Issue: Supports add volume and require the printer to travel back and forth.
- The Fix: Rotate the model to minimize overhangs. Use tree supports (available in Cura and PrusaSlicer) which are faster to generate and remove.
2. Retraction Settings
If your retraction distance is too high or speed too slow, the printer spends too much time pulling filament back and forth.
- The Fix: Optimize retraction for your specific extruder. Direct drive extruders usually need less retraction than Bowden setups.
3. Cooling Fan Issues
If the part cooling fan is set to 10% from layer 1, the printer might slow down to allow the plastic to cool.
- The Fix: Set a “minimum layer time” in your slicer. This forces the printer to wait if a layer is too thin, but prevents unnecessary slowing on thicker layers.
4. Firmware Limitations
Older firmware might have conservative speed limits.
- The Fix: Update your printer’s firmware. Newer versions often include performance improvements.
Real Story: We once had a print that was supposed to take 4 hours but took 8. It turned out the slicer was generating millions of tiny support structures because the model had a complex internal lattice. Switching to “Tree Supports” cut the time in half!
🚀 Pro Tips to Slash Your Print Times Without Sacrificing Quality
Ready to speed things up? Here are our top strategies to cut print time without turning your part into a blob.
1. Optimize Orientation
Printing a tall object vertically is slow. If you can lay it flat, you reduce the Z-height, which is the biggest time consumer.
- Example: Printing a long rod vertically takes hours. Printing it flat takes minutes.
2. Use a Larger Nozzle
Switching from a 0.4mm nozzle to a 0.6mm nozzle allows you to extrude more plastic per pass.
- Result: You can increase layer height to 0.3mm or 0.4mm, reducing time by 25-30%.
- Trade-off: Slightly less detail on small features.
3. Reduce Infill for Non-Functional Parts
If you’re printing a display model, drop infill to 10%.
- Result: Massive time savings. A 10-hour print can become a 4-hour print.
4. Batch Printing
Instead of printing one item, print five.
- Why? The setup time (heating bed, homing) is the same. Printing five items in one go is often faster than printing them one by one.
5. Use “Vase Mode” (Spiralize Outer Contour)
For vases and cups, this setting eliminates the top layer and infill, printing only the outer wall in a continuous spiral.
- Result: Up to 50% time reduction for hollow objects.
6. Preheat the Bed
If you’re printing multiple items, keep the bed warm between prints.
- Result: Eliminates the 10-15 minute heat-up time for each new print.
Final Thought: Remember, speed is a tool, not a goal. Sometimes, taking the extra time to get a perfect print is worth it. But knowing how to balance speed and quality is the mark of a true 3D printing enthusiast.
Stay tuned for the Conclusion, where we’ll wrap up our journey through time and speed, and answer your burning questions in the FAQ section!
🤔 Conclusion

So, we’ve journeyed from the “guitar pick” that prints in minutes to the “life-size bust” that keeps your printer humming for days. We’ve dissected the variables, debated the trade-offs, and even peeked under the hood of your slicer settings. But remember that question we posed earlier: “Does faster always mean better?”
The answer, as with most things in engineering, is a resounding “It depends.”
If you are printing a functional prototype for a kitchen appliance gear, speed is your ally. You want to iterate fast, test, and refine. In this case, a 0.28mm layer height and 15% infill on a Bambu Lab X1-Carbon or a tuned Prusa MK4 is the way to go. You might sacrifice some surface smoothness, but you gain time.
However, if you are printing a detailed miniature for a tabletop game or a cosplay helmet that needs to look seamless, speed is the enemy. Here, the 0.1mm layer height and 10% infill (or at least 40-50%) are non-negotiable. The extra 10 hours of print time is the price of admission for a part that looks like it was cast in a factory, not extruded by a hobbyist.
Our Confident Recommendation:
Don’t let the fear of long print times stop you from starting. The “perfect” print time doesn’t exist; only the optimal time for your specific goal.
- For Beginners: Start with PLA at 0.2mm layer height and 20% infill. This is the sweet spot where you get decent quality without waiting days.
- For Speed: Embrace 0.28mm+ layers and tree supports.
- For Quality: Slow down, use 0.12mm layers, and consider resin for tiny details.
The beauty of 3D printing isn’t just the object you hold in your hand; it’s the process of learning how to manipulate time and material to create something from nothing. Whether it takes 20 minutes or 20 hours, the result is yours.
🔗 Recommended Links
Ready to dive deeper or grab some gear? Here are our top picks for books, models, and hardware to get you printing faster and better.
📚 Essential Reading & Resources
- “The 3D Printing Handbook” by Ben Redwood: A comprehensive guide covering everything from design to post-processing. Available on Amazon
- “Make: Getting Started with 3D Printing” by Christopher Barnatt: Perfect for beginners looking to understand the “why” and “how.” Available on Amazon
🛒 Shop 3D Printers & Accessories
Looking for a machine that balances speed and quality? Check out these top contenders:
- Bambu Lab X1-Carbon: The current king of speed and reliability for FDM.
- Search on Amazon | Bambu Lab Official Store
- Prusa MK4: The reliable workhorse with incredible community support.
- Search on Amazon | Prusa Research Official Store
- Elegoo Mars 4 (Resin): For those who need speed on detailed miniatures.
- Search on Amazon | Elegoo Official Store
🧱 Find Free 3D Models
Don’t know what to print? Explore these massive repositories:
- Thingiverse: The largest community-driven library. Browse Models
- Cults3D: Great for high-quality, often paid, premium designs. Browse Models
- Printables: The rising star with excellent community challenges. Browse Models
❓ FAQ

What is the average print time for a standard 3D printed keychain?
A standard keychain (approx. 40mm x 20mm x 3mm) is one of the quickest prints you can make.
- FDM (PLA): Typically takes 10 to 20 minutes at 0.2mm layer height with 15% infill.
- SLA (Resin): Takes about 30 to 45 minutes due to the curing time per layer and the washing/curing post-process, even though the actual print time is short.
- Why? The volume is tiny, and the geometry is usually flat, minimizing travel moves.
How does infill percentage affect the duration of printing common household items?
Infill is the single biggest time-saver (or time-waster) for non-cosmetic parts.
- Linear Relationship: Generally, doubling the infill percentage roughly doubles the time spent on the internal structure.
- Example: A phone stand with 10% infill might take 1.5 hours. The same stand with 50% infill could take 2.5 to 3 hours.
- The “Sweet Spot”: For most household items (tothbrush holders, organizers), 15-20% is sufficient for strength. Going above 40% yields diminishing returns in strength but a massive penalty in time.
Read more about “45 Most Useful PLA 3D Prints to Transform Your Life in 2025 🎉”
What are the fastest settings to print a phone stand without losing quality?
To maximize speed while maintaining a usable phone stand:
- Layer Height: 0.24mm or 0.28mm.
- Infill: 15% Gyroid or Cubic (strong and fast).
- Walls: 2 or 3 perimeters (don’t go lower, or it will be flimsy).
- Supports: Use Tree Supports and orient the stand so the phone slot is on the bottom or side to minimize supports.
- Speed: Increase travel speed to 20mm/s+ if your printer supports it.
- Result: You can often cut the time by 30% compared to standard 0.2mm/20% settings with no visible loss in quality for a functional part.
How long does it take to 3D print a small figurine at 0.2mm layer height?
A “small figurine” (like a standard D&D mini, ~35mm tall) is a tricky case for FDM.
- FDM Time: At 0.2mm, expect 2 to 4 hours. The small features force the printer to slow down significantly to maintain accuracy.
- The Catch: At this size, FDM often struggles with detail. If you switch to 0.1mm, the time jumps to 4-6 hours.
- Alternative: For this size, SLA/Resin is superior, taking only 1-2 hours for the same level of detail.
Does using a larger nozzle speed up the printing of everyday objects?
Absolutely. This is one of the most effective speed hacks.
- The Math: A 0.6mm nozzle extrudes roughly 2.25x more material per pass than a 0.4mm nozzle.
- The Result: You can increase your layer height to 0.3mm or 0.4mm, which reduces the number of layers by 25-3%.
- Trade-off: Fine details (like text or small holes) may become blurry or fail to print. It’s perfect for large, functional parts like brackets, vases, or storage bins, but not for miniatures.
Read more about “15 Mind-Blowing 3D Printed Creations & Tips You Must See (2026) 🎉”
What is the typical print time for a 3D printed phone case?
A phone case is a large, thin-walled object.
- Standard Settings (0.2mm, 15% infill): 2 to 4 hours.
- Vase Mode: If the case is designed for it (no top layer, continuous spiral), it can drop to 1 to 1.5 hours.
- Why so long? The large surface area means the printer has to travel a long distance for every layer, and the thin walls require precise speed control to avoid gaps.
Read more about “🌐 Distributed Manufacturing 3D Printing: The 2026 Revolution”
How can I estimate the print time for custom 3D printed tools?
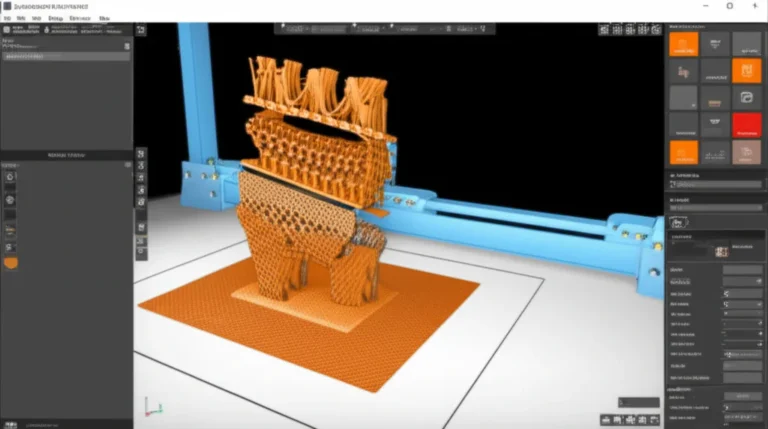
Never guess! Use your Slicer Software.
- Import the STL/OBJ: Load your custom tool design into Cura, PrusaSlicer, or OrcaSlicer.
- Apply Settings: Select your material (PLA, PETG), layer height, and infill.
- Check the Estimate: The slicer will calculate the estimated print time and material usage before you even hit “Slice.”
- Pro Tip: Always add a 10-15% buffer to the estimated time for real-world variables like retraction failures or bed leveling adjustments.
H4: Why do my slicer estimates sometimes differ from reality?
Slicers calculate based on ideal conditions. They don’t account for:
- Retraction delays: If your retraction speed is slow, the nozzle waits.
- Cooling pauses: If a layer is too thin, the slicer forces a wait for cooling.
- Firmware limits: Your printer might not be able to reach theoretical max speed set in the G-code.
- Support generation: Complex supports can sometimes take longer to generate and print than the slicer predicts if the geometry is tricky.
Read more about “35 Easy 3D Print Projects for Beginners (2026) 🚀”
📚 Reference Links
For those who want to verify our data or dive deeper into the technical specs, here are the authoritative sources we consulted:
- Raise3D Blog: How Long Does 3D Printing Take? – A comprehensive breakdown of time estimates by object size and technology. Read the full article
- Prusa Research: 3D Printing Time Calculator & Guide – Official insights on how Prusa printers handle speed and quality. Visit Prusa Support
- Ultimaker (Cura): Slicing Settings Explained – Detailed documentation on how layer height, infill, and speed affect print time. Cura Documentation
- Formlabs: SLA vs FDM: Speed and Quality Comparison – Technical analysis of resin vs. filament printing times. Formlabs Blog
- NinjaFlex (Flexfill): Printing Guidelines for Flexible Filaments – Why TPU takes longer and how to optimize it. NinjaFlex Support
- Bambu Lab: X1 Series Performance Specs – Data on high-speed printing capabilities and acceleration limits. Bambu Lab Tech Specs