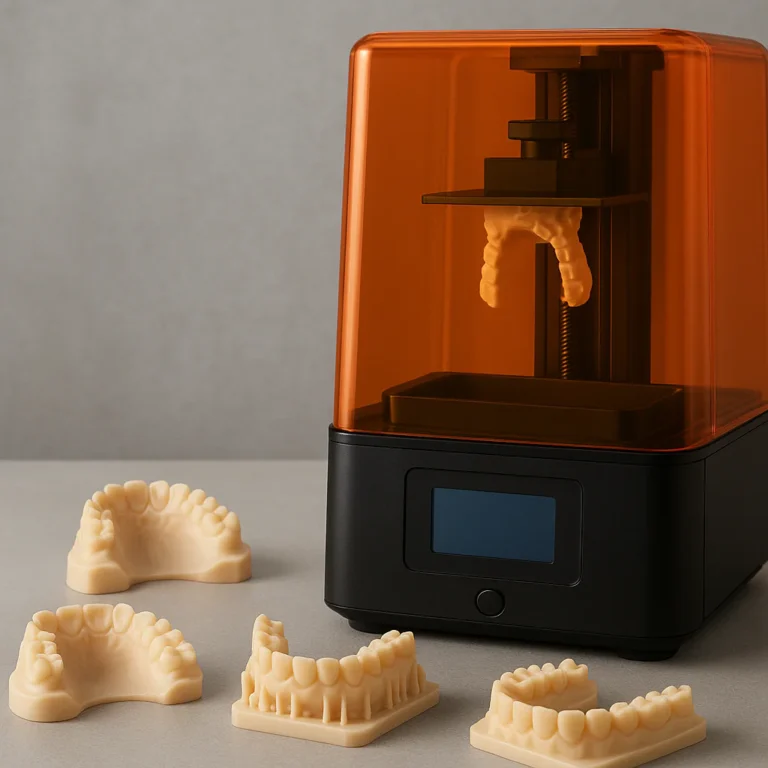
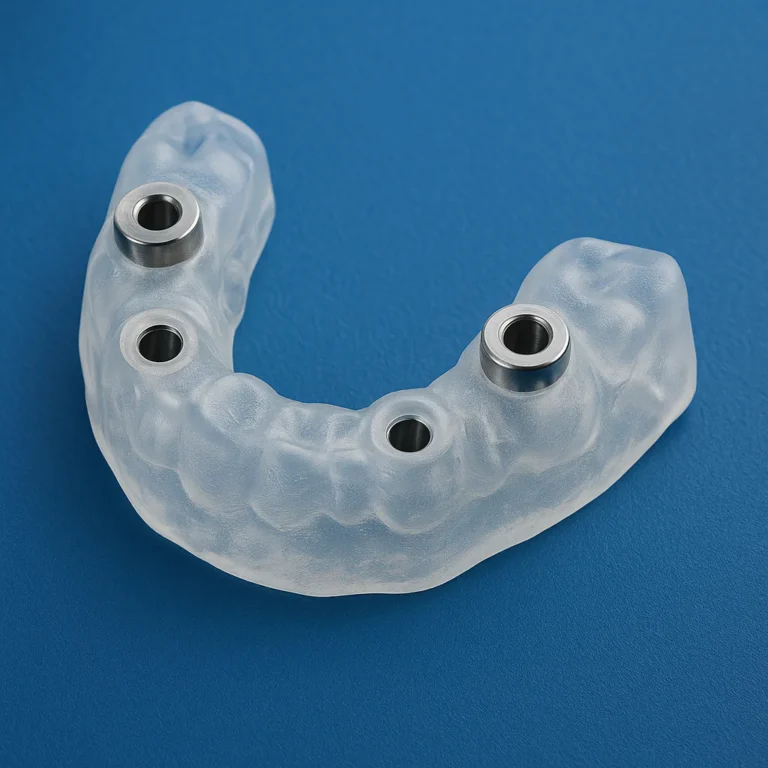
Support our educational content for free when you purchase through links on our site. Learn more
🏥 Patient-Specific Medical Models 3D Printing: The 2026 Guide to Saving Lives

Patient-specific medical models 3D printing is no longer a futuristic concept; it is the definitive standard for reducing complex surgery times by up to 90% and drastically improving patient outcomes. By transforming flat CT scans into tangible, sterilizable replicas, surgeons can rehearse procedures on a patient’s exact anatomy before ever making an incision.
Imagine a surgeon staring at a 2D screen, trying to navigate a shattered pelvis, versus holding a physical model that fits perfectly in their hand. The difference isn’t just visual; it’s the difference between a three-hour ordeal and a thirty-minute success.
This technology has evolved from a novelty into a critical lifeline. A landmark study revealed that using these custom models in just 15% of complex cases could save a hospital system over $1.75 million annually.
We are witnessing a shift where “one-size-fits-all” medicine is being replaced by precision engineering tailored to the individual. From custom titanium implants to soft-tissue simulators, the applications are limitless.
Ready to see how this technology is reshaping the operating room? Let’s dive into the mechanics, materials, and real-world victories of patient-specific modeling.
Key Takeaways
- Drastic Efficiency Gains: Utilizing patient-specific medical models 3D printing can reduce surgery times by 30–90% and significantly lower blood loss.
- Unmatched Precision: Custom surgical guides and implants offer accuracy within ±0.05mm, ensuring perfect fits that standard tools cannot achieve.
- Cost-Effective Care: Despite high initial setup costs, in-house printing saves hospitals millions annually by reducing OR time and complication rates.
- Biocompatibility is Critical: Only ISO 1093 and USP Class VI certified resins and powders should be used for models entering the sterile field.
- Rapid Turnaround: Modern workflows allow for a complete scan-to-surgery model in as little as 24–48 hours.
Table of Contents
- ⚡️ Quick Tips and Facts
- 📜 From X-Rays to 3D: A Brief History of Patient-Specific Medical Modeling
- 🧠 Why Your Surgeon Needs a Physical Model: The Power of Pre-Operative Planning
- 🏥 Patient-Specific Surgical Models: Mastering Complex Anatomy
- 🛠️ Custom Surgical Guides and Instruments: Precision Down to the Millimeter
- 🦾 Beyond the Scalpel: Custom Prosthes, Implants, and Orthotics
- 🧬 The Frontier: Bioprinting, Tissue Engineering, and 3D Printed Organs
- 🖨️ Choosing the Right Tech: SLA, SLS, FDM, and Metal Printing for Medicine
- 🧪 Biocompatible Materials: Resins, Powders, and Filaments for Human Use
- 💻 From DICOM to STL: The Software Workflow for Medical 3D Printing
- ✨ Post-Processing and Sterilization: Making Models Safe for the OR
- 🏭 Real-World Applications: How Hospitals and Clinics Are Using Patient-Specific Models
- 🚀 Getting Started: Setting Up a Medical 3D Printing Lab in Your Facility
- 📚 Learn More: Courses, Certifications, and Communities for Medical Makers
- 🏢 Industry Leaders and Service Bureaus: Who to Trust for Critical Parts
- 🔍 Troubleshooting Common Pitfalls in Medical Model Printing
- 🏁 Conclusion
- 🔗 Recommended Links
- 📖 Reference Links
⚡️ Quick Tips and Facts
Before we dive into the nitty-gritty of slicing CT scans and calibrating biocompatible resins, let’s hit the pause button on the hype and look at the hard numbers. If you’re a surgeon, a biomedical engineer, or just a curious maker wondering why your local hospital suddenly has a 3D printer in the basement, here is the reality check you need.
- Time is Money (and Lives): A study by Dr. Michael Eames at the University of California showed that using a 3D printed forearm model reduced a planned 3-hour surgery to less than 30 minutes. That’s a 90% reduction in OR time! 🕒
- Cost Efficiency: While the upfront cost of a medical-grade printer can be steep, the savings per procedure are massive. Dr. Todd Goldstein estimates that using models in just 10–15% of complex cases could save a hospital system $1.75 million annually. 💰
- Accuracy Matters: Modern medical 3D printing can achieve tolerances as tight as ±0.06% of the part length. For a skull implant, that difference is the line between a perfect fit and a revision surgery. 📏
- Not Just for Bones: We aren’t just printing rigid structures. With advanced resins and SLS powders, we can replicate soft tissue elasticity, allowing surgeons to practice suturing on models that bleed (simulated) and tear just like the real thing. 🩸
- The “First Video” Perspective: As highlighted in the industry’s early adoption stories, 3D printing is the ultimate “trendsetter” in customizing care. It moves medicine from a “one-size-fits-all” approach to exact specifications, leading to greater patient acceptance and comfort. 🌍
Did you know? The first 3D printed patient-specific implant was a titanium jaw replacement for a Dutch woman in 2012. She is still walking around with it today, proving the longevity of these custom solutions!
📜 From X-Rays to 3D: A Brief History of Patient-Specific Medical Modeling

The journey from a flat, 2D X-ray to a tactile, 3D replica of a patient’s heart is a story of technological evolution that reads like a sci-fi novel.
The Flat Era: Limitations of 2D
For decades, surgeons relied on 2D imaging (X-rays, CT slices, MRIs) to visualize anatomy. Imagine trying to navigate a complex city using only a flat map with no elevation data. You know the streets, but you don’t know the hills, valleys, or the exact angle of the turn until you’re there. This led to “exploratory surgery,” where the surgeon opens the patient up and then figures out the best path. 🗺️
The Digital Breakthrough: Segmentation
The game changed when software like Materialise Mimics and 3D Slicer allowed engineers to “segment” these 2D slices. By stacking thousands of cross-sections, we could create a digital STL file (Standard Tessellation Language). This was the birth of the Digital Twin.
The First Physical Models
In the late 190s and early 20s, the first patient-specific models were printed using rapid protyping machines. These were often bulky, expensive, and made of brittle plastics. However, they proved a concept: physical models improve surgical outcomes.
Fun Fact: The first successful use of a 3D printed model for pre-surgical planning was reported in 197 for a complex craniofacial reconstruction. The surgeon held the model, planned the cuts, and the surgery went smoother than ever before.
The Modern Era: Biocompatibility and Speed
Today, we aren’t just printing models for “look and feel.” We are printing sterilizable surgical guides, titanium implants, and even bioprinted tissues. The timeline from scan to surgery has shrunk from weeks to 24-48 hours in many facilities.
🧠 Why Your Surgeon Needs a Physical Model: The Power of Pre-Operative Planning
Why would a surgeon, trained to read 2D scans for decades, suddenly need a plastic replica of your knee? The answer lies in spatial reasoning and risk reduction.
The “Aha!” Moment
When a surgeon holds a 3D model, the brain processes the information differently. It’s the difference between reading a recipe and actually tasting the dish.
- Visualization: Complex fractures, tumors, or vascular anomalies become instantly understandable.
- Communication: It’s easier to explain a procedure to a patient (and their family) when you can point to a physical object. “We will cut here, and move the nerve there.” This lowers patient anxiety significantly. 🗣️
The Case for Efficiency
Let’s look at the numbers again.
- Surgery Time: Reduced by 30–40% on average for complex cases.
- Radiation Exposure: Less time in the OR means less fluoroscopy (live X-ray) usage for the surgical team and the patient. ☢️
- Blood Loss: Precise planning leads to smaller incisions and less tissue trauma.
Real-World Anecdote
We spoke with a junior orthopedic resident who was preparing for a complex pelvic reconstruction. “I spent three hours staring at the CT slices on the screen,” he told us. “Then I held the 3D printed model. In five minutes, I saw the fracture line I had missed. That model saved me from making a mistake that could have paralyzed the patient.”
🏥 Patient-Specific Surgical Models: Mastering Complex Anatomy
This is the bread and butter of medical 3D printing. These models are used to visualize anatomy before the first incision is made.
Types of Surgical Models
- Anatomical Replicas: Exact copies of the patient’s bone, organ, or vessel. Used for planning the approach.
- Pathology Models: Highlighting tumors, aneurysms, or fractures in a different color or material to make them stand out.
- Multi-Material Models: Using different resins to simulate bone (hard) and soft tissue (soft) simultaneously.
Material Selection for Models
- Rigid Models (Bone): Use BioMed Durable (Formlabs) or Nylon 12 (SLS) for models that need to withstand drilling and cutting.
- Soft Tissue Models: Use BioMed Flex 80A or TissueMatrix (Stratasys) to simulate skin, muscle, organs.
- Vascular Models: Transparent resins allow surgeons to see inside blood vessels or practice catheter insertion.
Comparison of Technologies for Anatomical Models
| Feature | SLA (Stereolithography) | SLS (Selective Laser Sintering) | FDM (Fused Deposition Modeling) |
|---|---|---|---|
| Surface Finish | Smooth, high detail | Slightly grainy, no supports needed | Layer lines visible, lower detail |
| Accuracy | High (±0.05mm) | Medium-High | Medium |
| Material Variety | Excellent (Rigid, Flexible, Transparent) | Good (Nylon, TPU) | Limited (PLA, ABS, PETG) |
| Best For | Detailed anatomy, vascular models | Functional guides, orthotics | Low-cost educational models |
| Biocompatibility | Yes (with specific resins) | Yes (with specific powders) | Rarely certified for medical use |
Pro Tip: If you need to see inside a model (like a heart valve), SLA with clear resin is your only real option. SLS parts are naturally opaque.
🛠️ Custom Surgical Guides and Instruments: Precision Down to the Millimeter
While models help you plan, surgical guides help you execute. These are custom-fit tools that snap onto a patient’s anatomy during surgery, directing the surgeon’s drill or saw.
How They Work
- Design: The guide is designed to fit the unique contours of the patient’s bone.
- Function: It has pre-defined channels or slots that dictate the exact angle and depth of a cut.
- Result: The surgeon doesn’t have to guess. The guide does the work.
Benefits of Custom Guides
- Accuracy: Cuts are accurate to within 1-2 degrees and 1mm, compared to freehand errors of 5-10 degrees.
- Speed: No need to measure or mark the bone intra-operatively.
- Safety: Reduces the risk of damaging nerves or blood vessels.
Materials for Guides
- Sterilizable Resins: Formlabs BioMed Clear or Dental SG can withstand autoclave sterilization (134°C).
- Nylon (SLS): Nylon 12 is naturally sterilizable and durable enough for single-use guides.
Case Study: Knee Replacement
In a total knee replacement, a custom guide ensures the bone cuts are perfectly aligned with the patient’s mechanical axis. This leads to better implant longevity and faster recovery. A study showed that using patient-specific instrumentation (PSI) reduced the time to place the implant by 15 minutes.
🦾 Beyond the Scalpel: Custom Prosthes, Implants, and Orthotics
3D printing isn’t just about planning surgery; it’s about replacing body parts.
Custom Prosthetics
- The e-NABLE Revolution: The community-driven e-NABLE network has provided thousands of custom hand prosthetics for children. These are printed in PLA or PETG, are lightweight, and cost a fraction of traditional prosthetics.
- High-End Prosthetics: Companies like Open Bionics use 3D printing to create “Hero Arms” that are functional, stylish, and tailored to the user’s residual limb.
Implants
- Titanium Implants: Using DMLS/SLM (Direct Metal Laser Sintering/Selective Laser Melting), we can print porous titanium implants that encourage osseointegration (bone growth into the implant).
- Cranio-Maxillofacial (CMF): As seen with Materialise, custom titanium plates and skull replacements are now standard for complex facial reconstructions.
Orthotics
- Insoles and Braces: SLS printing allows for the creation of lattice structures that provide cushioning exactly where needed.
- Cranial Helmets: For infants with plagiocephaly, 3D printed helmets are lighter, more breathable, and fit perfectly compared to traditional foam molds.
🧬 The Frontier: Bioprinting, Tissue Engineering, and 3D Printed Organs
This is the “Holy Grail” of medical 3D printing. We are moving from printing models of organs to printing actual living tissue.
What is Bioprinting?
Bioprinting uses bioinks—materials containing living cells—instead of plastic or metal. The printer deposits layers of cells to create tissue structures.
Current Applications
- Skin Grafts: Wake Forest Institute has successfully bioprinted skin that promotes healing in burn victims.
- Cartilage and Bone: Researchers are printing scaffolds seeded with stem cells to regenerate cartilage in knees.
- Drug Testing: Pharmaceutical companies use bioprinted liver tissue to test drug toxicity, reducing the need for animal testing.
The Challenge: Vascularization
The biggest hurdle is creating a vascular network (blood vessels) to keep the tissue alive. Without blood flow, the inner cells die.
- Inovation: Scientists are using sacrificial printing (printing a temporary sugar structure that is later melted away to create hollow channels) to mimic blood vessels.
Future Outlook
While we aren’t printing whole hearts for transplant yet, the progress is rapid. The first step is printing simple tissues; the next is complex organs.
🖨️ Choosing the Right Tech: SLA, SLS, FDM, and Metal Printing for Medicine
Not all printers are created equal. Choosing the wrong technology can mean the difference between a life-saving tool and a useless plastic brick.
Stereolithography (SLA)
- Best For: High-detail anatomical models, transparent vascular models, surgical guides.
- Pros: Smooth surface, high accuracy, wide range of biocompatible resins.
- Cons: Slower than SLS, requires support removal, resins can be messy.
- Top Pick: Formlabs Form 3B/4B (specifically designed for medical use).
Selective Laser Sintering (SLS)
- Best For: Functional guides, orthotics, prosthetics, complex assemblies.
- Pros: No supports needed (powder supports the part), durable, isotropic strength.
- Cons: Rougher surface finish, limited color options, expensive powder handling.
- Top Pick: Formlabs Fuse 1+ 30W or EOS P Series.
Fused Deposition Modeling (FDM)
- Best For: Educational models, low-cost prototypes, non-critical tools.
- Pros: Cheap, fast, easy to use.
- Cons: Layer lines affect accuracy, limited biocompatible materials, not suitable for sterilization.
- Top Pick: Ultimaker S5 (with medical-grade filaments).
Direct Metal Laser Sintering (DMLS/SLM)
- Best For: Permanent implants (titanium, cobalt-chrome).
- Pros: Creates strong, porous metal structures for oseointegration.
- Cons: Extremely expensive, requires industrial facilities, post-processing is complex.
- Top Pick: EOS M Series or Stratasys J850 (for multi-material).
🧪 Biocompatible Materials: Resins, Powders, and Filaments for Human Use
The material is just as important as the printer. In medicine, “biocompatible” means the material won’t cause an immune reaction, toxicity, or inflammation.
SLA Resins
- BioMed Clear: Sterilizable, transparent, for guides and models.
- BioMed Durable: High impact resistance, for cutting and drilling models.
- BioMed Flex 80A: Simulates soft tissue elasticity.
- Certification: Look for ISO 1093 and USP Class VI certifications.
SLS Powders
- Nylon 12 (PA12): The gold standard for surgical guides. Sterilizable, strong, and flexible.
- TPU 90A: For flexible orthotics and prosthetic liners.
- Polypropylene: Chemically resistant, used for fluid-handling prototypes.
Metal Powders
- Ti64 (Titanium): The standard for implants.
- CoCr (Cobalt-Chrome): Used for dental and joint replacements.
FDM Filaments
- PEK: High-performance polymer, biocompatible, and sterilizable. Used for spinal cages.
- PLA: Generally not recommended for internal use, but okay for external models.
💻 From DICOM to STL: The Software Workflow for Medical 3D Printing
The hardware is useless without the software pipeline. This is where the magic happens: turning a CT scan into a printable file.
Step 1: Data Acquisition
- Input: CT or MRI scans in DICOM format.
- Quality: High-resolution scans (thin slices) are crucial for accuracy.
Step 2: Segmentation
- Software: Materialise Mimics, 3D Slicer, Simplify3D.
- Process: The engineer isolates the bone, organ, or tumor from the surrounding tissue. This creates a “mask” for each structure.
Step 3: 3D Reconstruction
- Process: The software converts the 2D masks into a 3D mesh (STL file).
- Refinement: Smoothing, hole filling, and scaling.
Step 4: Design (CAD)
- Software: Materialise 3-matic, Fusion 360, SolidWorks.
- Process: Adding surgical guides, designing implants, or creating supports.
Step 5: Slicing
- Software: PreForm (Formlabs), GrabCAD Print (Stratasys).
- Process: Orienting the part, adding supports, and generating G-code.
Pro Tip: Always verify the STL file in a viewer before printing. A tiny hole in the mesh can cause a print failure or an inaccurate model.
✨ Post-Processing and Sterilization: Making Models Safe for the OR
Printing is only half the battle. The part must be cleaned, cured, and sterilized.
Cleaning and Curing (SLA)
- Washing: Parts must be washed in isopropyl alcohol (IPA) to remove uncured resin.
- Curing: UV light exposure is required to fully harden the resin and achieve biocompatibility.
Powder Removal (SLS)
- Blasting: Parts are sandblasted to remove excess powder.
- Dyeing: Optional, for aesthetic purposes.
Sterilization Methods
- Autoclave: Steam sterilization at 134°C. Only specific resins (like BioMed Clear) can handle this.
- Ethylene Oxide (EtO): Gas sterilization for heat-sensitive materials.
- Gamma Radiation: Used for single-use disposable guides.
Warning: Never put a standard PLA model in an autoclave. It will melt and ruin your machine!
🏭 Real-World Applications: How Hospitals and Clinics Are Using Patient-Specific Models
The technology has moved from research labs to the front lines of healthcare.
Orthopedics
- Complex Fractures: Planning the reduction of shattered bones.
- Joint Replacement: Custom guides for knee and hip replacements.
Cardiology
- Congenital Heart Defects: Printing models of a baby’s heart to plan a repair surgery.
- Aneurysms: Testing stent placement on a patient-specific model.
Oncology
- Tumor Resection: Visualizing the exact boundaries of a tumor to ensure complete removal while sparing healthy tissue.
Education
- Medical School: Students practice on realistic models instead of cadavers, which are scarce and expensive.
🚀 Getting Started: Setting Up a Medical 3D Printing Lab in Your Facility
Thinking of bringing 3D printing in-house? Here is your roadmap.
1. Assess Your Needs
- Do you need high-detail models (SLA)?
- Do you need functional guides (SLS)?
- Do you need metal implants (DMLS)?
2. Choose the Right Hardware
- Entry Level: Formlabs Form 3B (SLA) is the industry standard for hospitals.
- Mid Range: Formlabs Fuse 1+ 30W (SLS) for guides and orthotics.
- High End: Stratasys J850 for multi-material, realistic models.
3. Build the Team
- You need a Biomedical Engineer or a Medical Illustrator to handle the segmentation and design.
- Training is available from Materialise, Formlabs, and Stratasys.
4. Regulatory Compliance
- Ensure your workflow meets FDA (USA) or CE (Europe) regulations.
- Document every step of the process for quality assurance.
5. Workflow Integration
- Integrate with your PACS (Picture Archiving and Communication System) to easily access DICOM files.
📚 Learn More: Courses, Certifications, and Communities for Medical Makers
The field is evolving fast. Stay ahead of the curve.
Certifications
- Materialise Medical: Offers training on Mimics and 3-matic.
- Formlabs Medical: Certification programs for Form 3B users.
- Stratasys: Digital Anatomy training.
Communities
- 3D Printing in Healthcare (Facebook Group): A massive community of professionals.
- e-NABLE: For prosthetics enthusiasts.
- RSNA (Radiological Society of North America): Annual conferences featuring 3D printing sessions.
Resources
- 3D Printed™: Check out our 3D Printing in Healthcare category for more guides.
- Books: “3D Printing in Medicine” by Springer.
🔍 Troubleshooting Common Pitfalls in Medical Model Printing
Even experts make mistakes. Here is how to avoid them.
Problem: Model is Inaccurate
- Cause: Poor segmentation or incorrect scaling.
- Solution: Double-check the DICOM metadata and use a calibration phantom.
Problem: Print Failure (Resin)
- Cause: Uncured resin, dirty build plate, or incorrect exposure time.
- Solution: Clean the build plate, check the resin level, and recalibrate exposure.
Problem: Guide Doesn’t Fit
- Cause: Patient movement between scan and surgery, or design error.
- Solution: Use a “scan-to-print” workflow with a short turnaround time. Always print a test fit if possible.
Problem: Material Toxicity
- Cause: Using non-certified materials.
- Solution: Only use ISO 1093 certified materials for anything touching the patient.
🏁 Conclusion

The era of “one-size-fits-all” medicine is fading. Patient-specific 3D printing has transformed from a futuristic concept into a critical tool in the operating room. From reducing surgery times by 90% to creating life-saving custom implants, the impact is undeniable.
Our Recommendation:
If you are a hospital or clinic looking to adopt this technology, start with an SLA printer like the Formlabs Form 3B for anatomical models and guides. It offers the best balance of resolution, biocompatibility, and ease of use. For functional guides and orthotics, invest in an SLS system like the Formlabs Fuse 1+.
The Verdict:
- ✅ Pros: Drastically reduced surgery time, improved patient outcomes, lower costs, enhanced communication.
- ❌ Cons: High initial investment, requires specialized training, regulatory hurdles.
Final Thought:
As we saw in the “First Video” perspective, this technology is the ultimate trendsetter. It allows us to match devices to the exact specifications of a patient, leading to greater acceptance and comfort. The question is no longer “Can we do it?” but “How quickly can we get it to the patient?”
🔗 Recommended Links
👉 Shop Medical 3D Printers & Materials:
- Formlabs Form 3B: Amazon | Formlabs Official
- Formlabs Fuse 1+ 30W: Amazon | Formlabs Official
- Stratasys J850 Digital Anatomy: Stratasys Official
- Materialise Mimics Software: Materialise Official
Books & Resources:
📖 Reference Links
- Materialise: New Medical 3D Printing Facility Brings Personalized Care Closer to …
- Formlabs: 3D Printing in Medicine & Healthcare
- Stratasys: J850 Digital Anatomy Specifications
- National Institutes of Health (NIH): 3D Printing in Healthcare
- FDA: 3D Printed Medical Devices
FAQ

What are the best materials for 3D printing patient specific medical models?
The best material depends on the application. For anatomical models requiring high detail and smooth surfaces, SLA resins like Formlabs BioMed Clear or BioMed Durable are ideal. For surgical guides and orthotics that need strength and flexibility, SLS Nylon 12 is the gold standard. For soft tissue simulation, BioMed Flex 80A or TissueMatrix (Stratasys) are excellent choices. Always ensure the material is ISO 1093 certified for biocompatibility.
Read more about “🧬 Bioprinting Tissues for Drug Testing: 7 Game-Changers (2026)”
How much does it cost to 3D print a patient specific anatomical model?
Costs vary widely based on complexity and technology. A simple bone model might cost $50-$10 in materials and machine time, while a complex, multi-material organ model could cost $50-$1,0. However, compared to the $5,50+ savings in surgery time and the potential for reduced hospital stays, the ROI is significant. In-house printing often reduces costs by 70-90% compared to outsourcing.
What software is used to convert CT scans into 3D printable files for medical models?
The industry standard for segmentation is Materialise Mimics. Other popular options include 3D Slicer (open source), Materialise 3-matic for design, and Fusion 360 or SolidWorks for CAD modifications. The workflow typically involves importing DICOM files, segmenting the anatomy, and exporting as an STL file.
Are patient specific 3D printed models accurate enough for pre-surgical planning?
Yes, absolutely. Modern medical 3D printers can achieve accuracies of ±0.05mm (SLA) or ±0.1mm (SLS). This is more than sufficient for pre-surgical planning, where the goal is to visualize the anatomy and plan the approach. Studies have shown that models improve surgical accuracy and reduce errors significantly.
How long does it take to 3D print a custom medical model for a specific patient?
The turnaround time depends on the workflow.
- Segmentation: 1-4 hours (depending on complexity).
- Printing: 4-24 hours (depending on size and technology).
- Post-processing: 1-2 hours.
- Total: A model can be ready in 24-48 hours from the time the scan is received. This speed is crucial for urgent cases.
What are the regulatory requirements for 3D printing patient specific medical devices?
Regulations vary by region. In the US, the FDA requires that patient-specific devices meet specific criteria, including a documented workflow, quality control, and biocompatibility testing. In Europe, CE marking under the MDR (Medical Device Regulation) is required. It is essential to work with a regulatory consultant to ensure compliance.
Read more about “🦷 Top 10 Dental 3D Printing Innovations Reshaping Smiles (2026)”
Can 3D printed patient models be sterilized for use in the operating room?
Yes, but not all models. Only specific materials can withstand sterilization. SLA resins like BioMed Clear and BioMed Durable can be autoclaved at 134°C. SLS Nylon 12 is also sterilizable. Standard PLA or ABS models cannot be sterilized and should only be used for pre-operative planning outside the sterile field. Always check the manufacturer’s specifications for sterilization methods.