Support our educational content for free when you purchase through links on our site. Learn more
10 Expert Ways to Remove Support Structures in 3D Printing 🛠️ (2025)
If you’ve ever stared at your freshly printed 3D model only to be daunted by the tangled web of support structures clinging to it, you’re not alone. Removing supports is often the make-or-break moment in 3D printing — one wrong move and hours of work can be ruined. But what if we told you there’s a way to make this step easier, cleaner, and even satisfying?
In this comprehensive guide, the 3D Printed™ team shares 10 proven techniques to remove support structures like a pro, from handy tool recommendations to slicer settings that make supports practically fall off. We’ll also reveal insider tips on dissolvable supports, post-processing tricks, and how professional services like Xometry can save your day. Curious about which support materials dissolve in water and which require citrus-based solvents? Or how freezing your print can make supports snap off effortlessly? Stick with us — the secrets are coming!
Key Takeaways
- Patience and the right tools are essential for clean, damage-free support removal.
- Optimizing slicer settings like Z-Distance and using tree or organic supports drastically reduce removal effort.
- Dissolvable supports (PVA, HIPS) offer near-magical ease but require dual-extrusion printers and proper handling.
- Post-processing with sanding, filling, and chemical smoothing can transform your print from “just removed” to “museum quality.”
- Professional services like Xometry provide expert support removal and finishing for complex or high-stakes projects.
Ready to ditch the frustration and master support removal? Let’s get started!
Table of Contents
- ⚡️ Quick Tips and Facts
- 🛠️ The Evolution of Support Structures in 3D Printing: A Brief History
- 🔍 Understanding Support Structures: Why They’re Needed and How They Work
- 1️⃣ Top 10 Techniques for Removing Support Structures in 3D Printing
- 🧰 Essential Tools and Materials for Support Removal: What Every Maker Needs
- ⚠️ Things That Make Support Removal Difficult: Troubleshooting Common Challenges
- 🧪 Post-Processing Tips: Smoothing, Sanding, and Finishing After Support Removal
- 🌿 Eco-Friendly and Safe Support Removal Methods: Protect Yourself and the Planet
- 🤖 How Advanced Software and Slicer Settings Can Simplify Support Removal
- 🔧 Comparing Support Materials: PLA, PVA, HIPS, and More – Which Removes Best?
- 💡 Pro Tips from 3D Printed™ Experts: Secrets to Effortless Support Removal
- 📦 How Professional Services Like Xometry Can Help with Support Removal and Finishing
- 🎯 Common Mistakes to Avoid When Removing Support Structures
- 🧩 Troubleshooting: What to Do When Supports Damage Your Print
- 📚 Conclusion: Mastering Support Removal for Flawless 3D Prints
- 🔗 Recommended Links for Further Learning
- ❓ FAQ: Your Burning Questions About Removing Support Structures Answered
- 📖 Reference Links and Resources
Here at 3D Printed™, we’ve seen it all: the triumphs of a perfectly finished model and the tragedies of a print shattered during the final, frustrating step of support removal. It’s the part of the 3D printing journey that can feel like defusing a bomb. One wrong move, and snap! Hours of printing, gone. But fear not, intrepid maker! We’re here to guide you through the sticky, sometimes sharp, and ultimately satisfying process of freeing your creation from its temporary scaffolding.
Let’s dive in and turn that post-print-purgatory into a victory lap!
⚡️ Quick Tips and Facts
In a hurry? Here’s the lowdown on support removal, distilled into bite-sized nuggets of wisdom:
- Cool It! Always let your print cool down completely before you even think about touching those supports. A warm print is a soft print, and you risk deforming your masterpiece.
- Patience is a Virtue: Rushing is the #1 cause of broken prints and sliced fingers. As the experts at EufyMake say, “It is important to be patient and take your time when cutting off supports from 3D prints.”
- Tools Matter: Using your fingernails is a recipe for disaster. A basic toolkit with flush cutters, needle-nose pliers, and a craft knife will change your life.
- Slicer Settings are Your Best Friend: The easiest support to remove is the one you optimized beforehand. Tweaking settings like Z-Distance and using tree or organic supports can make removal a breeze.
- Start from the Outside In: Begin by breaking away the most accessible supports first, then work your way into the nooks and crannies.
- Dissolvable for the Win? For incredibly complex models, using water-soluble supports like PVA with a dual-extrusion printer is the ultimate cheat code.
- Remove Before Curing (for Resin): If you’re working with SLA/DLP resin prints, it’s generally best to remove supports before the final UV cure, as the curing process makes them much harder.
🛠️ The Evolution of Support Structures in 3D Printing: A Brief History

Remember the early days of desktop 3D printing? We do! It was a wild west of constant tinkering. Supports, back then, were often a monolithic nightmare—dense, stubborn, and fused to the model with the tenacity of a barnacle. Removing them felt less like post-processing and more like amateur dentistry.
The core problem has always been gravity. 3D printing builds objects layer by layer, but you can’t print a layer on top of thin air. This led to the first, crude “scaffolding” generated by early slicer software. These were often simple, linear walls or dense grids that did the job but left behind hideous scars on the print surface.
The real game-changer came with advancements in 3D Design Software. Slicers like Cura and PrusaSlicer introduced more intelligent support options:
- Zig-Zags and Grids: More efficient patterns that used less material.
- Support Interfaces: The introduction of a dense, smooth “roof” on the support structure that provides a better surface for the model to rest on, while a calculated air gap (Z-Distance) prevents it from fusing completely.
- Tree Supports: A revolutionary approach, pioneered in Cura, that generates organic, tree-like branches reaching only the specific points that need support. They use significantly less material and have fewer contact points, making them a fan favorite.
- Organic Supports: PrusaSlicer’s answer to tree supports, offering a similar, highly efficient, and easy-to-remove structure.
These 3D Printing Innovations have transformed support removal from a dreaded chore into a much more manageable task.
🔍 Understanding Support Structures: Why They’re Needed and How They Work
Think of building with LEGOs. You can’t place a brick in mid-air; it needs another brick underneath it. 3D printing works on the same principle. When your design has a steep overhang (like an outstretched arm on a miniature) or a bridge (a horizontal span between two points), the printer needs to build a temporary foundation to support that molten filament as it cools.
Without supports, that outstretched arm would droop, and the bridge would collapse into a stringy mess.
The “Y.H.T.” Rule of Thumb
A simple way to visualize this is the “Y.H.T.” rule:
- Y: Letters or shapes like ‘Y’ have gentle overhangs (typically less than 45 degrees) that can usually be printed without support. The new layer is still mostly resting on the layer below.
- H: The crossbar of an ‘H’ is a bridge. It might be printable without support if it’s short, but longer bridges will sag or fail.
- T: The arms of a ‘T’ are a 90-degree overhang. This is physically impossible to print without support underneath.
The slicer software is the brain behind this operation. It analyzes your 3D Printable Objects and automatically generates these support structures based on parameters you set, like the overhang angle.
1️⃣ Top 10 Techniques for Removing Support Structures in 3D Printing
Alright, your print is finished, cooled, and sitting on your workbench. It’s time for the main event. Here are our top ten tried-and-true methods, from brute force to surgical precision.
-
The Brute Force Break: For sturdy prints with thick, easy-to-reach supports, sometimes the best tool is your hands. Gently but firmly wiggle and snap the supports away. ✅ Best for: Simple, robust models. ❌ Worst for: Delicate, detailed prints.
-
The Pliers Twist & Pull: Needle-nose pliers are your best friend for getting a solid grip. Grab the base of a support column, twist sharply, and pull. This gives you leverage that your fingers lack.
-
The Flush Cutter Snip: For clean, precise cuts right against the model’s surface, nothing beats a good pair of flush cutters. They allow you to snip away at the support structure piece by piece, especially at the tricky contact points.
-
The Scalpel Slice: An X-Acto knife or scalpel is essential for surgical removal. Use it to carefully slice the thin interface layer connecting the support to your print. Always cut away from yourself!
-
The Dental Pick & Pry: For those impossibly tight spaces, a set of dental picks can be a lifesaver. Use them to hook, pry, and scrape away stubborn bits of support that other tools can’t reach.
-
The Sandpaper Smooth-Over: After the bulk of the support is gone, you’ll be left with little nubs. Use sandpaper or small files to smooth these areas down. Start with a coarser grit (like 150) and move to a finer grit (400+) for a polished finish.
-
The Heat Gun Trick (Use with EXTREME Caution!): For certain materials like PLA, a quick pass with a heat gun can soften tiny, stringy remnants, making them easier to wipe away. Be very careful, as it’s incredibly easy to warp or melt your actual print.
-
The Dissolvable Bath (PVA/BVOH): This is the magic method. If you printed with a water-soluble support material like PVA, simply submerge your print in a container of warm water. The supports will dissolve away over a few hours, leaving a perfectly clean surface. Agitating the water or using an ultrasonic cleaner can speed up the process.
-
The Limonene Soak (HIPS): For models printed in ABS with HIPS as a support material, a bath in a chemical solvent called D-Limonene is required. This dissolves the HIPS, leaving the ABS untouched. This must be done in a well-ventilated area with proper safety gear (gloves, goggles).
-
The Vibration Deburring Method: For professionals and serious hobbyists, a vibrating deburring tool with various tips can quickly and precisely remove support marks and smooth surfaces with minimal effort.
🧰 Essential Tools and Materials for Support Removal: What Every Maker Needs
Having the right tools for the job is half the battle. Here’s the ultimate support removal toolkit we recommend at 3D Printed™.
| Tool | Primary Use | Pro-Tip |
|---|---|---|
| Flush Cutters | Cleanly snipping supports flush with the model surface. | Look for a pair with a spring-loaded handle to reduce hand fatigue. |
| Needle-Nose Pliers | Gripping, twisting, and pulling stubborn support sections. | Get a set with both straight and bent-nose pliers for maximum versatility. |
| X-Acto/Craft Knife | Precise slicing of support interfaces and trimming small artifacts. | A fresh, sharp blade is safer and more effective than a dull one. |
| Deburring Tool | Scraping away sharp edges and support remnants. | The swivel-head type is fantastic for following curved edges. |
| Files & Sandpaper | Smoothing the contact points after removal. | A set of needle files is crucial for getting into small details. |
| Safety Glasses | Protecting your eyes from flying bits of plastic. | Non-negotiable. Seriously, wear them. |
| Gloves | Protecting your hands from cuts and solvents. | Nitrile gloves are a must when working with chemicals like Limonene. |
Our Top Tool Picks
Here are some specific brands we’ve come to trust in our workshop:
- Flush Cutters: The Hakko CHP-170 cutters are legendary in the electronics and 3D printing communities for their sharpness and durability.
- Craft Knife: You can’t go wrong with the classic X-Acto #1 Precision Knife.
- Pliers: Knipex makes exceptional pliers, but a quality set from any reputable hardware brand will do the trick.
👉 Shop our recommended tools on:
- Hakko CHP-170: Amazon | eBay
- X-Acto Knife: Amazon | Walmart
- Needle-Nose Pliers Set: Amazon | Walmart
⚠️ Things That Make Support Removal Difficult: Troubleshooting Common Challenges
Ever had a print where the supports seemed to be welded on? You’re not alone. Several factors can turn a simple task into a nightmare. Let’s break down the culprits.
Over-Adhesion and Fused Layers
This is the most common problem. The support material bonds too strongly to the model.
- The Cause: Your Z-Distance setting in the slicer is too small. This is the air gap between the top of the support and the bottom of your model. A tiny gap leads to better surface quality on the supported layer but makes removal incredibly difficult.
- The Fix: Increase the Top Contact Z Distance. As the advice in the featured video suggests, a good starting point is to make it about double your layer height (e.g., a 0.4mm distance for a 0.2mm layer height).
Dense and Impenetrable Supports
Sometimes the support structure itself is a fortress.
- The Cause: Your Support Density is too high. A high density (e.g., 30-40%) creates a very strong structure but uses more filament and is harder to remove.
- The Fix: Lower the support density. For many models, a density of 10-15% is perfectly adequate. Also, increasing the Pattern Spacing can save filament and time while making the structure weaker and easier to crush for removal.
Inaccessible Supports
The supports are buried deep inside your model, and you can’t reach them.
- The Cause: Complex internal geometry.
- The Fix: This is where tree/organic supports shine, as they often snake around the outside. If that’s not an option, consider using dissolvable supports. Another advanced trick is to use your design software to split the model into multiple parts that can be printed without internal supports and then assembled later.
🧪 Post-Processing Tips: Smoothing, Sanding, and Finishing After Support Removal
Removing the supports is just step one. Step two is making it look like they were never there.
Sanding Like a Pro
Sanding is the key to a glass-smooth finish.
- Start Coarse: Begin with a lower grit sandpaper, like 150 or 220, to knock down the major bumps and remnants from the support contact points.
- Go Finer: Move up to a 400-grit paper to smooth out the scratches from the first step.
- Wet Sand for Perfection: For the best possible finish, switch to wet/dry sandpaper. A few drops of water will help clear away the plastic dust and prevent friction heat. Work your way up through 600, 800, and even 1200 grit for a surface that’s ready for paint.
Filling the Gaps
Sometimes, removing a support can take a small chunk of your model with it. Don’t despair!
- Wood Filler or Bondo: For larger gouges, automotive body filler (like Bondo) or even simple wood filler works wonders. Apply it, let it dry, and then sand it flush with the rest of the model.
- Primer Filler: For smaller imperfections and layer lines, a few coats of a thick automotive “filler primer” can work miracles. It builds up in the tiny crevices, and once sanded, leaves a beautifully uniform surface.
Chemical Smoothing
For certain plastics, you can use chemical vapors to achieve a glossy, injection-molded look.
- ABS and Acetone: Exposing an ABS print to acetone vapor will melt the outer surface, smoothing away layer lines and support marks. This is a DANGEROUS process that requires a sealed, well-ventilated enclosure and extreme caution.
- PLA and… Not Much: Unfortunately, PLA doesn’t have a readily available, safe solvent for smoothing. While some chemicals exist, they are often highly toxic and not recommended for home use. Stick to sanding and priming for PLA.
🌿 Eco-Friendly and Safe Support Removal Methods: Protect Yourself and the Planet
While we love making cool stuff, it’s important to do it responsibly.
Personal Safety First!
- Eye Protection: We’ve said it before, and we’ll say it again: wear safety glasses. Little shards of plastic flying off at high speed can and will cause eye damage.
- Ventilation: When sanding, you’re creating fine plastic dust that isn’t great to breathe. Wear a dust mask. If you’re using solvents like Limonene or Acetone, you absolutely need to be in a well-ventilated space, preferably outdoors or with a fume extractor.
- Hand Protection: A slip with an X-Acto knife can lead to a nasty cut. Consider wearing a protective glove on the hand holding the print.
Responsible Disposal
- PLA/ABS Scraps: These are generally not recyclable in your household bin. Check with local maker spaces or specialized recycling programs. Unfortunately, most of it ends up as waste. This is why minimizing support material through smart slicer settings is so important!
- PVA-Laden Water: PVA (Polyvinyl Alcohol) is biodegradable. However, the water will also contain microplastics from your model. It’s best to let the water evaporate and dispose of the remaining solid sludge in the trash rather than pouring it down the drain.
- Limonene: D-Limonene is a citrus-based solvent, but it should not be poured down the drain. It can be reused multiple times. Once it’s saturated, check your local hazardous waste disposal guidelines.
🤖 How Advanced Software and Slicer Settings Can Simplify Support Removal
The best way to deal with supports is to make them smarter from the start. Your slicer is your command center. Let’s look at the key settings in popular slicers like UltiMaker Cura and PrusaSlicer.
As the Prusa3D forum highlights, “For support to be removable, there has to be a gap between supports and supported layers.” This gap is the secret sauce.
The Holy Trinity of Support Settings
| Setting | What It Does | Recommended Value | Why It Works |
|---|---|---|---|
| Top Contact Z Distance | The vertical air gap between the support and the model. | Layer Height x 2 (e.g., 0.4mm for 0.2mm layers) |
Creates a physical separation, preventing the layers from fusing together. |
| Support Interface | A dense “skin” on top of the supports. | Enabled, with 3-4 layers. |
Provides a smoother surface for your model to rest on, reducing scarring. |
| Interface Pattern Spacing | The spacing between lines in the interface layer. | 0.2mm - 0.3mm |
A wider spacing means less material is touching your print, making it easier to peel away. |
Game-Changing Support Types
Forget the old, blocky “linear” or “grid” supports. The future is organic.
- Cura’s Tree Supports: These are a game-changer, especially for complex models like miniatures from Thingiverse. They generate branches that grow from the build plate and touch the model only where necessary.
- ✅ Pros: Uses far less material, prints faster, much easier to remove, fewer contact points.
- ❌ Cons: Can take longer to “slice” (generate the G-code).
- PrusaSlicer’s Organic Supports: Prusa’s take on the tree support concept. They are incredibly efficient and break away cleanly. You can even use the “paint-on supports” tool to manually specify exactly where you want them to touch your model.
One of the best pieces of advice is to avoid supports altogether if you can. The featured video wisely points out that simply reorienting your model on the build plate can often eliminate the need for supports entirely, saving you time, filament, and hassle.
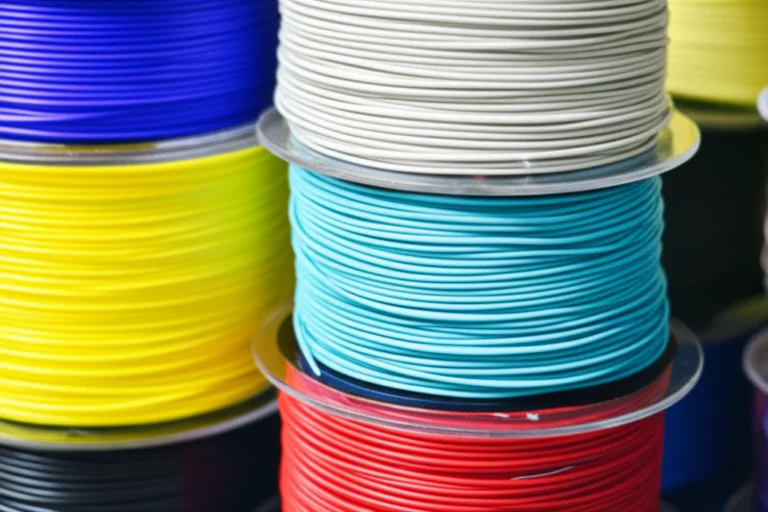
🔧 Comparing Support Materials: PLA, PVA, HIPS, and More – Which Removes Best?
The material you use for your supports can make all the difference. This choice depends heavily on your printer’s capabilities, specifically whether you have a dual-extrusion setup.
Single Extruder: Breakaway Supports
With a standard single-extruder printer, your supports are printed from the same material as your model.
| Material | Ease of Removal | Print Quality | Notes |
|---|---|---|---|
| PLA | Moderate | Good | The most common scenario. Can be stubborn but is manageable with the right settings. |
| PETG | Difficult | Excellent | PETG loves to stick to itself, making supports notoriously difficult to remove cleanly. Increase your Z-Distance! |
| ABS | Moderate | Good | Similar to PLA, but can be more brittle, which sometimes helps it snap off cleanly. |
Dual Extruder: The Magic of Dissolvables
This is where 3D printing feels like the future. A second extruder allows you to print your model in one material and your supports in another that’s designed to disappear.
| Support Material | Paired With | How to Remove | Pros | Cons |
|---|---|---|---|---|
| PVA (Polyvinyl Alcohol) | PLA, PETG, Nylon | Dissolves in warm water. | ✅ Leaves a perfect surface, allows for impossible geometries. | ❌ Very hygroscopic (absorbs moisture from the air), requires careful storage, can be pricey. |
| BVOH (Butenediol vinyl alcohol copolymer) | PLA, PETG, ABS | Dissolves in warm water. | ✅ Dissolves faster than PVA, less prone to clogging. | ❌ Even more expensive than PVA. |
| HIPS (High Impact Polystyrene) | ABS | Dissolves in D-Limonene. | ✅ Excellent support for ABS, leaves a clean finish. | ❌ Requires a chemical solvent, must be done with ventilation and safety gear. |
For anyone serious about printing complex 3D Printable Objects or looking at professional results, investing in a dual-extrusion printer from our 3D Printer Reviews is a worthwhile consideration.
💡 Pro Tips from 3D Printed™ Experts: Secrets to Effortless Support Removal
After thousands of hours of printing and post-processing, we’ve picked up a few tricks that aren’t in the manual.
- The “Cold Shock” Method: For stubborn PLA or PETG supports, try putting the finished print in the freezer for 15-20 minutes. The cold can make the thin support connections more brittle, causing them to snap off more cleanly.
- Use the “Support Blocker” Tool: In your slicer, you can add a “support blocker” cube. This tells the slicer not to generate supports in a specific area. It’s perfect for overriding the slicer when you know a small bridge or overhang will print just fine on its own.
- The Pliers “Crush”: A user on the Prusa3D forum mentioned this, and it’s a great technique. Before pulling, use your needle-nose pliers to gently crush the base of the support structure. This breaks up the internal lattice and weakens its grip, making it easier to twist and remove.
- Print a Temperature Tower First: Sometimes, printing your filament too hot can cause supports to fuse more strongly to your model. Dialing in the perfect temperature for your specific filament roll can have a surprising impact on support removal.
- Listen for the “Crack”: When removing supports, listen carefully. A sharp, clean “crack” is good—it means the support is snapping at the intended interface. A dull, tearing sound means you might be delaminating a layer of your actual model. If you hear that, stop and try a different angle or tool.
📦 How Professional Services Like Xometry Can Help with Support Removal and Finishing
Let’s be real: sometimes you just don’t have the time, the tools, or the patience for post-processing. Or maybe you need a level of finish that’s difficult to achieve at home. That’s where professional 3D printing services come in.
Services like Xometry aren’t just for printing parts; they offer a full suite of post-processing and finishing options. As their own article states, “Support removal post processing is very dependent on the part material, geometry and build orientation.” These experts have seen it all and have industrial-grade tools to handle it.
When to Consider a Professional Service:
- You Need a Perfect Finish: They have access to bead blasting, vapor smoothing, and painting services that produce flawless results.
- The Geometry is Impossible: For parts with intricate internal channels that would trap support material, their industrial SLS (Selective Laser Sintering) or MJF (Multi Jet Fusion) printers can often produce the part without any supports at all.
- You Need Material Strength: They can print in materials like carbon fiber infused nylon or ULTEM, which are difficult to work with on desktop machines and require specialized support strategies.
- You’re on a Deadline: Offloading the printing and finishing saves you valuable time.
Their Senior Solutions Engineer, Matt Schmidt, emphasizes the importance of “Upfront DFAM (Design for Additive Manufacturing)” to plan where supports will go and how they’ll be removed. This is the kind of expert analysis you get when you use a professional service.
🎯 Common Mistakes to Avoid When Removing Support Structures
We’ve all made these mistakes. Learn from our pain!
- ❌ Ripping Supports Off a Hot Print: This is the cardinal sin. You will stretch, warp, and ruin the surface of your model. Let it cool!
- ❌ Using the Wrong Tool: Trying to pry with a screwdriver will gouge your print. Using dull cutters will crush instead of cut. Use the right tool for the job.
- ❌ Cutting Towards Yourself: An X-Acto knife can slip. A moment of carelessness can lead to a trip to the emergency room. Always brace the part and cut away from your body.
- ❌ Forgetting to Check Slicer Settings: Hitting “print” with the default support settings is a gamble. The defaults are often overly cautious, leading to excessively strong supports. A 5-minute check can save you 30 minutes of frustration.
- ❌ Ignoring Part Orientation: The laziest way to print is not always the best. Rotating your model can drastically reduce or even eliminate the need for supports. Always ask yourself, “Is there a better way to lay this on the build plate?”
🧩 Troubleshooting: What to Do When Supports Damage Your Print
CRACK! Oh no. A piece of the model came off with the support. Don’t throw it away! All is not lost.
For Small Divots and Scars
If the support just left a nasty mark or a small hole, you can usually fix it with filler and sanding, as we covered in the Post-Processing section above. A little bit of Bondo or even a 3D printing pen can be used to fill the gap before you sand it smooth.
For Clean Breaks
If a delicate part snapped off cleanly (like a finger on a miniature), you have a great opportunity for repair.
- Find the Part: First, locate the piece that broke off!
- Clean the Surfaces: Make sure both broken surfaces are clean and free of any stringy bits or dust.
- Use the Right Glue:
- For PLA, a good quality super glue (cyanoacrylate) with a precision applicator is your best bet.
- For ABS, you can use super glue, but the absolute best method is to use acetone. A tiny dab of acetone on both surfaces will chemically weld the pieces back together, creating a bond that is as strong as the original print. Apply it with a small brush and hold the pieces together firmly for about 30 seconds.
When It’s a Lost Cause
Sometimes, the damage is too severe, or the broken piece is lost to the carpet monster. In these cases, it’s often faster and less frustrating to learn from the experience, adjust your support settings, and print it again. Every failed print is a lesson in what to do better next time! This is a core part of learning in 3D Printing in Education.
📚 Conclusion: Mastering Support Removal for Flawless 3D Prints

Removing support structures is often the unsung hero of 3D printing success. It’s the final, crucial step that transforms a rough, scaffolded object into a polished, display-worthy masterpiece. As we’ve explored, mastering this process requires a blend of patience, the right tools, smart slicer settings, and sometimes a little bit of chemistry.
From the humble beginnings of dense, hard-to-remove grids to today’s sophisticated tree and organic supports, the evolution of support technology has made our lives easier — but only if we know how to wield the tools and settings properly. Whether you’re wielding needle-nose pliers, soaking your print in warm water to dissolve PVA, or carefully sanding away the last remnants, every step counts.
Remember the golden rule: prepare before you print. Optimize your model’s orientation, choose the right support type and density, and pick the best support material for your printer. When trouble strikes, don’t despair — use the expert tips and troubleshooting strategies we shared to get your print back on track.
And if you’re pressed for time or want professional-level finishes, services like Xometry can take the burden off your shoulders, offering expert support removal and finishing.
In short: support removal doesn’t have to be a nightmare. With the right knowledge and tools, it can be a satisfying part of your 3D printing journey. So go forth, print boldly, and free your models with confidence!
🔗 Recommended Links for Further Learning & Shopping
Ready to upgrade your toolkit or dive deeper into the art of support removal? Here are some top picks and resources:
Essential Tools for Support Removal
- Hakko CHP-170 Flush Cutters:
Amazon | eBay - X-Acto #1 Precision Knife:
Amazon | Walmart - Needle-Nose Pliers Set:
Amazon | Walmart
Support Materials & Filaments
- PVA Water-Soluble Filament:
MatterHackers PVA Filament - HIPS Filament for ABS Supports:
Amazon HIPS Filament
Books & Guides
- 3D Printing Failures: How to Diagnose and Repair All 3D Printing Issues by Sean Aranda — Amazon Link
- Mastering 3D Printing by Joan Horvath and Rich Cameron — Amazon Link
❓ FAQ: Your Burning Questions About Removing Support Structures Answered

What are the best tools for removing support structures in 3D printing?
The best tools combine precision, grip, and safety:
- Flush cutters for clean, close cuts.
- Needle-nose pliers for twisting and pulling supports, especially in tight spots.
- X-Acto knives or scalpels for delicate trimming and slicing.
- Files and sandpaper for smoothing after removal.
Using the right tool reduces the risk of damaging your print and speeds up the process. Our favorite brands include Hakko for cutters and X-Acto for knives.
Read more about “Dyeing 3D Prints: 10 Expert Techniques to Transform Your Models 🎨 (2025)”
How can I prevent damage when removing support material from 3D prints?
Patience and preparation are key:
- Let your print cool completely before starting. Warm plastic is soft and prone to deformation.
- Adjust your slicer’s Z-Distance to create a small air gap between support and model, making supports easier to snap off.
- Use gentle twisting and cutting rather than brute force.
- Start with larger, accessible supports and work your way into tight areas.
- Always cut away from yourself and use proper safety gear.
What techniques make support removal easier for complex 3D prints?
For complex geometries:
- Use tree or organic supports that minimize contact points.
- Print with dissolvable supports like PVA or HIPS if your printer supports dual extrusion.
- Consider splitting your model into parts to reduce internal supports.
- Employ specialized tools like dental picks or vibrating deburring tools for hard-to-reach areas.
- Experiment with freezing your print briefly to make supports more brittle and easier to snap off.
Read more about “The Ultimate 15-Step 3D Print Post-Processing Guide (2025) ✨”
Are there specific support materials that are easier to remove after printing?
Yes! Support materials designed for easy removal include:
- PVA (Polyvinyl Alcohol): Water-soluble, ideal for PLA and PETG.
- BVOH: Similar to PVA but dissolves faster and is less hygroscopic.
- HIPS: Dissolves in Limonene, great for ABS prints.
Single-material supports (same as the print filament) are generally harder to remove and may require more manual post-processing.
Read more about “Ceramic 3D Printing Materials: 6 Game-Changing Options to Know in 2025 🔥”
How do different 3D printing technologies affect support removal methods?
- FDM (Fused Deposition Modeling): Supports are usually printed from the same or a dissolvable filament. Removal involves mechanical breaking or dissolving.
- SLA/DLP Resin Printing: Supports are cured resin, often requiring cutting tools and sometimes solvents. Supports are generally more delicate but harder to remove without damage.
- SLS (Selective Laser Sintering): Typically no supports are needed because the unsintered powder acts as a natural support. Post-processing involves powder removal rather than support removal.
Read more about “12 Surprising Drawbacks of 3D Printing You Need to Know (2025) 🖨️”
What safety precautions should I take when removing supports from 3D prints?
- Always wear safety glasses to protect against flying plastic shards.
- Use gloves when handling sharp tools or chemicals like Limonene or Acetone.
- Work in a well-ventilated area, especially when sanding or using solvents.
- Cut away from your body to avoid injury.
- Keep your workspace clean and organized to prevent accidents.
Can post-processing improve the surface finish after support removal in 3D printing?
Absolutely! Post-processing is essential for a professional look:
- Sanding smooths out rough spots and layer lines.
- Filling with Bondo or primer fixes gouges or imperfections.
- Chemical smoothing (acetone vapor for ABS) can create a glossy, smooth finish.
- Painting can hide minor flaws and add aesthetic appeal.
Each step adds time but dramatically improves the final appearance.
📖 Reference Links and Resources
- Xometry’s guide on How to Remove Supports from 3D Prints
- EufyMake’s detailed 3D Print Support Removal Guide
- Prusa3D Forum discussion on Removing Support Structures
- Ultimaker Cura Official Site: Support Settings Documentation
- PrusaSlicer Official Site: Support Material Settings
- MatterHackers on PVA Filament
- Safety guidelines for chemical solvents: OSHA Chemical Safety
We hope this comprehensive guide has empowered you to tackle support removal like a pro. Got a tricky support story or a favorite tool? Share it with us on 3D Printed™ — we love hearing from fellow makers! 🎉