Support our educational content for free when you purchase through links on our site. Learn more
🤔 What Do You Mean by 3D Printing? The Ultimate 2026 Guide

3D printing is simply the process of building solid objects layer-by-layer from a digital file, turning pixels into physical reality without the need for molds or cutting tools. When you ask, “What do you mean by 3D printing?”, you are really asking how we can create complex, functional parts from thin air using nothing but heat, light, and plastic. It is not magic, but it feels like it when you watch a nozzle trace a shape that didn’t exist five minutes ago.
Imagine trying to build a hollow sphere with a solid block of wood; you’d have to carve away 90% of the material, wasting time and resources. 3D printing flips this logic on its head by adding material only where it is needed. This additive approach allows us to create internal channels, lattice structures, and moving assemblies that traditional manufacturing simply cannot achieve.
The technology has exploded from industrial protyping labs to living rooms, with over 2 million FDM printers sold globally in the last decade alone. Yet, many still confuse the term with simple “plastic melting.” It is a vast ecosystem ranging from resin-curing miniatures to metal-sintering jet engine parts.
Key Takeaways
- Additive vs. Subtractive: Unlike traditional manufacturing that cuts away material, 3D printing builds objects layer-by-layer, drastically reducing waste and enabling impossible geometries.
- The Slicer is Critical: The hardware is useless without slicing software, which translates 3D models into machine-readable G-code instructions.
- Tolerance Matters: Successful functional prints require precise design tolerances (often 0.2mm offsets) to ensure parts like nuts and bolts fit together perfectly.
- Material Diversity: It’s not just about PLA plastic; the technology now supports resins, metals, ceramics, and even biological tissues.
- Accessibility: You can start your journey today with affordable entry-level printers under $30, making professional-grade protyping accessible to everyone.
Table of Contents
- ⚡️ Quick Tips and Facts
- 🕰️ From Stereolithography to Your Desk: A Brief History of 3D Printing
- 🤔 What Do You Mean by 3D Printing? The Core Definition Explained
- 🛠️ How Does 3D Printing Actually Work? The Additive Manufacturing Process
- 🧊 The Big Six: Major 3D Printing Technologies You Need to Know
- 🖥️ Demystifying the Digital Workflow: What is 3D Printing Slicing and How Does It Work?
- 🤖 Meet the Brain: What is a 3D Printing Slicer and What Does It Do?
- 🎛️ Mastering the Controls: Key Slicing Parameters for Perfect Prints
- 🏗️ Why Slicing Matters: The Purpose of Slicing in 3D Printing
- 🚀 Pro Slicing Hacks: Essential 3D Printing Slicing Tips for Better Results
- 📏 The Layer Height Dilemma: Balancing Speed and Detail
- 🕸️ Infill Strategies: When to Go Solid and When to Go Hollow
- 🧱 Wall Thickness (Shells): The Backbone of Structural Integrity
- 🆘 Support Structures: Saving Your Overhangs Without the Headache
- 🌡️ Temperature & Speed: Finding the Sweet Spot for Your Material
- 🛡️ Adhesion Allies: Brim, Raft, and Skirt Explained
- 🏭 Choosing Your Weapon: Overcome Your Challenge with the Right 3D Printer
- 🧩 Solving the Puzzle: Want to Solve Your Project Challenge?
- 💰 The Real Cost of 3D Printing: Materials, Machines, and Hidden Fees
- 🎁 Try Before You Buy: Get a Free Sample Box
- 🏆 Conclusion
- 🔗 Recommended Links
- ❓ FAQ
- 📚 Reference Links
⚡️ Quick Tips and Facts
Before we dive into the nitty-gritty of what “3D printing” actually means, let’s hit the ground running with some hard truths and golden nugets from our workshop floor. If you’re new here, welcome to the club where we eat, sleep, and breathe plastic fumes (safely, of course).
- It’s Not Just Plastic: While FDM (Fused Deposition Modeling) is the most common hobbyist method, 3D printing encompasses everything from printing with metal powders in aerospace to bioprinting human tissue.
- The “Slicer” is the Brain: You can have the most expensive printer in the world, but without a good slicer (the software that translates your 3D model into G-code), it’s just a very expensive paperweight. As the experts at Sinterit put it, “Without slicing, even the most sophisticated 3D printer is just a motionless piece of hardware.”
- Tolerance is King: If you print a nut and a bolt and they don’t fit, it’s not magic; it’s tolerance. We’ll get deep into this later, but generally, you need to offset your designs by 0.2mm to 0.3mm for a perfect fit.
- First Layer is Everything: 90% of print failures happen in the first 10 minutes. If the first layer isn’t stuck, the rest won’t matter.
- Speed vs. Quality: There is no “fast and perfect” setting. As one Prusa community member wisely noted, “Physics gets in the way at some point and if you’re interested in maximum quality…gotta slow it down.”
🕰️ From Stereolithography to Your Desk: A Brief History of 3D Printing

You might think 3D printing is a 21st-century phenomenon, but the roots go back further than you’d expect. The term “3D printing” is often used interchangeably with additive manufacturing, but the history is a fascinating journey from industrial protyping to your living room.
It all started in the 1980s. In 1984, Chuck Hull invented Stereolithography (SLA), the first form of 3D printing. He didn’t just invent the machine; he invented the file format we still use today: the STL file. Hull’s vision was to create physical objects from digital data, layer by layer.
Fast forward to the 190s, and Fused Deposition Modeling (FDM) was patented by Scott Crump, the co-founder of Stratasys. This is the technology you see in most home printers today, where a plastic filament is melted and extruded.
For decades, these machines were locked behind patents and cost hundreds of thousands of dollars, reserved for automotive and aerospace giants. But in 209, the patent on FDM expired. Suddenly, the floodgates opened. Companies like MakerBot and RepRap began bringing these machines to the masses.
Did you know? The first 3D printed object was a simple eye wash cup created by Chuck Hull in 1983. Today, we print entire houses, jet engine parts, and even food!
If you want to see the evolution of what we can create, check out our guide on 3D Printable Objects.
🤔 What Do You Mean by 3D Printing? The Core Definition Explained
So, you’ve heard the term, but what do you mean by 3D printing?
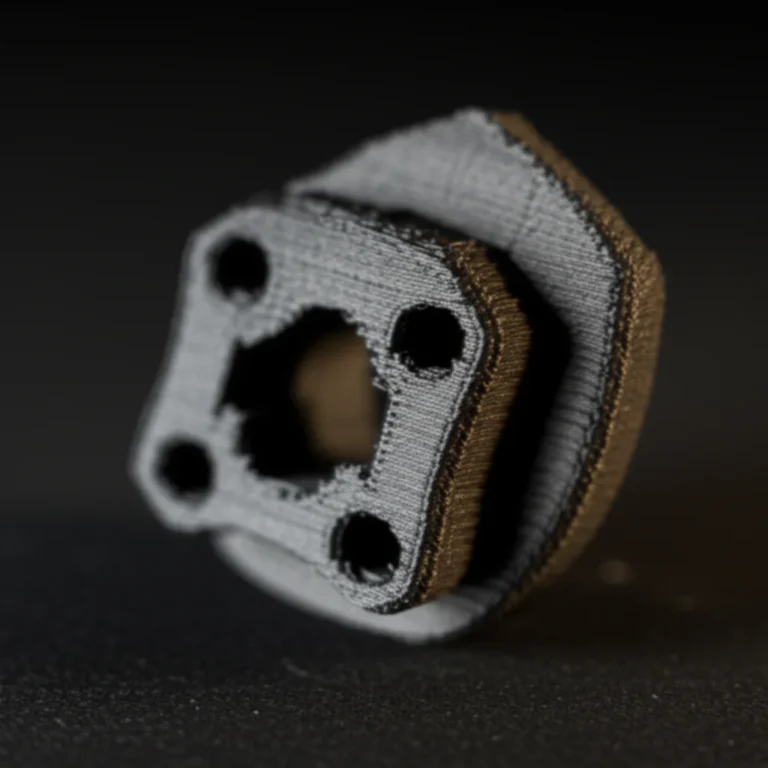
At its simplest, 3D printing is a process of creating three-dimensional solid objects from a digital file. The creation of a 3D printed object is achieved using additive processes. In an additive process, an object is created by laying down successive layers of material until the entire object is created. Each of these layers can be seen as a thinly sliced horizontal cross-section of the eventual object.
Contrast this with subtractive manufacturing (like CNC machining), where you start with a block of material and carve away everything you don’t need. 3D printing is the opposite: you start with nothing and add material only where needed.
Key Insight: As noted in our analysis of industry trends, “3D printing is part of a process known as additive manufacturing, where an object is created by adding material layer by layer.” This fundamental shift allows for geometries that are impossible to create with traditional methods, like internal channels or complex lattice structures.
But how does a flat screen turn into a physical object? That’s where the magic of the workflow comes in.
🛠️ How Does 3D Printing Actually Work? The Additive Manufacturing Process
The journey from a digital idea to a physical object involves a specific workflow that every enthusiast must master. It’s a three-step dance: Design, Slice, and Print.
1. The Digital Design (CAD)
It all starts with a 3D model. You can create one using CAD (Computer-Aided Design) software like Fusion 360, Blender, or Shapr3D, or download one from repositories like Thingiverse or Cults3D.
- Pro Tip: If you are designing functional parts, precision matters. As discussed in the Shapr3D community regarding thread tolerances, simply modeling a bolt and a nut to the exact same dimensions often results in parts that won’t fit. You need to account for the “offset face” strategy to ensure clearance.
2. The Slicing Process
Once you have your 3D model (usually an STL or 3MF file), you can’t just send it to the printer. The printer doesn’t understand “a chair”; it understands “move X to 10, extrude 0.2mm, move Y to 20.”
This is where slicing happens. The software slices the 3D model into hundreds or thousands of horizontal layers and generates the G-code (the instruction set) for the printer.
3. The Physical Print
The printer reads the G-code.
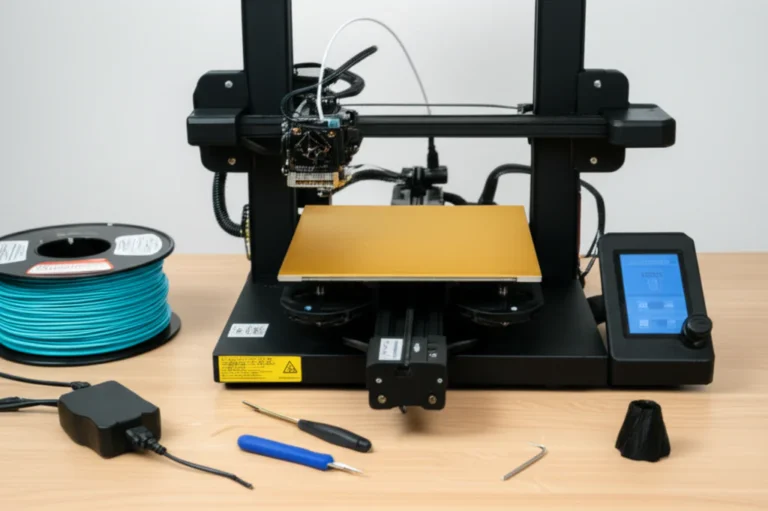
- For FDM: The nozzle heats up, melts the filament, and moves in the X and Y axes to draw the first layer. The bed moves down (or the nozzle moves up) by the layer height, and the next layer is deposited on top.
- For SLA (Resin): A UV laser cures liquid resin layer by layer, pulling the object out of the vat.
This layer-by-layer approach is what gives 3D printing its unique ability to create complex internal structures.
🧊 The Big Six: Major 3D Printing Technologies You Need to Know
When people ask “What is 3D printing?”, they are often thinking of the plastic extruder on their desk. But the world of additive manufacturing is vast. Here are the six major technologies you should know:
| Technology | Full Name | How It Works | Best For | Pros | Cons |
|---|---|---|---|---|---|
| FDM | Fused Deposition Modeling | Melts and extrudes thermoplastic filament. | Protyping, functional parts, hobbyists. | Low cost, wide material range, easy to use. | Visible layer lines, lower precision. |
| SLA | Stereolithography | Uses UV laser to cure liquid resin. | High-detail miniatures, jewelry, dental. | Ultra-smooth surface, high detail. | Britle materials, messy post-processing. |
| SLS | Selective Laser Sintering | Sinters powdered material with a laser. | Functional end-use parts, complex geometries. | No supports needed, strong parts. | Expensive machines, powder handling. |
| DLP | Digital Light Processing | Uses a digital projector to cure resin. | Fast resin printing, dental applications. | Faster than SLA, high detail. | Limited build volume, resin waste. |
| MJF | Multi Jet Fusion | Jets binding agents onto powder bed. | Mass production of functional parts. | High speed, excellent mechanical properties. | Very expensive, limited to specific materials. |
| EBM | Electron Beam Melting | Uses electron beam to melt metal powder. | Aerospace, medical implants (metal). | High strength, works with refractory metals. | Extremely expensive, requires vacuum. |
For those interested in how these technologies are transforming the built environment, explore our coverage on 3D Printing in Architecture.
🖥️ Demystifying the Digital Workflow: What is 3D Printing Slicing and How Does It Work?
If you’ve ever wondered why your 3D model looks perfect on the screen but turns into a spaghetti monster on the bed, the answer lies in slicing.
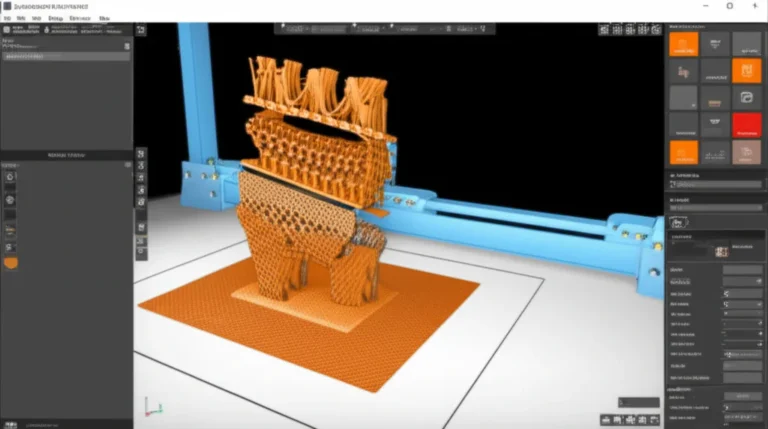
Slicing is the critical bridge that makes 3D printing possible. It transforms static digital geometry into machine-readable commands. Without it, even the most sophisticated 3D printer is just a motionless piece of hardware.
How it works:
- Import: You load your STL file into the slicer.
- Orientation: You rotate the model to minimize supports and maximize strength.
- Slicing: The software cuts the model into horizontal layers (e.g., 0.2mm thick).
- Path Generation: It calculates the path the nozzle or laser must take to fill each layer.
- G-Code Output: It saves the instructions as a
.gcodefile.
As the team at Sinterit explains, “Slicing decisions directly affect your print’s outcome. A well-sliced model can mean the difference between a failed print and a perfect result.”
🤖 Meet the Brain: What is a 3D Printing Slicer and What Does It Do?
A 3D printing slicer is the software that acts as the brain of your operation. It interprets your 3D model and tells the printer exactly how to move.
Top Slicers on the Market
- Ultimaker Cura: The open-source giant. It’s free, supports almost every printer, and has a massive community.
- PrusaSlicer: Originally for Prusa printers but now supports many others. Known for its excellent “organic supports” and user-friendly interface.
- Bambu Studio: The go-to for Bambu Lab users, optimized for high-speed printing.
- Simplify3D: A paid software ($150+) that offers granular control over every aspect of the print. Many users swear by its ability to fix complex issues, though the UI feels a bit dated.
- Chitubox: The standard for resin (SLA/DLP) printing.
Why do you need a slicer?
Because the printer doesn’t know what a “chair” is. It only knows coordinates. The slicer translates the “chair” into thousands of tiny movements.
🎛️ Mastering the Controls: Key Slicing Parameters for Perfect Prints
This is where the rubber meets the road. If you want to move from “I made a blob” to “I made a masterpiece,” you need to understand these parameters.
Layer Height
This determines the vertical resolution.
- 0.1mm – 0.15mm: High detail, slow print. Great for miniatures.
- 0.2mm: The sweet spot for most functional parts. Good balance of speed and quality.
- 0.28mm – 0.3mm: Fast, rough prints. Good for large prototypes.
Infill
The internal structure of your print.
- 15-25%: Enough for decorative items.
- 40-60%: For functional parts that need strength.
- 10%: Solid. Only use if you need maximum weight or water-tightness (and even then, it’s often better to use a different wall strategy).
Wall Thickness (Shells)
The outer walls.
- Standard: 3 perimeters (shells) is usually sufficient for most prints.
- High Strength: 4-6 perimeters.
Supports
Required for overhangs (usually anything beyond 45 degrees).
- Tree Supports: Grow like a tree, easier to remove, less contact with the model.
- Linear Supports: Traditional grid pattern, stronger but harder to remove.
🏗️ Why Slicing Matters: The Purpose of Slicing in 3D Printing
Why can’t we just print the STL file directly? Because the STL file is just a mesh of triangles. It has no information about how to build it.
The purpose of slicing is to:
- Translate Geometry: Convert 3D shapes into 2D layers.
- Optimize Path: Determine the most efficient route for the nozzle to save time and reduce wear.
- Manage Physics: Account for gravity (supports), cooling (fan speed), and material flow (retraction).
Without slicing, the printer would have no idea where to start, how fast to move, or when to extrude.
🚀 Pro Slicing Hacks: Essential 3D Printing Slicing Tips for Better Results
We’ve all been there: you hit print, and two hours later, you’re staring at a mess. Here are some hacks to avoid that.
- The “One Variable” Rule: Never change two settings at once. If you change speed and temperature, you won’t know which one fixed (or broke) your print.
- Visual Inspection: Always use the “Preview” mode in your slicer. Look for weird gaps, thin walls, or supports that look like they’ll snap your model in half.
- Retraction Tuning: If you have string (those spiderwebs), increase your retraction distance. For Prusa printers, moving from 0.8mm to 1.4mm can make a huge difference.
- Infill Overlap: If your top layers look like they have gaps, increase the “Infill Overlap” setting in your slicer.
📏 The Layer Height Dilemma: Balancing Speed and Detail
Choosing the right layer height is a constant trade-off.
- High Detail (0.1mm): Takes 3x longer than 0.2mm. Great for figurines, but overkill for a bracket.
- Standard (0.2mm): The industry standard.
- Fast (0.28mm+): Great for large, non-critical prototypes.
Pro Tip: If you are printing a functional part that needs to be strong, consider printing it with a lower layer height only for the top and bottom surfaces, while keeping the infill fast.
🕸️ Infill Strategies: When to Go Solid and When to Go Hollow
Infill isn’t just about filling space; it’s about engineering.
- Gyroid Infill: An isotropic pattern that provides strength in all directions. Great for functional parts.
- Cubic Infill: Good balance of strength and speed.
- Grid Infill: Fast, but weaker in the Z-axis.
Warning: Don’t use 10% infill for anything structural. As one user on the Prusa forum noted, “Don’t ever use 10% infill, it just causes problem.” Stick to at least 20% for anything that will bear weight.
🧱 Wall Thickness (Shells): The Backbone of Structural Integrity
The walls (or perimeters) are often stronger than the infill.
- Rule of Thumb: Your wall thickness should be a multiple of your nozzle diameter (usually 0.4mm).
- Why? If you set your wall to 1.2mm with a 0.4mm nozzle, the printer can lay down exactly 3 perfect lines. If you set it to 1.3mm, the printer has to squeeze an extra 0.1mm, causing blobs and inconsistencies.
🆘 Support Structures: Saving Your Overhangs Without the Headache
Supports are necessary evil. They hold up your overhangs but leave ugly marks.
- Z-Distance: The gap between the support and the model. Too close, and you can’t remove them. Too far, and they don’t support. 0.2mm is usually a good start.
- Interface Layers: Add a few layers of dense support right under the model to make removal easier and the surface smoother.
🌡️ Temperature & Speed: Finding the Sweet Spot for Your Material
Every material has a “Goldilocks” zone.
- PLA: 190°C – 20°C. Easy to print, but sensitive to heat.
- PETG: 230°C – 250°C. Stronger, but prone to string if too hot.
- ABS: 240°C – 260°C. Requires an enclosure to prevent warping.
Speed:
- Infill: Can be fast (10mm/s+).
- Perimeters: Slower (40-60mm/s) for better surface quality.
- First Layer: Always slow (20-30mm/s) to ensure adhesion.
🛡️ Adhesion Allies: Brim, Raft, and Skirt Explained
Getting that first layer to stick is 90% of the battle.
- Skirt: A line drawn around the model (not touching it) to prime the nozzle. Good for checking flow.
- Brim: A wide ring of material attached to the base of the model. Increases surface area to prevent warping. Best for small parts.
- Raft: A whole grid of material under the model. Use this if your bed is uneven or you are printing with ABS. It acts as a sacrificial base.
🏭 Choosing Your Weapon: Overcome Your Challenge with the Right 3D Printer
Not all printers are created equal. Your choice depends on your needs.
- Beginer/General Purpose: Prusa i3 MK3S+ or Bambu Lab P1P. Reliable, community-supported, great for learning.
- High Speed: Bambu Lab X1 Carbon. Blazing fast, but expensive.
- Resin (Miniatures): Elegoo Mars or Anycubic Photon.
- Large Format: Creality CR-M4 or Voron 2.4 (for the brave).
If you are looking for a specific machine, check out our 3D Printer Reviews for in-depth analysis.
👉 CHECK PRICE on:
- Prusa i3 MK3S+: Amazon | Prusa Research
- Bambu Lab P1P: Amazon | Bambu Lab
- Elegoo Mars 4: Amazon | Elegoo
🧩 Solving the Puzzle: Want to Solve Your Project Challenge?
Maybe you need a specific part for a project, or you want to print a custom bracket for your car. The challenge isn’t just printing; it’s designing and slicing correctly.
If you are struggling with thread tolerances, remember the advice from the Shapr3D community: don’t rely solely on digital offsets. Import a standard bolt from McMaster-Carr, modify it, and use it as a reference. Or, print the hole slightly undersized and use a physical tap to clean it up.
Real Talk: “Depending on the tolerances you are shooting for the best solution I’ve found is to create the hole in the part the size of the actual tap drill size.”
For more inspiration on what to print, browse our 3D Printable Objects collection.
💰 The Real Cost of 3D Printing: Materials, Machines, and Hidden Fees
3D printing isn’t free.
- Machine: $20 (cheap resin) to $3,0+ (high-end FDM).
- Filament: $20-$30 per kg.
- Electricity: Surprisingly low for FDM, but resin printers need UV curing and ventilation.
- Time: Your time is the most expensive part. Debuging a failed print can take hours.
Hidden Costs:
- Nozzles (they wear out).
- Build plates (PEI sheets, glass).
- Cleaning supplies (isopropyl alcohol for resin).
- Upgrades (better fans, hotends).
🎁 Try Before You Buy: Get a Free Sample Box
Many filament manufacturers offer sample packs. This is a great way to test different colors and materials without buying a full spool.
- Polymaker: Offers PolyLite and PolyTerra samples.
- Hatchbox: Often has trial packs.
- Prusa: Sells sample spools of their premium filaments.
👉 Shop Filament Samples on:
🏆 Conclusion

So, what do you mean by 3D printing? It’s not just a buzzword; it’s a fundamental shift in how we create the physical world. From the humble beginnings of Chuck Hull’s eye wash cup to the complex, functional parts we print today, 3D printing has democratized manufacturing.
We’ve covered the history, the technologies, the crucial role of slicing, and the nitty-gritty of parameters like layer height and infill. We’ve seen that while the technology is powerful, it requires patience, precision, and a willingness to learn. Whether you are printing a simple bracket or a complex medical implant, the principles remain the same: design with tolerance in mind, slice with care, and print with confidence.
Our Recommendation:
If you are just starting, don’t get boged down in the specs. Get a reliable machine like the Prusa i3 MK3S+ or Bambu Lab P1P, download PrusaSlicer or Bambu Studio, and start printing. Embrace the failures; they are part of the process. And remember, if you’re designing functional parts, always account for tolerances—don’t let a 0.2mm gap ruin your project!
Ready to start your journey? Check out our 3D Design Software guide to pick the right tool for your designs.
🔗 Recommended Links
Books to Master 3D Printing:
Hardware & Materials:
- Prusa Research: Official Site
- Bambu Lab: Official Site
- Polymaker Filament: Official Site
- McMaster-Carr (for reference parts): Official Site
Community & Models:
- Thingiverse: Search for Models
- Cults3D: Search for Models
- Prusa Forum: Troubleshooting & Tips
❓ FAQ

What are the limitations and challenges of 3D printing and how can they be overcome?
Limitations:
- Speed: 3D printing is generally slower than injection molding for mass production.
- Size: Build volume is limited by the printer’s physical dimensions.
- Surface Finish: Layer lines can be visible, requiring post-processing (sanding, painting).
- Material Strength: Anisotropy (weaker in the Z-axis) can be an issue for FDM parts.
Solutions:
- Use multi-material or multi-nozzle systems for speed.
- Design parts to fit within build volumes or print in sections and assemble.
- Use sanding, acetone vapor smoothing (for ABS), or resin coating to improve finish.
- Optimize infill patterns (like Gyroid) and orientation to maximize strength.
How much does a 3D printer cost and what are the factors that affect its price?
Cost Range:
- Entry-level: $20 – $50 (e.g., Creality Ender 3, Elegoo Mars).
- Mid-range: $50 – $1,50 (e.g., Prusa i3 MK3S+, Bambu Lab P1P).
- High-end: $2,0 – $10,0+ (e.g., Bambu Lab X1 Carbon, Formlabs Form 3).
Factors:
- Technology: Resin printers are often cheaper for small volumes, while high-speed FDM is pricier.
- Build Volume: Larger printers cost more.
- Features: Auto-bed leveling, dual extruders, and enclosures add to the cost.
- Brand: Established brands like Prusa command a premium for reliability and support.
What are some popular things to 3D print for beginners and hobbyists?
- Benchy: The classic “Boat” test print to calibrate your machine.
- Phone Stands: Functional and easy to print.
- Cosplay Props: Helmets, armor pieces (great for resin printing).
- Organizers: Desk organizers, cable management clips.
- Replacement Parts: Gears, knobs, and brackets for household items.
Read more about “🤯 How Many 3D Printers Have Been Sold? (2026 Update)”
What kind of materials can be used for 3D printing and what are their properties?
- PLA: Easy to print, biodegradable, brittle. Good for prototypes and decor.
- PETG: Strong, flexible, chemical resistant. Good for functional parts.
- ABS: Durable, heat resistant, but warps easily. Requires an enclosure.
- TPU: Flexible, rubber-like. Good for phone cases and gaskets.
- Resin (SLA): High detail, brittle. Good for miniatures and jewelry.
Read more about “🏗️ How Strong Are 3D Printed Parts? The 2026 Truth”
What are the benefits of using 3D printing for manufacturing and production?
- Rapid Protyping: Iterate designs quickly without tooling costs.
- Customization: Create personalized products (e.g., medical implants, custom shoes).
- Complex Geometries: Create internal channels and lattice structures impossible with subtractive methods.
- On-Demand Production: Print parts only when needed, reducing inventory costs.
Read more about “🌱 Reducing 3D Printing Carbon Footprint: The Ultimate 2026 Guide”
How does 3D printing work and what are its applications?
How it works: As detailed in the “How Does 3D Printing Actually Work?” section, it involves slicing a 3D model into layers and building it layer-by-layer.
Applications:
- Healthcare: Prosthetics, surgical guides, bioprinting.
- Aerospace: Lightweight brackets, fuel nozzles.
- Automotive: Protypes, custom tools.
- Education: Teaching STEM concepts.
- Construction: Printing houses and infrastructure.
Read more about “🧬 Bio-inks for Bioprinting: The Ultimate 2026 Guide to Living Inks”
What are the potential real-world applications of 3D printing industries such as healthcare, aerospace, and education?
- Healthcare: Custom prosthetics that fit perfectly, surgical planning models, and even bioprinting of tissues.
- Aerospace: GE Aviation uses 3D printing to create fuel nozzles that are lighter and more durable than traditional parts.
- Education: Students can visualize complex concepts in 3D, from molecular structures to historical artifacts.
How can I get started with 3D printing and what equipment do I need to begin?
- Buy a Printer: Start with a reliable FDM printer like the Prusa i3 MK3S+ or Bambu Lab P1P.
- Get Filament: Buy a spool of PLA (easiest to print).
- Install Software: Download Cura or PrusaSlicer.
- Download a Model: Get a simple file from Thingiverse.
- Print: Slice the file, load the filament, and hit print!
What are some popular and creative things to 3D print for beginners and hobbyists?
- Voronoi Lamps: Beautiful light fixtures.
- Fidget Toys: Spinning tops, infinity cubes.
- Board Game Organizers: Custom inserts for games like Catan or D&D.
- Planters: Geometric pots for succulents.
- Keychains: Custom names or logos.
What are the limitations and challenges of 3D printing and how are they being addressed?
- Speed: Addressed by high-speed printers like Bambu Lab and multi-nozzle systems.
- Material Limitations: New composites (carbon fiber, metal-filled) are constantly being developed.
- Post-Processing: Automated support removal and smoothing technologies are emerging.
What are some common materials used in 3D printing and their applications?
- PLA: Decorative items, prototypes.
- PETG: Functional parts, outdoor use.
- ABS: Automotive parts, enclosures.
- Nylon: Gears, mechanical parts.
- Resin: Miniatures, dental models.
Read more about “🏺 5 Ceramic 3D Printing Materials to Master in 2026”
How does 3D printing work and what are the different types of 3D printing processes?
Process: Layer-by-layer additive manufacturing.
Types:
- FDM: Melting plastic filament.
- SLA/DLP: Curing liquid resin with light.
- SLS: Sintering powder with a laser.
- MJF: Jeting binding agents onto powder.
What are the benefits of using 3D printing technology?
- Cost-effective for low-volume production.
- Design freedom for complex shapes.
- Reduced waste compared to subtractive methods.
- Rapid iteration for product development.
Read more about “🥩 3D Printed Plant-Based Meat: The Future of Flavor (2026)”
What is 3D printing with example?
Example: Imagine you need a custom gear for a broken toy. Instead of buying a whole new toy, you design the gear in CAD, slice it, and print it in PLA. You now have a replacement part in a few hours.
What is 3D printing in simple terms?
It’s like a hot glue gun on steroids, but controlled by a computer, building an object one thin layer at a time from the bottom up.
Read more about “How Does 3D Printing Work? Unraveling 12 Fascinating Insights for 2024! 🖨️”
📚 Reference Links
- Sinterit: Introduction to 3D Printing & Slicing
- Prusa Forum: Troubleshooting & Test Interpretation
- Shapr3D Discourse: 3D Printing Thread Tolerances: Can Offset Face Be the Way?
- Ultimaker: Cura Slicer Documentation
- Prusa Research: PrusaSlicer Documentation
- Thingiverse: 3D Model Repository
- McMaster-Carr: Standard Bolt Reference