Support our educational content for free when you purchase through links on our site. Learn more
📊 3D Printing Statistics for Custom Tools: The Real Numbers


Statistics on 3D printing for custom tools and gadgets reveal a clear takeaway: additive manufacturing works best when a tool needs a unique fit, quick revision, or low-volume production—not when a standard off-the-shelf tool already does the job. There’s no reliable global count for how many people print custom tools, so the most useful evidence comes from clearly defined industry data and specific case studies.
One striking example: Formlabs reports that an Eaton plant replaced 90% of its machined Delrin fixtures with 3D-printed parts. That’s an impressive result for one factory, not a universal promise—but it shows why a thoughtfully printed drill guide or assembly fixture can be more than workshop decoration.
Key Takeaways
- Custom-tool statistics are limited: Most research measures the wider 3D-printing market, not tools and gadgets specifically.
- Case studies show practical value: 3D-printed jigs, fixtures, grips, and replacement parts can work well when designed and tested for their real use.
- Savings depend on the job: Low-volume, customized parts may benefit most; material, labor, machine time, and testing all affect the true cost.
- Choose technology and material for the task: FDM suits many workshop aids; resin favors fine detail, while SLS nylon can serve more demanding functional parts.
- Validate safety-critical parts: Print orientation, material, loads, heat, and repeated use all matter. A printed part that looks sturdy isn’t automatically safe.
Table of Contents
- ⚡️ Quick Tips and Facts: 3D Printing Custom Tools and Gadgets
- 📊 3D Printing Statistics for Custom Tools and Gadgets at a Glance
- What the Numbers Measure—and What They Don’t
- How to Read Market, Adoption, and Survey Data
- 🕰️ From Rapid Prototyping to Everyday Custom Gear: A Brief History
- 🧰 Why 3D Printing Fits Custom Tools and Gadgets
- How Additive Manufacturing Works
- When a Printed Part Beats a Store-Bought Tool
- 📈 Adoption and Market Trends in 3D-Printed Tools
- Industrial, Professional, and Home-Workshop Use
- On-Demand Manufacturing and Digital Inventories
- What’s Driving Growth—and What Still Holds It Back
- 🔩 1. Custom Jigs, Fixtures, and Workshop Aids
- 🪛 2. Hand Tools, Handles, and Ergonomic Grips
- 🏠 3. Home Repair Tools and Replacement Parts
- 📷 4. Gadgets, Mounts, Cases, and Everyday Carry
- ♿ 5. Assistive Devices and Personalized Everyday Tools
- 🏭 6. Manufacturing, Maintenance, and Field-Service Tools
- 🧪 7. Prototypes, One-Off Tools, and Small-Batch Products
- 🖨️ Choosing a 3D Printer for Custom Tools and Gadgets
- FDM, Resin, SLS, and Other 3D Printing Technologies
- Build Volume, Accuracy, Speed, and Reliability
- Desktop Printers Versus Professional Services
- 🧵 Materials for Durable 3D-Printed Tools
- PLA, PETG, ABS, ASA, Nylon, and TPU Compared
- Choosing Materials for Heat, Impact, Flex, and Chemical Exposure
- When to Use Metal Inserts or Reinforcement
- 📐 Designing Custom Tools That Work in Real Life
- Measure the Job Before Modeling the Part
- Strength, Orientation, Wall Thickness, and Infill
- Tolerances, Fit, and Moving Parts
- CAD Software and 3D Model Libraries
- ⚙️ Printing, Testing, and Improving a Custom Tool
- Slicer Settings and Print Preparation
- Functional Testing and Iteration
- Post-Processing and Finishing
- 💰 Cost, Time, and Return on Investment
- What Determines the Cost of a 3D-Printed Tool
- Print-on-Demand Versus Buying or Machining
- How to Estimate Material Use and Waste
- ✅ Benefits and ❌ Limitations of 3D-Printed Custom Gear
- 🛡️ Safety, Reliability, and Intellectual Property
- Load Limits, Heat Risks, and Protective Equipment
- Copyright, Licenses, and Sharing 3D Models
- 🔭 The Future of 3D Printing for Custom Tools and Gadgets
- Conclusion
- Recommended Links
- FAQ
- What are the most common 3D-printed custom tools?
- Are 3D-printed tools strong enough for regular use?
- Which filament is best for durable tools and gadgets?
- Can a 3D printer make replacement parts for discontinued products?
- How accurate are 3D-printed tools?
- Is it cheaper to 3D print a custom tool?
- Can 3D-printed tools withstand heat, water, or chemicals?
- Where can I find files for custom 3D-printed gadgets?
- Reference Links
Table of Contents
- ⚡️ Quick Tips and Facts: 3D Printing Custom Tools and Gadgets
- 📊 3D Printing Statistics for Custom Tools and Gadgets at a Glance
- What the Numbers Measure—and What They Don’t
- How to Read Market, Adoption, and Survey Data
- 🕰️ From Rapid Prototyping to Everyday Custom Gear: A Brief History
- 🧰 Why 3D Printing Fits Custom Tools and Gadgets
- How Additive Manufacturing Works
- When a Printed Part Beats a Store-Bought Tool
- 📈 Adoption and Market Trends in 3D-Printed Tools
- Industrial, Professional, and Home-Workshop Use
- On-Demand Manufacturing and Digital Inventories
- What’s Driving Growth—and What Still Holds It Back
- 🔩 1. Custom Jigs, Fixtures, and Workshop Aids
- 🪛 2. Hand Tools, Handles, and Ergonomic Grips
- 🏠 3. Home Repair Tools and Replacement Parts
- 📷 4. Gadgets, Mounts, Cases, and Everyday Carry
- ♿ 5. Assistive Devices and Personalized Everyday Tools
- 🏭 6. Manufacturing, Maintenance, and Field-Service Tools
- 🧪 7. Prototypes, One-Off Tools, and Small-Batch Products
- 🖨️ Choosing a 3D Printer for Custom Tools and Gadgets
- FDM, Resin, SLS, and Other 3D Printing Technologies
- Build Volume, Accuracy, Speed, and Reliability
- Desktop Printers Versus Professional Services
- 🧵 Materials for Durable 3D-Printed Tools
- PLA, PETG, ABS, ASA, Nylon, and TPU Compared
- Choosing Materials for Heat, Impact, Flex, and Chemical Exposure
- When to Use Metal Inserts or Reinforcement
- 📐 Designing Custom Tools That Work in Real Life
- Measure the Job Before Modeling the Part
- Strength, Orientation, Wall Thickness, and Infill
- Tolerances, Fit, and Moving Parts
- CAD Software and 3D Model Libraries
- ⚙️ Printing, Testing, and Improving a Custom Tool
- Slicer Settings and Print Preparation
- Functional Testing and Iteration
- Post-Processing and Finishing
- 💰 Cost, Time, and Return on Investment
- What Determines the Cost of a 3D-Printed Tool
- Print-on-Demand Versus Buying or Machining
- How to Estimate Material Use and Waste
- ✅ Benefits and ❌ Limitations of 3D-Printed Custom Gear
- 🛡️ Safety, Reliability, and Intellectual Property
- Load Limits, Heat Risks, and Protective Equipment
- Copyright, Licenses, and Sharing 3D Models
- 🔭 The Future of 3D Printing for Custom Tools and Gadgets
- Conclusion
- Recommended Links
- FAQ
- What are the most common 3D-printed custom tools?
- Are 3D-printed tools strong enough for regular use?
- Which filament is best for durable tools and gadgets?
- Can a 3D printer make replacement parts for discontinued products?
- How accurate are 3D-printed tools?
- Is it cheaper to 3D print a custom tool?
- Can 3D-printed tools withstand heat, water, or chemicals?
- Where can I find files for custom 3D-printed gadgets?
- Reference Links
⚡️ Quick Tips and Facts: 3D Printing Custom Tools and Gadgets
For broader industry context, see our statistics about 3D printing. Here’s the short version for custom tools: printing is most compelling when you need a specific shape, fit, or replacement—not when you need a mass-produced steel wrench.
| Quick fact | What it means for your project |
|---|---|
| Digital designs can be revised without making new physical tooling | Great for one-off jigs, ergonomic handles, and evolving prototypes |
| FDM printers are accessible and versatile | A practical starting point for workshop organizers, brackets, and light-duty fixtures |
| Resin printing favors detail and surface finish | Useful for small, precise models and ergonomic mockups; less ideal for impact-heavy shop tools |
| Nylon SLS parts can be durable and complex | A strong service-bureau option for functional low-volume parts |
| A printed part is not automatically safe because it looks solid | Material, print direction, design, and testing determine whether it holds up |
| Claims of dramatic savings are application-specific | A custom fixture may save substantial labor; a simple mass-produced tool may not |
Our quick recommendations
- Start with PLA for fit checks and low-load prototypes. Move to PETG, ASA, nylon, or another suitable material for demanding use.
- Design for the load direction. FDM parts are weaker between layers than along the extruded roads; orient the part so the main force doesn’t try to peel those layers apart.
- Use metal where metal matters. A printed handle around a steel shaft can be a smart hybrid. A printed replacement for a high-load ratchet pawl is usually not.
- Print the smallest useful test first. A little tolerance coupon or grip section can save a full-size print from becoming a very attractive paperweight.
- Treat statistics with care. Reports often measure the whole additive-manufacturing market, not the narrower category of home-printed tools.
📊 3D Printing Statistics for Custom Tools and Gadgets at a Glance
Reliable statistics specifically counting custom tools and gadgets are scarce. Most reports group them under broader categories such as protyping, production parts, tooling, consumer goods, or additive manufacturing overall. That distinction matters: a market-size figure for all 3D printing does not tell us what share consists of printed screwdriver handles and workshop jigs.
| Reported figure or claim | What it describes | How to interpret it |
|---|---|---|
| Formlabs says some printed parts can cost “up to 95% less” than traditional alternatives | A best-case comparison for particular parts and workflows | Not a universal saving; part geometry, labor, machine use, finishing, and quantity all affect the result |
| Formlabs describes parts going from CAD to physical form in a few hours | A possible production turnaround for suitable parts | Printing may take hours, but design, setup, post-processing, and testing also take time |
| Formlabs reports Eaton’s Olean plant replaced 90% of its machined Delrin fixtures with 3D-printed parts | A company-specific manufacturing-aid case study | Strong evidence that printed fixtures can work in a suitable industrial setting, not a general adoption rate |
| A.W. Miller describes in-house printing for tooling, fixtures, and end-use parts | An industry supplier’s view of shop-floor use | Useful application context; the article does not provide a broad adoption survey or quantified performance dataset |
| The FutureList article cites a projection that agricultural 3D printing would reach USD 4.8 billion by 2025, at 22.3% CAGR from 2020–2025 | A forecast for the agricultural 3D-printing market | This was a projection, not proof the market reached that value; check the original report and its market definition before quoting it as an outcome |
Formlabs’ examples are helpful because they show what is possible in specific workflows. But a case study is not a population statistic. Likewise, a forecast is not a measured result. For broader context and links to industry data, see our 3D-printing statistics roundup.
What the Numbers Measure—and What They Don’t
Three kinds of numbers often get blended together:
- Market forecasts estimate future revenue across a defined industry segment.
- Adoption surveys count companies or respondents that use a technology.
- Case studies describe the performance of a specific organization or part.
They answer different questions. A forecast for additive manufacturing cannot tell you how many people print custom tools at home. A factory story can show that a printed jig works at that factory, but it cannot establish how often every factory does the same thing.
We recommend checking the source’s date, sample, geography, and category definition before drawing conclusions. If a report says “3D printing market,” ask whether it includes printers, materials, software, services, metals, medical parts, and industrial tooling. Those are very different buckets wearing one big statistical trench coat.
How to Read Market, Adoption, and Survey Data
When comparing statistics, check:
- What is counted? Revenue, machines, printed parts, users, organizations?
- Who was surveyed? Hobbyists, manufacturers, service bureaus, or a mixture?
- When was the data collected? Forecasts made several years ago should not be presented as current measurements.
- What qualifies as a “tool”? A production fixture, a drill guide, and a phone stand are all printable objects, but they serve different purposes.
- Is the figure independently verified? A vendor case study can be informative and still reflect a selected success story.
For example, Formlabs’ claim that a particular printed-part workflow may be up to 95% less costly is best treated as a potential, application-specific result. A.W. Miller’s article supports the practical case for additive manufacturing on the shop floor but gives no broad statistics on adoption. The responsible takeaway: custom tooling is a proven use case; exact adoption and savings vary widely.
🕰️ From Rapid Prototyping to Everyday Custom Gear: A Brief History

Modern additive manufacturing grew from early rapid-prototyping processes into a family of technologies used for prototypes, fixtures, production parts, and custom consumer products. The foundational idea is simple: create a digital model, then build a physical object in successive layers rather than cutting it entirely from a larger block.
That change matters for custom tools. Conventional production often rewards repeatability and quantity: make a mold, machine a batch, or buy a standardized tool. 3D printing makes it easier to justify one useful part, especially when the part’s value comes from a custom fit or unusual geometry.
The technology has also broadened:
- FDM/FFF made desktop printing widely accessible for thermoplastics.
- SLA and DLP brought fine detail and smooth surfaces to resin printing.
- SLS enabled powder-bed production of functional polymer parts without the same support structures used in many other methods.
- Composite and metal systems expanded industrial applications, though they require specialized equipment and engineering.
The shift from “make a prototype” to “print a tool that gets used every day” did not happen by magic. It came from better materials, more capable machines, and companies learning how to validate printed parts for real workloads. The NIST overview of additive manufacturing provides useful background on the field and its industrial measurement challenges.
🧰 Why 3D Printing Fits Custom Tools and Gadgets
A custom tool often has a very specific job: hold a part at an odd angle, reach behind a machine, protect a delicate surface, or fit someone’s hand. The design may be too specialized to find on a store shelf, yet too small a production run to justify traditional tooling.
That is where additive manufacturing earns its keep.
How Additive Manufacturing Works
A typical workflow looks like this:
- Model the part in CAD or find a model with a license that permits your intended use.
- Export and inspect the file, commonly as 3MF, STL, or STEP depending on the workflow.
- Prepare the print in a slicer by choosing orientation, supports, layer height, infill, and material settings.
- Print the part layer by layer, or use a professional service for processes such as SLS or metal printing.
- Finish and test it by removing supports, cleaning surfaces, adding inserts, and checking the part under a safe, realistic load.
The U.S. Department of Energy describes additive manufacturing as a process that creates parts from digital designs through successive layers of material. For practical work, the key point is that the same machine can produce different shapes without a new mold or cutting fixture for every design.
When a Printed Part Beats a Store-Bought Tool
3D printing tends to shine when:
- The tool is unusual, personal, or hard to source.
- You need one or a few units, rather than thousands.
- The design will change after the first test.
- The part needs to fit an existing object, machine, or user.
- A lightweight fixture can simplify a repetitive task.
- You need to replace an obsolete non-critical plastic part.
It is less attractive when you need a standard tool cheaply, require certified load performance, or need a polished metal surface and tight tolerances straight off the printer.
Our shop-floor rule: print the geometry that creates convenience, customization, or speed. Buy or machine the part when standardized strength, precision, or certification is the real value.
📈 Adoption and Market Trends in 3D-Printed Tools
Industry use is not limited to making prototypes that sit in a conference room. Companies also print drill guides, assembly aids, ergonomic handles, inspection fixtures, protective covers, and replacement components. The best adoption evidence often appears in specific case studies, not in a tidy global count of “3D-printed tools.”
Industrial, Professional, and Home-Workshop Use
| User group | Common printed items | Typical advantage | Main caution |
|---|---|---|---|
| Home workshop | Tool holders, drill guides, knobs, jigs, organizers | Custom fit and quick iteration | FDM strength and heat limits |
| Product design team | Ergonomic mockups, assembly aids, prototypes | Faster design feedback | Prototype material may not match production behavior |
| Factory or maintenance team | Fixtures, guides, guards, low-volume spare parts | Reduced waiting and improved task-specific fit | Must validate reliability, safety, and repeatability |
| Service bureau customer | Nylon SLS parts, resin details, industrial polymers | Access to processes unavailable on a desktop | Lead time, design constraints, and outsourced quality control |
| Field-service technician | Cable guides, covers, brackets, temporary aids | On-demand problem solving | Harsh environments may exceed polymer limits |
The Formlabs manufacturing case studies include examples of production aids and end-use parts. A.W. Miller similarly emphasizes shop-floor tooling and fixtures, including applications involving Markforged systems. These sources make a persuasive case for where printing can help, but they do not establish one universal adoption percentage.
On-Demand Manufacturing and Digital Inventories
A digital file can serve as a compact inventory for parts that are rarely needed. Instead of storing a box of low-turnover plastic components, a company may keep approved CAD files and make a replacement when required.
That approach can help with:
- Obsolete or hard-to-order plastic parts
- Customized maintenance aids
- Low-volume fixtures for a specific production line
- Revisions when a machine or workflow changes
- Remote work where shipping delays are costly
But digital inventory is not free of responsibility. Files need version control, permissions, material specifications, and a clear indication of whether a part is non-critical, load-bearing, or safety-related.
What’s Driving Growth—and What Still Holds It Back
What drives use:
- Better desktop and industrial printers
- Wider material choices
- Easier CAD and slicing software
- Shorter design-to-test loops
- Demand for personalized and low-volume products
- Interest in reducing downtime and sourcing delays
What limits use:
- Uneven material performance and print quality
- Operator skill requirements
- Weakness across layer lines in some FDM designs
- Post-processing time
- Qualification, documentation, and liability requirements
- Unclear savings when machine time and labor are included
The practical message is less dramatic than “printing replaces every factory tool,” and much more useful: it can replace the right tool, in the right workflow, when the design and material are validated.
🔩 1. Custom Jigs, Fixtures, and Workshop Aids
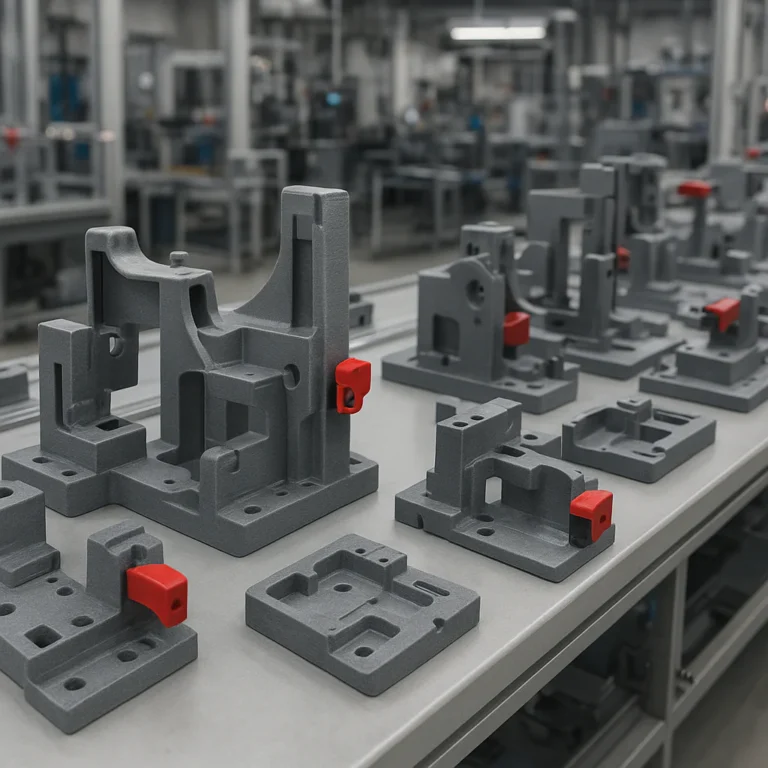
Jigs and fixtures are among the strongest use cases because they often need to hold or guide a workpiece without carrying the same extreme loads as a cutting tool.
Useful examples include:
- Drill guides for repeatable hole spacing
- Corner clamps and alignment blocks
- Soldering stands and cable-routing guides
- Assembly fixtures that keep parts in position
- Soft jaws that protect finished surfaces
- Templates for marking, cutting, or drilling
- Dust-collection adapters and hose reducers
A small printed guide can make a repetitive task feel less like a three-handed magic trick. For a range of designs, browse 3D-printable objects on 3D Printed™ or search Thingiverse for drill guides and workshop jigs.
Design tips for useful fixtures
- Use ribs and gusets around sections that take bending loads.
- Add clearance for the workpiece, clamps, and human fingers.
- Design sacrificial contact surfaces so they can be replaced.
- Use a metal drill bushing when the guide needs sustained accuracy.
- Avoid using a plastic fixture near hot chips, cutting tools, or high-speed rotating equipment unless its suitability is established.
Our experience: We’ve found that even a simple alignment jig can save more time than an elaborate gadget, especially when a job repeats. But the first model should be treated as a test: check fit with the actual workpiece, not just a CAD drawing that looks beautifully convinced of itself.
🪛 2. Hand Tools, Handles, and Ergonomic Grips
3D printing can make customized handles, grips, caps, knobs, and adapters for existing tools. This is one of the most satisfying applications because geometry and comfort are personal: a handle that feels perfect in one hand may feel like a garden rake in another.
Good candidates include:
- Replacement handles for low-load hand tools
- Enlarged grips for small knobs or switches
- Custom screwdriver handles that accept a metal shaft
- Bit holders and tool adapters
- Soft or flexible grips printed in TPU
- Ergonomic prototypes for testing hand position
A safer hybrid approach
For tools exposed torque or impact, print the grip, not the working metal element. A printed handle fitted around a commercial steel shaft can improve comfort while leaving the high-stress portion to a material designed for the job.
| Part | Better candidate for printing? | Why |
|---|---|---|
| Ergonomic grip around a metal tool | ✅ | The printed part shapes the interface; metal takes the working load |
| Custom knob for a low-load adjustment | ✅ | Easy to tailor and replace |
| Hammer head or pry-bar tip | ❌ | High impact and potential injury risk |
| Prototype handle for comfort testing | ✅ | Fast to revise before committing to a production design |
| Ratchet pawl or load-bearing wrench jaw | ❌ | Failure could cause sudden loss of control |
If a tool’s failure could injure someone, damage expensive equipment, or release a heavy load, do not rely on an unvalidated print.
🏠 3. Home Repair Tools and Replacement Parts
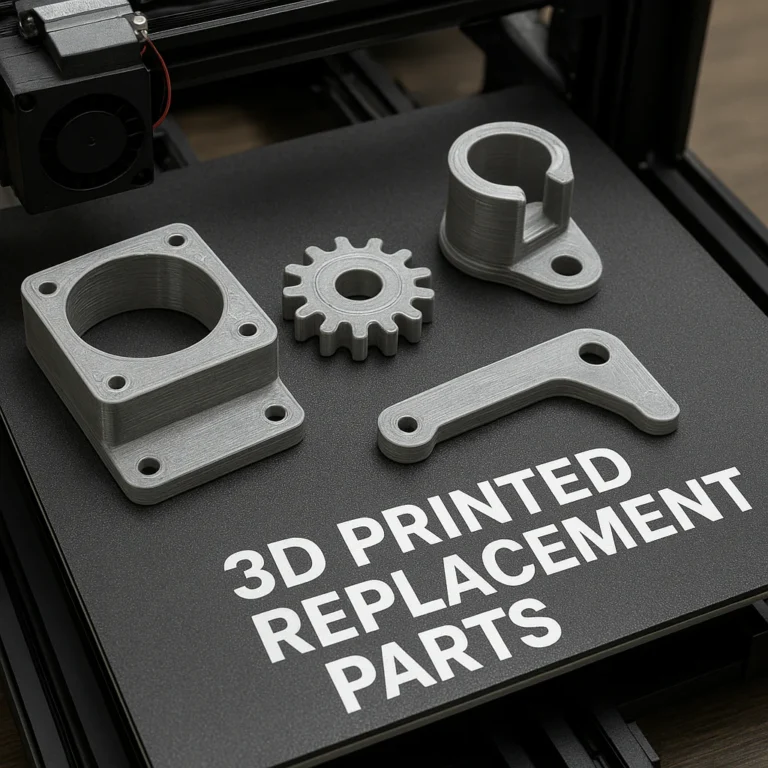
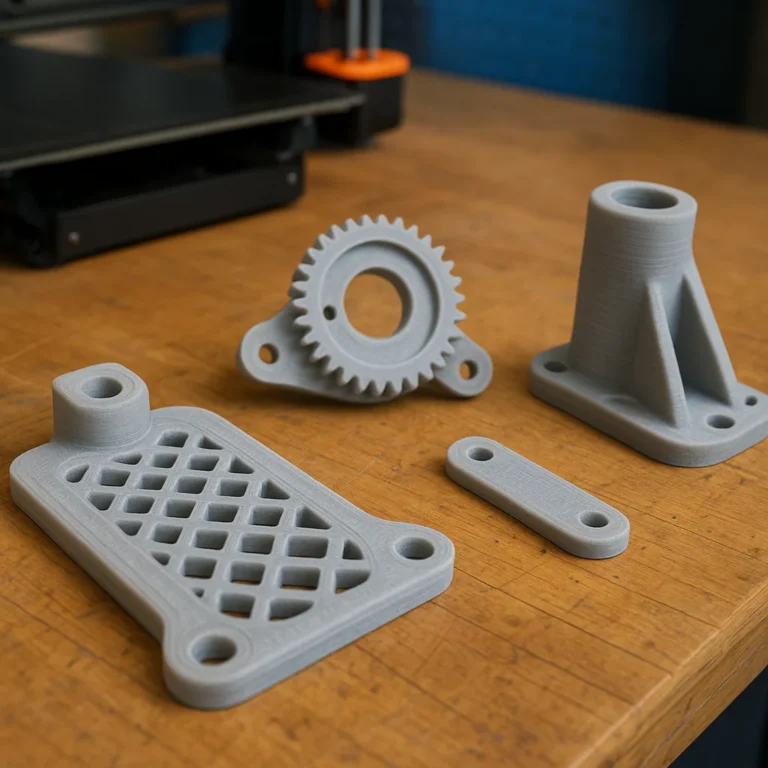
A 3D printer can be a quiet hero when a small plastic part breaks and the manufacturer no longer stocks it. Think of a bespoke clip, appliance knob, vacuum adapter, remote-control battery cover, or cabinet spacer.
Before modeling a replacement:
- Identify the part’s function and how it is loaded.
- Measure the mating surfaces with calipers if available.
- Photograph the broken part from several angles.
- Check whether the part contacts food, hot water, electricity, or moving machinery.
- Choose a suitable material and include extra clearance for fit testing.
- Print a test version before committing to a durable revision.
A replacement cover is very different from a component that holds a door, supports weight, contains pressure, or sits near heat. For electrical appliances, pressure systems, gas equipment, and safety-critical parts, use manufacturer-approved replacements or qualified repair guidance.
You can browse Thingiverse replacement-part models, but inspect the model’s comments, license, and intended use. A model that fits one brand’s older appliance may not fit a visually similar newer version.
📷 4. Gadgets, Mounts, Cases, and Everyday Carry
Custom gadgets are a natural fit for printing because they often combine awkward dimensions with personal preference. Common projects include:
- Phone and tablet stands
- Camera and action-camera mounts
- Cable clips and charging docks
- Sensor housings
- Small electronics enclosures
- Headphone hooks and controller stands
- Custom organizers for bags, desks, or vehicles
For electronics enclosures, plan openings for connectors, access to buttons, airflow, and cable strain relief. Don’t assume a snug-looking case will keep sensitive electronics cool. Add ventilation where appropriate, and check the operating-temperature limits of the electronics and filament.
For design inspiration, search Thingiverse for electronics enclosures or explore our 3D design software coverage.
Road-trip anecdote: We once needed a small cable guide to keep a charging lead from slipping behind a workbench. The first version was a plain clip; the second added a screw hole and a rounded entry. The upgrade used almost no extra material but made the part actually convenient. That’s the beauty of iteration: the first print answers, “Does it fit?” The second asks, “Is it pleasant to use?”
♿ 5. Assistive Devices and Personalized Everyday Tools
3D printing can support personalized grips, switches, utensil adapters, writing aids, and other low-risk daily-living tools. The benefit is not novelty; it is fit. A custom shape may be more comfortable or usable for a particular person than an off-the-shelf product.
Potential examples:
- Enlarged handles for utensils
- Custom grips for pens or toothbrushes
- Switch extensions and remote-control aids
- Clip-on guides for positioning objects
- Personalized holders for lightweight devices
- Prototypes that help a therapist assess a design
This area deserves care. A printed aid should be evaluated by the user and, when appropriate, an occupational therapist or other qualified clinician. A design that works for a photo may pinch skin, create pressure points, or be hard to clean in everyday use.
Our 3D printing in healthcare coverage explores related applications. For anything that supports body weight, affects mobility, or may create a medical risk, seek professional assessment rather than trusting a promising model download.
🏭 6. Manufacturing, Maintenance, and Field-Service Tools
Factories use custom printed parts for tasks such as holding components during assembly, protecting a surface during handling, guiding an operator, organizing a production cell. These tools may be designed for one line, one machine, or one product variation.
Formlabs describes an Eaton plant that replaced 90% of its machined Delrin fixtures with parts produced using a Fuse Series SLS printer. That is an impressive company-specific case study. It shows that printed fixtures can replace traditional ones when the material, geometry, and workflow suit the application. It does not mean every factory can replace 90% of its tooling.
A.W. Miller highlights Markforged’s FX10 and continuous-fiber composite printing as options for industrial tooling. Its article discusses composite and metal-ready capabilities, but it does not publish broad adoption statistics or detailed performance measurements. Treat vendor and distributor claims as useful leads, then validate them against the manufacturer’s technical data and your own operating conditions.
Where printed tooling can help
- Ergonomic assembly fixtures
- Soft jaws for delicate parts
- Custom gauges and inspection aids
- Protective caps and covers
- Cable-routing clips
- Lightweight handling tools
- Low-volume replacement components
Where to proceed cautiously
- High-temperature manufacturing zones
- Tools exposed to aggressive chemicals
- Parts in contact with food or medical products
- Safety interlocks, guards, or load-bearing supports
- Components whose failure could stop or damage a production line
For demanding applications, a hybrid workflow can be sensible: print near-net geometry, then CNC-machine precision surfaces or critical interfaces. A.W. Miller describes this printed-plus-machined approach as a way to combine geometry freedom with finishing precision. See its manufacturing and additive-manufacturing services for the company’s perspective.
🧪 7. Prototypes, One-Off Tools, and Small-Batch Products
Custom tools often begin as prototypes. A designer may print three handle shapes before choosing one, test a snap-fit enclosure, or develop a tool that only a small group of users needs.
| Production need | A sensible route |
|---|---|
| Check shape and fit | Desktop FDM or resin prototype |
| Test a flexible grip | TPU, with a design suited to flex |
| Make a small batch of durable polymer parts | Consider a professional SLS service |
| Need multiple colors or material-like appearance | Material jeting may be appropriate for presentation prototypes |
| Need certified or high-strength metal performance | Consult a qualified metal additive supplier and validate the part |
This is where claims about speed and savings need context. A print can be ready in hours, while traditional tooling may require much longer setup. But the whole project still includes design, machine availability, post-processing, and inspection. A quick print is not automatically a quick product launch.
For low-volume production, compare the complete workflow—not just the material cost—with injection molding, machining, or purchasing an existing component. The best method may change as quantity grows.
🖨️ Choosing a 3D Printer for Custom Tools and Gadgets
There is no single “best” printer for every tool. A printer suited to a detailed tabletop model may be the wrong choice for a fixture that gets clamped all day.
For reviews and practical buying context, see 3D Printer Reviews on 3D Printed™.
FDM, Resin, SLS, and Other 3D Printing Technologies
| Technology | Best suited to | Strengths | Trade-offs |
|---|---|---|---|
| FDM/FFF | Brackets, organizers, prototypes, simple fixtures | Accessible materials, large ecosystem, versatile part sizes | Visible layers; properties depend on orientation and process |
| SLA/DLP/MSLA resin | Detailed models, fine features, smooth prototypes | High detail and surface finish | Requires resin handling, washing, curing, and support removal |
| SLS | Durable, complex polymer parts and production aids | Powder supports the geometry; good design freedom and functional nylon options | Usually accessed through professional equipment or services |
| Material jeting | Appearance, ergonomic, and multi-material prototypes | Fine detail and multi-material presentation | Materials may not suit sustained load, heat, or UV exposure |
| Metal additive manufacturing | Specialized metal components | Complex geometries and metal material options | Requires engineering, post-processing, and careful validation |
Formlabs recommends FDM as an accessible starting point, resin printing for fine detail and smooth surfaces, and SLS for durable functional polymer parts. These are broad technology comparisons, not guarantees for every machine or material. The actual performance depends on the printer, process settings, design, and post-processing.
Build Volume, Accuracy, Speed, and Reliability
Before buying a printer, ask:
- Will the part fit the build volume? Include orientation and support structures in your estimate.
- Does it need dimensional accuracy or cosmetic detail? These are related but not identical.
- Can the printer handle the material? Nylon, ABS, ASA, and fiber-filled materials may need controlled temperatures or enclosure conditions.
- How often will you use it? Reliability and serviceability matter more as use becomes routine.
- Will you tolerate post-processing? Resin prints require more handling; FDM prints may need support cleanup.
- Can it reproduce the part consistently? A fixture that fits one time but not the next is not much of a fixture.
Check manufacturer documentation for the exact printer and filament combination. Marketing terms such as “industrial strength” or “precision” need a specification attached to them.
Desktop Printers Versus Professional Services
| Choose a desktop printer when… | Choose a service bureau when… |
|---|---|
| You print often and want rapid iteration | You need SLS, metal, or a material your printer cannot process |
| Most parts are modest in size and complexity | Parts are large, complex, or needed in a small production batch |
| You can learn maintenance and calibration | You want professional finishing or controlled production |
| In-house availability matters | You need technical advice on a specialized process |
A service bureau can be the smarter route for infrequent advanced jobs. A desktop printer makes sense when you repeatedly need low-risk, custom parts and value having a machine nearby. Our 3D printer reviews can help compare machines by use case.
🧵 Materials for Durable 3D-Printed Tools
Material choice can decide whether a custom tool lasts one afternoon or becomes a dependable workshop regular. Don’t choose by filament name alone: brand formulation, print settings, part orientation, geometry, and environmental exposure all matter.
PLA, PETG, ABS, ASA, Nylon, and TPU Compared
| Material | Useful traits | Watch-outs | Typical tool or gadget use |
|---|---|---|---|
| PLA | Easy to print, stiff, good for fit checks | Can soften in heat; impact behavior varies | Templates, organizers, prototypes |
| PETG | Useful balance of toughness and ease | Can string; stiffness and creep may be limiting | Brackets, covers, everyday fixtures |
| ABS | Heat resistance and post-processing options | Enclosure and ventilation may be needed | Housings, shop parts, some functional prototypes |
| ASA | Weather and UV resistance compared with many basic plastics | Printing can be more demanding | Outdoor housings, mounts, covers |
| Nylon | Toughness, wear resistance, and flexibility depending on grade | Moisture-sensitive; needs suitable drying and process control | Durable fixtures and functional components |
| TPU | Flexible and impact-absorbing | Slower, more demanding printing; not a rigid support material | Grips, feet, protective bumpers |
Use manufacturer datasheets for actual material properties. “Nylon” and “TPU” each describe broad material families, not one standardized performance level. Formlabs, for example, discusses nylon and nylon composites for SLS functional parts; that should not be taken as a direct comparison with every desktop filament bearing the same family name.
Choosing Materials for Heat, Impact, Flex, and Chemical Exposure
Start with the environment:
- Heat: Identify the hottest expected operating condition, not merely room temperature.
- Impact: Consider whether the part will be dropped, struck, or suddenly loaded.
- Flex: Decide whether controlled bending is useful or whether the part must stay rigid.
- Chemicals: Check compatibility with cleaners, oils, solvents, and fluids.
- Weather: For outdoor use, consider UV exposure, moisture, and temperature swings.
- Contact: Food, skin, medical use, or drinking water may require material and process documentation beyond a filament label.
A printer’s material chart is a starting point, not proof of suitability for a safety-critical application. If a part supports a person, contains pressure, or guards a hazardous machine, use an appropriate certified solution.
When to Use Metal Inserts or Reinforcement
Printed threads can work for light use, but repeated assembly may wear them out. Add heat-set inserts, captive nuts, washers, or metal pins when the design needs stronger threaded connections or durable hinge points.
Reinforcement options include:
- Heat-set brass inserts for repeated screws
- Washers to spread clamping loads
- Metal shafts inside printed grips
- Fiber-reinforced filament for stiffness, where appropriate
- Continuous-fiber reinforcement in compatible industrial systems
Keep reinforcement away from surfaces that need to flex. Also remember: a stiff reinforced part can fail suddenly if its design creates a stress concentration. Reinforcement is not a substitute for sensible geometry.
📐 Designing Custom Tools That Work in Real Life
A successful print begins long before the first layer. Measure the task, identify the loads, and design for how the object will be held, clamped, cleaned, and repaired.
Measure the Job Before Modeling the Part
A useful measurement checklist:
- Overall dimensions and mating surfaces
- Screw and shaft sizes
- Clearances around moving parts
- The direction and approximate magnitude of the force
- Contact points with the workpiece
- Access needed for fingers, tools, cables, or fasteners
- Environmental factors such as heat, moisture, and vibration
Digital calipers are handy, but don’t over-trust a single measurement from a worn, curved, or flexible part. Take multiple readings and, when possible, create a simple cardboard or low-cost plastic mockup.
Strength, Orientation, Wall Thickness, and Infill
In FDM printing, the part is built from stacked layers. That makes orientation a structural choice, not merely a way to reduce supports. If the force pulls layers apart, the part may split more easily than if the same force runs along the printed roads.
Practical design habits:
- Orient the part so its main load follows the stronger direction.
- Use more walls around fasteners and load paths.
- Add filets and ribs to reduce sharp stress concentrations.
- Use infill to support the shell, but don’t rely on high infill alone for strength.
- Leave enough material around holes and threaded inserts.
- Test a small sample under a controlled load before relying on a full-size part.
A 100% infill part is not automatically stronger in every useful direction. Geometry, shell thickness, material, and layer bonding matter.
Tolerances, Fit, and Moving Parts
Printer tolerances vary, so design clearances should be tested on your own machine and material. Start by printing a small fit coupon with a few clearance options rather than printing the entire part and hoping the screw gods are feeling generous.
For moving parts:
- Provide clearance for the printer’s process and material shrinkage.
- Avoid long, tight sliding surfaces unless you can finish them.
- Keep hinges and pivots aligned.
- Use metal pins or bushings for heavily used pivots.
- Expect a prototype to reveal something your CAD model missed.
CAD Software and 3D Model Libraries
For functional parts, parametric CAD is useful because dimensions can be revised without remodeling everything. Options include:
For existing printable models, check Thingiverse, Printables, and MyMiniFactory. Read the license and comments before using a model commercially or adapting someone else’s design. For more tools and tutorials, visit our 3D design software category.
⚙️ Printing, Testing, and Improving a Custom Tool
A practical printing workflow should include a fit test, a real-use test, and a revision plan. Printing once is a beginning, not a quality-control system.
Slicer Settings and Print Preparation
A general process:
- Inspect the model for holes, broken surfaces, and incorrect scale.
- Choose the material based on use conditions, not convenience alone.
- Set orientation for strength and manageable supports.
- Select wall count and infill based on the load path.
- Preview the sliced layers to catch thin walls or unsupported features.
- Print a small test when fit or tolerance is important.
- Label the part with material and revision if it will be used in a workshop or production setting.
Common slicers include PrusaSlicer, Ultimaker Cura, OrcaSlicer, and manufacturer-specific software. Follow the printer and filament makers’ guidance for temperature and drying requirements.
Functional Testing and Iteration
Test in stages:
- Fit test: Does the part attach or align as intended?
- Operation test: Does it perform the task smoothly?
- Controlled load test: Does it handle a realistic load without cracking, slipping, or deforming?
- Repeat test: Does it still work after repeated use?
- Environment test: Does heat, moisture, oil, or cleaning affect it?
Keep early tests controlled. Don’t test a questionable printed hook over someone’s head or use a prototype as a lifting point. If you see whitening, layer separation, cracking, permanent bending, or loose inserts, stop and redesign.
Record the material, printer, orientation, slicer settings, and revision. That small habit turns “it worked last time” into something much more useful.
Post-Processing and Finishing
Depending on the process, finishing may include:
- Support removal and edge cleanup
- Sanding or filing mating faces
- Adding heat-set inserts or captive nuts
- Cleaning resin and completing its required post-cure
- Blasting or dyeing SLS parts through a professional service
- Machining critical surfaces
Resin requires careful handling and the manufacturer’s safety procedures. FDM parts may need deburring, but don’t sand a part so aggressively that you weaken a thin wall or remove a critical fit feature.
💰 Cost, Time, and Return on Investment
A printed part’s cost is more than filament. A fair comparison includes design time, machine use, failed prints, finishing, and the cost of the alternative.
What Determines the Cost of a 3D-Printed Tool
Consider these factors:
- Material quantity and type
- Print time and machine availability
- Design and measurement labor
- Support material and expected waste
- Finishing and assembly
- Reprints during fit development
- Whether specialized equipment or a service bureau is needed
Formlabs notes that some printed parts can be up to 95% less costly than traditional alternatives. That is a maximum reported potential, not a universal outcome. It may apply where tooling and setup dominate the traditional cost, especially for customized or low-volume components.
Print-on-Demand Versus Buying or Machining
| Approach | Often makes sense when… | Common drawback |
|---|---|---|
| Buy a standard tool | A suitable product is readily available | May not fit the exact job |
| Print in-house | You need frequent iteration or a low-risk custom part | Requires equipment, time, and operator skill |
| Use a service bureau | You need advanced materials or a small production batch | Less immediate control and potentially longer turnaround |
| Machine the part | Precision, surface finish, or material performance is critical | Setup and machining may be uneconomical for one-off complex shapes |
| Use a hybrid process | A printed shape needs precise machined interfaces | Adds steps and coordination |
How to Estimate Material Use and Waste
Use your slicer’s estimate as a first approximation, then add realistic allowances for:
- Supports and brim
- Purge or nozzle-cleaning material
- Failed prints
- Test coupons
- Infill and shell changes
- Post-processing scrap
The most accurate comparison is to track actual material and time over several jobs. A lightweight fixture that saves an operator a few minutes repeatedly may be more valuable than a one-off gadget that looks clever but never leaves the bench.
✅ Benefits and ❌ Limitations of 3D-Printed Custom Gear
| ✅ Benefits | ❌ Limitations |
|---|---|
| Custom shape, fit, and ergonomics | Printed properties vary by process and orientation |
| Rapid iteration without new molds | Design and testing still take time |
| Useful for one-offs and small batches | High-volume production may favor other methods |
| Complex shapes and consolidated assemblies | Some geometries still need supports or finishing |
| Digital files can be stored and revised | File licensing and version control need attention |
| Can reduce waiting for niche parts | Not every part is safe or economical to print |
Best perspective: 3D printing is not a universal replacement for conventional tools. It is a flexible way to make the specific tool or part that conventional supply chains handle poorly.
🛡️ Safety, Reliability, and Intellectual Property
A custom tool should be judged by its failure mode, not just its appearance. A cracked organizer is annoying. A failed lifting hook can be dangerous.
Load Limits, Heat Risks, and Protective Equipment
- Don’t use an unvalidated print as a lifting point, pressure vessel, safety guard, or climbing component.
- Keep printed plastics away from heat sources unless the material and design are rated for the application.
- Consider layer direction, impact, creep, and repeated loading.
- Follow printer and material safety instructions, especially for resin, heated enclosures, and ventilation.
- If the part is safety-critical, consult a qualified engineer and use appropriate testing or certified components.
The NIST additive-manufacturing program discusses measurement and process-control challenges that help explain why repeatability and validation matter.
Copyright, Licenses, and Sharing 3D Models
Before downloading or selling a model, check its license. A file may permit personal printing but prohibit commercial use or redistribution. If you modify a design, follow the original license terms and document your changes.
For workplace parts, also control:
- Approved material and revision
- Print orientation and settings
- Inspection criteria
- Who may edit or distribute the CAD file
- Whether the printed part is approved for its intended application
🔭 The Future of 3D Printing for Custom Tools and Gadgets
The next wave is less about printing a plastic trinket faster and more about fitting additive manufacturing into a well-managed workflow. Likely growth areas include:
- Material improvements: More engineering polymers and reinforced options
- Digital inventory: Approved files for low-demand spare parts
- Hybrid manufacturing: Printing geometry, then machining critical features
- Personalization: Ergonomic and user-specific accessories
- Connected production: Better traceability, remote monitoring, and repeatable workflows
- More local fabrication: Printing parts closer to where they’re needed
Agriculture is one example of this broader shift. The FutureList article describes custom seed equipment, irrigation components, monitoring housings, and replacement parts, while also profiling FarmBot and Prospera Technologies. Its market figures are projections cited from an external report, so they should be treated as forecasts rather than confirmed results. For a related look at farm-specific equipment, see 3D Printing in Agriculture: Custom Equipment and Tools for Farmers.
The real test for every new trend remains wonderfully unglamorous: does the printed tool solve a real problem, perform reliably, and make sense compared with the alternatives? That question brings us back to the headline statistics—and why careful definitions matter more than a flashy percentage.