Support our educational content for free when you purchase through links on our site. Learn more
30 Creative 3D Printing Projects to Try at Home 🛠️

What are some creative ideas for 3D printing projects? Start with useful, satisfying prints such as a custom phone stand, cable organizers, planters, board-game inserts, and replacement knobs, then branch out into articulated toys, lithophanes, cosplay props, and miniature terrain. The best project is one that fits your printer, suits your skill level, and gives you a reason to use it after the first “look what I made!” moment.
We’ve seen a tiny custom cable clip tame a desk faster than a whole afternoon of untangling, while a personalized lithophane turned an ordinary photo into a gift people actually kept. That’s the fun of 3D printing: one day you’re fixing a household annoyance, the next you’re making a dragon. 🐉
Key Takeaways
- Pick a project for your goal: Try organizers and phone stands for practical wins, or miniatures and cosplay props for visual impact.
- Match the material to the job: PLA suits many indoor projects, PETG can work well for tougher functional parts, and TPU is useful for flexible designs.
- Measure before you print: Check dimensions and make a small fit-test for custom parts, lids, clips, or moving joints.
- Plan for safe, reliable prints: Consider orientation, supports, ventilation, and material limitations—especially for resin, food-contact items, and heat exposure.
- Make it personal: Customize downloaded models with your own measurements, text, colors, and features.
Table of Contents
- ⚡️ Quick Tips and Facts
- 🧭 3D Printing Project Ideas: Background and Inspiration
- 🛠️ Choose the Right Project for Your Printer, Skill Level, and Goals
- FDM vs. resin: which projects suit each printer?
- Beginer, intermediate, and advanced project picks
- PLA, PETG, TPU, ABS, and resin: matching filament to the idea
- 💡 30 Creative 3D Printing Projects to Make at Home
- 1. Custom phone stand
- 2. Cable clips and cord organizers
- 3. Modular desk organizer
- 4. Headphone hanger
- 5. Custom key holder
- 6. Plant pots and self-watering planters
- 7. Wall hooks and entryway organizers
- 8. Kitchen drawer dividers
- 9. Measuring scops and kitchen tools
- 10. Cookie cutters and custom stamps
- 11. Board-game organizers and inserts
- 12. Dice towers and tabletop gaming accessories
- 13. Miniature terrain and scenery
- 14. Custom chess pieces and puzzles
- 15. Cosplay armor and costume props
- 16. Articulated dragons and flexi toys
- 17. Fidget toys and sensory tools
- 18. Lithophanes and personalized photo gifts
- 19. Custom lampshades and LED diffusers
- 20. Vases, sculptures, and modern home decor
- 21. Personalized nameplates and signs
- 22. Custom bookmarks and book accessories
- 23. Replacement knobs, brackets, and household parts
- 24. Tool holders and workshop organizers
- 25. Camera, microphone, and action-camera mounts
- 26. Robotics and Arduino enclosures
- 27. RC car parts and drone accessories
- 28. Phone cases and wearable accessories
- 29. Educational models and science projects
- 30. Custom cookie jars, containers, and storage
- 🎨 Make a 3D Print Your Own: Customization and Design Tips
- Personalize models with text, patterns, and measurements
- Find free 3D models and printable files
- Create your own designs with beginner-friendly CAD software
- ⚙️ Plan a Successful Print: Slicers, Settings, and Supports
- Layer height, infill, walls, and print orientation
- Supports, bridging, and avoiding failed prints
- How to estimate print time and material use
- 🧽 Finishing, Painting, and Asembling 3D Printed Projects
- Remove supports and clean up layer lines
- Painting, sanding, and sealing prints
- Join parts with screws, glue, magnets, and heat-set inserts
- 🧒 3D Printing Projects for Kids: Fun Ideas and Safety
- Age-appropriate projects for children
- Printer, filament, and small-part safety
- ♻️ Make Useful, Durable, and Sustainable 3D Prints
- Design for strength, fit, and everyday use
- Food safety, heat resistance, and outdoor use
- Reduce filament waste and reuse failed prints
- 🔧 Troubleshooting Common 3D Printing Project Problems
- Warping, string, and poor bed adhesion
- Parts that do not fit or move smoothly
- Weak prints, brittle parts, and layer separation
- 🚀 Turn Your 3D Printing Hobby into a Small Business
- Choose projects people actually want
- Licensing, copyright, and selling printed models
- ✅ Conclusion
- 🔗 Recommended Links
- ❓ FAQ
- What are some creative ideas for 3D printing projects?
- What is the easiest thing to 3D print for a beginner?
- What can I 3D print that is useful around the house?
- What are fun 3D printing projects for kids?
- Where can I download free 3D printable models?
- Can I sell items I make with a 3D printer?
- 📚 Reference Links
⚡️ Quick Tips and Facts
Our first stop for inspiration is our guide to 3D printed projects and objects, where the best ideas share one trait: they solve a real problem, spark a little joy, or both.
| Quick fact | What it means for your project |
|---|---|
| FDM printers melt filament, usually PLA, PETG, or TPU | Great for organizers, brackets, toys, planters, and larger parts |
| Resin printers cure liquid photopolymer layer by layer | Ideal for miniatures, jewelry details, and highly detailed models; resin requires careful handling |
| A model’s shape matters as much as its size | A flat, support-free design often prints faster and more reliably than a complicated model |
| Print orientation affects strength | Parts can split between layers, so orient load-bearing pieces with their forces in mind |
| A useful print often needs a test fit | Measure the real object, print a small fit-check, then commit to the full version |
| “Food-safe filament” does not automatically make a food-safe print | Layer grooves, printer contamination, coatings, and design all matter; see FDA food-contact guidance |
Our fast project-picking checklist
- Need a quick win? Try a cable clip, bookmark, or simple phone stand.
- Want to learn design? Customize a drawer divider or make a nameplate in Tinkercad.
- Want a showstoper? Try a lithophane, articulated dragon, or layered cosplay prop.
- Printing for a specific problem? Measure first. “It looks about right” is not a unit of measurement, unfortunately.
- Printing for kids? Supervise around hot parts and choose age-appropriate designs; the COEX 3D kids’ project guide has useful safety reminders.
Our rule of thumb: start with a print you can finish, use, and learn from. Your first project does not need to be a dragon the size of a house.
🧭 3D Printing Project Ideas: Background and Inspiration

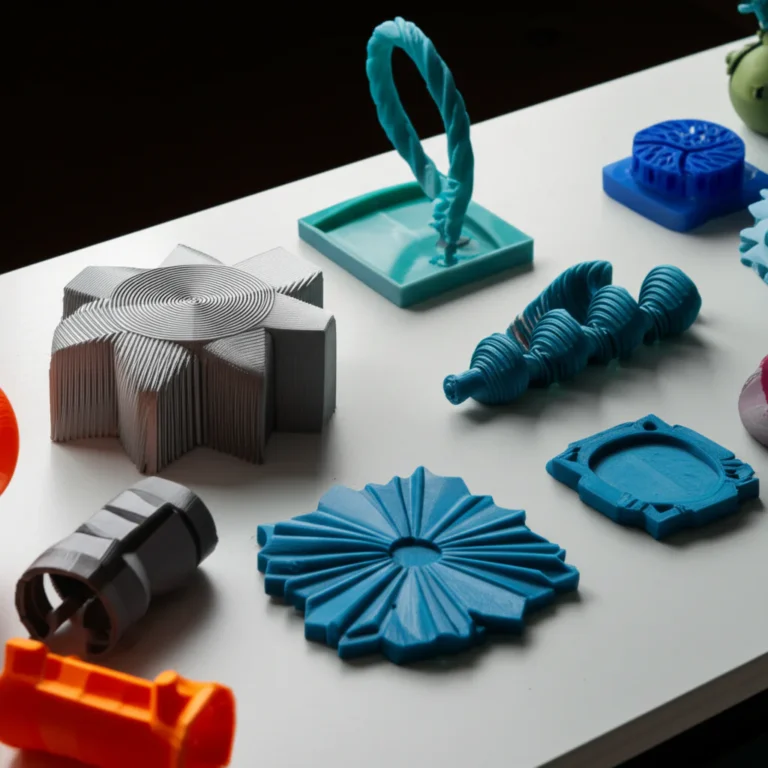
A 3D printer is part tiny factory, part problem-solving machine, part excuse to finally organize that drawer full of mystery cables. The range of possible projects has grown from simple brackets and figurines to interactive mechanisms, home decor, educational models, and custom replacement parts.
A Phrozen guide to cool 3D prints describes its 71 featured ideas as “fun, functional, and some even interactive.” That mix is exactly what makes a good project list useful: not every print has to be practical, and not every decorative print has to justify its existence. Sometimes the dragon is the point. 🐉
Why custom printing beats “close enough”
A store-bought organizer has fixed dimensions. A printed one can fit the odd-shaped drawer, the exact number of tools, or the particular remote that keeps vanishing into the sofa cushions.
With a custom 3D print, you can adjust:
- Dimensions: Match the object, shelf, or workspace you already have.
- Features: Add holes, clips, labels, hinges, or mounting points.
- Style: Change colors, text, patterns, or shape.
- Repairability: Reprint one broken component instead of replacing a whole assembly.
- Iteration: Test a rough version, spot the flaw, and revise the design.
For more project inspiration, browse our 3D printable objects and 3D design software categories.
Three useful ways to choose an idea
| If you want… | Choose… | You’ll practice… |
|---|---|---|
| A quick success | Cable clip, bookmark, or keychain | Basic slicing and first-layer setup |
| A functional fix | Drawer divider, wall hook, or replacement knob | Measuring, tolerances, and part orientation |
| A skill-building challenge | Print-in-place hinge, puzzle, or articulated creature | Clearances, supports, and motion |
| A display piece | Lithophane, miniature, or cosplay prop | Surface quality, finishing, and assembly |
| A learning project | Solar system model, anatomy model, or simple mechanism | Design thinking and scientific visualization |
The fun part is finding an idea that fits your life. The trickier part is picking a version your printer can actually make cleanly. We’ll get to that before the giant cosplay helmet tries to eat your whole weekend.
🛠️ Choose the Right Project for Your Printer, Skill Level, and Goals
Before downloading a model, check three things: printer type, build volume, and material needs. A beautiful model that exceeds your build plate or requires an unsuitable material is not a project; it is a very detailed way to learn disappointment.
FDM vs. resin: which projects suit each printer?
| Project type | FDM filament printer | Resin printer |
|---|---|---|
| Desk organizers and household parts | ✅ Excellent fit | ❌ Usually inefficient |
| Large costume pieces | ✅ Can print in sections | ❌ Build volume is often limiting |
| Miniatures and tiny details | Good, but layer lines show | ✅ Excellent detail |
| Flexible print-in-place toys | ✅ TPU may work with careful setup | Depends on resin properties |
| Functional brackets or clips | ✅ PETG or suitable engineering filament | ⚠️ Standard resin can be brittle |
| Jewelry prototypes | Good for larger designs | ✅ Strong detail and smooth surfaces |
FDM printers melt thermoplastic filament. Resin printers use liquid photopolymer that is cured with light, and their parts need appropriate washing and post-curing. The NIOSH guide to additive manufacturing safety explains why material handling and ventilation deserve attention, particularly when using resin.
For printer-specific guidance, browse our 3D printer reviews.
Beginner, intermediate, and advanced project picks
| Skill level | Good starter ideas | Why they’re a good fit |
|---|---|---|
| Beginner | Keychain, cable clip, simple phone stand, bookmark | Small, forgiving, and easy to inspect |
| Intermediate | Drawer organizer, planter, snap-fit box, wall hook | Introduces dimensions, fit, or strength |
| Advanced | Articulated mechanism, cosplay armor, large diorama, precision jig | May need multiple parts, supports, tuning, or finishing |
A beginner project should teach one new thing at a time. If your first print is a 12-part mechanical dragon with tiny joints, no support scars, and flawless tolerances, you may be setting the bar somewhere in the clouds.
PLA, PETG, TPU, ABS, and resin: matching filament to the idea
| Material | Useful for | Watch out for |
|---|---|---|
| PLA | Decor, toys, prototypes, organizers, low-stress indoor parts | Can soften in heat and is less suitable for demanding outdoor use |
| PETG | Brackets, containers, functional parts, projects needing more toughness | Can string; tune retraction and cooling |
| TPU | Flexible feet, bumpers, grips, phone cases, soft toys | Prints slowly and can be sensitive to the filament path |
| ABS/ASA | Heat- or weather-exposed parts when printed correctly | Warping and emissions require suitable enclosure and ventilation |
| Photopolymer resin | Miniatures, detailed figures, jewelry prototypes | Uncured resin needs careful handling; standard resins may be brittle |
Material properties vary by formulation, so check the manufacturer’s datasheet rather than assuming every spool behaves the same. For general polymer information, see the NIST polymer materials resources.
A practical choice: use PLA for a decorative desk organizer, PETG for a frequently handled bracket, TPU for a flexible grip, and a suitable resin for fine miniature detail. For anything load-bearing, hot, or safety-critical, do not trust a material name alone. Test the actual part.
💡 30 Creative 3D Printing Projects to Make at Home
Here’s the main event: 30 project ideas, from “I can print that before dinner” to “I should probably clear the workbench first.” Most can be downloaded as a starting point, then customized to fit your space or style.
Our reference points include the Phrozen collection of 71 cool prints, community model libraries such as Thingiverse, and practical models featured in the 11 useful 3D prints video.
1. Custom phone stand
A phone stand is a classic first project because it is useful, compact, and easy to personalize. Add a cable notch, a wider base, or a second viewing angle for video calls.
- Best for: PLA or PETG, depending on use.
- Design tip: Leave space for your charging cable and phone case.
- Try: A simple phone stand model search on Thingiverse.
2. Cable clips and cord organizers
Print clips that match your desk edge, cable diameter, or wall layout. A small set of cable guides can make a workstation look as if it has its life together.
- Best for: PLA for light-duty clips; TPU for flexible grips.
- Design tip: Measure the cable and clip gap. Too tight, and installation becomes a wrestling match.
- Try: Cable organizer models on Thingiverse.
3. Modular desk organizer
Build bins, pen cups, trays, and drawers that connect or stack. A modular design lets you expand only when the pen population mysteriously multiplies.
The Phrozen guide includes a Desktop Organizer, a Cute Hamster Pen Holder, and a Print-in-Place Cute Cat Pencil Holder. Those are great reminders that practical storage can also have a personality.
- Best for: PLA.
- Design tip: Print a small module first to check how snugly parts connect.
- Try: Modular desk organizer models on Thingiverse.
4. Headphone hanger
A desk-mounted or wall-mounted hanger keeps headphones off the floor and away from chair wheels, the natural enemy of cables and expensive electronics.
- Best for: PETG for a frequently used hanger; PLA may be fine for light headphones.
- Design tip: Use rounded contact surfaces to avoid stressing the headband.
- Try: Headphone hanger models on Thingiverse.
5. Custom key holder
Make a wall-mounted key rack with hooks, labels, or a small shelf for sunglasses. Personalize it with a surname, simple icon, or the phrase “keys go here,” aimed at the person who keeps asking where the keys are.
- Best for: PLA or PETG.
- Design tip: Choose mounting hardware based on your wall, not just the model.
- Try: Key holder models on Thingiverse.
6. Plant pots and self-watering planters
A printed planter can be sized to a specific sill or plant pot. A self-watering design uses a reservoir and a wick or capillary path to supply moisture.
- Best for: PETG for damp environments; test for leaks.
- Design tip: Print a separate inner pot or use a removable liner if water tightness matters.
- Drawback: FDM layer lines can leak. A design that looks like a water tank is not automatically a water tank.
- Try: Planter models on Thingiverse.
7. Wall hooks and entryway organizers
Hooks can hold lightweight items such as hats, lanyards, or keys. Add a small tray for coins and a label for each person in the household.
- Best for: PETG for routine use; print with strength-oriented walls and orientation.
- Design tip: Screw-mounted designs generally provide a more dependable attachment than relying on adhesive alone.
- Safety: Do not use an untested printed hook for heavy loads or anything that could injure someone if it falls.
8. Kitchen drawer dividers
Measure the drawer, then design adjustable or interlocking compartments for utensils, clips, and the collection of tiny kitchen gadgets nobody remembers buying.
- Best for: PLA for dry drawers; PETG where more toughness or moisture tolerance is useful.
- Design tip: Leave a little clearance so the organizer can be removed for cleaning.
- Try: Drawer divider models on Thingiverse.
9. Measuring scops and kitchen tools
Custom scops can be handy for non-food tasks such as pet food, garden nutrients, or craft supplies. For direct food contact, take a cautious approach: layer grooves can trap residue, and a material’s label alone does not certify a finished print.
- Best for: A dedicated non-food use, or a professionally validated food-contact application.
- Design tip: Clearly mark the scoop’s volume and its intended use.
- Reference: Review the FDA overview of food-contact substances before making food-contact claims.
10. Cookie cutters and custom stamps
Make a custom outline for a party, school event, or seasonal bake. Use bold shapes without fragile, hair-thin features, and wash the tool carefully.
- Best for: A dedicated, carefully cleaned cutter; do not assume ordinary filament and a home printer are food safe.
- Design tip: A sturdy cutting edge needs enough thickness to resist bending.
- Alternative: Use the print as a template to cut dough by hand instead of pressing it directly into food.
11. Board-game organizers and inserts
A custom insert can speed up setup and keep tokens from scattering across the shelf. Make trays for cards, resource cubes, and player pieces, then check that the packed box still closes.
- Best for: PLA.
- Design tip: Measure the inside of the box and account for card sleeves.
- Try: Board-game insert models on Thingiverse.
12. Dice towers and tabletop gaming accessories
Dice towers, dice trays, token holders, and initiative trackers make excellent tabletop accessories. A modular tower can be customized to match a campaign or game table.
- Best for: PLA.
- Design tip: Add a removable tray so dice do not escape under the sofa.
- Try: Dice tower models on Thingiverse.
13. Miniature terrain and scenery
Print buildings, walls, scatter terrain, dungeon furniture, or a whole tiny battlefield. Resin gives excellent fine detail, while FDM works well for larger terrain pieces.
The Phrozen article highlights detailed sets such as Library Full Set, Dining Full Set, and Evil King’s Castle. Check the model license before printing pieces based on a commercial game.
- Best for: Resin for fine miniatures; FDM for larger scenery.
- Try: Miniature terrain models on Thingiverse.
14. Custom chess pieces and puzzles
Design a chess set around a theme or print a brain teaser with interlocking components. Puzzles reward careful tolerances: too loose, and the pieces fall apart; too tight, and your “puzzle” becomes a permanent sculpture.
- Best for: PLA for larger pieces; resin for small detailed designs.
- Design tip: Print one sample joint before printing the full set.
- Try: 3D printable puzzles on Thingiverse.
15. Cosplay armor and costume props
Armor panels, masks, badges, and props can be printed in sections, then sanded, assembled, and painted. Plan seams around natural costume lines to make them easier to hide.
- Best for: PLA for many display pieces; select materials based on fit, environment, and intended use.
- Design tip: Make a paper or low-cost fit test before printing a full helmet.
- Safety: Wear suitable protective equipment when sanding and painting, and follow the product’s instructions.
- Try: Cosplay prop models on Thingiverse.
16. Articulated dragons and flexi toys
Print-in-place dragons, snakes, and other articulated creatures have moving links built into one model. They look like magic; they are actually a careful balance of clearance, printer calibration, and not crushing the first layer.
The Phrozen collection includes models such as a Ball Jointed Dragonfly and other articulated fantasy creatures. For a first attempt, choose a model with broad joints and a clear success history.
- Best for: FDM with well-tuned clearances; some flexible resin formulations may suit specific designs.
- Design tip: Avoid scaling a print-in-place model without checking how the joint gaps change.
- Try: Articulated dragon models on Thingiverse.
17. Fidget toys and sensory tools
Spinning tops, clickers, gears, and simple sliders can be satisfying to design and print. Keep small parts away from young children and inspect moving toys regularly for damage.
- Best for: PLA for rigid toys; TPU for soft-touch components.
- Design tip: Avoid sharp points and thin snap features that may break.
- Try: Fidget toy models on Thingiverse.
18. Lithophanes and personalized photo gifts
A lithophane is a thin relief whose varying thickness reveals an image when light passes through it. It is one of the most delightful “wait, that’s a photo?” prints you can give someone.
- Best for: White or light-colored filament, often PLA.
- Design tip: Use a high-contrast photo and a consistent backlight.
- Try: Search lithophane models and tools on Thingiverse.
19. Custom lampshades and LED diffusers
Printed lamp shades, LED diffusers, and decorative panels can create patterned light without requiring a complicated assembly. Phrozen’s examples include the Ring Lamp II with Halloween Panels and a Hot Air Balloon Lamp.
- Best for: A suitable material used with a cool-running LED source.
- Critical safety point: Keep printed plastics away from hot bulbs. Do not treat a printed lampshade as an electrical or heat-rated component.
- Design tip: Check airflow, wiring clearance, and the lamp manufacturer’s guidance.
20. Vases, sculptures, and modern home decor
A vase mode print can make a striking, lightweight decorative vessel. Organic shapes, geometric surfaces, and spiral patterns look especially good in a single filament color.
- Best for: PLA for dry decor; PETG can be considered for damp use, but leak-test it.
- Design tip: A decorative vase may not be watertight. Use a glass insert for real flowers.
- Inspiration: Phrozen’s guide features geometric forms such as Reticular Forms and sculptural pieces such as Lotus Blossoms Flourish.
21. Personalized nameplates and signs
Make desk labels, room signs, garden markers, or a custom plaque. Two-color lettering can be achieved with a multi-material printer or a pause-and-swap technique.
- Best for: PLA.
- Design tip: Use clear lettering with enough contrast to read at a glance.
- Try: Nameplate models on Thingiverse.
22. Custom bookmarks and book accessories
Bookmarks are small, fast, and ideal for practicing raised text, thin walls, and decorative patterns. Add a tassel hole or create a page holder that keeps a book open.
- Best for: PLA.
- Design tip: Round the corners and keep the bookmark thin enough not to stress the binding.
- Try: Bookmark models on Thingiverse.
23. Replacement knobs, brackets, and household parts
A replacement knob or simple bracket can be the most satisfying thing you print because it fixes a real annoyance. Measure the broken part, note its orientation, and test the fit before relying on it.
- Best for: PETG or another appropriate material for many functional parts.
- Design tip: Reinforce screw holes and avoid thin sections around stress points.
- Safety: Do not print parts for critical appliances, vehicles, pressure systems, or safety devices unless they are properly engineered and validated.
24. Tool holders and workshop organizers
Wall-mounted holders, drill-bit trays, solder-spool stands, and labeled bins make the workshop easier to use. The video at #featured-video showcases practical ideas including a drill bit holder, broom hanger, and desktop organizing bins.
- Best for: PLA for light-duty storage; PETG for tougher or more frequently handled parts.
- Design tip: Organize by actual tool dimensions, not the dimensions listed on the box.
- Try: Tool holder models on Thingiverse.
25. Camera, microphone, and action-camera mounts
Custom mounts can position a webcam, microphone, or small light exactly where you need it. The modular phone/tablet document-camera holder mentioned in Phrozen’s guide is a clever example of a practical, adjustable setup.
- Best for: PETG for many everyday mounts; select material based on heat, load, and vibration.
- Design tip: Test the mount with a light dummy load before attaching expensive gear.
- Safety: Avoid overhead installations or high-vibration uses without proper testing and suitable hardware.
26. Robotics and Arduino enclosures
Custom electronics cases can include board standoffs, cable exits, ventilation, and snap-fit lids. Measure components and connectors together; the board may fit while the USB cable stubbornly does not.
- Best for: PLA for indoor prototypes; PETG or another suitable material for more demanding environments.
- Design tip: Add ventilation where heat builds up and keep conductive debris away from electronics.
- Try: Arduino enclosure models on Thingiverse.
27. RC car parts and drone accessories
Prototypes, body accessories, organizers, and non-critical brackets are good candidates for custom printing. High vibration and impact make functional replacement parts more demanding than they look.
- Best for: A material selected for the specific load and environment.
- Design tip: Test fit and durability at low risk before real use.
- Safety: Do not rely on an unvalidated printed component for a safety-critical aircraft or fast-moving mechanism.
28. Phone cases and wearable accessories
Phone cases, watch bands, rings, and wearable decorations can be tailored to the person rather than the product shelf. TPU is a common choice when flexibility is needed.
- Best for: TPU for flexible cases and grips; resin or rigid filament for decorative pieces.
- Design tip: Check button access, camera clearance, and edge protection.
- Try: Phone case models on Thingiverse.
29. Educational models and science projects
Print solar-system models, anatomy diagrams, topographic maps, historic landmarks, or simple mechanical demonstrations. These projects turn abstract concepts into objects you can examine from every angle.
The COEX 3D guide to educational printing for kids highlights dinosaurs, custom games, useful inventions, educational models, and art. As the article puts it, 3D printing lets kids “turn their ideas into reality.”
- Best for: PLA for larger classroom models; resin for small details with adult-managed handling.
- Try: Educational models on Thingiverse.
30. Custom containers, bins, and storage
Print a parts tray, small-parts box, stackable bin, or container shaped to fit a shelf. Add labels or dividers so the box is easier to use than the mystery drawer it is meant to replace.
- Best for: PLA for dry indoor storage; PETG for tougher use.
- Design tip: Add a little clearance for lids and sliding parts, then test the lid before printing a full set.
- Try: Storage box models on Thingiverse.
🎨 Make a 3D Print Your Own: Customization and Design Tips
Downloading a model is a perfectly good way to start. Changing it to fit your own needs is where 3D printing begins to feel less like “making a thing” and more like making your thing.
Personalize models with text, patterns, and measurements
A reliable customization workflow:
- Measure the real object or space. Use calipers for small parts, and measure more than once.
- Write down the dimensions. Include width, height, depth, holes, and clearances.
- Add practical details. Consider cable slots, labels, rounded corners, drainage, or mounting holes.
- Check the model’s license. Personal-use permissions do not automatically allow commercial sales.
- Print a small test section. Check fit before committing to the full design.
- Revise in small steps. Change one key dimension at a time so you know what fixed the problem.
If two parts need to slide together, leave a clearance gap. The right amount depends on your printer, material, and design; a small calibration test is more reliable than copying a number from a random forum post.
Find free 3D models and printable files
| Model library | Useful for | Remember |
|---|---|---|
| Thingiverse | Community STL models across many categories | Check print notes, files, and license |
| Printables | Community models and printer-oriented projects | Review the model page and user feedback |
| MakerWorld | Ready-to-print projects and maker profiles | Confirm model requirements and permissions |
| MyMiniFactory | Miniatures, tabletop models, and creator collections | Licensing varies by creator |
| Cults3D | Diverse downloadable models, including paid designs | Read the license before selling prints |
| Yegi | Search across multiple model repositories | Follow through to the original source |
A model’s photos can look spectacular while concealing tricky supports or fragile parts. Read the designer’s print settings and user comments before you slice.
Create your own designs with beginner-friendly CAD software
- Tinkercad: Browser-based and approachable for simple objects, text, and basic geometry.
- Onshape: Parametric CAD in a browser, useful for dimension-driven parts and assemblies.
- Fusion: A capable CAD environment for precise mechanical design; check its current licensing terms.
- Blender: Strong for sculptural, organic, and artistic models, though it works differently from mechanical CAD.
Explore our 3D design software guides for more CAD and modeling options.
A simple first design: custom cable clip
- Measure the desk edge and cable diameter.
- Create a base that sits flat against the desk.
- Add a clip opening slightly larger than the cable.
- Round sharp corners to reduce stress concentration.
- Export an STL or 3MF file and open it in your slicer.
- Print one clip and test it before making a full set.
That tiny project teaches measurement, fit, and iteration without demanding an all-night print.
⚙️ Plan a Successful Print: Slicers, Settings, and Supports
A slicer converts a 3D model into printer instructions. It also lets you choose layer height, infill, walls, supports, material settings, and orientation. In other words, it is the place where a nice-looking model becomes a realistic print plan.
Layer height, infill, walls, and print orientation
| Setting | What it changes | Practical starting point |
|---|---|---|
| Layer height | Surface detail and print time | Use finer layers for visible detail; taller layers for rough prototypes |
| Walls/perimeters | Outer strength and durability | Add walls for functional parts rather than blindly increasing infill |
| Infill | Internal structure and weight | Use moderate infill for many everyday items; increase only when the design needs it |
| Orientation | Surface finish, supports, and layer strength | Place functional loads across the design thoughtfully |
| Supports | Helps print overhangs and suspended features | Reduce supports by reorienting the model when possible |
| Brim | Adds first-layer area to help bed adhesion | Useful for narrow bases or parts prone to lifting |
There is no universal “best infill percentage.” A thick-walled bracket with sensible orientation may be stronger than a high-infill part printed with weak layer bonding.
Supports, bridging, and avoiding failed prints
- Inspect the model preview. Look for islands, thin walls, and unsupported features.
- Rotate the part. The best orientation can reduce supports and improve strength.
- Check first-layer contact. Small feet or narrow tips may need a brim.
- Use supports only where needed. They add material and can leave marks.
- Consider splitting large parts. A clean seam can be easier to finish than an awkward overhang.
- Run a small test. For critical fits, print a sample joint or a cropped section first.
For resin printing, unsupported islands and drainage matter too. Hollow prints need appropriate openings, and uncured resin must not remain trapped inside.
How to estimate print time and material use
Your slicer provides the most useful estimate because print time depends on geometry, speed, supports, and machine settings. Treat the estimate as a planning guide, not a stopwatch promise.
- Small, low-profile prints may finish relatively quickly.
- Tall, detailed prints take longer because layer count increases.
- Supports, slow outer walls, and fine layers add time.
- Large infill areas and extra walls increase filament use.
- Resin prints are often driven by layer count and exposure settings, not simply model volume.
For a first project, choose something small enough that a failed attempt is a lesson rather than a spool-shaped tragedy.
🧽 Finishing, Painting, and Asembling 3D Printed Projects
A print can look finished straight off the bed, or it can look like it survived a tiny plastic snowstorm. Finishing depends on the project: a cable clip may need no cleanup, while cosplay armor can take several rounds of sanding and paint.
Remove supports and clean up layer lines
- Let the part cool before removing it from the build plate.
- Use suitable flush cutters or a deburring tool carefully.
- Remove support material gradually to avoid snapping thin features.
- Sand only where needed; aggressive sanding can soften details or distort dimensions.
- Wear appropriate eye and respiratory protection when sanding, and clean up dust.
For resin models, follow the resin manufacturer’s washing and post-curing instructions. Avoid skin contact with uncured resin and manage waste according to local rules and the safety data sheet.
Painting, sanding, and sealing prints
A practical finishing sequence for a display piece:
- Remove supports and trim rough spots.
- Sand gradually, starting with a suitable grit for the surface.
- Remove sanding dust.
- Apply a primer compatible with the material.
- Paint in light coats and allow the coating to cure.
- Use a compatible clear coat if the project needs extra protection.
Always test paint and solvents on a scrap piece first. Some chemicals can soften or damage certain plastics.
Join parts with screws, glue, magnets, and heat-set inserts
| Joining method | Best suited to | Caution |
|---|---|---|
| Screws | Removable assemblies and brackets | Reinforce holes and avoid overtightening |
| Heat-set inserts | Repeatedly assembled parts | Use the right insert and controlled installation technique |
| Magnets | Lids, panels, modular accessories | Secure magnets so they cannot become a hazard for children |
| Adhesive | Display models and simple assemblies | Match adhesive to both materials |
| Interlocking joints | Print-in-place or tool-free assemblies | Test clearances before printing the full set |
One of our favorite finishing tricks is to design seams where the object already changes shape. A panel line on a helmet is much easier to hide than a seam running across a smooth forehead.
🧒 3D Printing Projects for Kids: Fun Ideas and Safety
A 3D printer can make learning tangible: children can design a name tag, watch a simple mechanism move, and see how changing a dimension changes the object. The COEX 3D kids’ guide highlights dinosaurs, toys, useful inventions, educational models, and art as project directions that encourage creativity and problem-solving.
Age-appropriate projects for children
Good supervised projects include:
- Simple name tags and keychains
- Pencil holders and desk organizers
- Large game pieces and puzzles
- Dinosaurs and fantasy creatures
- Solar-system or anatomy models
- Custom phone stands
- Simple bridges, gears, or other engineering demonstrations
A useful learning pattern is ask, sketch, make, test, improve. Let the child make design choices, even if the first result needs a revision. That is engineering, not failure.
Printer, filament, and small-part safety
- Keep children away from hot nozzles, heated beds, moving components, and sharp tools.
- Use age-appropriate supervision and follow the printer manufacturer’s safety instructions.
- Provide ventilation appropriate to the printer and materials; the NIOSH additive manufacturing safety guidance explains that exposure considerations vary by process and material.
- Handle resin and post-processing chemicals only under responsible adult supervision.
- Keep small components away from children who may put them in their mouths.
- Do not assume a printed toy is automatically safe because it was printed at home.
The competing kids’ guide is right to emphasize supervision and ventilation. Those precautions are not reasons to avoid the hobby; they are reasons to set up the printer thoughtfully.
♻️ Make Useful, Durable, and Sustainable 3D Prints
The most sustainable print is often the one that genuinely replaces a disposable item, repairs something, or gets used for years. A drawer full of novelty prints that never leave the drawer is less impressive from an environmental perspective, no matter how adorable the dragons are.
Design for strength, fit, and everyday use
- Measure carefully and include appropriate clearances.
- Round corners and reinforce areas around holes and clips.
- Orient parts for the forces they will experience.
- Use test pieces to validate snap fits, sliding joints, and mounting points.
- Choose a material suited to heat, moisture, UV exposure, and load.
- Inspect parts periodically if they are used often or carry weight.
The NIST additive manufacturing resources discuss process quality and repeatability. In practice, a successful everyday print depends on more than the STL: material, printer settings, geometry, and use all matter.
Food safety, heat resistance, and outdoor use
A standard home-printed object should not be assumed safe for direct food contact. FDM layer lines may be difficult to clean thoroughly, and printer components or coatings can introduce additional concerns. For food-contact uses, consult the FDA food-contact substances information, the filament manufacturer’s documentation, and relevant local requirements.
For heat and outdoor use:
- PLA may soften in warm environments.
- UV exposure can affect some plastics.
- Moisture resistance varies by material and print quality.
- A print that holds water today may leak after stress or aging.
- Do not use a printed plastic part near flames or hot elements unless the full assembly is rated for that use.
Best practical approach: use a removable glass or metal insert for food and water, and choose a professionally rated component for safety-critical jobs.
Reduce filament waste and reuse failed prints
- Test small sections before large jobs.
- Use a brim only when it helps.
- Orient models to reduce unnecessary supports.
- Store filament according to the manufacturer’s guidance.
- Keep useful failed prints as calibration or material test pieces.
- Check local recycling rules; many curbside programs do not accept all 3D-printing plastics.
A failed print is not automatically waste if it teaches you what to change. A failed print that teaches you nothing is a hint to check the first layer before launching the next twelve-hour project.
🔧 Troubleshooting Common 3D Printing Project Problems
Most print failures fall into a few familiar categories: first-layer trouble, temperature or cooling mismatch, poor fit, or a design that asks too much of the printer. Change one variable at a time so you can tell what helped.
Warping, string, and poor bed adhesion
| Symptom | Common causes | First checks |
|---|---|---|
| Corners lifting | Poor adhesion, draft, material shrinkage | Clean build surface, check first layer, use a brim if appropriate |
| Fine strings | Moist filament or retraction settings | Dry filament as directed, tune retraction and temperature |
| Rough first layer | Nozzle height or bed leveling issue | Recheck first-layer setup and surface cleanliness |
| Blobs or zits | Temperature, flow, or travel settings | Review slicer settings and inspect the nozzle |
The material maker’s recommended temperature range is a better place to start than a random setting copied from a different printer.
Parts that do not fit or move smoothly
- Check that the real object was measured accurately.
- Confirm the model has not been scaled unexpectedly.
- Look for elephant’s foot or first-layer over-expansion.
- Print a small clearance test.
- Adjust the design or slicer settings incrementally.
- Re-test before producing the full assembly.
If a phone case is too tight or a drawer insert does not fit, the fix is usually a measured revision, not brute force and hope.
Weak prints, brittle parts, and layer separation
- Add walls where the design needs more shell strength.
- Rotate the part so loads do not pry layers apart.
- Check nozzle temperature and cooling for the selected filament.
- Avoid thin, sharp corners around holes and clips.
- Use a material better suited to impact, heat, or repeated flexing.
- Replace cracked parts rather than continuing to rely on them.
For critical applications, a consumer print is not a substitute for a tested, certified component.
🚀 Turn Your 3D Printing Hobby into a Small Business
Selling prints can be appealing, especially when friends keep asking for “just one more” custom organizer. The business side takes more than a good model: you need permission to sell the design, consistent quality, realistic production planning, and clear communication with customers.
Choose projects people actually want
Good candidates solve a clear, recurring problem:
- Custom-fit organizers
- Replacement parts that are safe and non-critical
- Personalized signs and gifts
- Small-batch workshop accessories
- Educational kits and display models
- Niche hobby accessories
Before making a batch, print and test several examples. Check fit, finish, repeatability, packaging, and whether the design is easy to explain.
Licensing, copyright, and selling printed models
A downloadable model is not automatically free for commercial use. Read the creator’s license and ask permission when terms are unclear. Do not assume that changing a few dimensions makes someone else’s protected design yours.
For legal basics, review the U.S. Copyright Office’s copyright overview and get professional advice for a commercial product or complex licensing question. Avoid selling prints of branded characters, logos, or designs unless you have the necessary rights.