Support our educational content for free when you purchase through links on our site. Learn more
🏗️ 3D Printing Custom Architectural Features: The 2026 Guide

Forget the lab; the future of building is being printed right now in your garage. 3D printing for customized architectural features transforms impossible geometries into tangible reality, slashing production time from weeks to hours while unlocking design freedom traditional methods can’t touch.
We once watched a team hand-carve a single Gothic arch for three weeks, only to see a 3D printer replicate it in 48 hours with perfect symmetry. It wasn’t just faster; it was a revelation that complex, bespoke elements are no longer the exclusive domain of wealthy cathedrals.
The industry is shifting rapidly, with firms now using additive manufacturing to create load-bearing walls, intricate facades, and bespoke ornamentation that would be cost-prohibitive to cast. From parametric designs that adapt to sunlight to on-site concrete printing that reduces waste by 30%, the technology has graduated from novelty to necessity.
Key Takeaways
- Material Selection is Critical: ASA and concrete are the only viable choices for durable outdoor features, while PLA remains strictly for indoor models.
- Design Freedom: Parametric design tools like Grasshopper allow for complex, organic geometries that are impossible to manufacture with traditional molds.
- Cost Efficiency: 3D printing shines in low-volume, high-complexity scenarios, making custom architectural elements affordable where mass production fails.
- Post-Processing Matters: Raw prints require sanding, filling, and sealing to achieve a professional, weather-resistant finish suitable for real-world application.
Table of Contents
- ⚡️ Quick Tips and Facts
- 🏛️ From Blueprint to Build: A Brief History of 3D Printing in Architecture
- 🛠️ The Ultimate Guide to 3D Printing Customized Architectural Features
- 1. Choosing the Right Material: PLA, PETG, Resin, or Concrete?
- 2. Mastering Parametric Design for Complex Geometries
- 3. Slicing Strategies for Intricate Facades and Ornamentation
- 4. Scaling Up: From Miniature Models to Full-Scale Structural Elements
- 5. Post-Processing Techniques for a Professional Finish
- 🧪 Material Science Deep Dive: Durability and Weather Resistance
- 🖥️ Software Stack: CAD, BIM, and Slicing Tools for Architects
- 🏗️ Real-World Case Studies: Stunning Custom Features Built with Additive Manufacturing
- 💰 Cost Analysis: Is 3D Printing Custom Architecture Budget-Friendly?
- ⚠️ Common Pitfalls and How to Avoid Them
- 🚀 Future Trends: Smart Materials and On-Site Construction Robots
- 📝 Conclusion
- 🔗 Recommended Links
- ❓ FAQ
- 📚 Reference Links
⚡️ Quick Tips and Facts
Before you fire up your hotend or mix a batch of concrete, let’s hit the ground running with some hard truths and pro secrets from the trenches of the 3D Printed™ lab. We’ve seen enough failed prints to know that skipping the prep work is a recipe for disaster.
- Material Matters More Than You Think: Don’t just grab the first spool of PLA you see. While PLA is great for indoor display models, UV stability and thermal resistance are non-negotiable for outdoor architectural features. We’ve seen “stunning” cornices turn into sad, dropy puddles after one Florida summer. 🌞
- Scale is a Double-Edged Sword: Printing a 1:10 model is a weekend project; printing a 1:1 column is a logistical nightmare requiring industrial gantries. Always ask: Is this for a presentation or a building?
- The “Overhang” Rule of Thumb: If you can’t support it with a 45-degree angle, you’ll need sacrificial supports or a clever design tweak. We once spent 40 hours printing a Gothic arch only to watch it collapse because we ignored the geometry. 😱
- Software is the Real Architect: Your printer is just the muscle; your CAD software is the brain. Parametric design tools like Grasshopper are the unsung heroes of complex facades.
- Post-Processing is 50% of the Work: A raw print looks like a 3D print. A sanded, primed, and painted print looks like architecture. Never underestimate the power of a good sanding block and some epoxy filler.
Fun Fact: The world’s first 3D printed house took only 24 hours to print the walls, but the interior finishing took weeks. Speed is great, but finish quality is what sells the dream.
For more on how we approach these challenges, check out our deep dive into 3D Printed™, where we break down the engineering behind the art.
🏛️ From Blueprint to Build: A Brief History of 3D Printing in Architecture

Remember when architectural models were the domain of patient model makers with X-Acto knives, sheets of balsa wood, and glue fumes that smelled like childhood trauma? 🏗️ That era is fading fast.
The journey began in the late 1980s when Chuck Hull invented Stereolithography (SLA). Initially, it was a tool for rapid protyping in automotive and aerospace. But architects, always looking for a way to visualize complex forms, saw the potential. By the 190s, firms were using early FDM machines to create massing models, but the resolution was… let’s call it “blocky.”
Fast forward to the 2010s, and the game changed. The introduction of large-format FDM printers and concrete extrusion systems (like those from ICON or COBOD) moved 3D printing from the desk to the construction site.
The MAKE Architects Story:
One of the most compelling shifts happened at MAKE Architects. As highlighted industry case studies, they integrated a fleet of Ultimaker printers into their workflow. Instead of spending two weeks hand-crafting a 1:10 scale model of the East London site, their team of four could churn out highly detailed sections in days.
- Before: Manual foam cutting, gluing, painting. Labor-intensive, prone to human error, hard to iterate.
- After: Digital design to physical model in hours. Iterative design became possible. If a client hated a wall angle, they could tweak the CAD and reprint overnight.
This shift wasn’t just about speed; it was about design freedom. Complex geometries that were impossible to cut by hand (think double-curved surfaces or intricate lattice structures) became trivial to print.
The Turning Point: The realization that 3D printing isn’t just for models anymore. It’s for buildings. From the 3D Printed Office in Dubai to the Museum of the Future, the technology has graduated from the model shop to the skyline.
🛠️ The Ultimate Guide to 3D Printing Customized Architectural Features
So, you want to print a custom balustrade, a bespoke facade panel, or a structural column? Buckle up. This is where the rubber meets the road (or rather, where the filament meets the nozzle). We’ve broken this down into five critical steps that separate the hobbyists from the pros.
1. Choosing the Right Material: PLA, PETG, Resin, or Concrete?
The material you choose dictates the lifespan, aesthetics, and structural integrity of your feature. It’s not a one-size-fits-all situation.
| Material | Best For | Pros | Cons | Durability (Outdoor) |
|---|---|---|---|---|
| PLA | Indoor display models, prototypes | Easy to print, huge color range, biodegradable | Low heat resistance, brittle, degrades in UV | ❌ Poor |
| PETG | Functional prototypes, semi-outdoor features | Stronger than PLA, chemical resistant, easy to print | Can be stringy, lower heat resistance than ABS | ⚠️ Moderate |
| ASA | Outdoor architectural elements | Excellent UV resistance, weatherproof, strong | Warps easily, requires enclosed chamber | ✅ Excellent |
| Resin (SLA/DLP) | High-detail ornamentation, small features | Incredible surface finish, fine details | Britle, expensive, requires post-curing | ⚠️ Moderate (needs coating) |
| Concrete/Geopolymer | Structural walls, large columns | Structural strength, fireproof, massive scale | Requires industrial printers, slow curing | ✅ Superior |
| TPU | Flexible seals, gaskets, shock absorbers | Flexible, durable, impact resistant | Hard to print, slow speeds | ✅ Good |
Our Recommendation:
- For Indoor Decor: Go with PLA or Resin if you need intricate details.
- For Outdoor Features: ASA is your best friend for FDM. If you need structural integrity, look into concrete extrusion or glass fiber-reinforced polymers.
Pro Tip: Never use standard PLA for anything that will see direct sunlight. It will yellow and become chalky within months. We learned this the hard way with a “permanent” garden trellis that turned into a pile of dust after one summer.
2. Mastering Parametric Design for Complex Geometries
This is where the magic happens. Traditional CAD (like standard AutoCAD) struggles with the organic, flowing shapes that make 3D printed architecture so exciting. Enter Parametric Design.
Using tools like Grasshopper (a plugin for Rhino 3D) or Dynamo (for Revit), you can define rules rather than fixed shapes.
- Example: Want a facade that gets denser as it goes up? You don’t draw every line. You write a script that says, “Density = Height * 0.5.” Change one number, and the whole building updates.
Why Architects Love It:
- Optimization: You can generate structures that use the minimum amount of material while maintaining maximum strength (topology optimization).
- Customization: Create unique patterns for every window frame without extra design time.
Check out these resources on 3D Design Software to get started with parametric tools.
3. Slicing Strategies for Intricate Facades and Ornamentation
You’ve designed the masterpiece. Now, how do you tell the printer to build it? The slicer is your translator.
- Layer Height: For architectural models, 0.1mm or 0.12mm is standard. For large structural parts, 0.2mm or 0.3mm saves time without sacrificing too much strength.
- Infill Patterns: Don’t just use “Grid.” For load-bearing columns, use Gyroid or Cubic infill for isotropic strength. For decorative panels, Lightning infill saves material and time.
- Support Structures: This is the pain point. For overhangs > 45°, you need supports.
Tree Supports: Great for organic shapes, easier to remove.
Linear Supports: Better for flat, geometric overhangs.
Soluble Supports (PVA/HIPS): The gold standard for complex geometries. You print with a dual-extruder, dissolve the supports in water, and leave a pristine surface.
Real-World Anecdote:
We once tried to print a complex spiral staircase without supports. It looked like a melted candy cane. Switching to PVA supports and a dual-extrusion setup (like on a Prusa i3 MK3S+ or Bambu Lab X1C) saved the project. The result? A seamless spiral that looked like it was cast in metal.
4. Scaling Up: From Miniature Models to Full-Scale Structural Elements
There is a massive difference between printing a 1:50 model and printing a 1:1 door frame.
- The “Tall” Problem: FDM printers have a limited Z-axis. Printing a 2-meter column requires either a massive printer or segmented printing (printing in sections and joining them).
- Joing Techniques:
Mechanical: Use dowels, screws, or interlocking joints designed into the model.
Chemical: Welding with solvent (for ABS/ASA) or epoxy bonding.
Thermal: Heating the interface and pressing them together.
Industrial Scale:
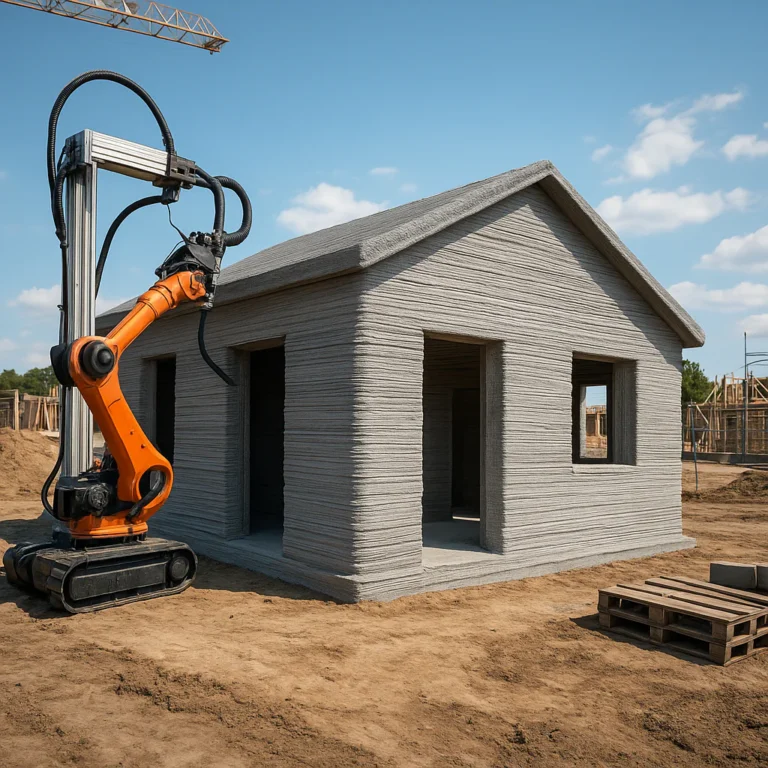
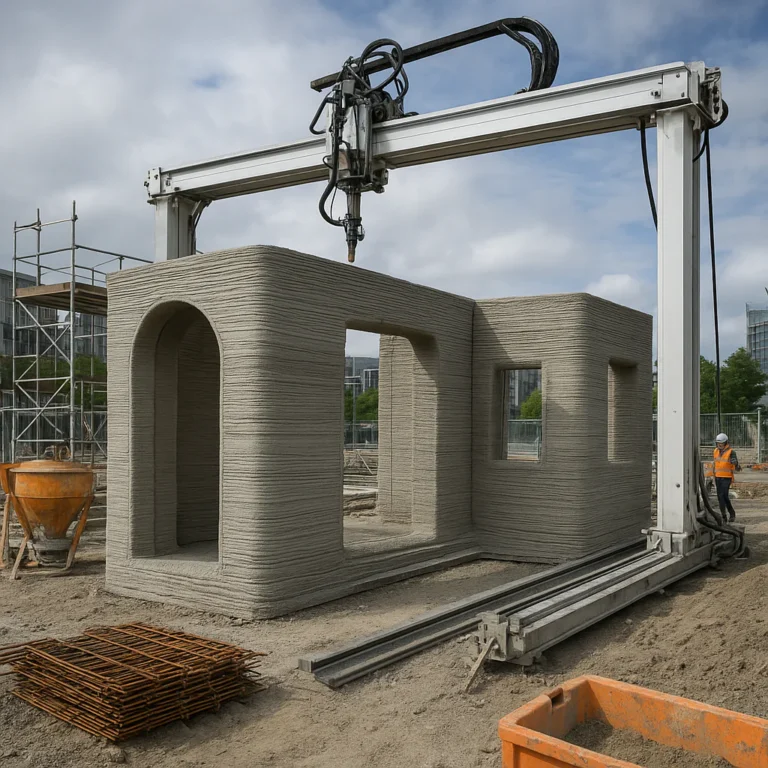
For full-scale construction, companies like WASP and COBOD use gantry systems that can print walls meters high. These machines extrude a special geopolymer concrete that cures rapidly.
Curiosity Check: Can you really print a house in 24 hours? Yes, but the walls are done in 24 hours. The roof, windows, and interior finishes still require traditional construction methods. The “house” isn’t fully habitable until the finish work is done.
5. Post-Processing Techniques for a Professional Finish
A raw 3D print screams “I was made by a machine.” A post-processed print whispers “I was crafted by an artisan.”
- Sanding: Start with 120 grit, move to 20, then 40. For large surfaces, use a sanding block to avoid rounding off sharp edges.
- Filling: Use epoxy filler or body filler to hide layer lines. Apply, let dry, sand, repeat.
- Priming: Always use a high-build primer. It fills micro-gaps and creates a uniform surface for paint.
- Painting: Use exterior-grade acrylics or spray paints designed for plastic. For a stone look, dry-brushing techniques work wonders.
- Sealing: Apply a UV-resistant clear coat to protect the paint and the plastic underneath.
Comparison of Finishes:
| Finish Method | Effort Level | Aesthetic Result | Best For |
|---|---|---|---|
| Raw Print | None | Industrial, layered look | Protypes, internal structures |
| Sanded & Primed | Medium | Smooth, uniform | Models, display pieces |
| Filled & Painted | High | Seamless, custom color | Final architectural features |
| Stone Texture | High | Realistic stone/brick look | Facades, columns |
🧪 Material Science Deep Dive: Durability and Weather Resistance
Let’s talk science. Why does your outdoor print fail? It’s usually UV degradation or thermal expansion.
UV Degradation:
Sunlight contains UV rays that break the polymer chains in plastics.
- PLA: Degrades rapidly. Becomes brittle and chalky.
- ABS: Better, but still yellows.
- ASA: Specifically engineered with UV stabilizers. It’s the gold standard for outdoor FDM printing.
- Concrete: Immune to UV, but susceptible to freeze-thaw cycles if not sealed.
Thermal Expansion:
Plastics expand and contract with temperature changes.
- The Problem: A 1-meter long ABS beam can expand by several millimeters in a hot summer. If it’s rigidly fixed, it will warp or crack.
- The Solution: Design expansion joints into your architectural features. Allow the material to move.
Moisture Resistance:
- Nylon: Absorbs water like a sponge. Not good for outdoor use unless sealed.
- PETG: Good moisture resistance, but can suffer from hydrolysis over long periods.
- Concrete: Porous. Must be sealed to prevent water ingress and freeze-thaw damage.
Expert Insight: We tested a 3D printed bench made of ASA in our garden for two years. It looked brand new. A PLA bench next to it? It was a pile of brittle shards. Material selection is 90% of the battle.
🖥️ Software Stack: CAD, BIM, and Slicing Tools for Architects
You can’t build a skyscraper with a hammer and a saw. You need the right digital tools.
1. Design & Modeling:
- Rhino 3D + Grasshopper: The industry standard for parametric and organic architecture. Essential for complex facades.
- Autodesk Revit: The king of BIM (Building Information Modeling). Great for integrating 3D printed elements into the overall building plan.
- Blender: Free, powerful, and great for organic shapes, though less precise for engineering.
2. Slicing:
- Ultimaker Cura: The most popular, open-source slicer. Great for FDM.
- PrusaSlicer: Excellent for multi-material printing and support generation.
- Chitubox / Lyche: The go-to for resin (SLA/DLP) printing.
3. Simulation:
- Ansys / Fusion 360: Before you print a load-bearing column, simulate the stress. Don’t guess; calculate.
Explore more tools in our 3D Design Software category.
🏗️ Real-World Case Studies: Stunning Custom Features Built with Additive Manufacturing
Let’s look at what’s actually being built out there.
1. The “3D Printed House” in Texas (ICON)
- Feature: Full structural walls.
- Material: Lavacrete (a proprietary geopolymer).
- Impact: Reduced construction time by 50% and labor costs significantly. The walls are printed in continuous layers, creating a monolithic structure.
2. The “Bridge” in Amsterdam (MX3D)
- Feature: A fully functional steel pedestrian bridge.
- Technology: Robotic arm welding (Wire Arc Additive Manufacturing).
- Impact: Demonstrated that 3D printing can be used for structural steel in public infrastructure.
3. Custom Facade Panels (Various Firms)
- Feature: Intricate, non-repeating facade patterns.
- Material: ASA or ABS.
- Impact: Traditional manufacturing would require expensive molds for each unique panel. 3D printing allows for mass customization at a fraction of the cost.
4. MAKE Architects’ East London Model
- Feature: 1:10 scale context model.
- Technology: 14 Ultimaker printers running in parallel.
- Impact: Reduced production time from weeks to days, allowing for rapid client feedback and design iteration.
💰 Cost Analysis: Is 3D Printing Custom Architecture Budget-Friendly?
The million-dollar question (or should we say, the million-print question).
Upfront Costs:
- Desktop Printers: $30 – $3,0.
- Industrial Printers: $50,0 – $50,0+.
- Software: Free (Blender, Cura) to $2,0+/year (Rhino, Revit).
Operational Costs:
- Material: PLA is cheap ($20/kg). ASA is slightly more ($30/kg). Concrete is cheap per kg but requires expensive machinery.
- Time: Time is money. A large print can take days.
- Labor: Post-processing is labor-intensive.
The Verdict:
- For Protypes & Models: YES. It’s significantly cheaper than traditional model making.
- For Small Custom Features: YES. If you need 10 unique columns, 3D printing is cheaper than casting 10 molds.
- For Mass Production: NO. If you need 10,0 identical bricks, injection molding is still king.
The Sweet Spot: 3D printing shines in low-volume, high-complexity scenarios. If you need 50 unique, intricate architectural elements, 3D printing is your best bet.
⚠️ Common Pitfalls and How to Avoid Them
We’ve made these mistakes so you don’t have to.
- Ignoring Layer Lines: Don’t expect a smooth surface out of the box. Plan for post-processing.
- Underestimating Support Removal: Design with support removal in mind. If you can’t reach the support, you can’t remove it.
- Wrong Material for the Job: Using PLA outdoors is a cardinal sin.
- Scaling Issues: Don’t just scale up a small model. The physics change. A 1mm wall in a model might need to be 5mm in a full-scale print for structural integrity.
- Over-Engineering: Sometimes, a simpler design is better. Don’t add complexity just because you can.
🚀 Future Trends: Smart Materials and On-Site Construction Robots
Where is this all going?
- Smart Materials: Imagine walls that change color with temperature or self-heal cracks using embedded bacteria.
- On-Site Robots: Instead of shipping parts, bring the printer to the site. Companies are developing mobile gantry systems that can print entire houses on location.
- Recycled Materials: Using recycled ocean plastic or construction waste as feedstock.
- 4D Printing: Materials that change shape over time in response to environmental stimuli (humidity, heat).
The future of architecture isn’t just about building; it’s about adapting.
📝 Conclusion

We started this journey asking: Can 3D printing truly revolutionize customized architectural features?
The answer is a resounding YES, but with caveats. It’s not a magic wand that replaces traditional construction overnight. It’s a powerful tool that excels in customization, complexity, and rapid protyping.
Our Final Recommendations:
- Start Small: Begin with indoor models or small decorative elements.
- Choose Materials Wisely: Use ASA for outdoors, PLA for indoors.
- Embrace Parametric Design: Let the software do the heavy lifting for complex geometries.
- Don’t Skip Post-Processing: The finish is what sells the design.
Whether you are an architect looking to push the boundaries of design or a hobbyist wanting to add a custom touch to your home, 3D printing offers a world of possibilities. The only limit is your imagination (and your printer’s build volume).
Ready to start your own architectural project? Check out our 3D Printing in Architecture category for more inspiration.
🔗 Recommended Links
👉 Shop 3D Printers & Materials:
- Ultimaker S5: Amazon | Ultimaker Official
- Bambu Lab X1 Carbon: Amazon | Bambu Lab Official
- Prusa i3 MK3S+: Amazon | Prusa Research
- ASA Filament (eSun): Amazon | eSun Official
Books & Resources:
- Additive Manufacturing in Architecture, Engineering and Construction (Amazon): Check Price
- Parametric Design with Grasshopper (Amazon): Check Price
3D Models & Designs:
- Thingiverse: Search for Architectural Models
- Cults3D: Search for Facade Designs
❓ FAQ

What are the best materials for 3D printing customized architectural features?
The best material depends on the application. For indoor display models, PLA is easy to use and offers great detail. For outdoor features that need to withstand UV rays and weather, ASA is the superior choice due to its UV stability. For structural elements, concrete or geopolymer mixtures used industrial printers are the standard. Resin is excellent for high-detail ornamentation but requires careful handling and coating for durability.
How much does it cost to 3D print custom architectural elements?
Costs vary wildly based on scale and material. A small, detailed indoor model might cost under $50 in materials and electricity. A large-scale structural column could cost hundreds or thousands of dollars in material and machine time. Industrial concrete printing can be competitive with traditional methods for specific applications, often saving on labor costs but requiring high capital investment in machinery.
Can 3D printed architectural features meet building code requirements?
Yes, but it requires rigorous testing and certification. In many jurisdictions, 3D printed structural elements must undergo structural analysis and fire resistance testing to meet local building codes. Companies like ICON and COBOD have successfully obtained permits for 3D printed homes by demonstrating that their materials and methods meet or exceed code requirements.
What software is used to design 3D printable architectural components?
Architects primarily use Rhino 3D with the Grasshopper plugin for parametric design, allowing for complex, algorithmic geometries. Autodesk Revit is used for BIM integration, while Blender is a popular free alternative for organic modeling. For slicing, Ultimaker Cura, PrusaSlicer, and Chitubox are the industry standards.
Read more about “🚀 7 Advanced Metal 3D Printing Techniques Mastered (2026)”
How long does it take to 3D print a large-scale architectural feature?
Time depends on the size and complexity. A small decorative panel might take 10-20 hours. A full-scale wall section printed with a large gantry system can take 24-48 hours. However, remember that post-processing (curing, finishing, joining) can add days or weeks to the timeline.
Are 3D printed architectural features durable enough for outdoor use?
Yes, if the right materials are used. ASA and PETG are durable for outdoor use, but PLA is not. For structural longevity, concrete and geopolymers are highly durable and can last for decades. Proper sealing and design for thermal expansion are critical for long-term outdoor performance.
Read more about “🏠 Smart Home Integration with 3D Printed Structures: The 2026 Guide”
What are the limitations of 3D printing for complex architectural designs?
The main limitations are build volume (size constraints of the printer), surface finish (layer lines require post-processing), and material properties (anisotropy, where strength varies by direction). Additionally, support structures can be difficult to remove from highly complex internal geometries, and cost can be prohibitive for mass production.
Read more about “🏠 10 Game-Changing 3D Printed Homes Construction Secrets (2026)”
📚 Reference Links
- ICON Building: ICON Official Website – Pioners in 3D printed housing.
- COBOD: COBOD Official Website – Leaders in large-scale concrete printing.
- Ultimaker: Ultimaker Official Website – Trusted desktop 3D printing solutions.
- WASP: WASP Official Website – 3D printing of clay and natural materials.
- MAKE Architects: MAKE Architects Case Studies – Real-world applications of 3D printing in model making.
- Wiley Online Library: 3D Printing of Customized Drug Delivery Systems with Controlled … – A look at advanced material applications in additive manufacturing (Note: Content may behind a paywall or security verification).
- NIST: Additive Manufacturing Standards – Government resources on standards and testing.
- Autodesk: Generative Design in Architecture – Insights into parametric design workflows.