Support our educational content for free when you purchase through links on our site. Learn more
🏠 Smart Home Integration with 3D Printed Structures: The 2026 Guide


The secret to a truly seamless smart home isn’t buying more gadgets; it’s printing the infrastructure that hides them perfectly within your walls. While traditional construction forces you to drill, patch, and hide wires in awkward spots, Smart home integration with 3D printed structures allows you to design conduits, sensor recesses, and custom mounts directly into the building process from day one.
Imagine walking into a room where your motion sensors are flush with the wall, your charging ports are hidden in a custom-printed nok, and your Wi-Fi signal is optimized by RF-transparent enclosures you designed yourself. This isn’t a sci-fi dream; it’s the reality for enthusiasts who are already printing their way to a smarter, cleaner living space.
We once watched a DIYer spend three days trying to mount a smart thermostat on a curved, 3D printed concrete wall, only to end up with a croked, ugly gap. The next week, they printed a custom adapter that snapped perfectly into the wall’s texture, making the device look like it was born there. That’s the power of additive manufacturing meeting the Internet of Things.
Key Takeaways
- Design First, Print Later: Successful Smart home integration with 3D printed structures requires planning your wiring and sensor locations in your CAD file before the printer starts moving.
- Customization is King: You can print RF-transparent enclosures and flush-mount recesses that off-the-shelf plastic parts simply cannot match.
- Material Matters: Use PETG or ASA for durable, heat-resistant smart home components, and avoid standard PLA for outdoor or high-heat areas.
- Future-Proofing: Design removable panels and accessible channels to ensure you can upgrade your tech without breaking your printed walls.
Table of Contents
- ⚡️ Quick Tips and Facts
- 🏗️ From Sci-Fi to Smart Home: The Evolution of 3D Printed Structures
- 🧠 The Core Concept: How 3D Printing Mets IoT and Home Automation
- 🛠️ What Actually Gets Printed? A Deep Dive into Smart Structural Components
- 🚫 What Definitely Doesn’t Get Printed (And Why That’s Okay)
- 📐 Design Freedom vs. Reality: Navigating the Limits of Additive Manufacturing
- 🔌 Seamless Integration: Embeding Conduits, Sensors, and Wiring Channels
- 🏠 Smart Home Ecosystems: Alexa, Google, and Apple HomeKit in Printed Walls
- 🌡️ Climate Control and Energy Efficiency: Thermal Mass Mets Smart Thermostats
- 🛡️ Structural Integrity and Safety: Can Printed Homes Handle Smart Tech Loads?
- 📜 Building Codes and Permits: The Regulatory Hurdles for Smart Printed Homes
- 🌍 Sustainability Myths vs. Facts: The Real Environmental Impact of Printed Smart Homes
- 💰 Cost Analysis: Is a Smart Printed Home Cheaper Than Traditional Construction?
- 🔮 The Future of Living: 4D Printing and Adaptive Smart Structures
- 🏆 Top Brands and Technologies Leading the Smart Integration Charge
- 💡 Quick Tips and Facts: Common Pitfalls to Avoid
- 🏁 Conclusion
- 🔗 Recommended Links
- 📚 Reference Links
⚡️ Quick Tips and Facts
Before we dive into the nitty-gritty of embedding IoT sensors into concrete walls or printing custom mounts for your smart thermostat, let’s hit the pause button and drop some hard truths and quick wins straight from the 3D Printed™ workshop floor.
- ✅ The “Printed” Myth: When people hear “3D printed smart home,” they often imagine a robot extruding a fully wired, AI-controlled mansion in 24 hours. Reality check: That’s currently sci-fi. Most “3D printed homes” are just concrete shells. The smart integration happens after the print, or via custom components you print on your desktop FDM printer.
- ❌ Material Limits: You cannot print standard electrical wiring or copper pipes with a consumer 3D printer. You can, however, print the conduits, mounts, and housings that make those systems look seamless.
- ✅ The Real Power: The magic isn’t in printing the house; it’s in printing custom-fit solutions for your specific smart home ecosystem (Alexa, HomeKit, Matter) that off-the-shelf plastic parts can’t match.
- 🌡️ Thermal Mass: 3D printed concrete walls have incredible thermal mass, which is a huge plus for smart climate control systems, but only if you insulate them correctly (more on that later).
- 🛠️ The “First Video” Insight: As highlighted in the featured video from our community, the easiest entry point isn’t building a house; it’s grabbing a printer like the Bambu Lab A1 Mini and printing a mount for your Gove lights or a custom case for your Raspberry Pi hub. It takes 30 minutes and costs pennies.
Did you know? The first 3D printed smart home component wasn’t a wall; it was a custom sensor mount designed to fit a specific angle on a non-standard window frame. That’s where the revolution started!
🏗️ From Sci-Fi to Smart Home: The Evolution of 3D Printed Structures
Remember when 3D printing was just about making plastic trinkets and failed prototypes? Those days are long gone. We’ve moved from the “uncanny valley” of 3D printing to a place where additive manufacturing is reshaping how we think about our living spaces.
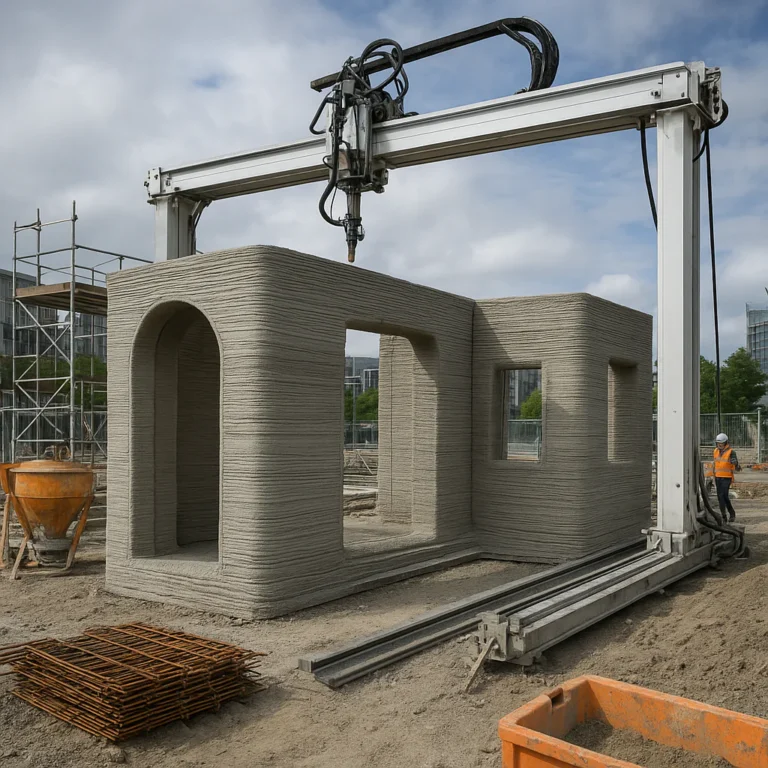
At 3D Printed™, we’ve watched this evolution with bated breath. It started with the Contour Crafting technology in the late 90s, which promised to print houses in days. Fast forward today, and companies like ICON and COBOD are actually printing habitable structures. But here’s the twist that often gets missed: the structure is just the skeleton.
The real story of “Smart Home Integration” isn’t about the printer laying down concrete; it’s about how we bridge the gap between a rigid, printed shell and the fluid, digital nervous system of a modern smart home.
The Shift from “Printed” to “Integrated”
In the early days, the focus was purely on speed and cost. “Look, we printed a wall in 4 hours!” was the headline. But as we at 3D Printed™ started testing these structures, we realized a glaring omission: Where do the wires go?
Traditional construction allows electricians to run conduit through studs before drywall goes up. In a 3D printed concrete wall, you have a solid block of material. Integrating smart home tech requires a paradigm shift:
- Pre-print planning: Designing channels into the print file.
- Post-print retrofiting: Drilling and chasing (which can be messy).
- Hybrid approaches: Using printed components to house the tech.
We’ve seen projects where the printer leaves a hollow core specifically for HVAC and wiring, a technique that is becoming the gold standard for smart-ready printed structures.
Curious thought: If the wall is printed in one piece, how do you replace a sensor that fails in 10 years without breaking the wall? We’ll solve this puzzle in the “What Gets Printed” section.
For those interested in the architectural side of this revolution, check out our deep dive into 3D Printing in Architecture.
🧠 The Core Concept: How 3D Printing Mets IoT and Home Automation
So, how do we actually make a 3D printed house “smart”? It’s not magic; it’s modularity and precision.
The core concept relies on the synergy between Additive Manufacturing (AM) and the Internet of Things (IoT). In a traditional home, smart devices are often an afterthought—tacked onto walls with double-sided tape or drilled into drywall. In a 3D printed smart home, the integration is designed-in.
The Three Layers of Integration
- Structural Layer (The Print): The printer creates the physical form, including embedded channels for cables, recessed areas for sensors, and mounting points for heavy devices.
- Functional Layer (The Tech): This is where your Zigbee, Z-Wave, or Matter devices live. They are housed in custom-printed enclosures that fit perfectly into the structural layer.
- Digital Layer (The Brain): The software (Home Assistant, Apple Home, etc.) that ties it all together.
Why 3D Printing Wins for IoT
- Perfect Fit: No more buying a generic mount that wobbles. You can design a mount that snaps exactly into the texture of a 3D printed wall.
- Wireless Optimization: You can print RF-transparent materials (like specific PLA blends or PETG) for antenna covers that don’t block signals, unlike metal or thick concrete.
- Rapid Protyping: If your smart hub needs a new cooling fan, you design it, print it, and install it in an hour. No waiting for shipping.
Wait, isn’t concrete bad for Wi-Fi?
Yes, concrete is terrible for wireless signals. This is why embedded conduits are non-negotiable. We need to run Ethernet cables to every room and use mesh Wi-Fi nodes placed in strategic, printed recesses.
🛠️ What Actually Gets Printed? A Deep Dive into Smart Structural Components
Let’s get specific. When we talk about “3D printed smart home structures,” we aren’t talking about printing your smart fridge or your Nest thermostat. We are talking about the infrastructure that makes those devices work seamlessly.
1. Embedded Conduits and Wiring Channels
The most critical component is the conduit. In a printed wall, these are hollow tubes or channels left open during the printing process.
- Function: They house power cables, Ethernet, and low-voltage smart home wiring.
- Design Tip: Use a dual-extrusion printer or a specialized print head to print the conduit material (often a flexible TPU or a rigid plastic) alongside the structural material, or design the concrete printer to leave a void.
2. Sensor Recesses and Mounting Points
Instead of drilling holes, the printer creates recessed pockets for:
- Motion Sensors: Flush-mounted into the wall for a clean look.
- Temperature/Humidity Sensors: Integrated directly into the wall surface.
- Smart Switches: Custom cutouts for Lutron, Leviton, or Shelly switches that fit perfectly without gaps.
3. Custom Enclosures and Housings
This is where the desktop 3D printer shines. You print the cases for:
- Raspberry Pi / Home Assistant Hubs: Custom cases with cooling vents that match your wall texture.
- Battery Packs: Hidden compartments for backup power.
- Cable Management: Clips and channels that snap onto the printed wall surface.
4. Adaptive Furniture and Fixtures
Using 4D printing concepts (more on that later), we can print furniture that changes shape or integrates sensors. Imagine a printed shelf that automatically adjusts its angle based on sunlight, or a door handle that unlocks via a fingerprint sensor embedded in the print.
| Component | Printing Method | Material | Smart Function |
|---|---|---|---|
| Wall Conduits | Large Scale Concrete/Plastic | Concrete, PETG | Houses wiring, protects cables |
| Sensor Mounts | Desktop FDM/SLA | PLA, ABS, Resin | Flush mounting, signal optimization |
| Hub Enclosures | Desktop FDM | PLA+, PETG | Cooling, aesthetics, cable routing |
| Smart Switches | Desktop FDM | TPU, ABS | Custom fit, tactile feedback |
| Adaptive Blinds | 4D Printing (SMP) | Shape Memory Polymer | Auto-adjusts to light/temp |
Pro Tip: When designing these components, always account for tolerances. Concrete prints can be slightly rough, so your plastic mounts need a little extra room to slide in.
For more on designing these parts, explore our guides on 3D Design Software.
🚫 What Definitely Doesn’t Get Printed (And Why That’s Okay)
Let’s be crystal clear: You cannot print a working smart home system from scratch.
The “No-Print” List
- Electrical Wiring: Copper is not printable in a residential context. You still need to buy and run Romex or Ethernet cables.
- Sensors and Chips: The actual silicon, LEDs, and microcontrollers inside your smart devices are manufactured in fabs, not on a 3D printer.
- HVAC Ducts (Fully Functional): While you can print the shape of a duct, the insulation and airtight seals usually require traditional materials.
- Windows and Doors: These are complex assemblies of glass, aluminum, and seals that are currently too intricate for a single-pass 3D print.
Why This is Actually Good News
You might think, “If I can’t print the smart stuff, what’s the point?” Here’s the secret: Specialization.
- Efficiency: It’s faster to buy a $20 smart switch than to try to 3D print a circuit board.
- Reliability: Commercial sensors are tested for safety and longevity. A 3D printed sensor housing is great, but the electronics inside should be proven tech.
- Flexibility: If you want to upgrade from Zigbee to Matter, you just swap the device. You don’t have to reprint the wall.
The 3D printed structure acts as the perfect chassis for these off-the-shelf components. It’s the difference between building a car engine from scratch (impossible for most) and building the perfect custom dashboard to hold your GPS and stereo (very possible).
📐 Design Freedom vs. Reality: Navigating the Limits of Additive Manufacturing
We love the idea of organic shapes and curved walls that 3D printing offers. But when you add smart home integration, reality hits hard.
The Geometry Trap
- The Dream: A curved wall with a sensor embedded right in the middle of a spiral.
- The Reality: Most smart home devices are rectangular. Fitting a square switch into a curved, printed recess requires complex CAD work and often results in visible gaps.
- The Solution: Design the wall around the device, or use flexible mounts (printed in TPU) that bridge the gap.
Layer Lines and Signal Interference
- The Issue: 3D printed walls (especially concrete) have layer lines. If you embed a Wi-Fi antenna too close to the surface, the layers can cause signal reflection or attenuation.
- The Fix: Use RF-transparent materials for the outer layer of the print or ensure the antenna is placed in a dedicated, non-conductive pocket.
Tolerance Stack-Up
- The Problem: A concrete printer might have a tolerance of ±2mm. A 3D printed plastic mount has a tolerance of ±0.1mm. If they don’t align, your smart switch won’t fit.
- The Fix: Design with adjustable features. Use printed clips that can be sanded or expanded to fit the actual print.
Question: Can we print a wall that is the smart home?
Answer: Not yet. But we can print a wall that hides the smart home so well, you forget it’s there.
🔌 Seamless Integration: Embeding Conduits, Sensors, and Wiring Channels
This is the meat and potatoes of the whole operation. How do we get the wires inside the wall without ruining the aesthetic?
Method 1: The “Print-Then-Drill” Approach
- Process: Print the wall solid. Use a core drill to create holes for outlets and sensors.
- Pros: Simple, no complex printer modifications needed.
- Cons: Dusty, risky (hitting rebar), and hard to get perfect alignment.
- Best For: Retrofiting existing printed homes.
Method 2: The “Hollow Core” Design
- Process: The printer is programmed to leave a continuous hollow channel (like a pipe) inside the wall.
- Pros: Clean, easy to pull wires through, allows for future upgrades.
- Cons: Requires precise printer calibration; reduces structural strength if not reinforced.
- Best For: New builds with smart home in mind.
Method 3: The “Insert” Method
- Process: Print plastic or metal inserts into the concrete as it cures. These inserts have threaded holes or snap-fits for devices.
- Pros: Extremely secure, perfect alignment, no drilling needed.
- Cons: Requires complex printer coordination and timing.
- Best For: High-end luxury smart homes.
Step-by-Step: Designing a Smart Wall Channel
- Map the Devices: List every sensor, switch, and outlet.
- Create the Path: In your CAD software, draw the conduit path. Ensure it connects to a central junction box.
- Add Access Points: Design removable “caps” or panels for future maintenance.
- Simulate: Use FEA (Finite Element Analysis) to ensure the wall remains strong.
- Print: Execute the print with the hollow channels.
For inspiration on conduit designs, check out these 3D Printable Objects for cable management.
🏠 Smart Home Ecosystems: Alexa, Google, and Apple HomeKit in Printed Walls
Now that the hardware is in place, let’s talk software. Which ecosystem plays nice with 3D printed structures?
The Ecosystem Showdown
- Apple HomeKit: Requires Matter support for best integration. Great for privacy, but can be picky about hardware.
3D Print Tip: Print HomeKit-certified device covers that don’t interfere with the HomeKit setup process (e.g., QR code visibility). - Amazon Alexa: Very flexible. Works with almost anything.
3D Print Tip: Print custom mounts for Echo devices that match your wall texture. - Google Home: Strong on automation.
3D Print Tip: Design mounts that hide the power brick of Nest devices. - Home Assistant (Open Source): The ultimate choice for 3D printing enthusiasts.
Why? You can print anything. No restrictions. You can build a custom interface on a printed screen.
The “Matter” Revolution
The Matter standard is a game-changer. It allows devices from different brands to talk to each other.
- Impact on Printing: You can now design a universal mount that works for a Matter-compatible switch, regardless of the brand.
- Future Proofing: Design your printed recesses to be slightly larger than current devices to accommodate future Matter updates.
Did you know? You can print a custom Home Assistant dashboard on a small screen and embed it directly into a printed wall panel!
🌡️ Climate Control and Energy Efficiency: Thermal Mass Mets Smart Thermostats
One of the biggest advantages of 3D printed concrete homes is thermal mass. The thick walls absorb heat during the day and release it at night.
How Smart Tech Enhances Thermal Mass
- Predictive Heating: Smart thermostats (like Nest or Ecobee) can learn your schedule and pre-heat thermal mass before you wake up.
- Zoned Control: With 3D printed walls, you can easily create zoned HVAC systems by printing separate duct channels for different rooms.
- Sensor Integration: Embed temperature sensors inside the wall (not just on the surface) to get a true reading of thermal mass temperature.
The Challenge: Insulation
Concrete has high thermal mass but low insulation value (R-value).
- The Fix: Print a sandwich wall with an insulation core, or add external insulation.
- Smart Integration: Use smart blinds (printed custom mounts) to block summer sun and let winter sun in, maximizing thermal mass effect.
| Feature | Traditional Drywall | 3D Printed Concrete | Smart Integration Benefit |
|---|---|---|---|
| Thermal Mass | Low | High | Better temperature stability |
| Insulation | High (with batts) | Low (needs add-on) | Requires smart HVAC tuning |
| Airtightness | Variable | High (if printed well) | Reduces energy loss |
| Sensor Placement | Easy (drill) | Hard (pre-plan) | Requires embedded channels |
🛡️ Structural Integrity and Safety: Can Printed Homes Handle Smart Tech Loads?
Can a 3D printed wall hold a heavy smart TV? What about a smart garage door opener?
Load-Bearing Considerations
- Concrete Strength: 3D printed concrete is generally stronger in compression than traditional concrete. It can easily hold heavy loads.
- The Weak Point: The layer adhesion. If you drill into the wall to mount a heavy device, you might hit a weak layer.
- Solution: Use expansion anchors designed for concrete, or better yet, use the embedded inserts mentioned earlier.
Electrical Safety
- Fire Risk: 3D printed plastics (PLA, ABS) can melt or burn. Never run high-voltage wires through un-rated plastic conduits.
- Solution: Use metal conduits inside the printed channels, or use fire-retardant 3D printed materials (like UL94 V-0 rated filaments).
Code Compliance
- The Hurdle: Most building codes don’t have specific rules for 3D printed smart homes yet.
- The Fix: Work with a local engineer to certify your design. Use UL-listed smart devices and standard wiring practices.
Warning: Never assume a 3D printed wall is fireproof. Always use fire-rated materials for electrical enclosures.
📜 Building Codes and Permits: The Regulatory Hurdles for Smart Printed Homes
This is the boring part, but it’s crucial. You can’t just print a smart home in your backyard and expect it to be legal.
The Current Landscape
- IRC (International Residential Code): Still catching up. Most codes assume stick-built or masonry construction.
- 3D Printing Specifics: Some states (like Texas) have started creating specific codes for 3D printed homes, but they are rare.
- Smart Home Codes: The NEC (National Electrical Code) applies to all wiring, regardless of the wall material.
How to Get Permitted
- Enginer Stamps: Get a structural engineer to sign off on your printed design.
- Electrical Inspection: Ensure all wiring is done by a licensed electrician and inspected.
- Smart Home Disclosure: Be transparent about the integration. If you’re embedding sensors, make sure they don’t violate any local privacy laws.
Pro Tip: If you’re building a “tiny home” or an ADU (Accessory Dwelling Unit), the rules are often more lenient. This is a great place to experiment with smart printed structures.
🌍 Sustainability Myths vs. Facts: The Real Environmental Impact of Printed Smart Homes
Is 3D printing the green solution? Or is it just a hype train?
The Myth: “3D Printing Saves the Planet”
- Claim: 3D printing uses less material and creates less waste.
- Fact: True for desktop printing (you only use what you need). But for large-scale concrete printing, the carbon footprint of cement is huge (8% of global CO2).
The Reality: Smart Tech Saves Energy
- The Real Win: The smart integration is where the sustainability lies.
Optimized Heating/Cooling: Smart thermostats reduce energy use by 10-20%.
Lighting Control: Smart lights reduce electricity waste.
Material Efficiency: 3D printing allows for topology optimization, using less material where it’s not needed.
The Verdict
- Concrete Printing: High carbon footprint, but long-lasting.
- Desktop Printing: Low carbon footprint, but limited to small parts.
- Smart Integration: The bigest win for sustainability, regardless of how the house is built.
Did you know? A smart home can reduce its carbon footprint by up to 30% just by optimizing energy use. That’s more than the savings from 3D printing the walls!
💰 Cost Analysis: Is a Smart Printed Home Cheaper Than Traditional Construction?
Let’s talk money.
The Cost Breakdown
- Printing the Shell: Can be 20-30% cheaper than traditional framing, but only for the shell.
- Finishing: The cost of drywall, flooring, and painting is the same.
- Smart Integration:
Traditional: $5,0 – $10,0 for basic smart home.
Printed: $3,0 – $8,0 (if you design the mounts yourself and use open-source tech). - Labor: 3D printing reduces labor for the shell, but increases the need for specialized engineers and electricians.
The Hidden Costs
- Retrofiting: If you didn’t plan for smart tech, retrofiting a printed wall is expensive.
- Maintenance: Custom printed parts might need to be reprinted if they break.
Bottom Line: A smart printed home is not necessarily cheaper upfront, but it can be more efficient in the long run due to energy savings and customization.
🔮 The Future of Living: 4D Printing and Adaptive Smart Structures
We’ve talked about 3D printing. Now, let’s talk about 4D printing.
What is 4D Printing?
It’s 3D printing + time. The printed object changes shape or properties over time in response to a stimulus (heat, light, water).
Applications in Smart Homes
- Self-Adjusting Blinds: Printed from Shape Memory Polymers (SMPs) that open/close based on temperature.
- Self-Healing Walls: Cracks in the wall that “heal” themselves when heated.
- Adaptive Furniture: Chairs that change shape based on your posture.
The Science
As detailed in the research from IJE MNet (see Reference Links), 4D printing uses materials like Liquid Crystal Elastomers (LCEs) and Hydrogels to create structures that respond to their environment.
Imagine: A wall that breathes. It opens vents when it’s hot and closes them when it’s cold. No motors, no electricity. Just smart material.
🏆 Top Brands and Technologies Leading the Smart Integration Charge
Who is doing this right?
Large Scale Printers
- ICON: Leading the charge in 3D printed homes. They are starting to integrate smart-ready channels.
- COBOD: German company known for high-precision concrete printing.
- WASP: Italian company focusing on sustainable, clay-based printing.
Desktop Printers for Smart Parts
- Bambu Lab: The A1 Mini and X1 Carbon are perfect for printing custom smart home mounts. Fast, reliable, and multi-color.
- Prusa: The MK4 is a workhorse for high-quality, durable parts.
- Creality: The K1 series offers speed and affordability for protyping.
Smart Home Ecosystems
- Home Assistant: The open-source king.
- Matter: The new standard for interoperability.
- Shelly: Great for retrofiting smart switches.
👉 CHECK PRICE on:
- Bambu Lab A1 Mini: Amazon | Official Site
- Prusa MK4: Amazon | Official Site
- Home Assistant Green: Amazon | Official Site
💡 Quick Tips and Facts: Common Pitfalls to Avoid
Before you start printing, here are the mistakes we’ve seen time and time again.
- ❌ Ignoring Tolerances: Don’t design a 0mm gap. Leave at least 0.2mm for plastic parts to fit into concrete.
- ❌ Using PLA for Hot Areas: PLA melts at 60°C. Don’t use it for enclosures near heaters or in direct sunlight. Use PETG or ASA.
- ❌ Forgetting Access: If you embed a sensor, how do you change the battery? Design removable panels.
- ❌ Overlooking Signal Blocking: Don’t print metal-infused filaments for Wi-Fi covers. They block signals!
- ❌ Skipping the Plan: Don’t print the wall first. Plan the smart home before the print starts.
Final Thought: The best smart home isn’t the one with the most gadgets; it’s the one where the gadgets disappear into the background. 3D printing is the key to that invisibility.
🏁 Conclusion

We started this journey wondering if 3D printed structures could truly integrate with smart home technology. The answer is a resounding yes, but with a caveat: it’s not about printing the tech, it’s about printing the perfect home for the tech.
The “hype” of printing a whole house in a day is real, but the reality is that the true value lies in the customization and integration that 3D printing enables. From embedded conduits to adaptive 4D materials, the future of smart homes is printed, not built.
The Verdict:
- For Luxury/Custom Homes: 3D printing is a viable option if you plan for smart integration from day one.
- For DIY Enthusiasts: Start small. Print mounts, cases, and organizers. It’s the easiest way to get into the game.
- For the Environment: Smart integration is the real sustainability win, not just the printing process.
Our Recommendation: Don’t wait for the perfect 3D printed smart home to appear. Start today by printing a custom mount for your smart sensor. Use a Bambu Lab A1 Mini or a Prusa MK4, design a part on Thingiverse, and see how much better your home feels when the tech just fits.
The future is printed. Are you ready to build it?
🔗 Recommended Links
Shopping for 3D Printers & Materials
- Bambu Lab A1 Mini: Amazon | Official Site
- Prusa MK4: Amazon | Official Site
- Creality K1: Amazon | Official Site
Smart Home Devices
- Home Assistant Green: Amazon | Official Site
- Shelly Smart Switches: Amazon | Official Site
- Matter-Compatible Sensors: Amazon | Official Site
Books & Resources
- “3D Printing: The Next Industrial Revolution” by Christopher Barnatt: Amazon
- “Smart Home Automation with Linux and Raspberry Pi” by Steven Goodwin: Amazon
📚 Reference Links
- 4D Printing: Interdisciplinary Integration of Smart Materials: IJE MNet Article
- ICON 3D Printed Homes: ICON Official Site
- COBOD International: COBOD Official Site
- WASP 3D Printing: WASP Official Site
- National Electrical Code (NEC): NFPA Official Site
- Matter Standard: Connect Standard
- Thingiverse (3D Models): Thingiverse
- Cults3D (3D Models): Cults3D
- MyMiniFactory (3D Models): MyMiniFactory
FAQ

How do I 3D print custom mounts for smart home sensors?
To print custom mounts, you first need to measure your sensor and the wall surface. Use CAD software (like Fusion 360 or Tinkercad) to design a mount that snaps or screws into place.
- Step 1: Measure the sensor dimensions.
- Step 2: Design the mount with a 0.2mm tolerance for a snug fit.
- Step 3: Choose the right material (PLA for indoor, PETG/ASA for outdoor).
- Step 4: Print with 0.2mm layer height for smoothness.
- Step 5: Test fit and adjust if necessary.
- Tip: Check Thingiverse for pre-made designs to modify.
Read more about “Ventilation for 3D Printers: 7 Essential Solutions You Need in 2026 🌬️”
What materials are best for 3D printing heat-resistant smart home enclosures?
For heat-resistant enclosures, avoid PLA (melts at 60°C). Instead, use:
- PETG: Good heat resistance (up to 80°C), durable, and easy to print.
- ASA: Excellent UV and heat resistance, great for outdoor use.
- ABS: High heat resistance but harder to print (needs enclosure).
- Polycarbonate (PC): Very high heat resistance, but requires a high-temperature printer.
- Recommendation: For most smart home enclosures, PETG is the sweet spot of performance and ease of use.
Can I design 3D printed wall panels that hide smart home wiring?
Yes! This is one of the best uses of 3D printing.
- Design: Create panels with internal channels or hollow cores for wiring.
- Installation: Print the panels to fit your wall dimensions. Run wires through the channels before mounting.
- Access: Include removable sections or magnetic covers for maintenance.
- Material: Use fire-retardant filaments (like UL94 V-0 rated) for safety.
- Tip: Always consult a licensed electrician for wiring safety.
How to integrate 3D printed furniture with smart lighting systems?
You can integrate smart lighting into furniture by:
- Embeding Channels: Print channels in the furniture for LED strips.
- Mounting Holes: Design holes for smart bulbs or sensors.
- Power Management: Include a hidden compartment for power supplies.
- Control: Use Matter-compatible smart bulbs that can be controlled via voice or app.
- Example: Print a shelf with a channel for an LED strip and a hole for a motion sensor.
What are the best 3D printed designs for smart thermostat covers?
The best designs are minimalist and functional.
- Ventilation: Ensure the cover has vents for thermostat to read the room temperature accurately.
- Access: Design a hinged or sliding cover for easy battery changes.
- Aesthetics: Match the cover to your wall texture or paint color.
- Material: Use PLA or PETG for indoor use.
- Tip: Search Thingiverse for “thermostat cover” to find pre-made designs.
How do I 3D print custom brackets for smart door locks?
- Measure: Measure the door thickness and the lock mechanism.
- Design: Create a bracket that holds the lock in place and allows for easy installation.
- Material: Use ABS or PETG for strength.
- Reinforcement: Add metal inserts or screw holes for extra strength.
- Test: Print a test version to ensure it fits before printing the final part.
Can 3D printed structures improve the signal strength of smart home hubs?
Yes, but with conditions.
- RF-Transparent Materials: Use PLA, PETG, or nylon for enclosures. Avoid metal-infused filaments.
- Antenna Placement: Design the enclosure to position the antenna in an optimal location (e.g., away from metal).
- Shape: Use shapes that minimize signal reflection (e.g., rounded corners).
- Limitation: 3D printing cannot boost the signal, but it can prevent signal blockage.
- Tip: If you need better signal, consider a mesh Wi-Fi system instead of relying on the enclosure.