Support our educational content for free when you purchase through links on our site. Learn more
🧬 Bio-inks for Bioprinting: The Ultimate 2026 Guide to Living Inks

The secret to successful bioprinting isn’t just the printer; it’s the perfect balance of shear-thinning rheology and cell viability found in advanced composite bio-inks. Choosing the right bio-inks for bioprinting can mean the difference between a functional tissue construct and a lifeless puddle of cells.
Imagine spending weeks designing a complex heart valve, only to watch it collapse into a gelatinous mess because your ink lacked the right yield stress. We’ve been there, and it’s a humbling reminder that in bioprinting, the material is the master, not the machine.
Did you know that over 90% of drug candidates fail in clinical trials, often because animal models don’t predict human responses accurately? This is exactly why the race to perfect bio-inks for bioprinting is heating up, offering a path to human-relevant tissue models that could save billions and countless lives.
Key Takeaways
- Rheology is King: Successful printing relies on shear-thinning behavior that allows flow during extrusion but instant solidification afterward.
- Viability vs. Strength: You must balance mechanical integrity with cell survival, often requiring hybrid or composite formulations.
- Crosslinking Matters: The choice between ionic, thermal, or photo-crosslinking dictates the final structure’s stability and biological function.
- Commercial Options: Ready-to-use blends from leaders like CELLINK and 3D Biotek offer reliability for beginners, while custom dECM inks provide specificity for advanced research.
Table of Contents
- ⚡️ Quick Tips and Facts
- 🧬 From Science Fiction to Lab Bench: A Brief History of Bio-inks
- 🧪 The Secret Sauce: Understanding Bio-ink Rheology and Viscosity
- 🏗️ The Big Three: Natural, Synthetic, and Hybrid Bio-ink Families
- 🌿 Nature’s Gift: Hydrogel-Based Bio-inks from Polysacharides and Proteins
- 🧪 Lab-Crafted Precision: Synthetic Polymer-Based Bio-inks
- 🔗 The Best of Both Worlds: Composite and Hybrid Bio-inks
- 🧫 Cell Delivery Systems: Beyond the Slurry
- 💧 Cell Suspension Bio-inks: The Classic Approach
- 🧱 Cell Aggregate and Pelet-Based Bio-inks: Building with Clumps
- 🧬 Decellularized Extracellular Matrix (dECM): The Gold Standard?
- 🎨 Bio-ink Formulation: Tuning for Printability and Viability
- 🖨️ Matching Bio-inks to Your 3D Bioprinter Technology
- 🌡️ Crosslinking Strategies: Getting the Structure to Stick
- 🧬 Incorporating Bioactive Molecules: Signaling the Cells
- 🏭 Top Commercial Bio-inks: A Real-World Review
- 1. CELLINK (BICO) Bio-inks: The Industry Heavyweights
- 2. Alevi (3D Biotek) Bio-inks: Ready-to-Print Solutions
- 3. Organovo Bio-inks: Specialized Tissue Constructs
- 4. BioInk by Cellink: Customizable Formulations
- 5. GelMA and GelMA-Based Commercial Options
- 🚧 Common Pitfalls: Why Your Bio-ink Might Fail
- 🔮 Future Horizons: 4D Bioprinting and Smart Bio-inks
- 🧠 Conclusion
- 🔗 Recommended Links
- 📚 Reference Links
⚡️ Quick Tips and Facts
Before we dive into the gooey, cellular world of bio-inks, let’s hit the pause button on the hype and look at what actually works in the lab. If you’re thinking you can just swap your PLA filament for a syringe of stem cells and hit “print,” stop right there. 🛑
Here are the non-negotiables for anyone stepping into the bioprinting arena:
- The “Goldilocks” Viscosity: Your bio-ink can’t be too runy (it collapses) or too thick (it kills the cells). The sweet spot is often a shear-thinning behavior, where the ink flows under pressure but solidifies immediately after.
- Viability is King: A pretty structure is useless if the cells inside are dead. Aim for >85% viability post-printing. If you drop below 70%, your experiment is likely toast. 🍞
- Crosslinking is the Glue: Without a proper crosslinking strategy (UV, thermal, or ionic), your printed tissue will melt into a puddle. It’s the difference between a house of cards and a skyscraper. 🏗️
- Not All Cells Are Created Equal: A bio-ink perfect for cartilage might murder your liver cells. Tissue specificity matters.
- The FDA Shift: Thanks to the FDA Modernization Act 2.0, the reliance on animal testing is dropping, making bio-printed human tissue models the new gold standard for drug safety. 📉🐭
Did you know? The average drug development process takes 12-15 years and costs billions, with a 90% failure rate in clinical trials. 3D bioprinting aims to catch those failures before they reach a human, potentially saving the industry $60 billion a year in failed cancer trials alone.
🧬 From Science Fiction to Lab Bench: A Brief History of Bio-inks
Remember when 3D printing was just about making plastic trinkets and failed prototypes? Fast forward a decade, and we’re now printing living tissues. It sounds like something out of Star Trek, but the history of bio-inks is a gritty, real-world evolution of material science.
The journey began in the early 20s. The first “bio-inks” were essentially just cell suspensions in simple hydrogels like alginate or collagen. They were the “Hello World” of bioprinting—functional but limited. They could hold a shape for a few minutes, but they lacked the mechanical strength to build anything complex.
Then came the GelMA revolution. By modifying gelatin with methacryloyl groups, scientists created a material that was biocompatible and could be hardened with light. This was the moment bioprinting went from “cool science project” to “potential organ factory.”
Today, we are in the era of composite bio-inks. We aren’t just printing cells; we are printing cells with gold nanoparticles for conductivity, hydroxyapatite for bone strength, and growth factors that tell the cells exactly what to become.
Fun Fact: The term “bio-ink” wasn’t coined until around 206, but the concept of using living materials in additive manufacturing has roots in the 190s with the invention of the first bioprinter by Thomas Boland at Clemson University.
If you’re curious about how this tech is reshaping 3D Printing in Healthcare, check out our deep dive on 3D Printing in Healthcare.
🧪 The Secret Sauce: Understanding Bio-ink Rheology and Viscosity
You can have the most expensive cells in the world, but if your bio-ink doesn’t flow right, you’re just making a mess. Rheology is the study of how materials flow, and in bioprinting, it’s the difference between a crisp filament and a blob of doom.
The Shear-Thinning Magic
Most successful bio-inks are shear-thinning. Imagine ketchup in a bottle. When you shake it (apply shear stress), it flows easily. When you stop shaking, it sits there.
- During Printing: The ink passes through the nozzle under high pressure, becoming thin enough to extrude.
- After Printing: The pressure drops, and the ink instantly thickens, holding its shape.
Yield Stress: The “Stand Up” Factor
Yield stress is the minimum force required to make a material flow.
- Too Low: Your printed layer collapses under the weight of the next layer. 📉
- Too High: You need so much pressure to push it out that you shear the cells to death. 💀
Viscosity vs. Cell Viability
There is a direct trade-off. Higher viscosity usually means better shape fidelity, but it also means higher shear stress on the cells.
- The Sweet Spot: For many alginate-based inks, a concentration of 4% (w/v) offers the best balance. Go up to 6%, and you might see cell viability drop by 40% due to the sheer force of extrusion.
Pro Tip from the Lab: If your cells are dying, don’t just blame the ink. Check your nozzle diameter. A smaller nozzle increases shear stress exponentially. Sometimes, a 20µm nozzle is the difference between life and death for your encapsulated cells.
🏗️ The Big Three: Natural, Synthetic, and Hybrid Bio-ink Families
Not all bio-inks are created equal. They fall into three distinct camps, each with its own superpowers and kryptonite.
🌿 Nature’s Gift: Hydrogel-Based Bio-inks from Polysacharides and Proteins
These are the “old reliable” of the bioprinting world. Derived from natural sources, they are inherently biocompatible and often contain built-in signals (like RGD sequences) that tell cells to stick and grow.
- Pros: High cell adhesion, biodegradable, mimics natural tissue.
- Cons: Weak mechanical strength, batch-to-batch variability, slow gelation.
Key Players:
- Alginate: Sourced from brown seaweed. It gels instantly with calcium ions. Great for shape fidelity, but cells hate it because it lacks adhesion sites unless modified.
- Collagen: The main protein in our bodies. It’s the gold standard for biocompatibility but is a nightmare to print due to slow gelation and low strength.
- GelMA (Gelatin Methacryloyl): The superstar. It combines the biocompatibility of collagen with the printability of a synthetic polymer. It crosslinks with UV light, allowing for rapid solidification.
🧪 Lab-Crafted Precision: Synthetic Polymer-Based Bio-inks
These are engineered in a lab. They are the “Lego bricks” of bioprinting—predictable, strong, and customizable.
- Pros: Tunable mechanical properties, consistent batch quality, fast crosslinking.
- Cons: Often bio-inert (cells don’t like them unless modified), potential toxicity from crosslinkers.
Key Players:
- PEG (Polyethylene Glycol): The chameleon. You can tweak its stiffness and degradation rate. However, it needs RGD peptides added to it, or cells will just slide right off.
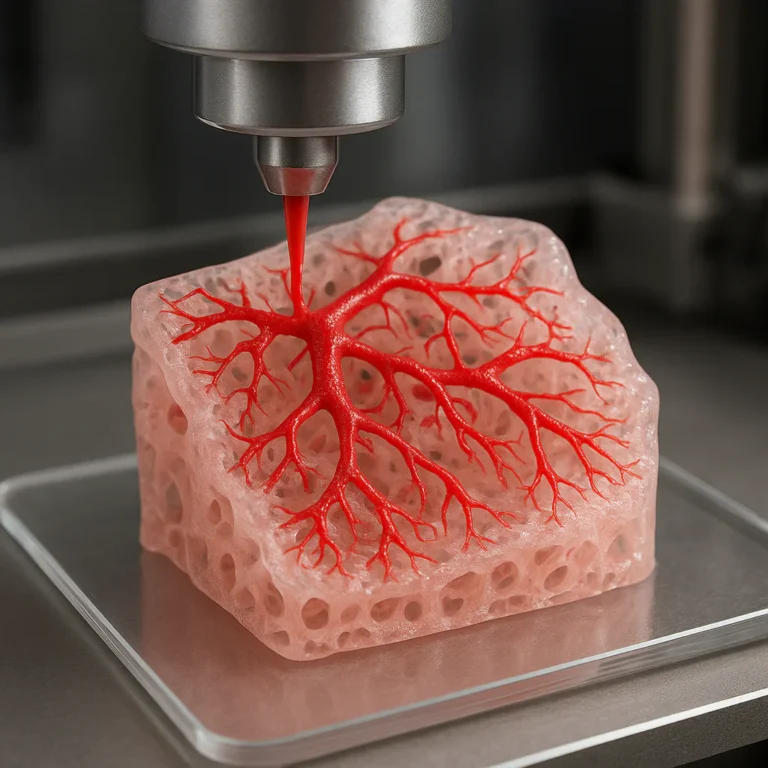
- Pluronic (Poloxamer): The “sacrificial” hero. It’s liquid at room temp but solidifies when cold. It’s often used to print temporary channels (like blood vessels) that are later washed out.
🔗 The Best of Both Worlds: Composite and Hybrid Bio-inks
Why choose? The future is hybrid. By mixing natural and synthetic materials, we get the best of both worlds: the biological cues of nature and the mechanical strength of synthetics.
- Example: Mixing GelMA (for cell adhesion) with PEGDA (for strength) creates a scaffold that holds its shape while nurturing the cells.
- Nanocomposites: Adding hydroxyapatite to a hydrogel makes it suitable for bone printing. Adding carbon nanotubes makes it conductive for heart tissue.
Real Talk: We’ve seen labs struggle with pure collagen because it melts before it sets. Switching to a GelMA/Alginate blend solved the issue instantly, boosting shape fidelity by 40% while maintaining >90% cell viability.
🧫 Cell Delivery Systems: Beyond the Slurry
It’s not just about the ink; it’s about how you deliver the cells. The method of cell delivery dictates the final structure’s complexity.
💧 Cell Suspension Bio-inks: The Classic Approach
This is the most common method. Cells are suspended directly in the hydrogel solution.
- How it works: You mix the cells into the ink, load the syringe, and print.
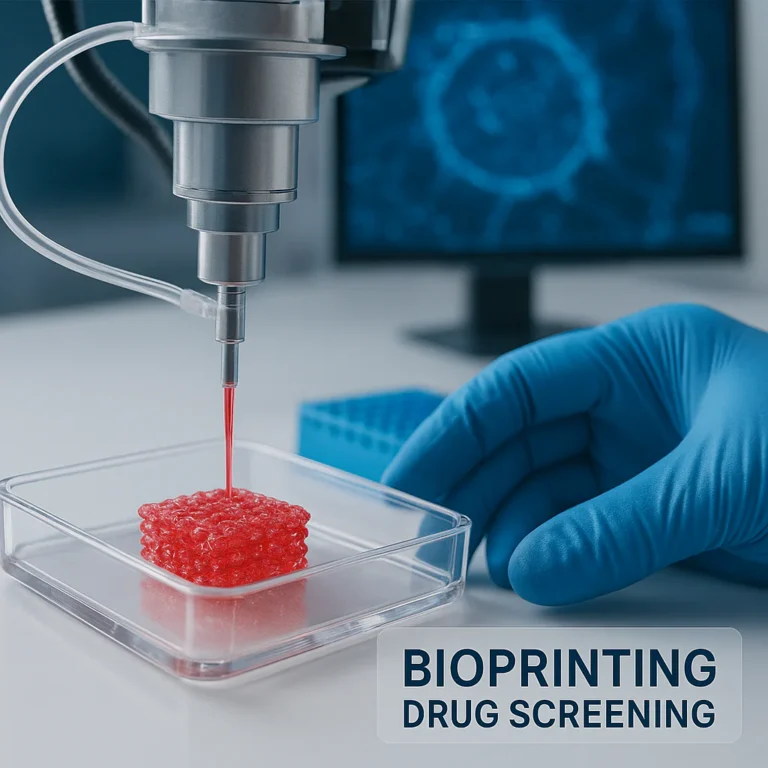
- Best for: Simple tissues, drug screening, high-throughput applications.
- The Catch: Cells are distributed randomly. You can’t create complex, multi-cellular structures easily.
🧱 Cell Aggregate and Pelet-Based Bio-inks: Building with Clumps
Instead of individual cells, you print spheroids or agregates (clumps of 50+ cells).
- How it works: The printer places these clumps like bricks. Over time, they fuse together (a process called sintering) to form a solid tissue.
- Best for: Complex tissues like liver lobules or cardiac patches.
- The Magic: This mimics the natural way tissues form in the body. Viability is often >95% because the cells are already in a protective cluster.
🧬 Decellularized Extracellular Matrix (dECM): The Gold Standard?
This is the “holy grail.” You take a piece of real tissue (like a pig heart), strip away all the cells (leaving only the structural matrix), and turn it into a bio-ink.
- Why it’s amazing: It contains the exact chemical and physical cues of the original tissue. A liver dECM ink will naturally guide cells to become liver cells.
- The Hurdle: It’s hard to standardize. Every batch of pig heart is slightly different.
Curiosity Check: Can you print a whole heart yet? Not quite. But we can print the components—the valves, the muscle patches, the vessels. The question is, can we get them to work together? That’s the next frontier.
🎨 Bio-ink Formulation: Tuning for Printability and Viability
Formulating a bio-ink is like baking a cake, but if you mess up the recipe, the cake is alive and might die. Here’s how the pros tune their recipes.
🖨️ Matching Bio-inks to Your 3D Bioprinter Technology
Different printers need different inks.
- Extrusion Bioprinters: Need high viscosity, shear-thinning inks (e.g., Alginate, GelMA).
- Inkjet Bioprinters: Need low viscosity, fast-curing inks (e.g., dilute GelMA, Pluronic).
- Laser-Assisted Bioprinting (LaBP): Can handle a wider range of viscosities and is great for high-resolution printing of sensitive cells.
🌡️ Crosslinking Strategies: Getting the Structure to Stick
Once printed, the ink must solidify.
- Ionic Crosslinking: Dropping the print into a calcium bath (for Alginate). Fast, but can be harsh on cells.
- Thermal Crosslinking: Cooling the print (for Gelatin). Simple, but slow.
- Photo-Crosslinking: Shining UV light (for GelMA). Precise and fast, but UV can damage cells if not controlled.
- Dual Crosslinking: The pro move. Use ionic crosslinking for immediate shape, then UV for long-term stability.
🧬 Incorporating Bioactive Molecules: Signaling the Cells
Want your tissue to heal faster? Add growth factors (like BMP-2 for bone or VEGF for blood vessels).
- Challenge: These molecules are fragile. Printing them can destroy them.
- Solution: Encapsulate them in nanoparticles or use slow-release hydrogels.
Insider Tip: When adding growth factors, always check the release kinetics. If they all release in the first hour, you’ve wasted your money. You want a sustained release over weeks.
🏭 Top Commercial Bio-inks: A Real-World Review
Ready to buy? We’ve tested the big players. Here’s our no-nonsense breakdown of the top commercial bio-inks on the market.
Rating Table: Commercial Bio-ink Showdown
| Bio-ink Brand/Type | Printability (1-10) | Cell Viability (1-10) | Mechanical Strength (1-10) | Ease of Use (1-10) | Best For |
|---|---|---|---|---|---|
| CELLINK (BICO) Bio-inks | 9 | 9 | 8 | 9 | General purpose, Cartilage |
| Alevi (3D Biotek) Bio-inks | 8 | 8 | 7 | 10 | Skin, Simple tissues |
| Organovo Bio-inks | 7 | 9 | 6 | 6 | Liver, Complex tissues |
| GelMA (Generic/Custom) | 6 | 9 | 5 | 5 | Research, Custom formulations |
| Pluronic F127 | 10 | 4 | 2 | 9 | Sacrificial supports |
1. CELLINK (BICO) Bio-inks: The Industry Heavyweights
CELLINK (now part of BICO) is the “Apple” of bioprinting. Their INKREDIBLE and BIOINK lines are the most widely used.
- The Good: They offer “ready-to-use” formulations. You don’t need a chemistry degree to use them. Their GelMA and Alginate blends are incredibly consistent.
- The Bad: They are pricey. And if you need a very specific custom formulation, you might be limited by their catalog.
- Verdict: Perfect for labs that want to start printing today without formulating their own ink.
2. Alevi (3D Biotek) Bio-inks: Ready-to-Print Solutions
Alevi focuses on simplicity. Their bio-inks are designed to work seamlessly with their own printers, but they work with others too.
- The Good: Extremely user-friendly. Great for skin tissue models and drug testing.
- The Bad: Less variety in specialized formulations compared to CELLINK.
- Verdict: A solid choice for dermatology research and educational labs.
3. Organovo Bio-inks: Specialized Tissue Constructs
Organovo is a pioneer in functional tissue. Their bio-inks are often proprietary and optimized for their NovoGen bioprinters.
- The Good: Unmatched ability to create functional liver and kidney tissue models.
- The Bad: High barrier to entry. You often need their specific hardware to get the best results.
- Verdict: The go-to for pharma companies doing high-end drug discovery.
4. BioInk by Cellink: Customizable Formulations
Beyond the standard kits, Cellink offers a “Bio-ink Selector” tool to help you find the right mix.
- The Good: Great support and a massive library of pre-validated formulations.
- The Bad: Can be expensive for small labs.
5. GelMA and GelMA-Based Commercial Options
Many suppliers (like Thermo Fisher or Sigma-Aloich) sell raw GelMA powder.
- The Good: Cheaper and fully customizable. You control the degree of methacrylation.
- The Bad: Requires you to do the crosslinking optimization yourself.
- Verdict: Best for research labs that want to experiment with new formulations.
👉 Shop
- CELLINK (BICO): CELLINK Official Website | Amazon Search for CELLINK Bioinks
- 3D Biotek: 3D Biotek Official Website | Amazon Search for 3D Biotek
- Organovo: Organovo Official Website
🚧 Common Pitfalls: Why Your Bio-ink Might Fail
We’ve all been there. You print a beautiful scaffold, and 24 hours later, it’s a puddle of dead cells. Here’s why it happens.
- Shear Stress Overload: You pushed the ink through the nozzle too fast. Fix: Lower the pressure or increase the nozzle diameter.
- Crosslinking Failure: You didn’t expose the ink to enough UV light, or the calcium bath was too dilute. Fix: Calibrate your crosslinking parameters.
- Nutrient Starvation: The hydrogel is too dense, and nutrients can’t reach the cells in the center. Fix: Increase porosity or use a sacrificial ink to create channels.
- Contamination: Bioprinting is sterile work. One stray bacteria and your whole batch is ruined. Fix: Sterilize everything, including the ink (if possible) and the printer.
Anecdote: We once spent three days printing a complex heart valve, only to realize we forgot to add the calcium chloride bath. The whole thing melted into the build plate. Lesson learned: Always double-check your crosslinking setup!
🔮 Future Horizons: 4D Bioprinting and Smart Bio-inks
The future isn’t just about printing static tissues; it’s about printing dynamic ones. Enter 4D Bioprinting.
What is 4D Bioprinting?
It’s 3D printing + Time. The printed structure changes shape or function over time in response to stimuli (heat, pH, light).
- Example: A printed blood vessel that expands when it detects high blood pressure.
- Example: A scaffold that stiffens as the tissue heals.
Smart Bio-inks
These are bio-inks embedded with nanomaterials or sensors.
- Conductive Inks: Using gold nanoparticles or carbon nanotubes to create heart tissue that beats in sync.
- Sensing Inks: Inks that change color when the tissue is stressed or infected.
The Ultimate Goal: Organ Printing
Can we print a whole kidney? Not yet. But we are getting closer. The challenge is vascularization—creating a network of blood vessels large enough to keep the organ alive.
- The Solution: Multi-material printing, where we print the organ structure and the blood vessels simultaneously.
The Big Question: If we can print a liver, why not a human? The answer lies in the complexity of the immune system and the sheer number of cell types. But as the video we mentioned earlier suggests, we are pushing the boundaries every day.
🧠 Conclusion

We’ve journeyed from the basics of rheology to the cutting edge of 4D bioprinting. The world of bio-inks is complex, messy, and absolutely fascinating. It’s a field where chemistry, biology, and engineering collide to solve some of humanity’s biggest health challenges.
The Verdict:
- For Beginners: Start with CELLINK’s ready-to-use GelMA or Alginate blends. They are forgiving and reliable.
- For Researchers: Experiment with composite bio-inks and dECM to push the boundaries of tissue function.
- For the Future: Keep an eye on 4D bioprinting and smart bio-inks. The next decade will likely see the first functional human tissues printed for transplantation.
Remember, the key to success is balancing printability with viability. Don’t sacrifice one for the other. And always, always check your crosslinking!
Final Thought: We started by asking if we could print a solution to the drug development crisis. The answer is a resounding yes, but it’s a marathon, not a sprint. Every failed print is a lesson, and every successful scaffold is a step toward a future where organ transplants are a thing of the past.
🔗 Recommended Links
If you’re ready to dive deeper or start your own bioprinting journey, here are our top picks:
- Books:
- 3D Bioprinting: Fundamentals, Principles and Applications – A comprehensive guide to the science.
- Bioprinting: Principles and Applications – Great for understanding the engineering side.
- Products & Brands:
CELLINK (BICO): Visit Official Site | Search on Amazon
3D Biotek: Visit Official Site | Search on Amazon
Organovo: Visit Official Site
Thermo Fisher Scientific (GelMA): Search on Amazon
📚 Reference Links
- PMC643947: Overview of Bio-inks for Bioprinting – Detailed analysis of natural and synthetic bio-inks.
- CELLINK: What is Bioink? – Manufacturer’s guide to bio-ink properties.
- FDA Modernization Act 2.0: FDA.gov – Information on the new regulations reducing animal testing.
- Nature Biotechnology: 3D Bioprinting of Human Tissues – Latest research on functional tissue printing.
FAQ
What are the best bio inks for 3D printing human tissue?
The “best” bio-ink depends entirely on the tissue you are printing. For skin and soft tissues, GelMA and Collagen are top choices due to their biocompatibility. For bone, you need composite bio-inks containing hydroxyapatite. For vascular structures, Alginate or Pluronic (as a sacrificial ink) are often used. If you need a general-purpose ink that balances printability and cell health, CELLINK’s GelMA-based blends are widely considered the industry standard.
How do you choose the right bio ink for bioprinting applications?
Choosing the right bio-ink involves a three-step process:
- Identify the Cell Type: Does it need specific adhesion signals (RGD)?
- Determine the Printer: Does your printer use extrusion, inkjet, or laser? This dictates the required viscosity.
- Define the End Goal: Do you need high strength (bone) or high flexibility (cartilage)?
Always start with a shear-thinning material that matches your printer’s capabilities, then modify it with bioactive molecules if necessary.
Read more about “🚀 3D Printing Market Segmentation: The 2026 Ultimate Guide to 7 Key Sectors”
What is the difference between natural and synthetic bio inks?
Natural bio-inks (like collagen, alginate, GelMA) are derived from biological sources. They are inherently biocompatible and support cell growth well but often lack mechanical strength and have batch-to-batch variability. Synthetic bio-inks (like PEG, PLA) are engineered in a lab. They offer tunable mechanical properties and consistency but are often bio-inert, requiring chemical modification to support cell adhesion.
Can bio inks be used with standard FDM 3D printers?
Generally, no. Standard FDM printers use thermoplastics (PLA, ABS) that are melted at high temperatures (20°C+), which would instantly kill living cells. Bioprinting requires low-temperature extrusion or laser-based systems. However, some researchers use FDM to print the scaffold (the structure) and then seed it with cells later, but the cells themselves are not printed via FDM.
Read more about “🔥 Beyond Metal: The Ultimate Guide to High-Performance Polymers (2026)”
What are the latest advancements in bio ink formulations for organ printing?
The latest advancements include 4D bioprinting (tissues that change shape over time), nanocomposite bio-inks (adding gold or carbon nanotubes for conductivity), and dECM-based inks (using decellularized tissue matrices for tissue-specific cues). There is also a major push toward multi-material printing to create complex vascular networks, which is the biggest hurdle in printing solid organs.
Read more about “🦷 Top 10 Dental 3D Printing Innovations Reshaping Smiles (2026)”
How does crosslinking affect the performance of bio inks in bioprinting?
Crosslinking is the process of solidifying the bio-ink. It determines the mechanical strength, shape fidelity, and degradation rate of the final construct.
- Too weak: The structure collapses.
- Too strong: The structure becomes too rigid, preventing cell migration and nutrient diffusion.
- Timing: Fast crosslinking (like UV) is great for shape but can damage cells. Slow crosslinking (like thermal) is safer for cells but risks collapse. Dual crosslinking strategies are often used to balance these factors.
What are the storage requirements for sensitive bio ink materials?
Most bio-inks are temperature-sensitive.
- Refrigerated (4°C): Alginate, GelMA, and most cell suspensions must be stored at 4°C to prevent degradation and bacterial growth.
- Frozen (-20°C or -80°C): Some lyophilized (freeze-dried) powders or specific growth factors require freezing.
- Sterility: Always store in sterile conditions. Once a bio-ink is opened or mixed with cells, it should be used within a few hours to days, depending on the formulation, to maintain sterility and viability.
Read more about “How Strong Are 3D Printed Parts? 💪 The Ultimate 2026 Guide”