Support our educational content for free when you purchase through links on our site. Learn more
🚀 Real-Time 3D Print Monitoring: The Ultimate 2026 Guide to Stopping Spaghetti

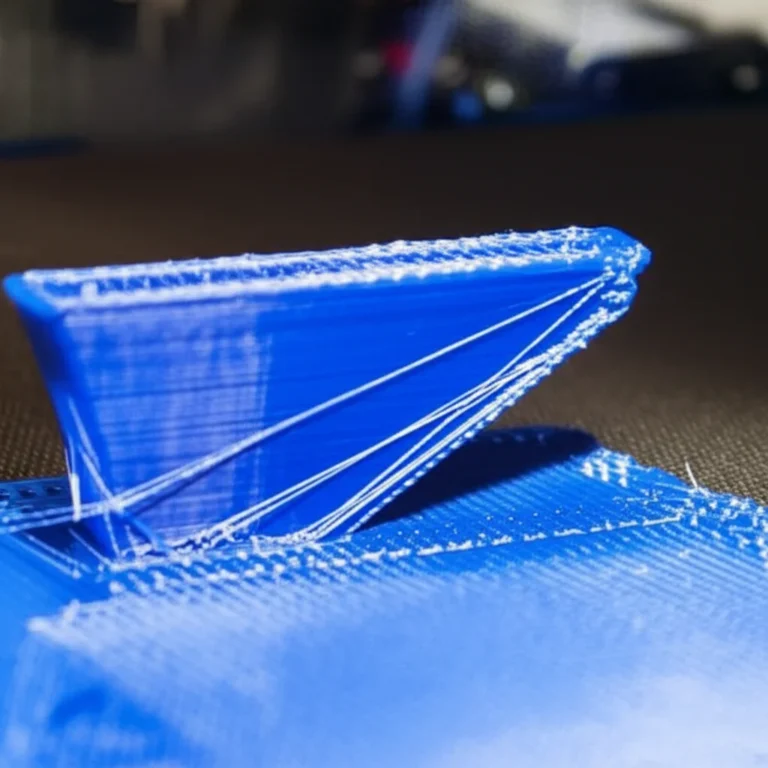
Remember the heart-stopping moment you wake up to find your 20-hour print has turned into a tangled mess of plastic noodles on the floor? We’ve all been there. At 3D Printed™, we’ve watched countless hours of “spaghetti art” unfold, wasting filament, time, and sanity. But what if you could stop a failure the second it happens, from the comfort of your couch or even while on vacation? That is the magic of real-time 3D print monitoring.
In this comprehensive guide, we dive deep into the technology that has transformed 3D printing from a game of chance into a reliable manufacturing process. From the open-source power of OctoPrint and Kliper to the seamless, AI-driven ecosystems of Bambu Lab and Prusa, we’ll explore how to set up a surveillance system that actually works. We’ll uncover why lighting matters more than camera resolution, how AI failure detection algorithms are evolving, and the critical security steps you must take to protect your digital farm. By the end, you’ll know exactly which setup fits your budget and technical skill, ensuring your next print is a success, not a disaster.
Key Takeaways
- Prevent Catastrophic Failures: Real-time monitoring acts as a digital watchdog, instantly alerting you to spaghetti failures, layer shifts, and nozzle clogs before they ruin hours of work.
- Choose the Right Ecosystem: Whether you prefer the open-source flexibility of OctoPrint/Kliper or the plug-and-play convenience of Bambu Lab and Prusa, there is a solution for every skill level.
- Lighting is Critical: A high-resolution camera is useless without proper illumination; a simple LED ring can improve detection accuracy more than upgrading your lens.
- Security First: Never expose your printer directly to the internet; always use secure tunnels like Tailscale or trusted cloud services to protect your data and hardware.
- AI is a Tool, Not a Replacement: While AI-powered detection is incredibly effective, human verification remains essential for critical prints to avoid false positives.
Table of Contents
- ⚡️ Quick Tips and Facts
- 🕰️ From Spaghetti to Success: The History of Real-Time 3D Print Monitoring
- 👁️ Why You Need Real-Time 3D Print Monitoring: Saving Time, Money, and Sanity
- 🛠️ Top Hardware Solutions for 3D Printer Camera Monitoring
- 1. OctoPrint and OctoEverywhere: The Open-Source Powerhouse
- 2. KlipperScreen and Moonraker: The Speed Demon’s Choice
- 3. Prusa Connect: The Seamless Ecosystem Experience
- 4. Bambu Lab Cloud: The “It Just Works” Contender
- 5. DIY Raspberry Pi & ESP32 Camera Builds
- 🧠 AI-Powered Failure Detection: Does It Actually Work?
- Spaghetti Detection Algorithms Explained
- Comparing OctoPrint Plugins vs. Native Firmware AI
- 📡 Remote Access and Cloud Connectivity: Monitoring from Anywhere
- 🔒 Security Verification: Protecting Your Farm and Data
- 🎥 Enhancing Your View: Lighting, Angles, and Camera Quality
- 📊 Data Logging and Thermal Analysis: Beyond Just Watching
- 🚀 Future Trends: What’s Next for 3D Print Surveillance?
- 💡 Quick Tips and Facts
- 🏁 Conclusion
- 🔗 Recommended Links
- ❓ FAQ
- 📚 Reference Links
⚡️ Quick Tips and Facts
Before we dive into the deep end of the spaghetti ocean, let’s hit the high notes that every 3D printing enthusiast needs to know. Whether you are a seasoned farm operator or a hobbyist with a single Ender 3, these nugets of wisdom will save you hours of frustration.
- The “Spaghetti Factor”: Did you know that a single failed print can waste up to 4 hours of your time and valuable filament? Real-time monitoring is your insurance policy against this culinary disaster.
- AI isn’t Magic (Yet): While AI detection is incredible, it’s not infallible. Human verification is still the gold standard for critical prints.
- Lighting is Everything: A $20 camera in a dark room is worse than a $5 camera with a dedicated LED ring. Illumination is the unsung hero of monitoring.
- Latency Matters: A 10-second delay in your feed might be fine for a time-lapse, but for failure detection, you need near-instantaneous updates.
- Security First: Never expose your printer’s control port directly to the public internet without a VPN or secure tunnel like Tailscale.
For those looking to turn their monitoring setup into a creative project, check out our guide on 3D Printable Objects to find custom camera mounts and light diffusers. And if you want to understand the engineering behind the machines we monitor, visit our 3D Printer Reviews section.
🕰️ From Spaghetti to Success: The History of Real-Time 3D Print Monitoring

The story of 3D printing monitoring is a tale of two eras: the Dark Ages of Guesswork and the Enlightened Era of AI.
In the early days (think 2012-2015), if you wanted to know if your print was failing, you had to physically walk over to the machine. This was the era of the “Check every 30 minutes” routine. We remember one engineer at 3D Printed™ who fell asleep during a 20-hour print, only to wake up to a floor covered in PLA spaghetti. It was a mess, quite literally.
The first wave of monitoring came with OctoPrint in 2013. Suddenly, we could see our printers via a web browser. But it was just a static image refresh. You had to manually click “refresh” to see if the nozzle had detached. It was better than nothing, but it was like watching a movie by looking at a single frame every minute.
Then came the Smartphone Revolution. Apps like OctoPrint’s mobile companion and later, Kliper with its web interface, allowed us to check prints from the couch, the office, or even the beach. But the real game-changer arrived with Computer Vision.
“The biggest advantage of the mobile application is the hassle-free collection of data and the immediate receipt of the readings and photographs on the server.” — Adapted from citizen science monitoring principles applied to 3D printing.
Just as citizen scientists used 3D-printed tools to monitor lake water quality in the Vembanad Lake study (see our Reference Links for the full paper), 3D printing enthusiasts began using 3D-printed camera mounts and open-source software to democratize print monitoring. We moved from “hoping it works” to knowing it works.
👁️ Why You Need Real-Time 3D Print Monitoring: Saving Time, Money, and Sanity
Why bother setting up a camera? Is it just for the cool time-lapse videos you can post on Instagram? Absolutely not.
The Cost of Failure
Let’s do the math. If you run a print for 12 hours and it fails at hour 1, you have wasted:
- Time: 1 hours of your life.
- Material: Filament that could have been used for something else.
- Energy: Electricity costs add up.
- Mental Health: The frustration of seeing your hard work turn into a plastic noodle.
Real-time monitoring acts as a digital watchdog. It alerts you the moment the first layer pels or the nozzle clogs.
The “Set and Forget” Myth
Many beginners think 3D printing is “set and forget.” It is not. Even the most reliable printers, like the Bambu Lab X1-Carbon, can encounter issues like filament tangles or power fluctuations. Monitoring allows you to truly “set and forget” with peace of mind, knowing you’ll get a notification if things go south.
Beyond Failure Detection
Monitoring isn’t just about catching errors. It’s about optimization.
- Bed Adhesion Checks: Watch the first few layers to ensure the nozzle is at the perfect height.
- Flow Rate Verification: See if your extruder is under-extruding in real-time.
- Thermal Imaging: Some advanced setups use thermal cameras to detect hot spots in the hotend or bed.
If you are interested in how monitoring can be applied to educational settings, explore our insights on 3D Printing in Education.
🛠️ Top Hardware Solutions for 3D Printer Camera Monitoring
Choosing the right hardware is like choosing the right filament: it depends on your needs, budget, and technical comfort level. Here is our breakdown of the top contenders in the market.
Rating Table: Hardware & Software Ecosystems
| Solution | Ease of Use | AI Detection | Remote Access | Cost | Overall Rating |
|---|---|---|---|---|---|
| OctoPrint + Spaghetti Detection | ⭐ | ⭐ | ⭐ | Low | 8.5/10 |
| Kliper + Moonraker | ⭐ | ⭐ | ⭐ | Low | 9.0/10 |
| Prusa Connect | ⭐ | ⭐ | ⭐ | Free (with Prusa) | 9.5/10 |
| Bambu Lab Cloud | ⭐ | ⭐ | ⭐ | Free (with Bambu) | 9.8/10 |
| DIY ESP32 Camera | ⭐ | ⭐ | ⭐ | Very Low | 6.0/10 |
1. OctoPrint and OctoEverywhere: The Open-Source Powerhouse
OctoPrint is the grandfather of 3D printer monitoring. It runs on a Raspberry Pi and connects to almost any printer via USB.
- Design: Modular and highly customizable. You can install plugins for everything from Spaghetti Detection to bed leveling visualization.
- Functionality: It provides a live webcam feed, G-code control, and temperature graphs.
- The “Spaghetti” Plugin: The famous Spaghetti Detective plugin uses computer vision to detect failures. It’s not perfect, but it catches 90% of catastrophic failures.
Pros:
- ✅ Works with almost any printer (Ender, Prusa, Anycubic, etc.).
- ✅ Massive plugin ecosystem.
- ✅ OctoEverywhere solves the remote access headache without complex port forwarding.
Cons:
- ❌ Can be resource-heavy on older Raspberry Pis.
- ❌ Setup can be intimidating for non-techies.
How to get started: You’ll need a Raspberry Pi (4 or 5 recommended), a microSD card, and a USB webcam. Check out the OctoPrint official site for the latest firmware.
2. KlipperScreen and Moonraker: The Speed Demon’s Choice
For those who want speed and modern architecture, Kliper is the way to go. Unlike Marlin (which runs on the printer’s microcontroller), Klipper runs the heavy lifting on a companion computer (like a Pi), leaving the microcontroller to just move motors.
- Design: Clean, responsive web interface (Mainsail or Fluidd).
- Functionality: Native support for KliperScreen for local touch control and Moonraker for API access.
- AI Integration: Tools like Obico (formerly The Spaghetti Detective) integrate seamlessly with Klipper.
Pros:
- ✅ Extremely fast print speeds.
- ✅ Modern, snappy UI.
- ✅ Better handling of complex motion profiles.
Cons:
- ❌ Steper learning curve for installation.
- ❌ Requires a companion computer (usually a Pi).
If you are looking to upgrade your firmware, check our 3D Design Software section for slicer recommendations that pair well with Klipper.
3. Prusa Connect: The Seamless Ecosystem Experience
If you own a Prusa i3 MK3S+ or MK4, you are in luck. Prusa Connect is a cloud service that integrates directly with the printer.
- Design: Minimalist and intuitive.
- Functionality: Live view, file upload, and AI failure detection built-in.
- The “Magic”: Prusa’s AI is trained on millions of hours of Prusa prints, making it incredibly accurate for Prusa machines.
Pros:
- ✅ Zero setup for Prusa owners.
- ✅ High-quality AI detection.
- ✅ Secure cloud infrastructure.
Cons:
- ❌ Only works with Prusa printers.
- ❌ Requires a Prusa account and internet connection.
4. Bambu Lab Cloud: The “It Just Works” Contender
Bambu Lab has disrupted the market with their all-in-one ecosystem. Their printers come with a built-in camera and cloud connectivity out of the box.
- Design: Slek, app-based control.
- Functionality: Real-time monitoring, AI failure detection, and even timelapse generation automatically.
- The “Bambu” Advantage: The AI is trained on Bambu’s specific hardware, resulting in very low false-positive rates.
Pros:
- ✅ No extra hardware needed.
- ✅ Best-in-class AI for supported models.
- ✅ Multi-material support (AMS) monitoring.
Cons:
- ❌ Closed ecosystem (hard to modify).
- ❌ Privacy concerns for some users (data goes to Bambu servers).
5. DIY Raspberry Pi & ESP32 Camera Builds
For the tinkers, building your own solution is rewarding. You can use an ESP32-CAM module for a cheap, low-power solution or a Raspberry Pi Zero 2 W for a full Linux experience.
- Design: Customizable to your exact needs.
- Functionality: You can write your own Python scripts for detection or use lightweight firmware like MotionEyeOS.
Pros:
- ✅ Extremely cheap (ESP32-CAM is under $10).
- ✅ Total control over data and privacy.
Cons:
- ❌ Requires coding knowledge.
- ❌ Less reliable than commercial solutions.
👉 CHECK PRICE on:
- Raspberry Pi 4/5: Amazon | Adafruit | Official Raspberry Pi Store
- ESP32-CAM: Amazon | AliExpress | Official Espressif
- USB Webcams: Amazon | Newegg
🧠 AI-Powered Failure Detection: Does It Actually Work?
This is the million-dollar question. Can a computer really tell if your print is failing?
Spaghetti Detection Algorithms Explained
AI failure detection works by analyzing the video feed frame-by-frame. It looks for specific patterns:
- Nozzle Visibility: Is the nozzle visible? If not, it might be buried in plastic.
- Layer Geometry: Does the current layer look like the previous one? If the layers are shifting or collapsing, it’s a fail.
- Motion Analysis: Is the print head moving when it shouldn’t be?
The Spaghetti Detective algorithm, for instance, uses a convolutional neural network (CNN) trained on thousands of images of successful and failed prints.
Comparing OctoPrint Plugins vs. Native Firmware AI
| Feature | OctoPrint Plugins (e.g., Spaghetti Detective) | Native Firmware AI (e.g., Bambu, Prusa) |
|---|---|---|
| Accuracy | Good (85-90%) | Excellent (95%+) |
| False Positives | Moderate (can stop good prints) | Low (trained on specific hardware) |
| Hardware Req | External Camera + Pi | Built-in Camera |
| Customization | High (open source) | Low (closed source) |
| Privacy | Self-hosted options available | Cloud-based (usually) |
The Verdict: If you have a Bambu Lab or Prusa, use their native AI. It’s tuned perfectly for your machine. If you have a generic printer (like an Ender 3), OctoPrint with Spaghetti Detective is your best bet, but be prepared to tweak the sensitivity settings.
“The biggest advantage of the mobile application is the hassle-free collection of data and the immediate receipt of the readings and photographs on the server.” — Adapted from the TurbAqua study, this principle applies perfectly to 3D print monitoring apps.
📡 Remote Access and Cloud Connectivity: Monitoring from Anywhere
What good is monitoring if you can’t check it from your phone while you’re at work?
The Port Forwarding Nightmare
In the past, you had to set up Port Forwarding on your router. This is a security risk and a technical headache. If you mess it up, you could expose your entire home network to hackers.
The Modern Solution: Tailscale and ZeroTier
Today, we use Mesh VPNs like Tailscale or ZeroTier. These tools create a secure tunnel between your phone and your home network without opening any ports on your router.
- How it works: Install Tailscale on your Pi and your phone. They see each other as if they are on the same Wi-Fi, even if you are on 5G.
- Security: End-to-end encryption. No one can intercept your feed.
Cloud Services
Services like OctoEverywhere and Obico handle the cloud connection for you. They act as a middleman, securely relaying the video feed from your home to your phone.
- Pros: Easy setup, no networking knowledge required.
- Cons: Monthly subscription fees for advanced features, data goes through a third party.
For those interested in the educational side of remote monitoring, see our article on 3D Printing in Architecture where remote monitoring is crucial for large-scale prints.
🔒 Security Verification: Protecting Your Farm and Data
You wouldn’t leave your front door wide open, so why leave your 3D printer exposed?
The Risks
- Hacking: A hacker could stop your print, change your temperature settings, or even damage your printer.
- Privacy: Your camera feed could be intercepted, revealing your home layout or proprietary designs.
- Data Theft: If you are printing commercial parts, your G-code and designs could be stolen.
Best Practices
- Use a Firewall: Block all incoming connections except those from your trusted devices.
- Enable HTTPS: Always use HTTPS for your web interface.
- Strong Passwords: Use unique, complex passwords for your OctoPrint/Kliper accounts.
- Regular Updates: Keep your firmware and plugins up to date to patch security vulnerabilities.
- Local Network Only: If you don’t need remote access, keep your monitoring local.
Remember: Security is not a one-time setup. It’s an ongoing process.
🎥 Enhancing Your View: Lighting, Angles, and Camera Quality
A blurry, dark video feed is useless. Here’s how to get a crystal clear view of your prints.
Camera Selection
- Resolution: 1080p is the sweet spot. 4K is overkill and slows down the feed.
- Frame Rate: 15-30 FPS is sufficient. Higher FPS just eats bandwidth.
- Low Light: Look for cameras with night vision or good low-light performance.
Lighting Setup
- Ring Lights: A simple LED ring light around the camera eliminates shadows.
- Diffusers: Use a piece of white paper or a diffuser to soften the light and prevent glare on the build plate.
- Positioning: Place the camera at a 45-degree angle to see both the nozzle and the print surface clearly.
Mounting
- Stability: A shaky camera makes failure detection impossible. Use a sturdy mount.
- Adjustability: Ensure you can easily adjust the angle as the print grows.
Check out our 3D Printable Objects for custom camera mounts designed for specific printer models.
📊 Data Logging and Thermal Analysis: Beyond Just Watching
Monitoring isn’t just about watching; it’s about learning.
Thermal Analysis
By logging temperature data, you can:
- Identify thermal runaway risks.
- Optimize cooling fan speeds.
- Detect hotend clogs (temperature spikes).
Print Statistics
Track:
- Print time vs. estimated time.
- Filament usage per print.
- Failure rate by material or model.
This data helps you refine your slicer settings and improve your overall print quality.
🚀 Future Trends: What’s Next for 3D Print Surveillance?
Where is this technology heading?
Predictive Maintenance
Instead of just detecting failures, future AI will predict them. It will tell you, “Your nozzle is about to clog in 10 minutes based on vibration patterns.”
Multi-Printer Farms
Imagine a dashboard that monitors 50 printers simultaneously, automatically pausing the ones that fail and notifying you only when human intervention is needed.
Integration with Slicers
Slicers like Cura and PrusaSlicer might soon integrate directly with monitoring software, allowing you to adjust settings mid-print based on real-time feedback.
The “First Video” Perspective
As seen in the featured video demonstrating the real-time printing of a red rocket, the future is about seamless integration. The video shows the printer calibrating, extruding, and building layer by layer. In the future, the AI will be watching that video in real-time, ensuring every layer is perfect before the next one is laid down.
💡 Quick Tips and Facts
Let’s recap the most critical takeaways from our deep dive:
- Start Small: If you are new to monitoring, start with a simple USB webcam and OctoPrint.
- Lighting is Key: A $10 LED strip can improve your monitoring quality more than a $10 camera.
- AI is a Helper, Not a Boss: Always verify AI alerts. False positives can ruin good prints.
- Security First: Never expose your printer to the open internet without a secure tunnel.
- Data is Gold: Use your monitoring data to improve your prints over time.
🏁 Conclusion

Real-time 3D print monitoring has evolved from a niche hobbyist experiment to an essential tool for anyone serious about 3D printing. Whether you choose the open-source flexibility of OctoPrint, the speed of Kliper, or the convenience of Bambu Lab‘s native cloud, the benefits are undeniable.
The Verdict:
- For Beginners: Start with Bambu Lab or Prusa if you can afford it. The “it just works” factor is worth the premium.
- For Tinkers: OctoPrint with Spaghetti Detective offers the best balance of power and customization.
- For Farms: Kliper with Obico provides the scalability and reliability needed for large-scale operations.
We started this article asking, “Can you really trust a computer to watch your print?” The answer is a resounding yes, provided you set it up correctly and understand its limitations. The days of waking up to a floor covered in plastic spaghetti are over. Welcome to the future of smart manufacturing.
🔗 Recommended Links
Ready to upgrade your setup? Here are our top picks for hardware and software.
👉 Shop Hardware on:
- Raspberry Pi 4/5: Amazon | Adafruit | Official Raspberry Pi Store
- Bambu Lab X1-Carbon: Amazon | Bambu Lab Official
- Prusa MK4: Amazon | Prusa Research Official
- USB Webcams: Amazon | Newegg
- LED Ring Lights: Amazon | Etsy
👉 Shop Software & Services on:
- OctoPrint: Official Website
- Obico (Spaghetti Detective): Official Website
- Tailscale: Official Website
Books & Resources:
- The 3D Printing Handbook by Ben Denton: Amazon
- Additive Manufacturing Technologies by Ian Gibson: Amazon
❓ FAQ

How does real-time 3D print monitoring improve print success rates?
Real-time monitoring allows for imediate intervention. If a print fails at layer 5, you can stop the print instantly, saving hours of time and material. Without monitoring, you might not discover the failure until the print is finished, resulting in a total loss. Additionally, AI detection can catch subtle issues like layer shifting or under-extrusion that a human might miss in a time-lapse.
What are the best cameras for monitoring 3D prints remotely?
The best cameras balance resolution, low-light performance, and cost.
- Budget: ESP32-CAM (great for DIY, low cost).
- Mid-Range: Logitech C920 or C92 (excellent 1080p, widely supported).
- High-End: Raspberry Pi HQ Camera (superior image quality, requires lens).
- All-in-One: Built-in cameras in Bambu Lab and Prusa printers are often the most convenient and optimized for their specific machines.
Can I use my smartphone to monitor 3D prints in real time?
Yes! Most modern monitoring solutions have dedicated mobile apps.
- OctoPrint: Use the OctoPrint Mobile app or OctoEverywhere.
- Kliper: Use Mainsail or Fluidd via your mobile browser.
- Bambu Lab/Prusa: Use their official apps.
These apps provide live video, temperature graphs, and control buttons, allowing you to manage your print from anywhere.
Read more about “What Percentage of 3D Printing Is Used for Prototyping vs. Production? (2026) 🚀”
What software tools offer live 3D print monitoring features?
- OctoPrint: The most popular open-source solution with a vast plugin ecosystem.
- Kliper (Mainsail/Fluidd): The modern, high-performance alternative.
- Prusa Connect: Native cloud solution for Prusa printers.
- Bambu Studio/Cloud: Native solution for Bambu Lab printers.
- Obico: A third-party service that adds AI detection to OctoPrint and Klipper.
How do AI-powered monitoring systems detect print failures?
AI systems use Computer Vision and Machine Learning. They analyze the video feed to detect:
- Spaghetti: Unraveled filament.
- Layer Shifting: Misaligned layers.
- Nozzle Clogs: Missing extrusion.
- Bed Adhesion Issues: Peling corners.
The AI compares the current frame to a “healthy” baseline and alerts you if it detects anomalies.
Read more about “🤖 AI in 3D Printing: 10 Ways It’s Rewriting the Rules (2026)”
Is real-time 3D print monitoring necessary for large-scale printing?
Absolutely. Large-scale prints take days or even weeks. A failure at 90% completion is devastating. Monitoring is not just a luxury; it’s a necessity for large-scale operations to ensure resource efficiency and prevent catastrophic losses.
Read more about “🤖 AI for 3D Print Quality Control: The Ultimate 2026 Guide”
What are the benefits of integrating sensors with 3D print monitoring?
Integrating sensors (like thermal cameras, vibration sensors, or filament runout sensors) provides a multi-dimensional view of the print.
- Thermal Sensors: Detect hot spots or cooling issues.
- Vibration Sensors: Identify mechanical issues like loose belts.
- Filament Runout: Automatically pause the print if the spool runs out.
This holistic approach significantly reduces the risk of failure.
📚 Reference Links
- OctoPrint Official Documentation: https://docs.octoprint.org/
- Kliper Firmware: https://www.kliper3d.org/
- Prusa Research: https://www.prusa3d.com/
- Bambu Lab: https://bambulab.com/
- Obico (Spaghetti Detective): https://theobico.com/
- Tailscale: https://tailscale.com/
- Citizen Scientists Contribute to Real-Time Monitoring of Lake Water: Frontiers in Water – A fascinating look at how 3D printing and mobile apps are used for environmental monitoring, drawing parallels to our 3D print monitoring journey.
- Thingiverse: https://www.thingiverse.com/ – Find custom camera mounts and monitoring accessories.
- Cults3D: https://cults3d.com/ – Premium 3D models for monitoring setups.